New to Rust? Grab our free Rust for Beginners eBook Get it free →
Creating a Savings Calculator in Python Using Tkinter
Ever wondered if you can create your own simple savings calculator to monitor your balance and expenditure? Well, if you know Python, you can do anything. Tkinter in Python enters the picture here to provide us with ease in creating an application. In this article, let’s see how we can create an application that will help us with our savings and expenditures using Tkinter.
Understanding Income, Savings and Expenditure
To construct the logic for the application, we first need to understand the basic concepts of income, expenditure, and savings.
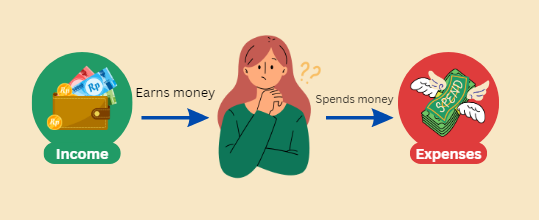
- Income and earnings represent the money we make from work, investments, or business activities. Essentially, it can be seen as an addition or credit to our account or current balance.
- Expenditure is the amount we spend to fulfil our needs and wants. It involves deducting or debiting money from our current balance.
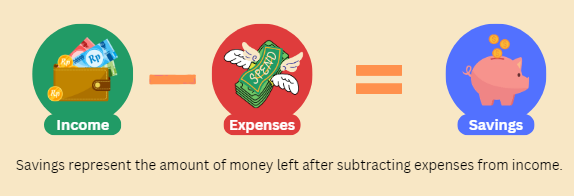
- Savings are essentially what’s left or saved. It’s the amount remaining from income after deducting expenditure costs.
Creating Python Tkinter Calculator Application
Now that we understand the logic, let’s see how we can implement it with Tkinter. Tkinter is a Python library that simplifies building desktop apps with its user-friendly interface elements such as buttons and menus. Usually, it is preinstalled in the system. But if not, you can run the given command:
pip install tk
Approach
We will create an application that takes income and expenses along with their category and then calculates the total expenditure and the savings amount when a button is pressed. Let’s see the step-by-step process.
Step 1: Importing Tkinter Library
First, we will import the Tkinter library, which is used for creating GUIs in Python.
import tkinter as tk
Step 2: Function to Add Expenses
Next, we define a function called add_expense(). This function gets triggered when the “Add Expense” button is clicked. It collects the expense name and amount from the input fields, converts the amount to a float, adds the expense details to a list, and then updates the expenses.
def add_expense():
    global expense_entries, expenses_frame
    expense_name = expense_name_entry.get()
    expense_amount = float(expense_amount_entry.get())
    expense_entries.append((expense_name, expense_amount))
    update_expenses()
Step 3: Function to Update Expenses
Then, we create a function named update_expenses(). It updates the display of expenses in the GUI by removing any existing expense labels and creating new labels for each expense entry stored in the list.
def update_expenses():
    global expenses_frame, expense_entries
    for widget in expenses_frame.winfo_children():
        widget.destroy()
    for i, (name, amount) in enumerate(expense_entries):
        tk.Label(expenses_frame, text=name, fg="white", bg="#735DA5",
                 font=("Arial", 12, "bold")).grid(row=i, column=0, padx=5, pady=2, sticky="w")
        tk.Label(expenses_frame, text=amount, fg="white", bg="#735DA5",
                 font=("Arial", 12, "bold")).grid(row=i, column=1, padx=5, pady=2, sticky="w")
Step 4: Function to Calculate Savings
Now, we’ll create a function called calculate_savings(). It calculates the savings by subtracting the total expenses from the entered income and updates the savings label with the result.
def calculate_savings():
    total_expense = sum(amount for _, amount in expense_entries)
    savings = income.get() - total_expense
    savings_label.config(text=f"Savings: {savings}", fg="white", bg="#735DA5", font=("Arial", 12, "bold"))
Step 5: Function to Calculate Complete Expenditure
Then, we define a function called calculate_complete_expenditure(). It calculates the total expenditure by summing up all expense amounts. After updating the total expenditure label with the calculated value, it calls calculate_savings() to update the savings label.
def calculate_complete_expenditure():
    total_expense = sum(amount for _, amount in expense_entries)
    total_expense_label.config(text=f"Total Expenditure: {total_expense}", fg="white",
                               bg="#735DA5", font=("Arial", 12, "bold"))
    calculate_savings()
Step 6: Creating Expense Entries List
Then, we’ll create a list called expense_entries to store the details of expenses entered by the user.
expense_entries = []
Step 7: Creating the Tkinter Window
Next, we’ll create the main Tkinter window titled “Savings Calculator” with a custom background color.
root = tk.Tk()
root.title("Savings Calculator")
root.configure(bg="#735DA5")
Step 8: Creating GUI Elements
Now, we’ll create various GUI elements such as labels, entry fields, buttons, and frames for displaying income, expenses, total expenditure, and savings. We’ll also set their appearance properties such as text color, background color, font, etc.
# Income/Earning
tk.Label(root, text="Income/Earning -", fg="white", bg="#735DA5",
         font=("Arial", 12, "bold")).grid(row=0, column=0, padx=5, pady=2)
income = tk.DoubleVar()
tk.Entry(root, textvariable=income).grid(row=0, column=1, padx=5, pady=2)

# Expense Entry
tk.Label(root, text="Expense Name:", fg="white", bg="#735DA5",
         font=("Arial", 12, "bold")).grid(row=1, column=0, padx=5, pady=2)
expense_name_entry = tk.Entry(root)
expense_name_entry.grid(row=1, column=1, padx=5, pady=2)

tk.Label(root, text="Expense Amount:", fg="white", bg="#735DA5"
         , font=("Arial", 12, "bold")).grid(row=2, column=0, padx=5, pady=2)
expense_amount_entry = tk.Entry(root)
expense_amount_entry.grid(row=2, column=1, padx=5, pady=2)

# Add Expense Button
add_button = tk.Button(root, text="Add Expense", command=add_expense, fg="white",
                       bg="#D3C5E5", font=("Arial", 12, "bold"))
add_button.grid(row=3, columnspan=2, padx=5, pady=2)

# Expenses Frame
expenses_frame = tk.Frame(root, bg="#735DA5")
expenses_frame.grid(row=4, columnspan=2, padx=5, pady=2)

# Total Expenditure and Savings
total_expense_label = tk.Label(root, text="Total Expenditure: ", fg="white", bg="#735DA5", font=("Arial", 12, "bold"))
total_expense_label.grid(row=5, column=0, padx=5, pady=2)
savings_label = tk.Label(root, text="", fg="white", bg="#735DA5", font=("Arial", 12, "bold"))
savings_label.grid(row=6, column=0, padx=5, pady=2)

# Buttons to calculate total expenditure and savings
calculate_button = tk.Button(root, text="Calculate Expenditure", command=calculate_complete_expenditure, fg="white",
                             bg="#D3C5E5", font=("Arial", 12, "bold"))
calculate_button.grid(row=7, columnspan=2, padx=5, pady=2)
Step 9: Running the Application
Finally, we’ll run the Tkinter event loop. This loop continuously listens for events like button clicks, mouse movements, etc., and updates the GUI accordingly.
root.mainloop()
Complete Code
import tkinter as tk


def add_expense():
    global expense_entries, expenses_frame
    expense_name = expense_name_entry.get()
    expense_amount = float(expense_amount_entry.get())
    expense_entries.append((expense_name, expense_amount))
    update_expenses()


def update_expenses():
    global expenses_frame, expense_entries
    for widget in expenses_frame.winfo_children():
        widget.destroy()
    for i, (name, amount) in enumerate(expense_entries):
        tk.Label(expenses_frame, text=name, fg="white", bg="#735DA5",
                 font=("Arial", 12, "bold")).grid(row=i, column=0, padx=5, pady=2, sticky="w")
        tk.Label(expenses_frame, text=amount, fg="white", bg="#735DA5",
                 font=("Arial", 12, "bold")).grid(row=i, column=1, padx=5, pady=2, sticky="w")


def calculate_savings():
    total_expense = sum(amount for _, amount in expense_entries)
    savings = income.get() - total_expense
    savings_label.config(text=f"Savings: {savings}", fg="white", bg="#735DA5", font=("Arial", 12, "bold"))


def calculate_complete_expenditure():
    total_expense = sum(amount for _, amount in expense_entries)
    total_expense_label.config(text=f"Total Expenditure: {total_expense}", fg="white",
                               bg="#735DA5", font=("Arial", 12, "bold"))
    calculate_savings()


expense_entries = []

root = tk.Tk()
root.title("Savings Calculator")
root.configure(bg="#735DA5")


# Income/Earning
tk.Label(root, text="Income/Earning -", fg="white", bg="#735DA5",
         font=("Arial", 12, "bold")).grid(row=0, column=0, padx=5, pady=2)
income = tk.DoubleVar()
tk.Entry(root, textvariable=income).grid(row=0, column=1, padx=5, pady=2)

# Expense Entry
tk.Label(root, text="Expense Name:", fg="white", bg="#735DA5",
         font=("Arial", 12, "bold")).grid(row=1, column=0, padx=5, pady=2)
expense_name_entry = tk.Entry(root)
expense_name_entry.grid(row=1, column=1, padx=5, pady=2)

tk.Label(root, text="Expense Amount:", fg="white", bg="#735DA5"
         , font=("Arial", 12, "bold")).grid(row=2, column=0, padx=5, pady=2)
expense_amount_entry = tk.Entry(root)
expense_amount_entry.grid(row=2, column=1, padx=5, pady=2)

# Add Expense Button
add_button = tk.Button(root, text="Add Expense", command=add_expense, fg="white",
                       bg="#D3C5E5", font=("Arial", 12, "bold"))
add_button.grid(row=3, columnspan=2, padx=5, pady=2)

# Expenses Frame
expenses_frame = tk.Frame(root, bg="#735DA5")
expenses_frame.grid(row=4, columnspan=2, padx=5, pady=2)

# Total Expenditure and Savings
total_expense_label = tk.Label(root, text="Total Expenditure: ", fg="white", bg="#735DA5", font=("Arial", 12, "bold"))
total_expense_label.grid(row=5, column=0, padx=5, pady=2)
savings_label = tk.Label(root, text="", fg="white", bg="#735DA5", font=("Arial", 12, "bold"))
savings_label.grid(row=6, column=0, padx=5, pady=2)

# Buttons to calculate total expenditure and savings
calculate_button = tk.Button(root, text="Calculate Expenditure", command=calculate_complete_expenditure, fg="white",
                             bg="#D3C5E5", font=("Arial", 12, "bold"))
calculate_button.grid(row=7, columnspan=2, padx=5, pady=2)

root.mainloop()
Output
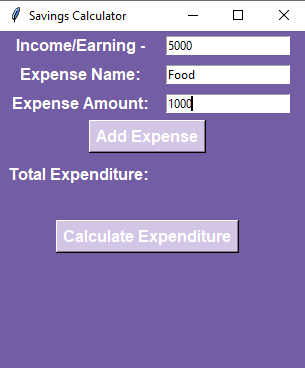
As we run the program, we see an application window with different labels and buttons.

Then, we add the income amount in the provided section.
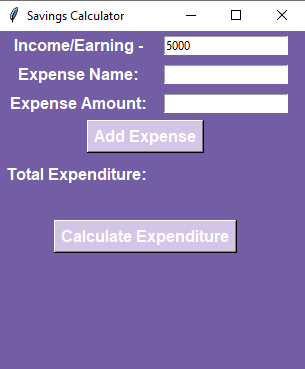
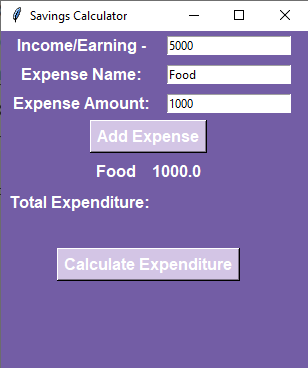
We will add the name and amount of the expense in the provided section and click on “Add Expense“, which will add that expense to the list. Similarly, we can add as many expenses as we want.
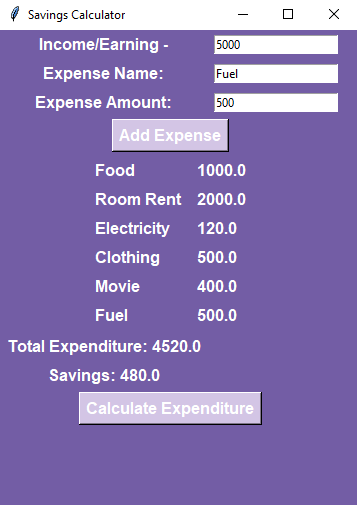
Once we finish creating the expense list, we can click on “Calculate Expenditure“, and the calculated expenditure and savings will appear on the screen.
Conclusion
Voilà! We have successfully created a savings calculator. Now, there’s no need to worry about keeping track of your money flow. You can use our created app to manage your finances and customize the application according to your preferences.
Also, if you enjoy using Tkinter and wish to learn more about it, do check out our following articles –
Reference