New to Rust? Grab our free Rust for Beginners eBook Get it free →
Creating an Age Calculator in Python Using Tkinter
Want to calculate someone’s age in seconds without any mental pressure? Well, we have a solution for you – an age calculator. The age calculator can determine anyone’s age with just their birthday. To achieve this, we can seek help from our best friend for application making, Tkinter. Yes, in today’s article, we will see how we can create an age calculator app using the Tkinter and datetime library in Python.
Introduction to Tkinter
Tkinter is a Python library used for creating graphical user interfaces (GUIs). It provides a set of tools for building windows, buttons, menus, and other GUI elements. Tkinter is simple to use, making it ideal for beginners to create interactive applications with ease.
To install Tkinter on your system, run the following command:
pip install tk
Python datetime Module
The datetime library in Python helps you work with dates and times in your programs. It lets you create, manipulate, and format dates and times easily. You can use it to represent dates, times, time differences, and time zones. With datetime, you can perform operations like adding or subtracting time intervals, comparing dates, and converting between different date and time formats.
Example:
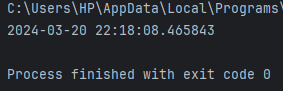
Let’s try to obtain the current date.
from datetime import datetime
current_date = datetime.now()
print(current_date)
This line of code gets the current date and time and prints it.
Output:
Creating Age Calculator Using Python
The main aim of this application will be to take the birthday and name as input, calculate the age using the birthdate data, and display the calculated age.
Now let’s see how we can achieve it step by step.
Step 1: Importing Modules
Firstly, we import the tkinter module as tk to create the GUI application. Secondly, we import the datetime class from the datetime module to work with dates and times.
import tkinter as tk
from datetime import datetime
Step 2: Function to Calculate Age
We create a function called calculate_age() that retrieves the name entered in an entry widget. Inside this function, we collect the day, month, and year from entry widgets, converting them into integers. Then, using the datetime library, we calculate the age based on the current date and the entered date of birth. This allows us to determine the age accurately within our program.
def calculate_age():
    # Get name from entry widget
    name = name_entry.get()

    try:
        # Get day, month, and year from entry widgets and convert them to integers
        day = int(day_entry.get())
        month = int(month_entry.get())
        year = int(year_entry.get())

        # Get current date
        current_date = datetime.now()

        # Create a datetime object for the entered date of birth
        birth_date = datetime(year, month, day)

        # Calculate age
        age = current_date.year - birth_date.year - ((current_date.month, current_date.day) < (
Step 3: Creating the Main Window
Then we create the main window for the application using tk.Tk(). We set the title of the window to “Age Calculator” using root.title(“Age Calculator”). Next, we set the background color of the window to white using root.config(bg=”#FFFFFF”).
root = tk.Tk()
root.title("Age Calculator")
root.config(bg="#FFFFFF")
Step 4: Loading and Displaying the Logo Image
Next, we load the logo image from “logo.png” and create a label to display it on the window. The label is placed in the first row and spans two columns. This sets up the logo at the top of our application window.
logo_img = tk.PhotoImage(file="logo.png")

logo_label = tk.Label(root, image=logo_img, bg="#FFFFFF")
logo_label.grid(row=0, column=0, columnspan=2)
Step 5: Displaying a Welcome Message
Now we’ll add a welcome message using tk.Label() and position it below the logo. We span it across two columns to ensure it stretches across the width of the window.
welcome_label = tk.Label(root, text="Welcome to Age Calculator,"
                                "\nPlease provide your Name and Birthday to know your age.", bg="#38B6FF",
                     fg="white", font=("Arial", 12, "bold"))
welcome_label.grid(row=1, column=0, columnspan=2)
Step 6: Creating Input Fields
Next, we’ll create label widgets and entry widgets for name and date of birth. Labels will be positioned to the left of entry widgets, and entry widgets will be aligned to the right. For date of birth, we’ll use three entry widgets for day, month, and year, respectively.
welcome_label = tk.Label(root, text="Welcome to Age Calculator,"
                                "\nPlease provide your Name and Birthday to know your age.", bg="#38B6FF",
                     fg="white", font=("Arial", 12, "bold"))
welcome_label.grid(row=1, column=0, columnspan=2)
Step 7: Adding a Button to Calculate Age
Then we will create a button widget to trigger the age calculation. We’ll assign the calculate_age() function to the button’s command parameter. The button will be placed in the fourth row and span across two columns with some padding to ensure proper spacing.
calculate_button = tk.Button(root, text="Calculate Age", command=calculate_age, bg="#2169AC",
                             fg="#FFFFFF", font=("Arial", 12, "bold"))
calculate_button.grid(row=4, column=0, columnspan=2, pady=10)
Step 8: Displaying the Result
Now we will create a label widget to display the result of the age calculation. Initially, the label will contain an empty string. We’ll position the label in the fifth row and span it across two columns to ensure it occupies the appropriate space in the GUI.
result_label = tk.Label(root, text="", bg="#FFFFFF", font=("Arial", 12, "bold"))
result_label.grid(row=5, column=0, columnspan=2)
Step 9: Starting Event Loop
Finally, we will start the main event loop. This loop listens for events, such as button clicks, and updates the GUI accordingly. It ensures that the application remains responsive and interactive, allowing users to interact with the buttons and input fields as intended.
root.mainloop()
Complete Code
import tkinter as tk
from datetime import datetime


def calculate_age():
    name = name_entry.get()
    try:
        day = int(day_entry.get())
        month = int(month_entry.get())
        year = int(year_entry.get())

        # Get current date
        current_date = datetime.now()

        # Calculate age
        birth_date = datetime(year, month, day)
        age = current_date.year - birth_date.year - (
                    (current_date.month, current_date.day) < (birth_date.month, birth_date.day))

        # Display age
        result_label.config(text=f"{name.capitalize()}, your age is {age}.", fg="#2169AC")
    except ValueError:
        result_label.config(text="Error: Please enter valid date.", fg="#FF0000")


# Create main window
root = tk.Tk()
root.title("Age Calculator")
root.config(bg="#FFFFFF")

# Load logo image
logo_img = tk.PhotoImage(file="logo.png")

# Create logo label
logo_label = tk.Label(root, image=logo_img, bg="#FFFFFF")
logo_label.grid(row=0, column=0, columnspan=2)

# Welcome message label
welcome_label = tk.Label(root, text="Welcome to Age Calculator,"
                                    "\nPlease provide your Name and Birthday to know your age.", bg="#38B6FF",
                         fg="white", font=("Arial", 12, "bold"))
welcome_label.grid(row=1, column=0, columnspan=2)

# Name entry
name_label = tk.Label(root, text="Name:", bg="#FFFFFF", fg="#2169AC", font=("Arial", 12))
name_label.grid(row=2, column=0, sticky="e")
name_entry = tk.Entry(root)
name_entry.grid(row=2, column=1, sticky="w")

# Date of Birth entry
dob_label = tk.Label(root, text="Date of Birth:", bg="#FFFFFF", fg="#2169AC", font=("Arial", 12,))
dob_label.grid(row=3, column=0, sticky="e")
day_entry = tk.Entry(root, width=5)
day_entry.grid(row=3, column=1, sticky="w")
month_entry = tk.Entry(root, width=5)
month_entry.grid(row=3, column=1, padx=(30, 0), sticky="w")
year_entry = tk.Entry(root, width=8)
year_entry.grid(row=3, column=1, padx=(60, 0), sticky="w")

# Calculate Age button
calculate_button = tk.Button(root, text="Calculate Age", command=calculate_age, bg="#2169AC",
                             fg="#FFFFFF", font=("Arial", 12, "bold"))
calculate_button.grid(row=4, column=0, columnspan=2, pady=10)

# Result label
result_label = tk.Label(root, text="", bg="#FFFFFF", font=("Arial", 12, "bold"))
result_label.grid(row=5, column=0, columnspan=2)

# Run the main event loop
root.mainloop()
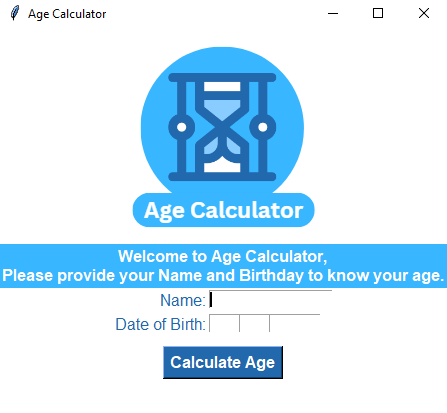
Output:
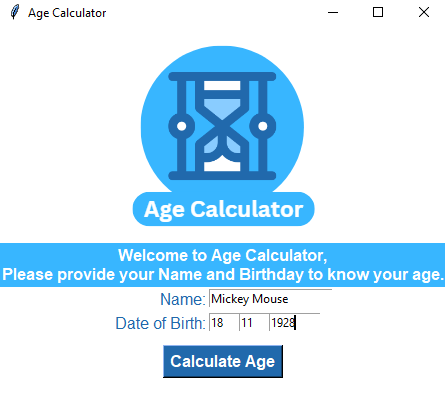
When we run the code, we will see that an application window gets displayed. It consists of a logo, a welcome message, an input section for name and birthday, as well as a button to calculate age.
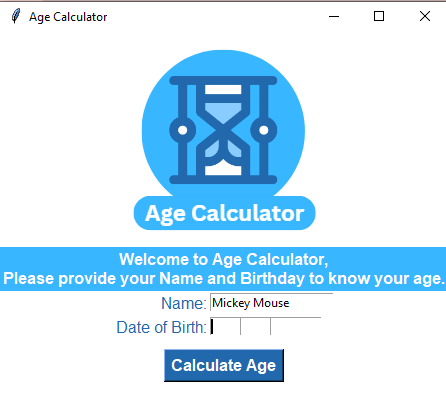
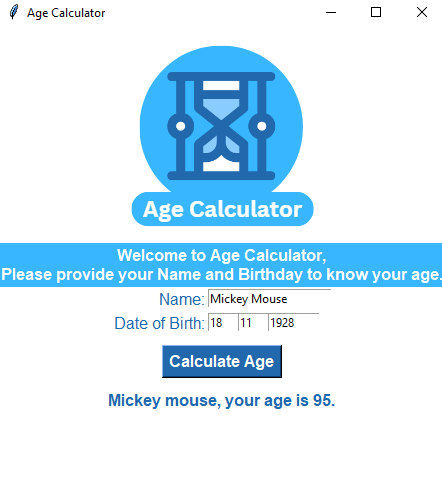
Once we enter the required details and click on ‘Calculate Age‘, the result gets displayed.
Conclusion
And yes, we did it! Now you have learned how to make an age calculator. If you have gained a proper and clear understanding, you can now try to make one yourself with modifications and customizations as you wish.
If you want to experiment more with Tkinter and learn how to make more interesting and cool applications, check out more content on Tkinter from our following articles:
Reference
https://stackoverflow.com/questions/62943669/check-age-in-tkinter-using-datetime