New to Rust? Grab our free Rust for Beginners eBook Get it free →
How to Create a TabBar in Flutter
This tutorial will provide a step-by-step guide to creating TabBar in a Flutter. There are many practical applications of TabBar in mobile applications, such as WhatsApp is using TabBar to navigate between Chats, Status, and Calls pages. So let us also implement our own TabBar using Flutter.
Also Read: Flutter Drawer Tutorial 2023
Understanding TabBar in Flutter
A “TabBar” is a built-in flutter widget that allows users to navigate between pages easily.
Example:
We can look at the below image where we have shown what “TabBar” exactly means in app development.
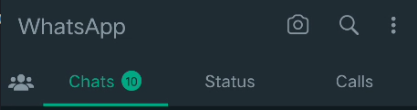
The above screenshot is familiar to everyone. Here “Chats”, “Status” and “Calls” buttons together make a TabBar. Users can easily use these buttons to navigate between tabs.
Some Important Terms related to TabBar
Before writing actual code we would like to introduce you to some of the terminologies that we are going to use in this post.
- DefaultTabController: To make a tab we need a tab controller that controls which page is being displayed on the screen.
- Tab: It represents an individual tab icon which has an icon and text just like “Chats” shown in the above screenshot.
- TabBar: It is a group of different tab widgets.
- TabBarView: It handles the actual UI content that we need to show the user on different pages when the user navigates through tabs.
Creating TabBar in FLutter
The below screenshot is of the project structure which we are going to create in this tutorial to implement TabBar.
Project Structure

Inside the “lib” folder we have created three more files. Make sure to do the same and we will talk later what is the use of each file shown in the project structure. But for now, just go and create them.
Initialize Project for Creating TabBar in FLutter
Create a new flutter project with the below command and a folder will be created with the name “tabs” and then simply opens that folder in VS Code.
flutter create tabs
Now we will get a “main.dart” file. Simply open that file and replace all the content with the below code. It will be familiar to you as it is a normal starting code for a flutter application.
import 'package:flutter/material.dart';

void main() {
  runApp(const MyApp());
}

class MyApp extends StatelessWidget {
  const MyApp({super.key});

  @override
  Widget build(BuildContext context) {
    return MaterialApp(
    );
  }
}
Introducing DefaultTabController
Now inside our MaterialApp, we have to write “DefaultTabController” which requires two parameters the first one is the length that tells us how many icons we are going to have and the next is Scaffold which allows us to use all other functionalities such as “AppBar”, “body” and much more. “DefaultTabController” is the parent widget of the tab which acts as a controller.
home: DefaultTabController(
  length: 3,
  child: Scaffold(),
)
Using AppBar and TabBar
To make such type of layout which we have shown you in the above image of WhatsApp we need to use AppBar. It has a property of bottom in which we can add any widget. We will use that property to show our TabBar.
appBar: AppBar(
  title: const Text('Learning Tabs'),
  bottom: const TabBar(tabs: [
    Tab(icon: Icon(Icons.home), text: 'Home'),
    Tab(icon: Icon(Icons.chat), text: 'Chat'),
    Tab(icon: Icon(Icons.settings), text: 'Settings'),
  ]),
),
Let’s go through this code line by line.
1. Firstly we declared AppBar and add a title to it.
2. Now as discussed above we will make use of the bottom argument that is available on “AppBar” and can be used to add content at the bottom of “AppBar”.
3. We added the “TabBar” widget to it and it has an argument of “tabs” which accept several numbers of widgets.
4. There we added three “Tab” widgets and passed icons and text to them.
If we run this code now then we will get the following output.
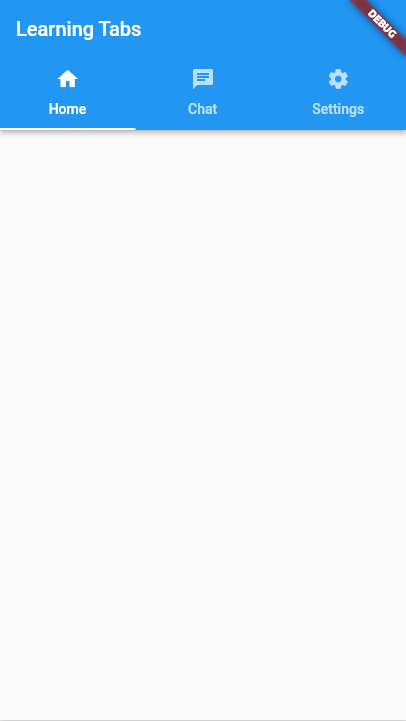
We successfully got our tab icons. Now the only thing left is to integrate the functionality and open different pages whenever we change tabs.
Creating Tabs and Adding Functionality
So we have three tab icons and we need three different pages to navigate.
The first step is to create three different pages, we are naming them “screen_one.dart”, “screen_two.dart” and “screen_three.dart”. We are simply going to put text in the center of each page showing the page number nothing much special.
// screen_one.dart
import 'package:flutter/material.dart';

class ScreenOne extends StatelessWidget {
  const ScreenOne({super.key});

  @override
  Widget build(BuildContext context) {
    return const Scaffold(
      body: Center(
        child: Text('Screen One'),
      ),
    );
  }
}
// screen_two.dart
import 'package:flutter/material.dart';

class ScreenOne extends StatelessWidget {
  const ScreenOne({super.key});

  @override
  Widget build(BuildContext context) {
    return const Scaffold(
      body: Center(
        child: Text('Screen Two'),
      ),
    );
  }
}
// screen_three.dart
import 'package:flutter/material.dart';

class ScreenOne extends StatelessWidget {
  const ScreenOne({super.key});

  @override
  Widget build(BuildContext context) {
    return const Scaffold(
      body: Center(
        child: Text('Screen Three'),
      ),
    );
  }
}
Import Pages & Pass in body
Our three pages and tab icons are ready it’s time to integrate them. In order to use them first import all of them in the main.dart file. To import them just copy and paste the below code at the top.
import 'package:tabs/screen_one.dart';
import 'package:tabs/screen_three.dart';
import 'package:tabs/screen_two.dart';
At last, create a “body” parameter in the scaffold and pass a “TabBarView” widget to it. This widget will contain children which will have three screens which we have imported.
body: const TabBarView(children: [ScreenOne(), ScreenTwo(), ScreenThree()]),
Complete Source Code for Creating TabBar in FLutter
import 'package:flutter/material.dart';
import 'package:tabs/screen_one.dart';
import 'package:tabs/screen_three.dart';
import 'package:tabs/screen_two.dart';

void main() {
  runApp(const MyApp());
}

class MyApp extends StatelessWidget {
  const MyApp({super.key});

  @override
  Widget build(BuildContext context) {
    return MaterialApp(
        home: DefaultTabController(
      length: 3,
      child: Scaffold(
        appBar: AppBar(
          title: const Text('Learning Tabs'),
          bottom: const TabBar(tabs: [
            Tab(icon: Icon(Icons.home), text: 'Home'),
            Tab(icon: Icon(Icons.chat), text: 'Chat'),
            Tab(icon: Icon(Icons.settings), text: 'Settings'),
          ]),
        ),
        body: const TabBarView(children: [ScreenOne(), ScreenTwo(), ScreenThree()]),
      ),
    ));
  }
}
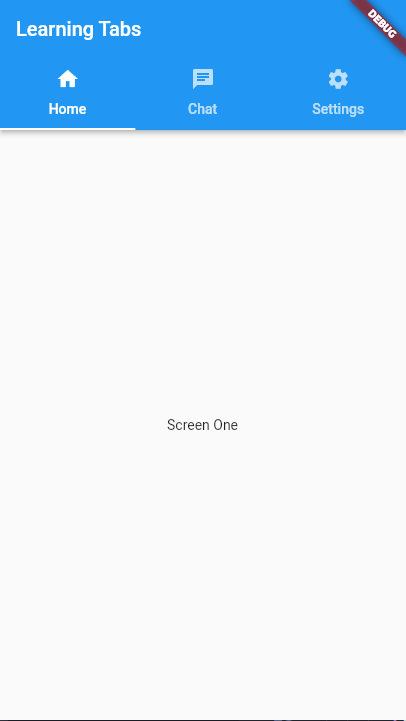
Output:
We have our “TabBar” ready and we can also navigate from one page to another using this “TabBar”.
Summary
We hope this tutorial was helpful to you. We learned how we can create “TabBar” in a flutter. This was just a basic version but creativity doesn’t stop here there are many creative decoration options that you can use. You can experiment with those creative options and create a much more unique “TabBar”.
Reference
https://api.flutter.dev/flutter/material/TabBar-class.html