New to Rust? Grab our free Rust for Beginners eBook Get it free →
Flutter Getting Started: Build Your First App

Getting a first Flutter app running starts with choosing a platform and setting up its tools. Flutter is an open-source UI framework and SDK for building applications across multiple platforms.
I’ll walk you through setting up one target and running a starter app.
TL;DR
To get started with Flutter, install its SDK, configure one development target, create an app, and run it on that target. The Flutter SDK provides the command-line tools and Dart runtime used to build Flutter projects.
- Choose one target platform before setup.
- Use the official quick setup in VS Code, or follow the custom install guide for another editor.
- Run flutter doctor and resolve the items for your chosen target.
- Create a starter project, select a device, and run it before adding features.
What is Flutter and what does it build?
Flutter is an open-source UI framework and SDK for building applications across multiple platforms. Dart is the programming language used to write Flutter apps, while widgets describe the elements and layout of the user interface.
A camera or location plugin may also require a platform permission declaration and native setup.
The interface is composed as a tree of widgets. A MaterialApp or CupertinoApp can provide the app shell, while a Scaffold, text, buttons and layout widgets form the screen beneath it. Changing a widget’s inputs changes how that part of the interface is built.
Flutter renders its UI with its own framework rather than simply wrapping each platform’s standard controls. That gives developers control over visual details, while target-specific checks remain part of testing.
During development, stateful hot reload applies many code changes to a running app without restarting it or losing its current state. Use a full restart when a change affects startup or state that must be rebuilt.
Select the build mode by the task you need to complete.
| Mode | Purpose |
|---|---|
| Debug | Develop the app with hot reload |
| Profile | Analyze performance |
| Release | Prepare an optimized deployment build |
See Flutter’s build modes guide for the trade-offs. For a first project, use debug mode until the starter runs and the widget tree makes sense.
How to get started with Flutter step by step
The shortest route is to install Flutter, generate a starter, and inspect its structure before adding packages.
Step 1: Choose the platform you will run first
Pick the platform on which you want to test your first app. Android development uses Android SDK tools and can run on an emulator or a connected device. iOS and macOS builds require Apple’s development tools on a Mac.
Web development can use a supported browser such as Chrome. Windows and Linux desktop targets need their own platform tooling.
Step 2: Install the Flutter SDK and editor support
Follow the current instructions at Flutter’s quick install guide if using VS Code or another Code OSS-based editor. The guide walks through installing Flutter and configuring the editor. After you update PATH, reopen terminals so they use the changed value.
If you prefer Android Studio, IntelliJ or a different editor, use Flutter’s custom installation instructions for your operating system. Install the listed prerequisites as required by that guide.
Avoid copying old Java version requirements or package-manager commands from older tutorials.
Here is the current first-party quick-start page. Its platform selector changes the setup steps to match the development machine, so check the selected operating system before following the instructions.
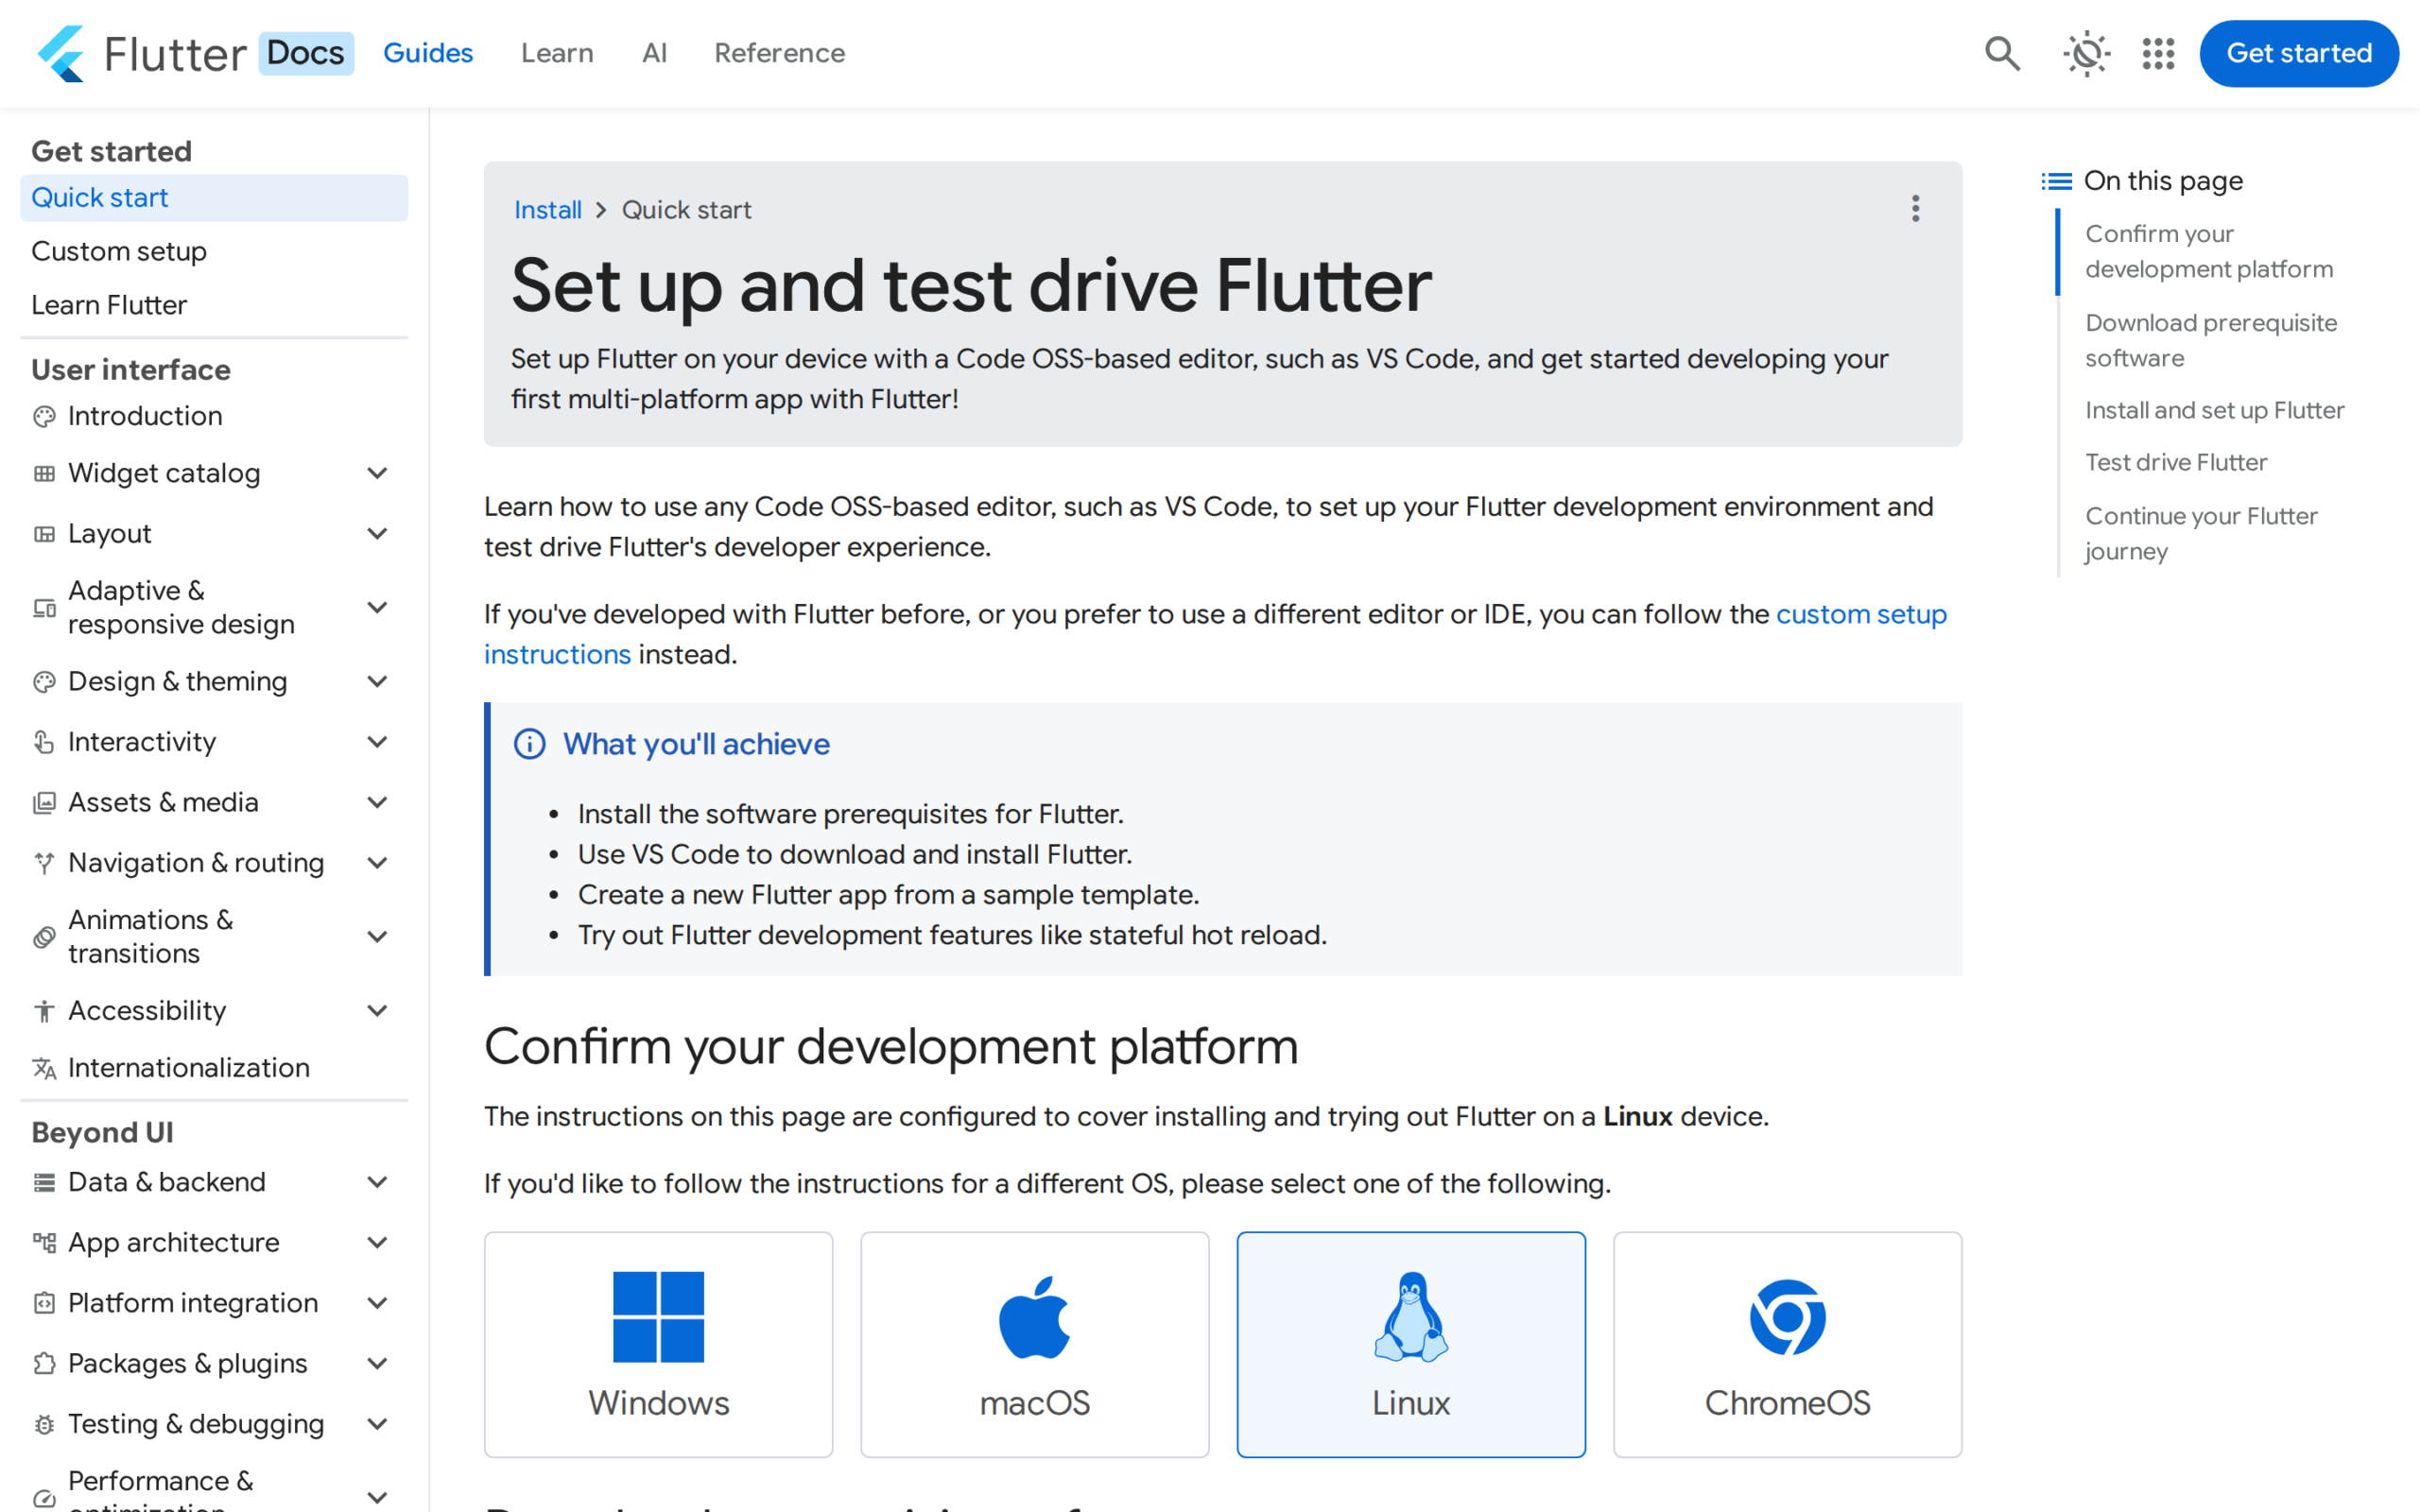
The platform selector sets the examples and prerequisites for the selected development machine. Confirm it before following the setup sequence.
The editor extension helps with project creation, completion and debugging. The Flutter SDK is installed separately. Keep track of the SDK directory you selected, since the editor and terminal must point to the same installation.
After installation, check that the shell can find Flutter by running:
flutter doctor
I installed the stable Flutter 3.47.7 SDK in this workspace and ran flutter doctor. The SDK was detected, while Android, Chrome and Linux desktop toolchains were incomplete on this machine. Your report will depend on the targets configured on your own computer.
Doctor summary (to see all details, run flutter doctor -v):
[✓] Flutter (Channel stable, 3.47.7, on Ubuntu 24.04.5 LTS 7.0.0-1013-oracle, locale C.UTF-8)
[✗] Android toolchain - develop for Android devices
    ✗ Unable to locate Android SDK.
      Install Android Studio from: https://developer.android.com/studio/index.html
      On first launch it will assist you in installing the Android SDK components.
      (or visit https://flutter.dev/to/linux-android-setup for detailed instructions).
      If the Android SDK has been installed to a custom location, please use
      `flutter config --android-sdk` to update to that location.

[✗] Chrome - develop for the web (Cannot find Chrome executable at google-chrome)
    ! Cannot find Chrome. Try setting CHROME_EXECUTABLE to a Chrome executable.
[✗] Linux toolchain - develop for Linux desktop
    ✗ clang++ is required for Linux development.
      It is likely available from your distribution (e.g.: apt install clang), or can be downloaded from https://releases.llvm.org/
    ✗ ninja is required for Linux development.
      It is likely available from your distribution (e.g.: apt install ninja-build), or can be downloaded from https://github.com/ninja-build/ninja/releases
    ✗ GTK 3.0 development libraries are required for Linux development.
      They are likely available from your distribution (e.g.: apt install libgtk-3-dev)
    ! Unable to access driver information using 'eglinfo'.
      It is likely available from your distribution (e.g.: apt install mesa-utils)
[✓] Connected device (1 available)
[✓] Network resources

! Doctor found issues in 3 categories.
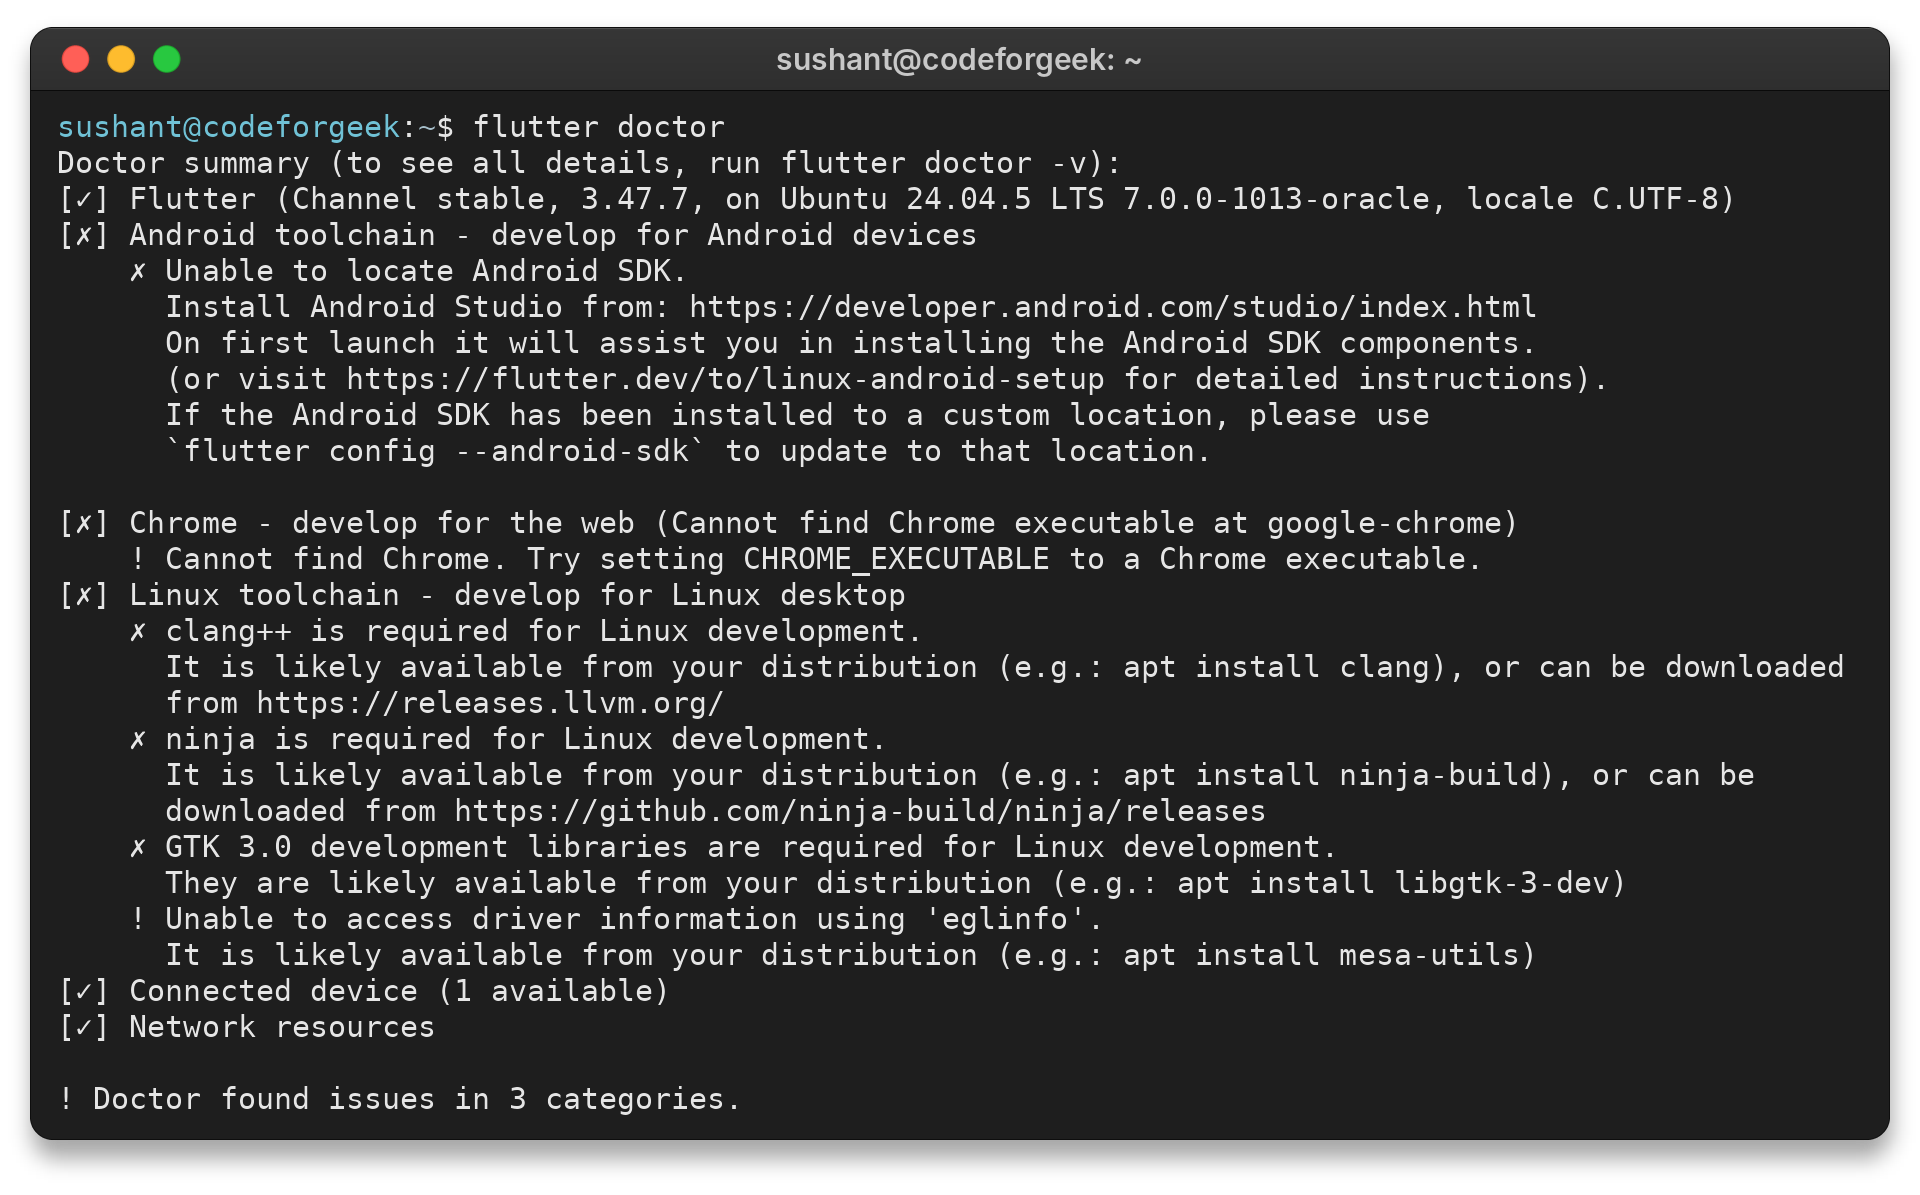
After installing the SDK, use the report to separate Flutter itself from target toolchains and connected devices.
Step 3: Configure the target platform
For Android, install Android Studio and the SDK components listed in the official Android setup guide. Use its SDK Manager directions and accept the Android SDK licences after reviewing them.
Create an emulator or connect a device with debugging enabled. Do not choose an Android API level based on a phone model alone. Use the versions Flutter’s current setup guide identifies.
For iOS or macOS development, follow the Apple-specific prerequisites in Flutter’s platform guides. For a web target, select an installed supported browser. Desktop targets also need their relevant compiler or SDK.
Step 4: Create a starter application
Use the editor’s Flutter: New Project command and select the Application template, or use the Flutter CLI from a terminal. Give the app a lowercase name with underscores, such as starter_app, and choose a parent folder for the project.
The editor route is a good first choice because it prompts for the SDK location if the terminal cannot find Flutter. Create the default starter project from the CLI with:
flutter create flutter_starter
Creating project flutter_starter...
Resolving dependencies in `flutter_starter`...
Downloading packages...
Got dependencies in `flutter_starter`.
Wrote 131 files.

All done!
You can find general documentation for Flutter at: https://docs.flutter.dev/
Detailed API documentation is available at: https://api.flutter.dev/
If you prefer video documentation, consider: https://www.youtube.com/c/flutterdev

In order to run your application, type:

  $ cd flutter_starter
  $ flutter run

Your application code is in flutter_starter/lib/main.dart.
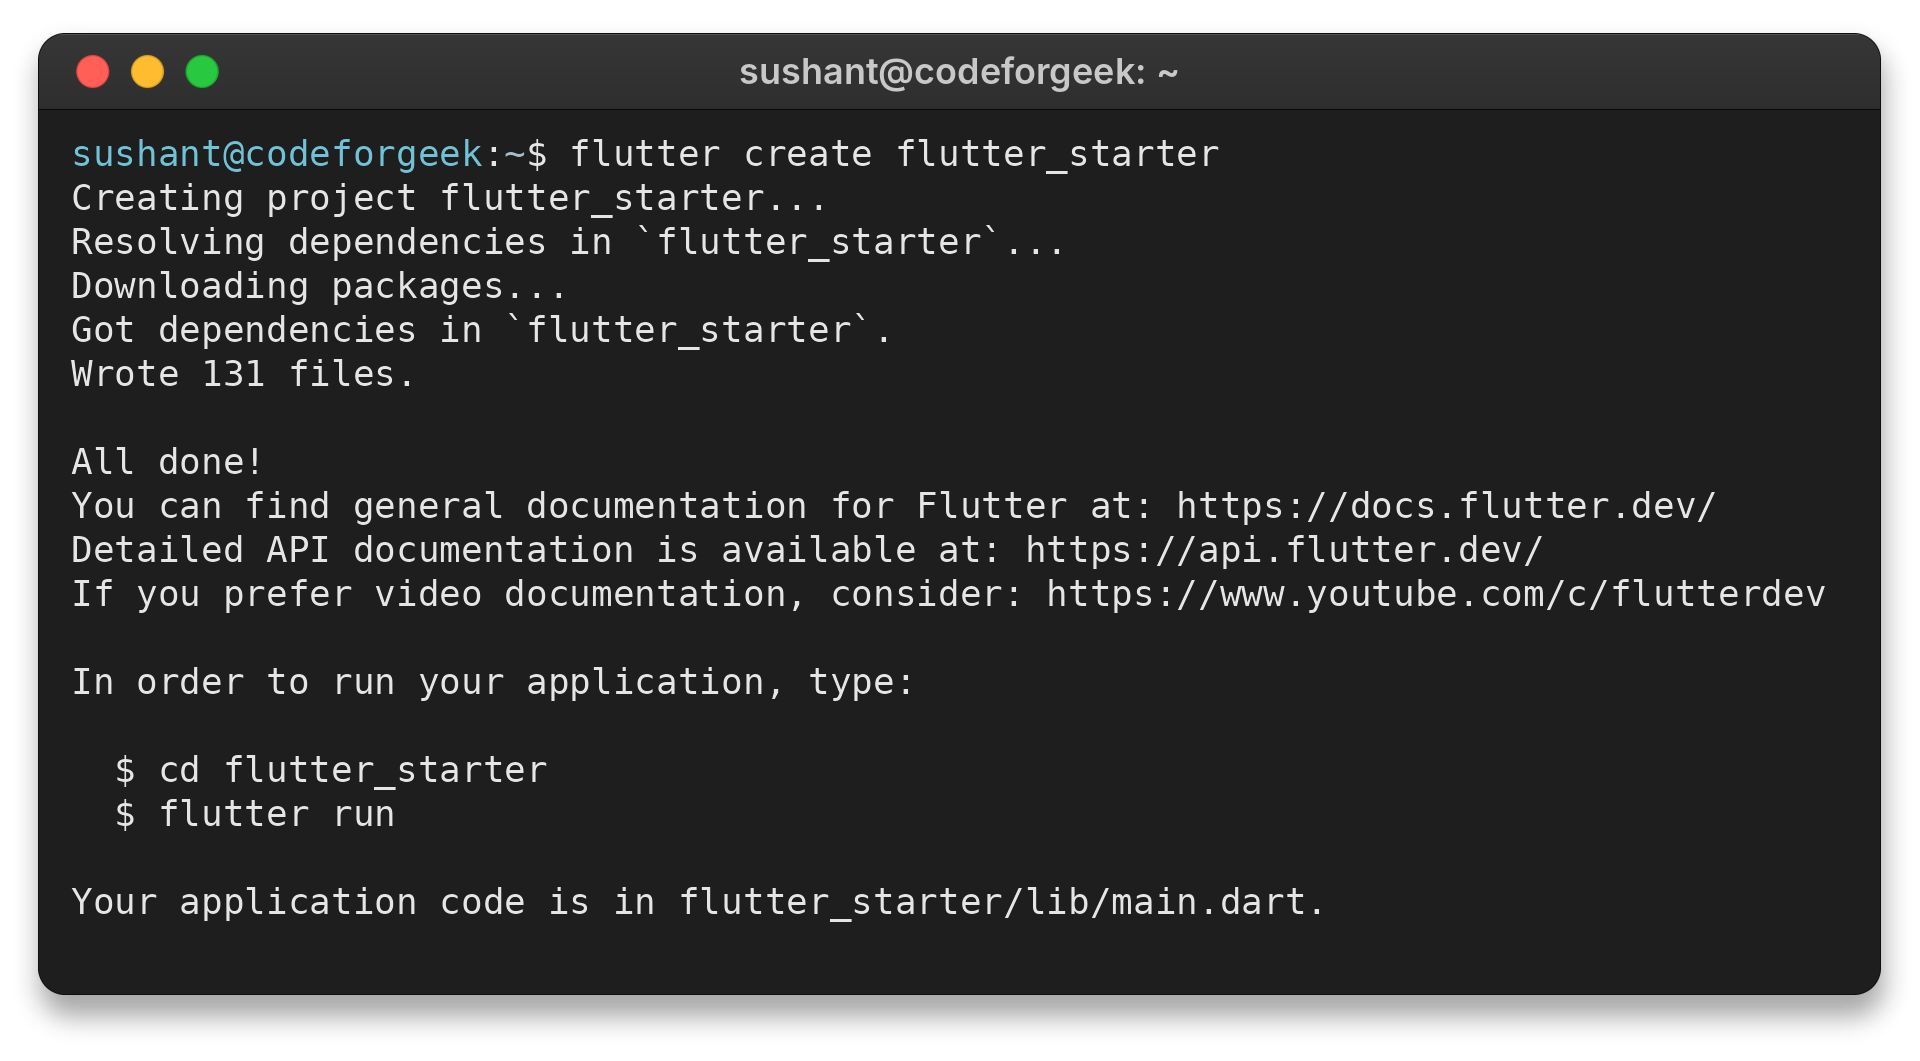
The generated project has platform folders. It usually puts startup code in lib/main.dart and dependency information in pubspec.yaml.
The starter often includes a counter screen. Treat it as a working scaffold: main() starts the app, runApp() attaches the root widget, and the widget tree describes what appears on screen. A button callback can update state, and Flutter rebuilds the affected UI from the new state.
A StatelessWidget describes UI from its inputs and has no mutable state of its own. A StatefulWidget pairs a widget configuration with a State object that can change while the app runs.
The generated counter keeps its number in the screen’s State object. Tapping the button updates that value inside setState, which tells Flutter to rebuild the affected widget. This local state suits a demo, but it does not persist if the app restarts.
Save information that must survive a restart in persistent storage, and keep shared values in an owner that the interested screens can reach. Try that ownership rule before adding a state-management package. It gives you a concrete problem to solve before comparing libraries.
Build the interface from small widgets with clear responsibilities. Flutter includes Column for vertical layout and Row for horizontal layout. Use a ListView when content extends beyond the visible area.
For camera or location access, review the platform permission model and plugin setup notes. Test the permission flow on a physical target before relying on the feature.
Step 5: Select a device and run the app
Start the emulator, connect the phone, or select a browser or desktop target before running. In VS Code, choose Flutter: Select Device and then start debugging. From the project directory, the CLI route is:
flutter run
The command builds the project for the selected device and launches the app. The first build can take longer while tools prepare platform artifacts. Check the terminal or editor’s debug console for build errors, and check the device list if Flutter reports that no target is available.
If you chose the web target, you can build its output separately. This project compiled for the web and Flutter created build/web. That checks the build but does not open the app in a browser:
flutter build web
Compiling lib/main.dart for the Web...
Wasm dry run succeeded. Consider building and testing your application with the `--wasm` flag. See docs for more info: https://docs.flutter.dev/platform-integration/web/wasm
Use --no-wasm-dry-run to disable these warnings.
Font asset "CupertinoIcons.ttf" was tree-shaken, reducing it from 257628 to 1472 bytes (99.4% reduction). Tree-shaking can be disabled by providing the --no-tree-shake-icons flag when building your app.
Font asset "MaterialIcons-Regular.otf" was tree-shaken, reducing it from 1645184 to 7800 bytes (99.5% reduction). Tree-shaking can be disabled by providing the --no-tree-shake-icons flag when building your app.
Compiling lib/main.dart for the Web...                             70.4s
✓ Built build/web
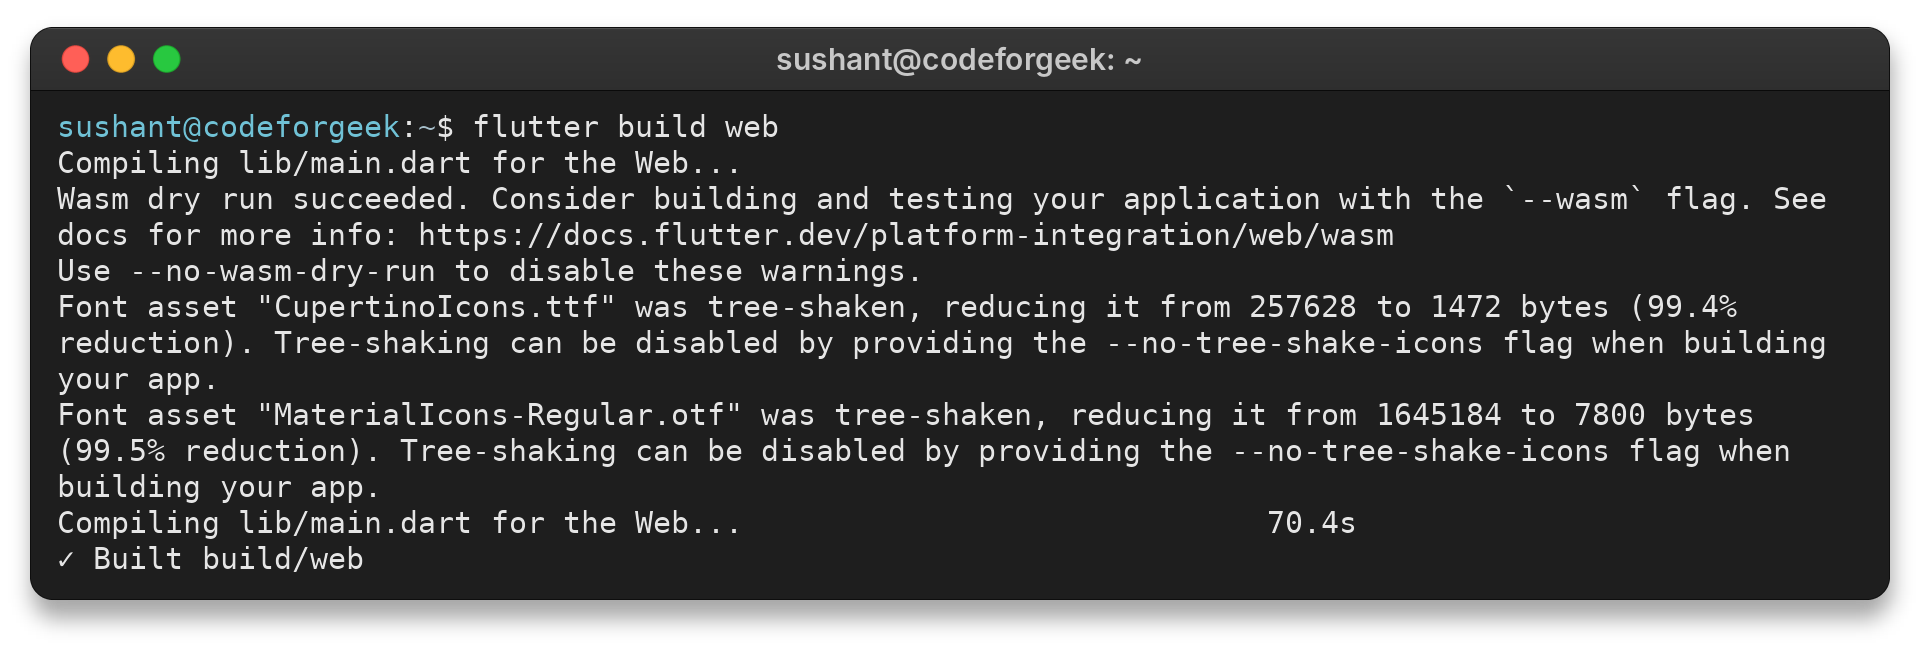
For an interactive web preview, select Chrome in the editor or run flutter run -d chrome after configuring that target.
Once the starter is visible, make a small text change and save the file. A supported edit should appear through hot reload while keeping the app’s current state. Use a full restart when the changed code needs the app to repeat startup or reconstruct state.
Step 6: Read the starter before adding a dependency
Trace the app from main() into the root widget, then follow the screen’s child widgets. This makes the relationship between Dart code and the visible interface concrete. If a widget owns state, note what changes it and which part of the tree reads that state.
The generated project also includes a counter widget smoke test. Run it before changing the starter. It gives you a quick check before the device run:
flutter test
sushant@codeforgeek:~$ flutter test
00:00 +0: loading /home/ubuntu/.cache/journaldev-article-runs/codeforgeek-flutter-getting-started-guide-20261019T202912Z-a68760ffe53d/flutter_starter/test/widget_test.dart
00:00 +0: Counter increments smoke test
00:01 +1: All tests passed!

The generated test starts MyApp, checks that the counter shows 0, taps the plus icon, then checks that 1 appears. It exercises the interaction through Flutter’s test harness without opening an Android emulator, Chrome or a desktop window.
Use the sample to structure future tests: pump the widget, perform one input, pump again, and assert the new text or state. A widget test catches regressions in app behavior as you add screens. Keep each check focused on one behavior.
It does not request camera or location permissions, because those belong to the platform and plugin. Follow the plugin’s test instructions for those flows.
When a screen fetches remote data, use async and await so the UI can keep responding while the request completes, then update the relevant state with the result.
When the app needs a package, search pub.dev and review its supported platforms and setup steps. Add the dependency through the project’s workflow. The package declaration belongs in pubspec.yaml.
Copying package source into lib/ makes upgrades and dependency tracking difficult.
For another UI topic, see CodeForGeek’s Flutter state management with setState. Use the site’s Dart getting started guide for language fundamentals.
What should you check when Flutter setup fails?
Use the failing layer to decide what to fix: shell path, Flutter SDK, platform toolchain, or device connection. Run flutter doctor after correcting a relevant item so the diagnostic reflects the current setup.
| Symptom | Likely check | Next move |
|---|---|---|
| flutter is not recognized or not found | SDK bin directory is missing from PATH, or the terminal was open before PATH changed | Confirm the selected SDK folder, add its bin directory using the official install steps, then reopen the terminal |
| Android toolchain warning | SDK tools, command-line tools or licences are incomplete | Use Android Studio’s SDK Manager and Flutter’s Android setup guide, then launch flutter doctor again |
| No supported devices found | Emulator is stopped, device debugging is off, or no target is selected | Start the emulator or authorize the connected device, then check Flutter’s device list |
| Build fails for another platform | That target’s own compiler, SDK or platform prerequisites are missing | Install its required tooling or switch to the target already configured |
If the Flutter command is missing, check the SDK path before reinstalling. In an editor-led installation, locate the SDK folder selected during setup and confirm the Flutter extension uses it. A terminal opened before a PATH change may need to be restarted before it can resolve the command.
An Android licence prompt is a separate step from installing Flutter. Read each licence prompt and accept it only if you agree, then run the diagnostic again. A missing command-line-tools component is handled in Android Studio’s SDK Manager, not by downloading a random tools archive.
When a connected phone is not listed, check its USB debugging setting and any authorization prompt on the device. For an emulator, start it in Android Studio’s Device Manager. Flutter’s Android guide also documents checking the connection with its device and emulator tools.
A web, desktop or Apple-target error may be irrelevant to an Android build, but it matters as soon as that platform becomes a release target. Keep a short list of the platforms the project promises to support, then make sure each one has a working development and test setup before release.
Conclusion: keep the first target small
Flutter is simpler to evaluate when the first milestone is one working app on one target. Set up that target, create the starter, run it, and inspect how its widgets and state connect before expanding to more platforms.
Use the official Flutter installation guide for current platform prerequisites and the Flutter learning pathway for Dart fundamentals and the next app exercises.
FAQ
These short answers cover the setup questions that commonly follow a first Flutter install.
What do I need to get started with Flutter?
Install the Flutter SDK, choose an editor, and set up the tools for one target platform. Use flutter doctor to check the setup before creating and running a starter app.
Which language does Flutter use?
Flutter apps are written in Dart. The Flutter SDK includes the tools used to build and run Flutter projects.
Why does Flutter say no devices are available?
No emulator or supported device may be running or selected. Start an emulator, connect and authorize a device, or select a configured browser or desktop target.
Does hot reload restart the whole app?
Hot reload applies supported code changes to a running app without a full restart and preserves current state. Some initialization changes need a full restart.