New to Rust? Grab our free Rust for Beginners eBook Get it free →
Create a Horizontal List in Flutter

A horizontal scroll list is a collection of items that we can scroll horizontally. For the simplest example let’s take Amazon. We can horizontally scroll between products on Amazon.
In this tutorial, we are going to discuss how we can create a horizontal list in Flutter. We will discuss two ways to create a horizontal list in Flutter. So without further waiting let’s dive into the interesting content.
Creating a Horizontal List In Flutter
In Flutter, we can create a Horizontal List by using ListView Widgets and ListView.builder which is an advanced version of ListView. ListView.builder has required fewer lines of code than ListView. Let’s see the step-by-step process to implement both one by one to make a Horizontal List.
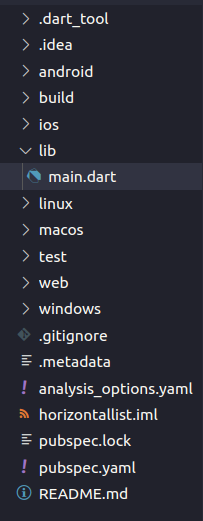
Folder Structure
The project structure for this project is very simple. We are just going to remove all the code in the main.dart file generated by the pre-built flutter create command and write our own code from scratch to create a Horizontal List.
Setup Flutter App
Create a simple Flutter application and replace the boilerplate code with the below code.
import 'package:flutter/material.dart';

void main() {
  runApp(const FlutterApp());
}

class FlutterApp extends StatelessWidget {
  const FlutterApp({super.key});

  @override
  Widget build(BuildContext context) {
    return MaterialApp(
      home: Scaffold(
        body: Container(),
      ),
    );
  }
}
As we can see above code is nothing but just a starter Flutter project. We have MaterialApp which has Scaffold inside it so that we can use all the UI components such as AppBar, etc which are defined inside the Scaffold.
The next thing that we are going to add is a TabBar to make our app a little bit more beautiful.
appBar: AppBar(
        title: const Text('Horizontal List'),
      ),
ListView Widget In Flutter
It is a built-in widget that can accept several children and make them scrollable either in vertical or horizontal directions. That is what we want to achieve so we are going to use this same widget to make our horizontal scrolling list.
Let’s have a look at the following code:
      body: Container(
        alignment: Alignment.topCenter,
        child: ListView(
          shrinkWrap: true,
          scrollDirection: Axis.horizontal,
          children: const [
            Text('Home ', style: TextStyle(fontSize: 18)),
            Text('About Us ', style: TextStyle(fontSize: 18)),
            Text('Blog ', style: TextStyle(fontSize: 18)),
            Text('Career ', style: TextStyle(fontSize: 18)),
            Text('Contact Us ', style: TextStyle(fontSize: 18)),
            Text('Disclaimer ', style: TextStyle(fontSize: 18))
          ],
        ),
      ),
In the above, we added a ListView child to the Container. Next, we specified two parameters “shrinkWrap” and “scrollDirection”. These two parameters specify in which direction the list will scroll and there will be no overflow errors during scrolling.
After that things become simple. We just have a children widget that holds several text widgets.
Now our horizontal scrolling list is completed and we can start our app and see the result. We have also attached an image of the output below.
Complete Code:
import 'package:flutter/material.dart';

void main() {
  runApp(MyApp());
}

class MyApp extends StatelessWidget {
  MyApp({super.key});

  List pages = ['Home', 'About', 'Careers', 'Contact Us', 'Blog', 'Disclaimer'];

  @override
  Widget build(BuildContext context) {
    return MaterialApp(
        home: Scaffold(
      appBar: AppBar(
        title: const Text('Horizontal List'),
      ),
      body: Container(
        alignment: Alignment.topCenter,
        child: ListView(
          shrinkWrap: true,
          scrollDirection: Axis.horizontal,
          children: const [
            Text('Home ', style: TextStyle(fontSize: 18)),
            Text('About Us ', style: TextStyle(fontSize: 18)),
            Text('Blog ', style: TextStyle(fontSize: 18)),
            Text('Career ', style: TextStyle(fontSize: 18)),
            Text('Contact Us ', style: TextStyle(fontSize: 18)),
            Text('Disclaimer ', style: TextStyle(fontSize: 18))
          ],
        ),
      ),
    ));
  }
}
Output:

We hope that the above tutorial was simple but most of you must be wondering what if we have thousands of children to pass in the list then what we will do. That’s why we are also going to discuss another approach to making a horizontal scroll list.
ListView.builder
As its name suggests it is an advanced version of ListView which have a builder function that helps us to dynamically generate lists by providing data. Suppose you have the name and age of 2000 employees then you can Store that in a JSON file and pass that to ListView.builder() and it will make the list automatically. That’s enough of talking let’s code something.
Let’s go through this not-simple but short version of ListView.
First of all, declare a list at the top of the class this list will contain all the page titles that we want to show in our horizontal scrolling menu.
List pages = ['Home', 'About', 'Careers', 'Contact Us', 'Blog', 'Disclaimer'];
Now here our little block of code comes.
child: ListView.builder(
            shrinkWrap: true,
            scrollDirection: Axis.horizontal,
            itemCount: pages.length,
            itemBuilder: (context, index) {
              return Text(pages[index] + "     ", style: TextStyle(fontSize: 20),);
            }),
In this code, we are using the builder function from ListView.
After that, we have to specify the number of items that will be on this menu. In our case, we can pass the length of the list as item count because we are going to have that much of items.
The next thing “itemBuilder” is most important. It is something that loops over a given data and passes that data into the user interface.
In our case, we are using context and index which is majorly used to loop for the list of pages. After that, we returned the Text widget and passed the pages list with an index. Also, we have done a little bit of formatting by adding extra white Space at the ending and a little bit of Style.
This is how the complete mechanism of the ListView.builder works.
Complete Code:
import 'package:flutter/material.dart';

void main() {
  runApp(MyApp());
}

class MyApp extends StatelessWidget {
  MyApp({super.key});

  List pages = ['Home', 'About', 'Careers', 'Contact Us', 'Blog', 'Disclaimer'];

  @override
  Widget build(BuildContext context) {
    return MaterialApp(
        home: Scaffold(
      appBar: AppBar(
        title: const Text('Horizontal List'),
      ),
      body: Container(
        alignment: Alignment.topCenter,
        child: ListView.builder(
            shrinkWrap: true,
            scrollDirection: Axis.horizontal,
            itemCount: pages.length,
            itemBuilder: (context, index) {
              return Text(
                pages[index] + "     ",
                style: TextStyle(fontSize: 20),
              );
            }),
      ),
    ));
  }
}
Output:

Also Read: Flutter setState Tutorial
Summary
So we hope that this post was helpful and you are returning from our website with some knowledge that will be implemented in real-life scenarios. In this post, we discussed two methods of creating a horizontally scrolling list in Flutter. Next, you can customize it on your own by providing it with custom widgets and playing with its predefined options.
We will be uploading such types of tutorials regularly so make sure to bookmark our websites and keep visiting us for the latest updates.
Reference
https://api.flutter.dev/flutter/widgets/ListView-class.html