New to Rust? Grab our free Rust for Beginners eBook Get it free →
Getting Started with Kubernetes

minikube stopped at the first command on the one-CPU machine I ran it on, and the message named my core count.
The cluster it starts puts the Kubernetes control plane and the workload on one Node, because a local cluster has no second machine to spread them across.
What a local Kubernetes cluster runs
Kubernetes is a control loop. You describe the state you want, the control plane compares that with the state it finds, and it acts on the difference.
| Part | What it does |
|---|---|
| kube-apiserver | Accepts every request and is the only component anything else talks to |
| etcd | Stores the objects and their current state |
| kube-scheduler | Picks a Node for each Pod that has no Node yet |
| kube-controller-manager | Compares the declared state with the observed state and acts on the difference |
| kubelet and the container runtime | Start and stop the containers a Pod asks for |
On a local cluster all of that runs as containers on one machine, which is why the object list matches production while the behaviour does not. Each part has one job and the loop only closes when all of them are running.
Production keeps the control plane away from the workers, so nothing here teaches you about scheduling across machines. The objects you create are still the objects a production cluster serves.
minikube validates the host before any of that starts.
What the first command needs from your machine
The install has three decisions in front of it, and any one of them can stop the start command.
The CPU and memory floor
minikube asks for two CPUs, two gigabytes of free memory, twenty gigabytes of disk, and a container or virtual machine manager to run the cluster on. The memory check warns and continues, while the CPU check ends the run.
That CPU message is what a small host meets before it has seen a single Kubernetes object.
I gave the cluster one CPU and eighteen hundred megabytes, which sits under the documented floor, and minikube printed both complaints and started anyway. The flag that allows it is –force, and it skips the validation pass rather than raising the limit.
Pick a driver before you install anything
The driver is how minikube gets a machine to run Kubernetes on. Docker, podman, qemu, hyperkit and kvm2 all work, and the choice decides which user needs access to which socket.
Docker is the common pick on Linux and the one I used, and its driver refuses to run as root without the same –force flag. That refusal is why the pair shows up so often in the upvoted minikube questions on Stack Overflow.
Install kubectl and minikube
kubectl is the client, and it works against any conformant cluster.
Keep it within one minor version of the cluster it talks to. That compatibility rule is on the Kubernetes install page, and it is the reason a fresh client against an old cluster can misbehave.
curl -LO "https://dl.k8s.io/release/$(curl -L -s https://dl.k8s.io/release/stable.txt)/bin/linux/arm64/kubectl"
sudo install -o root -g root -m 0755 kubectl /usr/local/bin/kubectl
kubectl version --client
The client I installed reports its own version and nothing about the cluster, because there is no cluster on the machine yet.
Client Version: v1.37.0
Kustomize Version: v5.8.1
minikube ships as a single binary, and the download URL carries the architecture.
curl -LO https://github.com/kubernetes/minikube/releases/latest/download/minikube-linux-arm64
sudo install minikube-linux-arm64 /usr/local/bin/minikube
minikube version
minikube version: v1.39.0
commit: 7a9f6a841470a207de8cf4bafcccee0969d8ba10
Start the cluster
The start command pulls a base image with the container runtime and a Kubernetes release inside it. It then writes a kubeconfig, which is how kubectl finds the new cluster without any further setup.
On a machine that has never run it, the first start spends its time downloading.
Run the start command
minikube start --driver=docker
A one-CPU host prints both validations before the base image is pulled.
* minikube v1.39.0 on Ubuntu 24.04 (arm64)
* Using the docker driver based on user configuration
X Requested cpu count 1 is less than the minimum allowed of 2
X Requested memory allocation (1800MB) is less than the recommended minimum 1900MB. Deployments may fail.
* Pulling base image v0.0.51 ...
* Configuring CNI (Container Networking Interface) ...
* Verifying Kubernetes components...
* Enabled addons: storage-provisioner, default-storageclass
* Done! kubectl is now configured to use "minikube" cluster and "default" namespace by default
The whole start took 135 seconds on this host, and the base image pull accounted for nearly all of it. A second cluster reuses that image and finishes far sooner.
Read the validation lines, not the cluster
The lines beginning with X are minikube’s own checks. They describe the host, so the CPU line means fewer cores than the documented minimum and the memory line means an allocation under the recommended figure.
Nothing Kubernetes-shaped fails in that pair, because the cluster starts and the API server comes up. The cost lands later, when a workload wants more CPU than one core can schedule.
Confirm the control plane is up
kubectl reads the kubeconfig minikube just wrote, so no extra setup is needed to talk to the new cluster.
kubectl get nodes
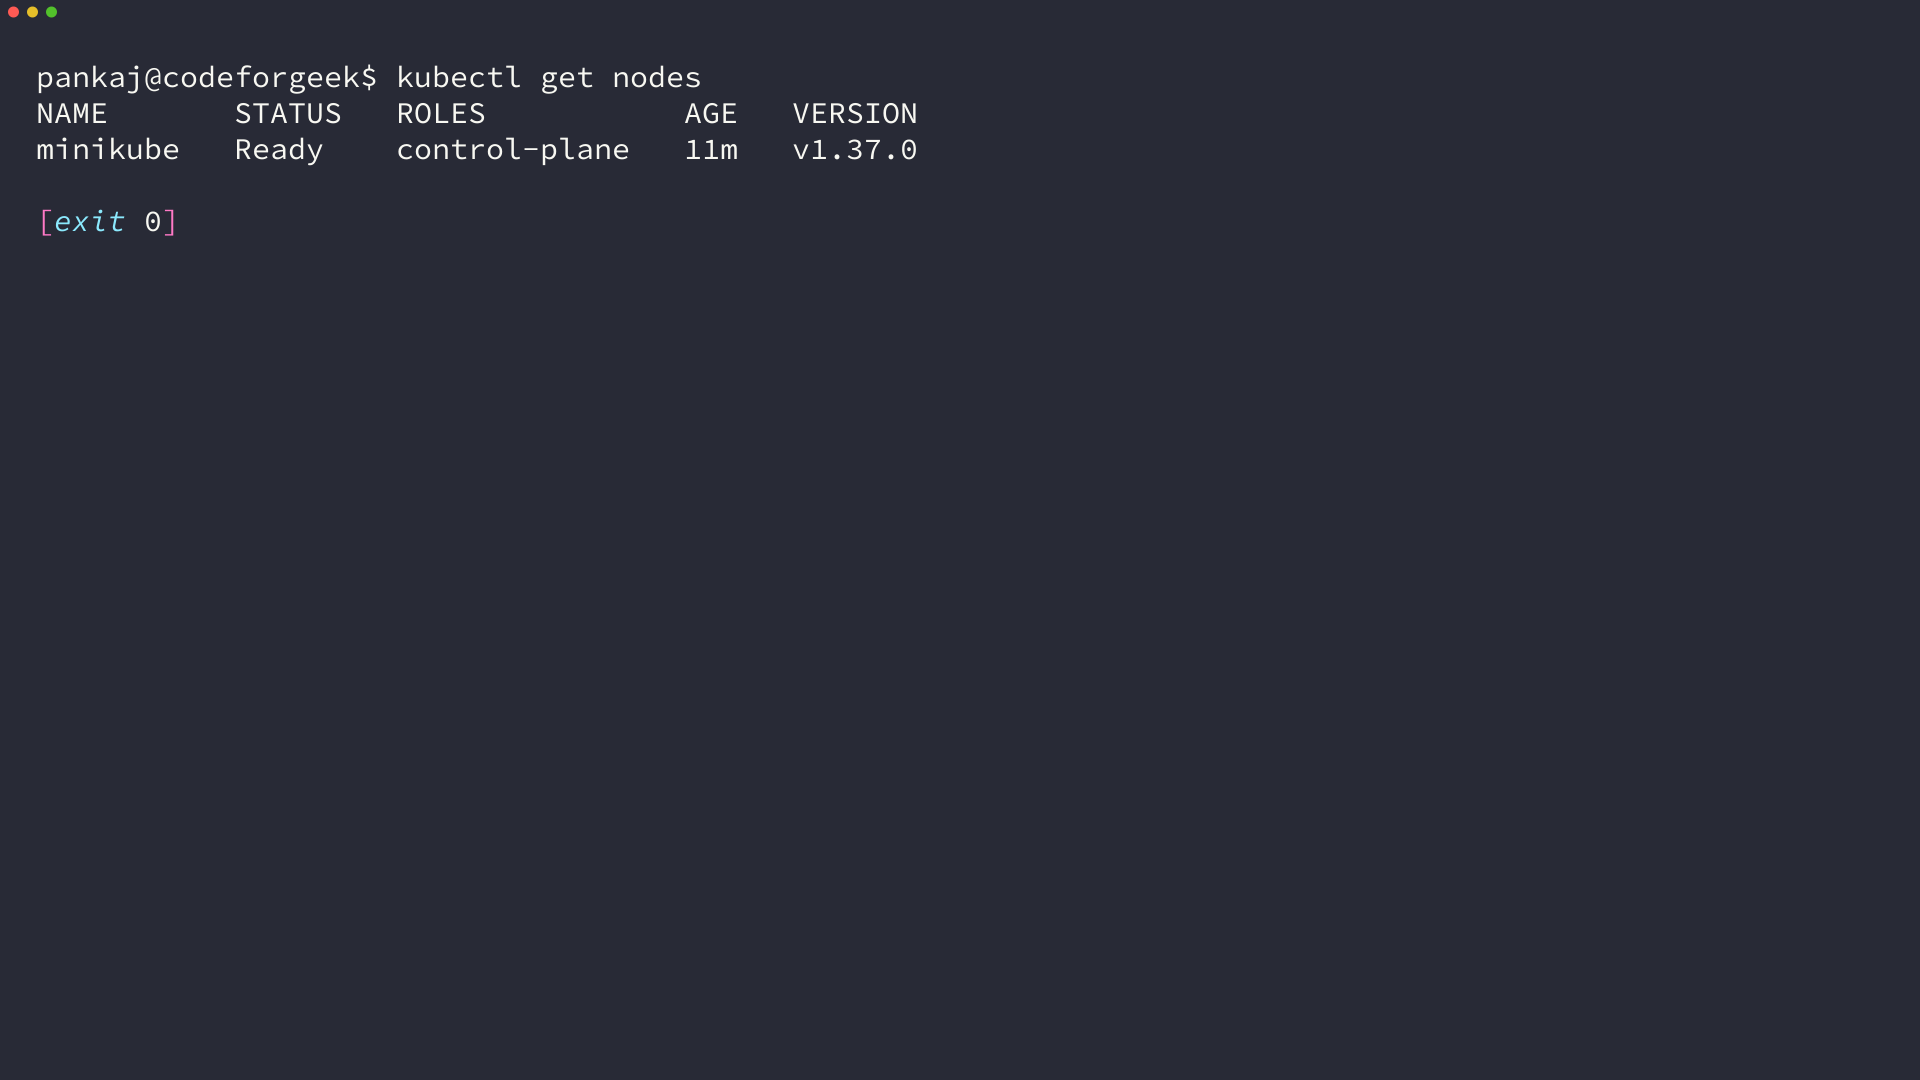
That single row is the whole cluster, with the role column naming it the control plane and the version naming the Kubernetes release I installed.
Ask for the Pods in every namespace and the control plane shows up as workloads of its own. They sit in kube-system, next to an empty default namespace.
kubectl get pods -A
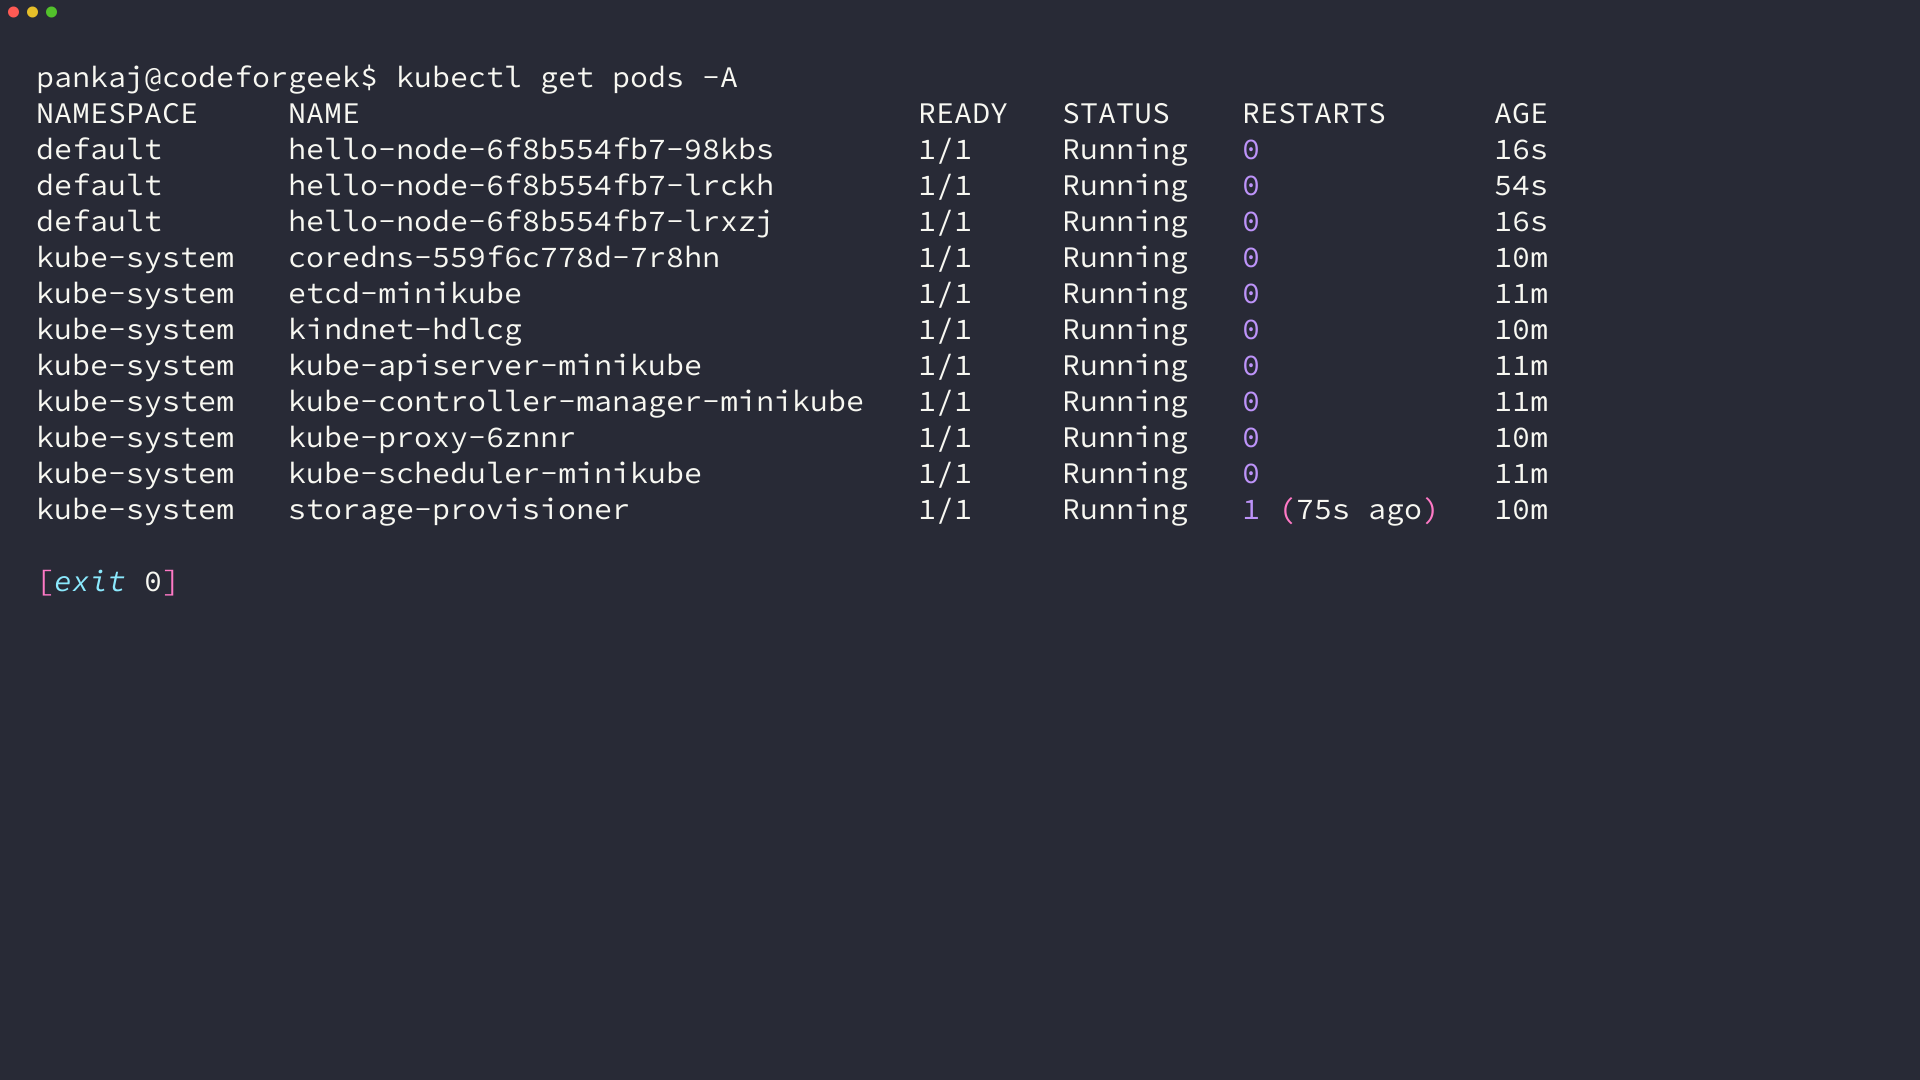
etcd, the API server, the scheduler and the controller manager each run as a container, which is the same software a hosted control plane runs for you.
Deploy a workload and reach it
A Pod on its own is a bad unit to manage, because nothing restarts it when the container dies. A Deployment holds the replica count, replaces failed Pods, and gives you something to scale.
- The Deployment states how many replicas you want.
- A ReplicaSet, created and owned by the Deployment, holds those replicas at the number you set.
- A Pod runs one container and disappears when that container exits.
Only the top entry is yours to edit, which is why every command below names the Deployment and never the Pod.
Create the Deployment
The image here is the Kubernetes test server, which answers HTTP on the port you name and logs every request it serves.
kubectl create deployment hello-node --image=registry.k8s.io/e2e-test-images/agnhost:2.53 -- /agnhost netexec --http-port=8080
deployment.apps/hello-node created
Everything after the double dash is passed to the container as its command and arguments. That is how you override an image’s default entrypoint without writing a manifest yet.
Asking for the Deployment shows the replica count it is maintaining.
kubectl get deployments
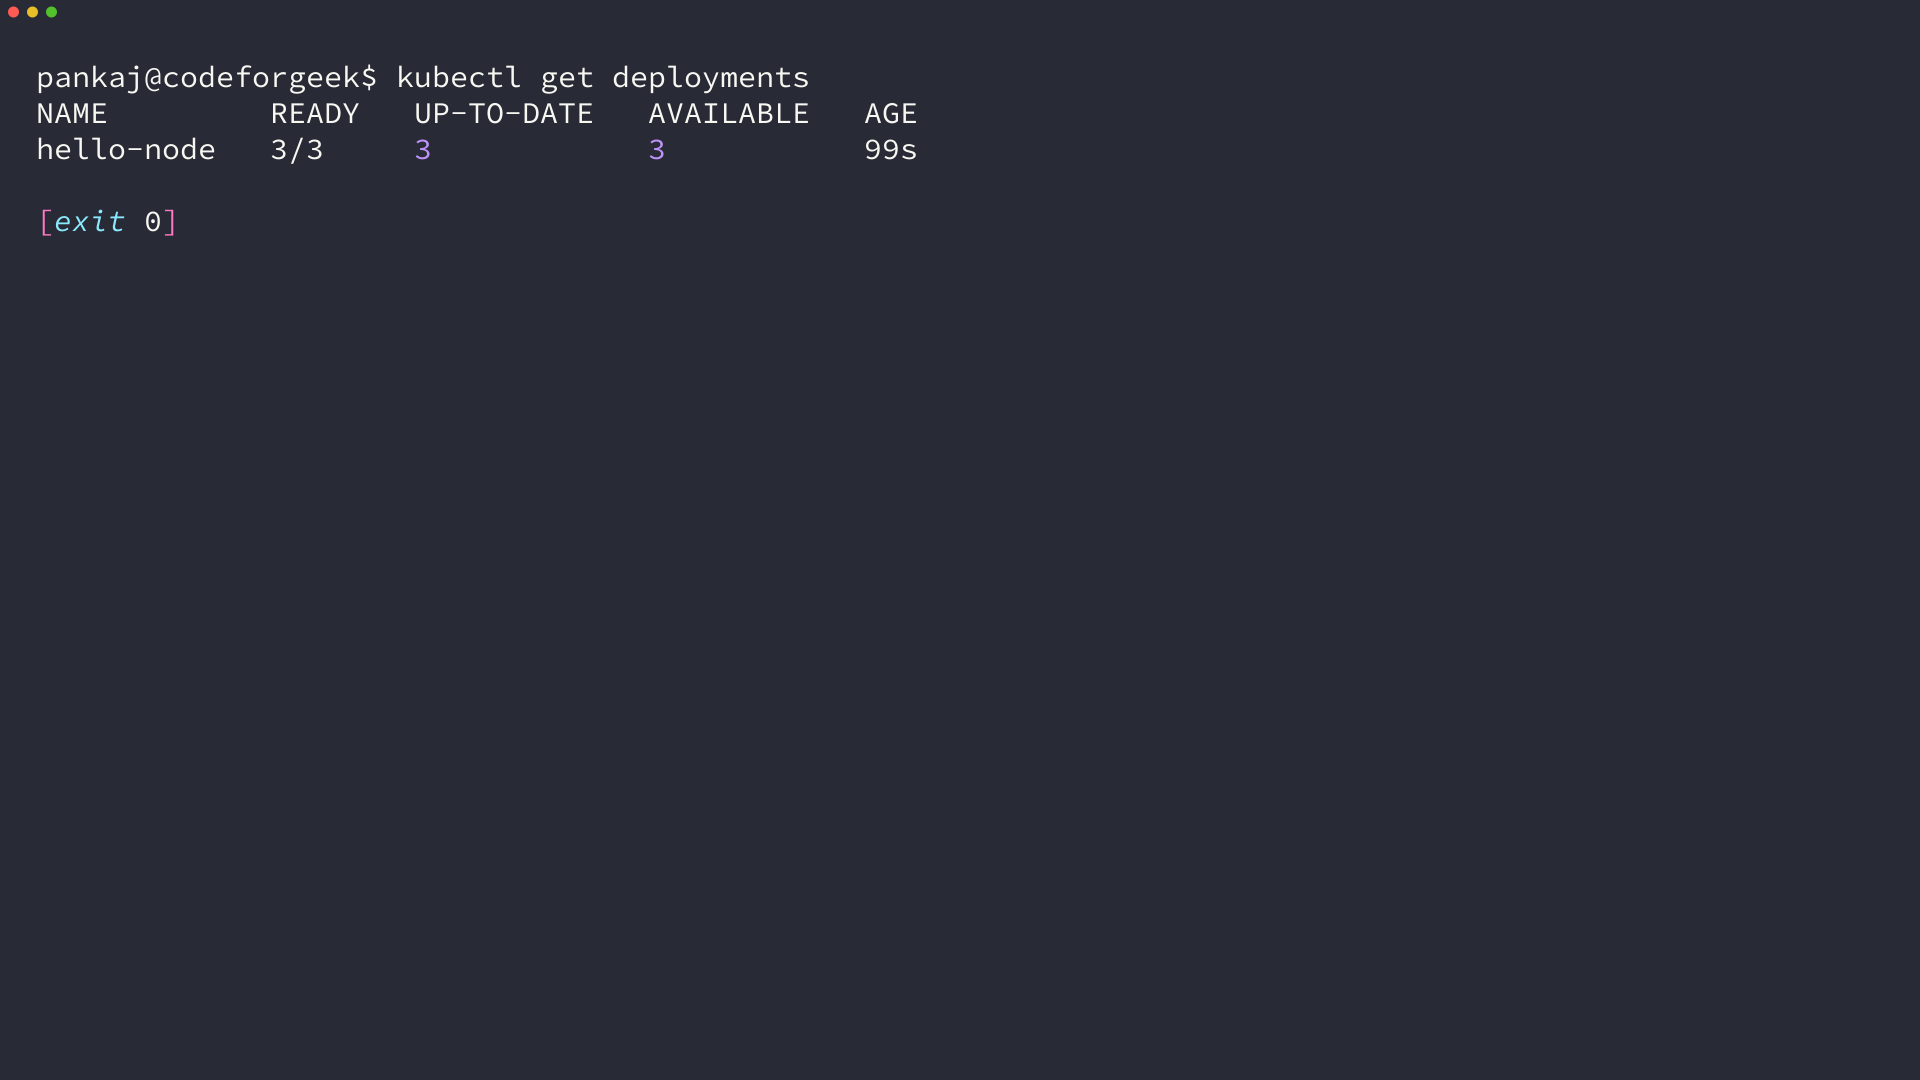
Expose it as a Service
A Pod address changes every time the Pod is replaced, so a Service gives the workload one stable name for as long as it exists. The Service finds its Pods through a label selector, which the Deployment already set.
kubectl expose deployment hello-node --type=LoadBalancer --port=8080
kubectl get services
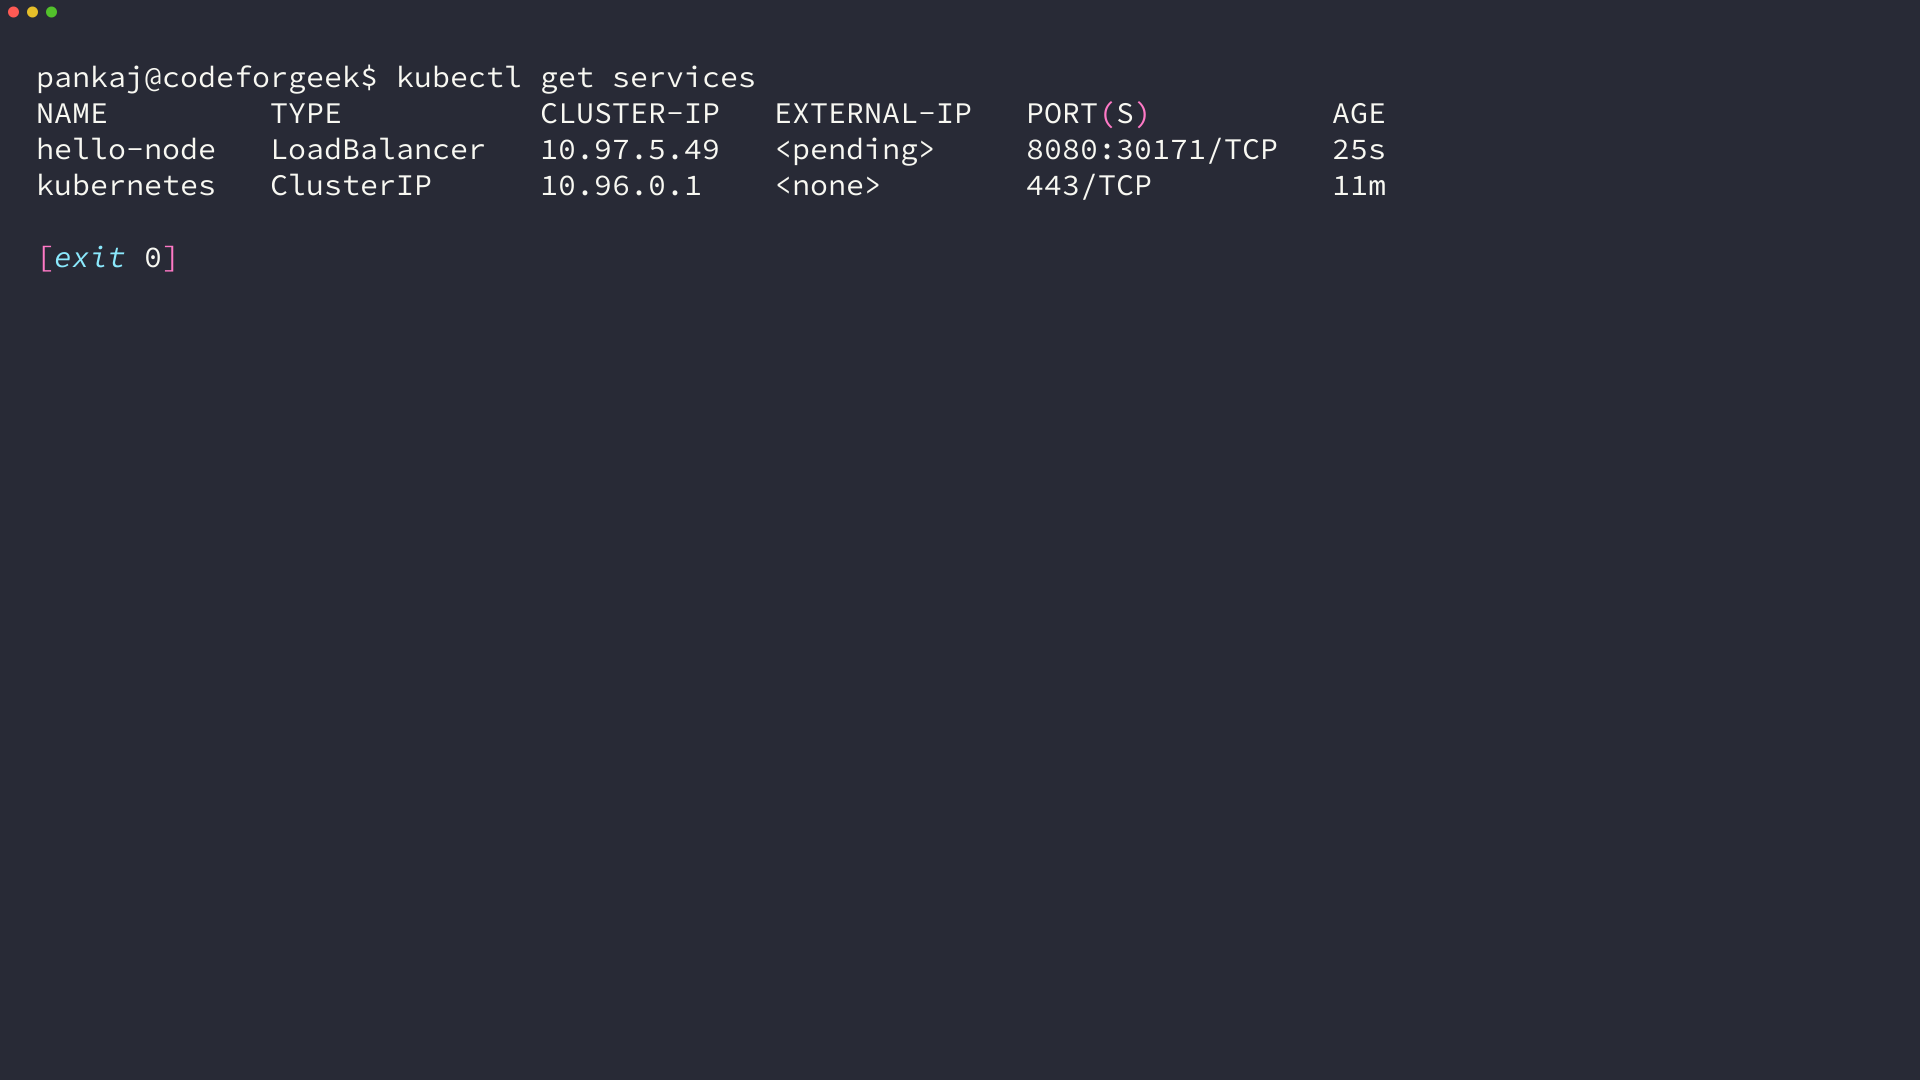
The address column is where the boundary of a local cluster shows up. A LoadBalancer Service asks the infrastructure for an external address, and a local cluster has no infrastructure to ask.
The value stays pending while the Service works inside the cluster, and a port-forward reaches it anyway. In practice the pending address is the only sign that you are not on a cloud provider.
Open the app in a browser
The port-forward command opens a tunnel from your machine to the Service through the API server, and it works the same way on every cluster. Leave it running in one terminal and check the app from another.
kubectl port-forward svc/hello-node 8080:8080
curl -s localhost:8080
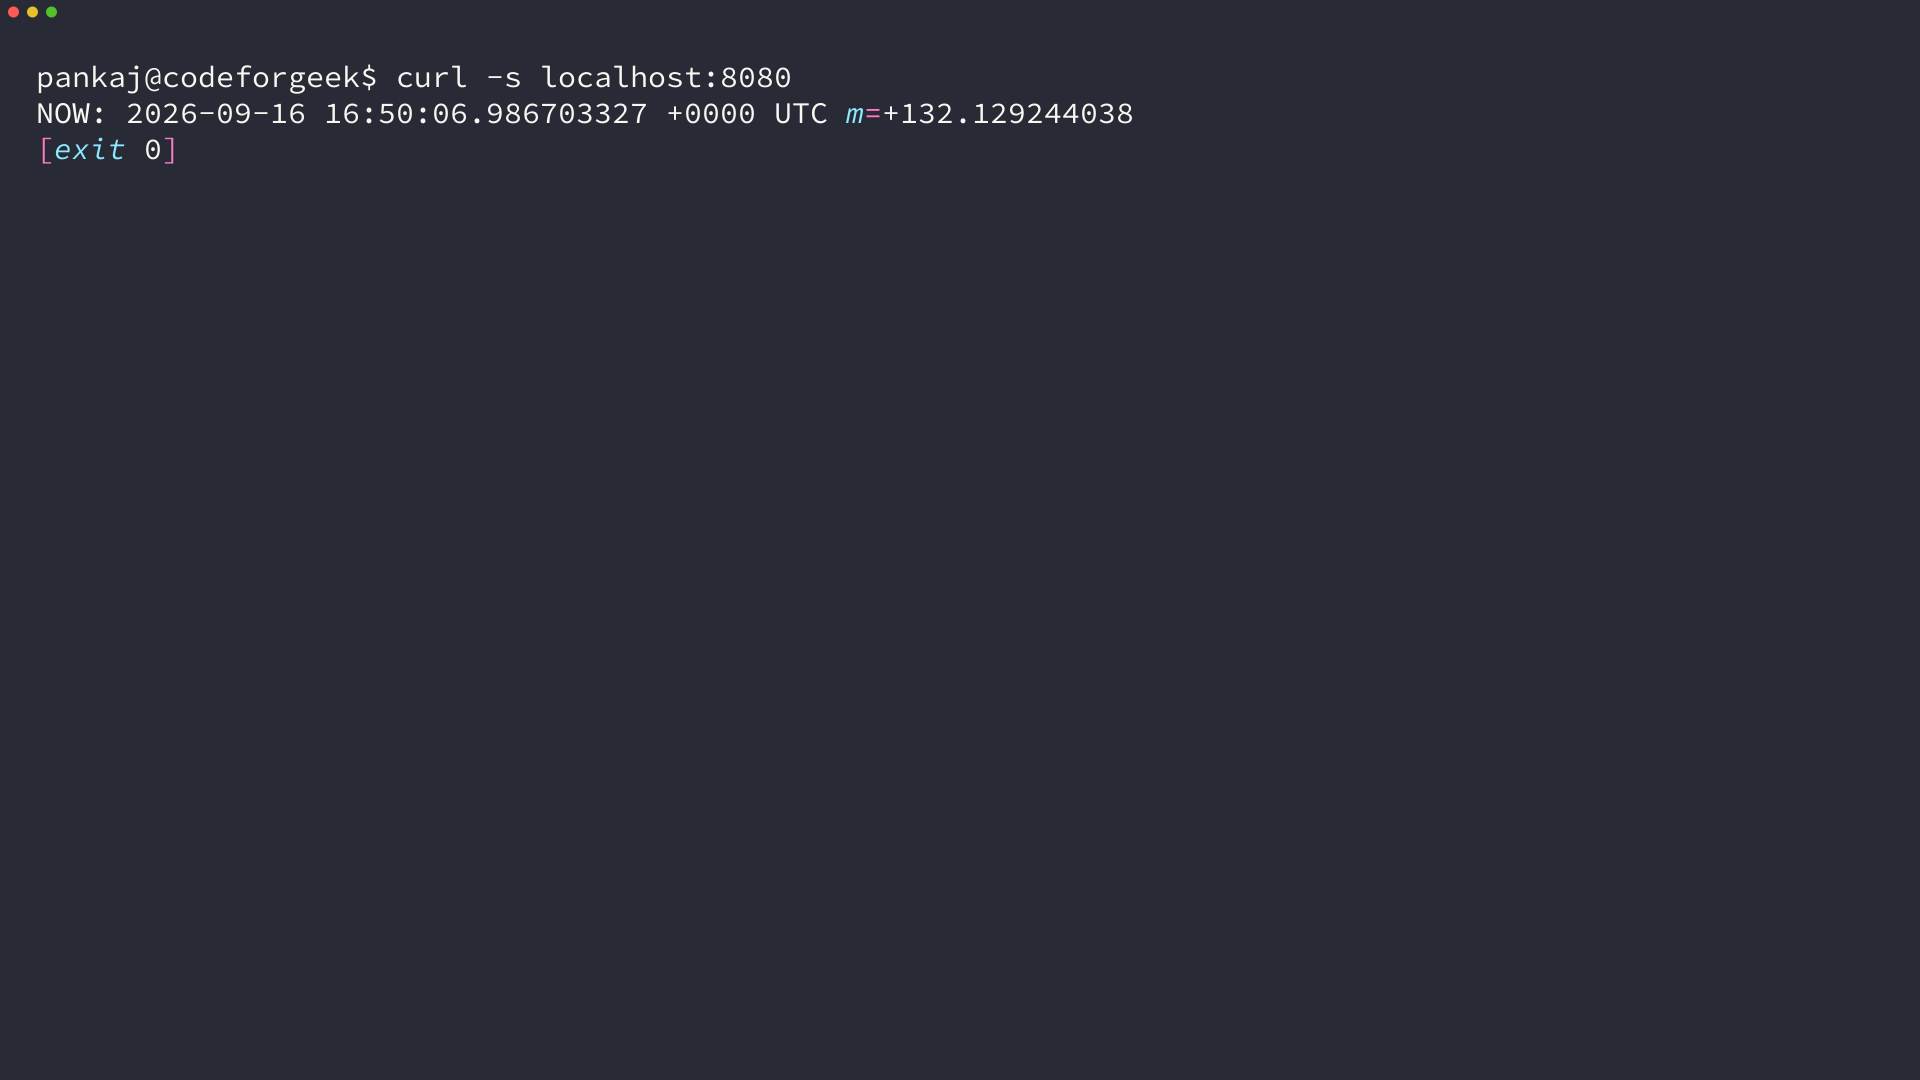
The reply is the test server’s own timestamp. Only a request that travelled through the API server, into the Pod, and back out produces it.
A blank response or a refused connection means the tunnel died, so start it again before you debug the workload.
Inspect, scale and remove the workload
Running is the start of the job rather than the end of it. The next three commands read what the container is doing, change the replica count, and take the whole thing apart again.
Read the log and the event list
Container output goes to the node’s log files, and kubectl fetches it without an SSH session.
kubectl logs deploy/hello-node
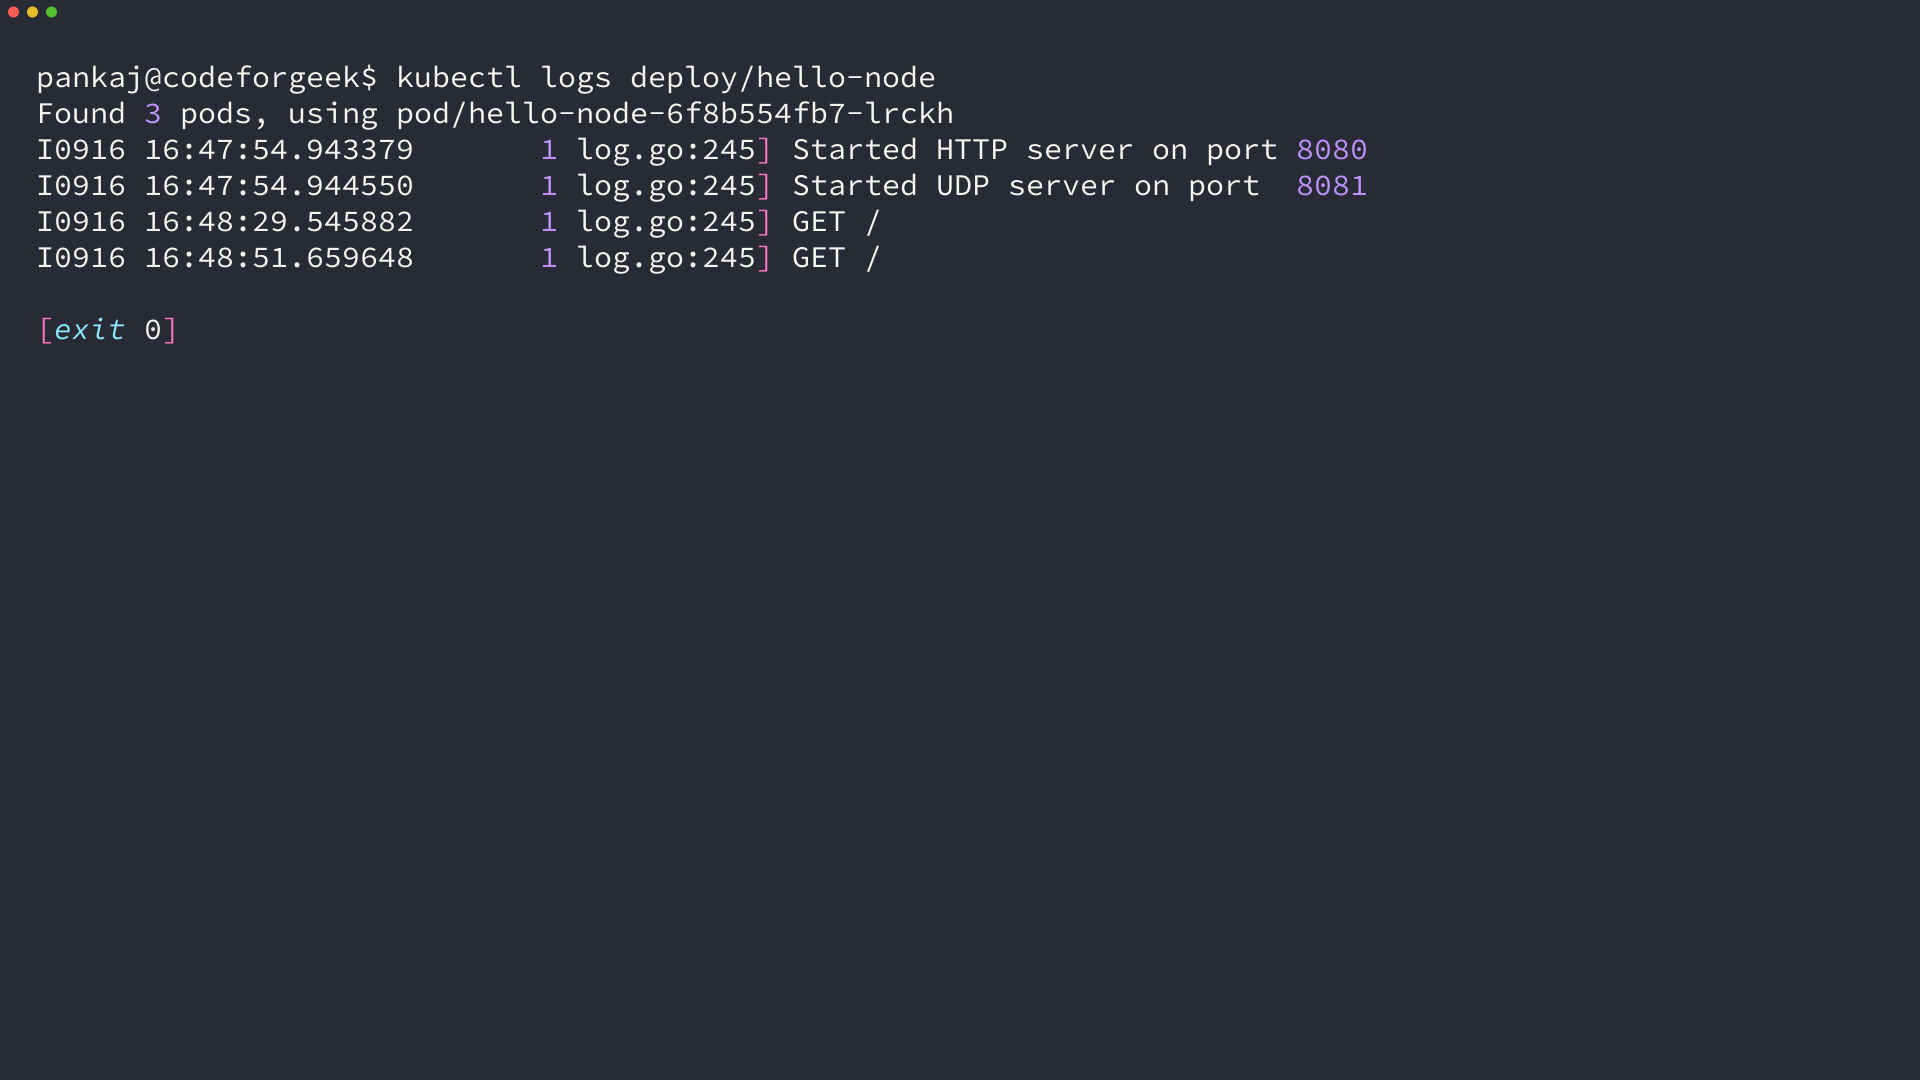
The first line names the port the server bound to, which is the fastest way to catch a container listening somewhere other than the port your Service targets.
Events are the cluster’s record of what its controllers did, and they answered the question my log could not. Filtering them to one object keeps the list short.
kubectl get events --field-selector involvedObject.kind=Deployment --sort-by=.metadata.creationTimestamp
LAST SEEN   TYPE     REASON              OBJECT                  MESSAGE
30s         Normal   ScalingReplicaSet   deployment/hello-node   Scaled up replica set hello-node-6f8b554fb7 from 0 to 1
Scale the Deployment
Changing the replica count is one field on the Deployment, and the controller does the rest.
kubectl scale deployment hello-node --replicas=3
kubectl get pods -l app=hello-node
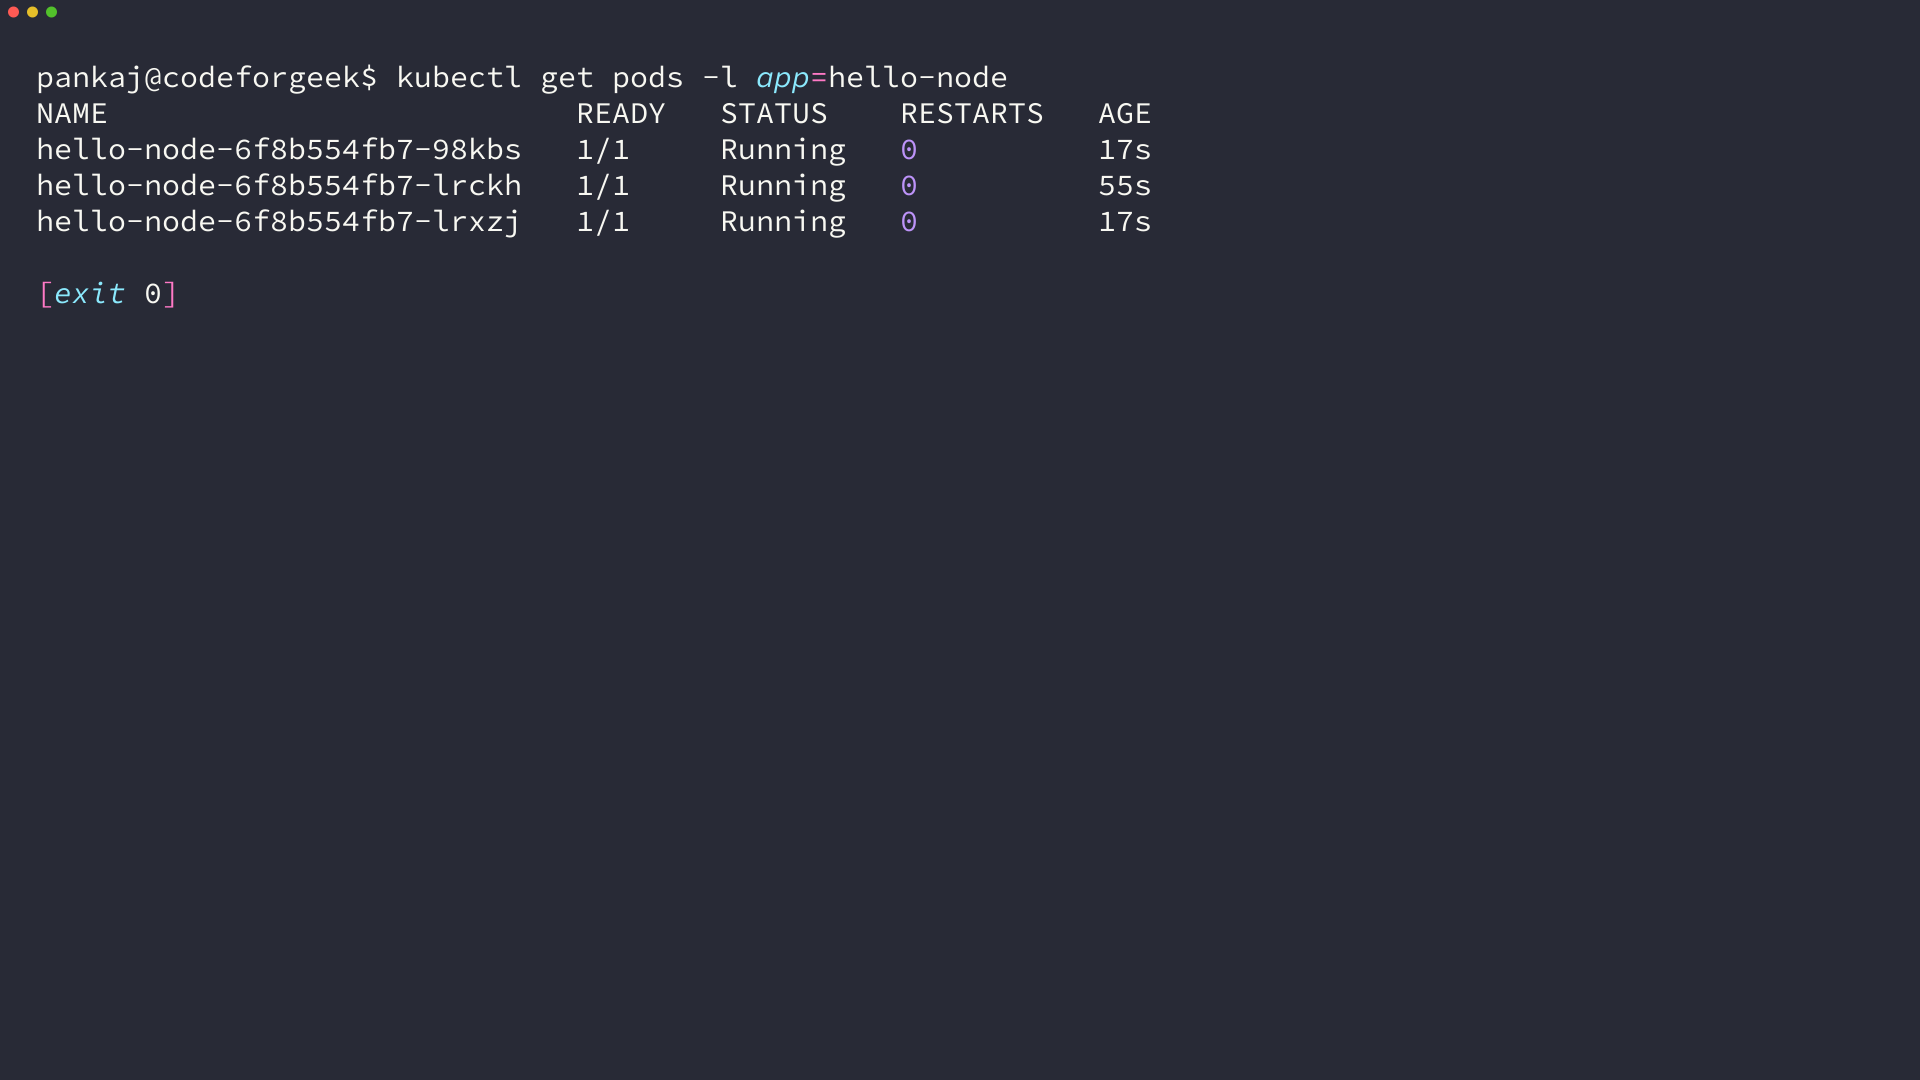
The same Service now fronts three Pods, which is the count I asked for. It selects them by label rather than by name, which is why a rolling update can replace every Pod without a client noticing.
Delete the objects and the cluster
Deleting the objects first keeps the two layers apart, so the workload goes while the cluster stays. That order also lets you watch what happens to the Pods.
kubectl delete service hello-node
kubectl delete deployment hello-node
service "hello-node" deleted from default namespace
deployment.apps "hello-node" deleted from default namespace
For a few seconds the Pods report Completed rather than Terminating, because the containers exited cleanly before the objects disappeared. The cluster itself comes down with one command, and it takes the kubeconfig entry with it.
minikube delete
* Deleting "minikube" in docker ...
* Deleting container "minikube" ...
* Removing /root/.minikube/machines/minikube ...
* Removed all traces of the "minikube" cluster.
When the start command refuses
The blocked first starts come from four failures, and each one belongs to a different layer of the stack.
| What you see | Layer | Where it lands |
|---|---|---|
| RSRC_INSUFFICIENT_CORES | The host | The CPU count is below the documented minimum |
| DRV_AS_ROOT | The driver | minikube was started as root against the docker driver |
| EXTERNAL-IP pending | The Service | A local cluster has no load balancer to provision |
| A driver error before the cluster | The host | The binary, daemon, or socket the driver needs is not reachable |
The workload-level failures that come after the cluster is up are a different set, and the Kubernetes troubleshooting tools I keep beside this page cover those.
RSRC_INSUFFICIENT_CORES on a small host
minikube exits with RSRC_INSUFFICIENT_CORES when the host has fewer than two CPUs and the validation pass is still on. No amount of reinstalling changes a core count, so the message is about the machine rather than a broken installation.
Adding –force skips the check, and that is a decision with a cost.
The same flag also lets minikube run a driver in ways it would refuse by default. A one-core control plane also gets slow once production workloads arrive.
The docker driver and root
Running minikube start as root against the docker driver exits with DRV_AS_ROOT unless –force is present. The refusal exists because the container that becomes your cluster would run with root privileges over an engine that already has them.
Granting your user access to the Docker socket is the cleaner fix. That access is equivalent to root on the host, so grant it deliberately rather than as a shortcut.
EXTERNAL-IP stuck on pending
A LoadBalancer Service on a local cluster keeps an empty external address, and that is the designed behaviour rather than a fault. Nothing on a laptop answers a request for a cloud load balancer.
Use kubectl port-forward when you need the app from your own machine, or add the ingress addon when you want a stable local hostname. Both keep the Service definition intact, so nothing has to be rewritten when the same manifest reaches a managed cluster.
A driver that cannot reach its socket
Drivers fail before Kubernetes does. A missing binary, a stopped daemon, or a socket your user cannot open produces an exit at the host-preparation stage, and the message names the driver rather than the cluster.
Checking the driver on its own is faster than reading minikube logs for the same answer. For docker that means one command, docker info, run as the same user who started minikube.
Turn the commands into a manifest
Every command so far changed the cluster one request at a time.
A manifest states the same objects as a file you can review, commit, and reapply, and kubectl apply reads it the same way on any cluster. The two forms produce the same objects.
apiVersion: apps/v1
kind: Deployment
metadata:
  name: hello-node
  labels:
    app: hello-node
spec:
  replicas: 2
  selector:
    matchLabels:
      app: hello-node
  template:
    metadata:
      labels:
        app: hello-node
    spec:
      containers:
      - name: agnhost
        image: registry.k8s.io/e2e-test-images/agnhost:2.53
        args:
        - netexec
        - --http-port=8080
        ports:
        - containerPort: 8080
---
apiVersion: v1
kind: Service
metadata:
  name: hello-node
spec:
  type: LoadBalancer
  selector:
    app: hello-node
  ports:
  - port: 8080
    targetPort: 8080
Save that as hello-node.yaml and apply it.
kubectl apply -f hello-node.yaml
deployment.apps/hello-node created
service/hello-node created
Reapply the same file after changing the replica count and kubectl reports the field it updated instead of recreating anything. That is how a manifest becomes the record of what the cluster should run.
Stopping the cluster without deleting it keeps the objects and the images on disk, so the next start is quick.
minikube stop
* Stopping node "minikube"  ...
* Powering off "minikube" via SSH ...
* 1 node stopped.
FAQ
Can minikube run with one CPU?
It can, but the start command validates against a two-CPU minimum first, so a one-CPU host needs the –force flag to skip that check. The cluster starts and the API server comes up. The cost shows later, when a workload needs more CPU than a single core can schedule.
Do I need Docker to run Kubernetes locally?
You need a container or virtual machine manager, and Docker is one of several that work. minikube also supports podman, qemu, hyperkit and kvm2, and the Kubernetes tools page lists kind and kubeadm as alternatives for other jobs. Pick the driver that matches what is already installed on the host.
Is a minikube cluster the same as a production cluster?
The API and the objects are the same, and the topology is not. A local cluster runs the control plane and the workload on one Node, while production separates the control plane from the workers and adds several of each. Manifests written locally usually apply unchanged, but scheduling, storage and networking behaviour will not match.
How do I stop a minikube cluster without deleting it?
Run minikube stop. It halts the node and leaves the machine, the images and your cluster objects on disk, so the next minikube start returns you to the same cluster. Use minikube delete only when you want the cluster and its kubeconfig entry removed.
Why does minikube service not open my browser?
The command starts a proxy from your machine to the Service and asks the desktop to open a browser, which fails on a headless host. Add the –url flag to print the address instead and open it wherever you prefer. kubectl port-forward reaches the same Service without the proxy.