New to Rust? Grab our free Rust for Beginners eBook Get it free →
Node.js Tutorial for Beginners Step by Step With Examples

This Node js tutorial is designed for beginners to help you learn Node.js step by step. All you need to do is follow this Node.js tutorial stepwise. Each step covers important topics related to Node.js.
This Node.js tutorial is divided into 7 steps. We expect you to follow this step by step.
We are going to cover the following topics in this Node.js tutorial:
- Step 1: Node js basic concepts – Libuv, Event loop, Libev.
- Step 2: Building a Simple Web Server in Node.js.
- Step 3: Node.js modules and NPM.
- Step 4: File system module.
- Step 5: Express framework.
- Step 6: Databases – MySQL, MongoDB, PostgreSQL and Redis.
- Step 7: Deployment – deploying applications in Digitalocean Server.
After reading this Node.js tutorial, you should be able to build applications using Node.js and deploy it on a cloud server. Let’s begin.
Step 1: Node js basic concepts
Node.js runs on top of V8-Chrome runtime engine-that compiles the JavaScript code in the native machine code (one of the reasons why Google Chrome runs fast and consumes a lot of memory), followed by the custom C++ code.
The original version has 8,000 lines of code (LOC)-and then, the standard libraries for programmers. The following is the figure of Node.js architecture:
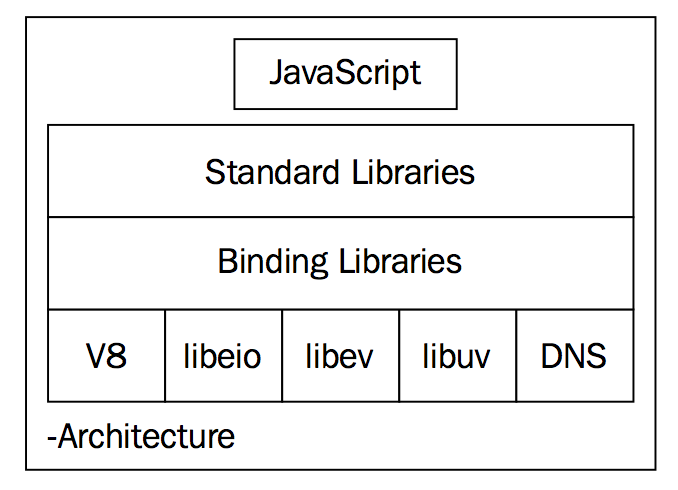
V8
The V8 JavaScript engine is an open-source JavaScript engine developed for the Chrome project. The innovation behind V8 is that it compiles the JavaScript code in native machine code and executes it.
The developers of V8 used the just-in-time (JIT) compiler methodology to improve the code compilation time. It is open-source and is used in the Node.js and MongoDB project.
Link: https://github.com/v8/v8
Event driven I/O – libuv
The libuv library is a cross-platform library that provides an asynchronous I/O facility by enabling an event-driven I/O operation. The libuv library creates a thread for the I/O operation (file, DNS, HTTP, and so on) and returns a callback.
Upon completion of the particular I/O operation, it returns the events so that the callee program does not have to wait for the completion of the I/O operation.
Working of libuv – the core of Node.js
As I mentioned earlier, libuv assigns threads for the I/O operation and returns the callback to the callee program. Therefore, Node.js internally creates threads for I/O operation; however, it gives the programmer access to a single runtime thread. In this way, things are simple and sweet:
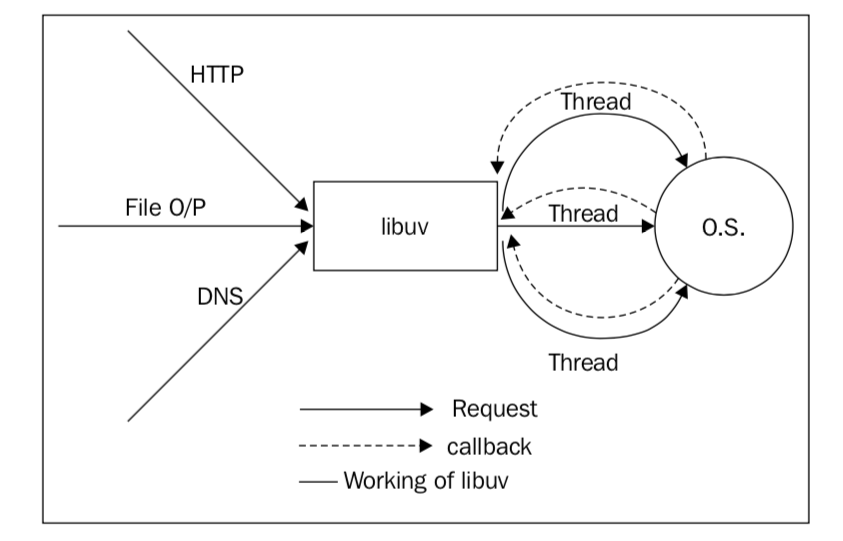
When you make an HTTP request to the web server built using Node. It creates the libuv thread and is ready to accept another request.
As soon as the events are triggered by libuv, it returns the response to the user. The libuv library provides the following important core features:
- Fully featured event loop
- Asynchronous filesystem operations
- Thread pool
- Thread and synchronization primitives
- Asynchronous TCP and UDP sockets
- Child process
- Signal handling
The libuv library internally uses another famous library called libeio, which is designed for threading and asynchronous I/O events and libev, which is a high-performance event loop.
Therefore, you can treat libuv as a package wrapper for both of them.
Let’s learn a little bit about multi-threading and single threading.
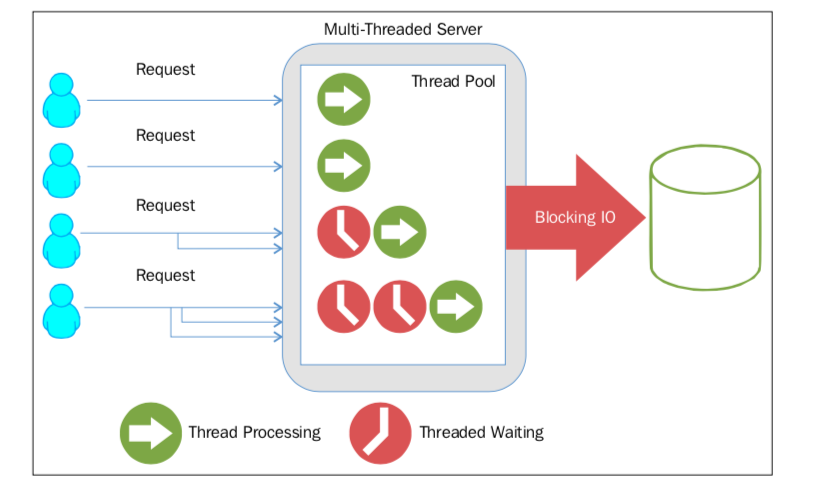
The multi-threading approach provides parallelism using threads so that multiple programs can simultaneously run.
it is really difficult to handle concurrency and deadlock in a multi-threading system.
On the other hand, with single-threading, there is no chance of deadlock in the process, and managing the code is also easy. You can still hack and busy the event loop for no reason; however, that’s not the point.
Consider the following working diagram that is developed by StrongLoop-one of the core maintainers of Node.js:
Node.js uses single-threading for runtime environment; however, internally, it does create multiple threads for various I/O operations.
It doesn’t imply that it creates threads for each connection, libuv contains the Portable Operating System Interface (POSIX) system calls for some I/O operations.
Multi-threading blocks the I/O until the particular thread completes its operation and results in overall slower performance.
Consider the following image:
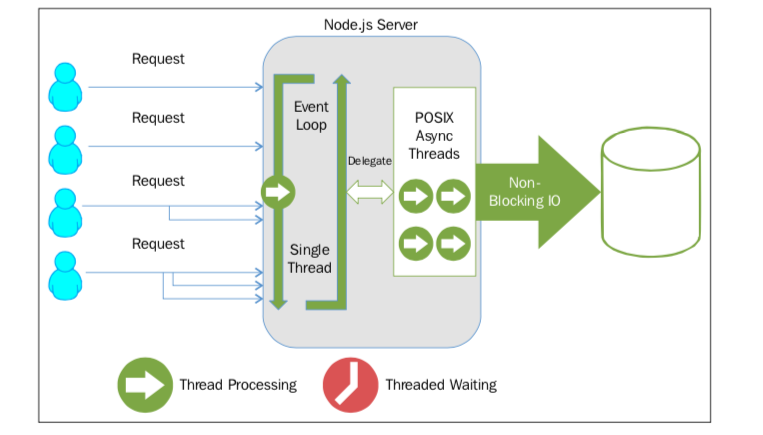
If the single-threading programs work correctly, they will never block the I/O and will be always ready to accept new connections and process them.
As you can see in the image earlier, I/O does not get blocked by any thread in Node.js. Then, how does it notify particular processes that the task has been done or an error has occurred?
Importance of event loop
Node.js is asynchronous in nature and you need to program it in an asynchronous way, which you cannot do unless you have a clear understanding of the event loop.
If you know how the event loop works, you will no longer get confused and hopefully, never block the event loop.
How Event Loop Works
The Node.js runtime system has an execution stack, where it pushes every task to execute.
The operating system pops the task from the execution stack and conducts the necessary action required to run the task.
To run the asynchronous code, this approach won’t work. The libuv library introduces a queue that stores the callback for each asynchronous operation.
Event loop runs on a specific interval, which is called tick in the Node.js terminology and checks the stack.
If the stack is empty, it takes the callback from the queue and pushes it in the stack for execution, as shown in the following figure:

The libuv library creates the thread and returns the callback to us.
As it’s an asynchronous operation, it goes to the queue instead of the stack and the event loop fetches it when the stack is empty and does the execution. You can validate the same concept using the setTimeout() function.
Consider the following code:
console.log('i am first');
setTimeout(timeout() => {
console.log('i am second');
}, 5000);
console.log('i am third');
If you run this code, you will get an output similar to the following:
i am first

i am third

i am second
The reason is obvious, setTimeout() waits for five seconds and prints its output; however, that does not block the event loop. Let’s set the timer to 0 seconds and see what happens:
console.log('i am first');
setTimeout(timeout() => {
console.log('i am second');
}, 0);
console.log('i am third');
The output is still the same:
i am first

i am third

i am second
Why so? Even if you set the timer to 0, it goes in the queue; however, it is immediately processed as its time is 0 second.
The event loop recognizes that the stack is still not empty, that is, the third console was in process; therefore, it pushes the callback after the next tick of the event loop.
We have covered the basics of Node. Let’s proceed ahead with the installation in your operating system. If you already have Node installed, kindly skip this section.
Installing Node in Your Operating System
To install Node in Windows Operating System, follow these steps:
- Step 1: Download the Installer
- Step 2: Run the installer.
- Step 3: Verify the installation
- Step 4: Update the NPM
Download the Node installer from the official site.
Run the installer and click Next until the setup wizard is complete.
Open command prompt or PowerShell and run the following command.
node -v
It should return the node version.
npm install -g npm
To install Node in the Mac operating system, follow these steps:
- Step 1: Download the Installer
- Step 2: Run the installer
- Step 3: Verify the installation
- Step 4: Update the NPM using the following command.
Download the Node installer from the official site.
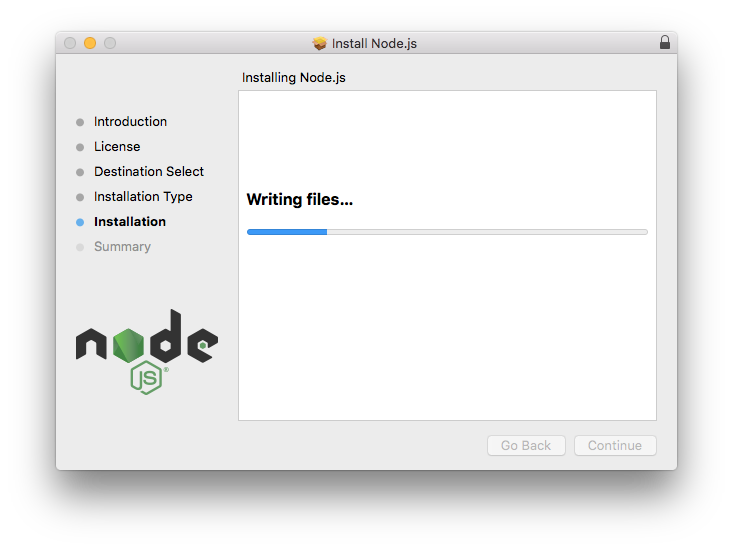
Run the installer and click Continue until the setup wizard is complete.
Open the terminal and run the following command.
node -v
It should return the node version.
npm install -g npm
To install Node in the Ubuntu operating system, open the terminal and run the following command one by one.
curl -sL https://deb.nodesource.com/setup_12.x | sudo -E bash -
Then,
sudo apt-get install -y nodejs
Also, install the build tools.
sudo apt-get install -y build-essential
Update the NPM.
sudo npm install -g npm
Verify the installation, run the following command.
node -v
It should return the version of Node installed in your system. In our case, it is V12.
Alright, let’s move to the next step.
Step 2: Building a Simple Web Server in Node.js
Let’s build a simple Web application that returns a message as “Hello World” when user request the server. We will use the native HTTP module of Node to achieve the Web Server functionality. Here is the code:
const http = require('http');

const hostname = 'localhost';

const port = 3000;

const server = http.createServer((req, res) => {

  res.statusCode = 200;

  res.setHeader('Content-Type', 'text/plain');

  res.end('Hello World ');

});
server.listen(port, hostname, () => {
console.log(`Server running at http://${hostname}:${port}/`);
});
Copy/paste it in a new file. Name the file as hello.js and save it.
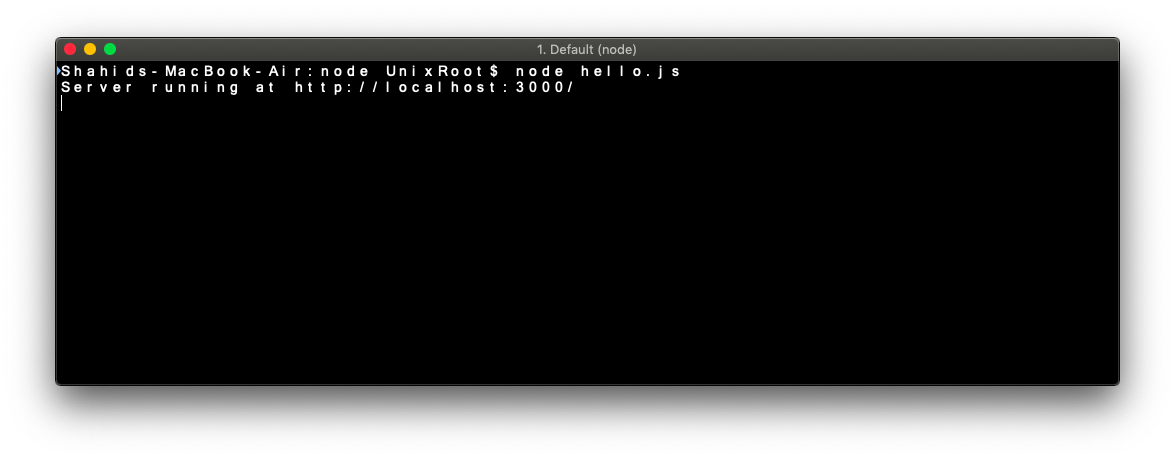
To run this code, open your terminal and switch to the location where you have stored the file. Run this command to execute your code.
node hello.js
You should have the following message on the terminal.
Open your browser and type localhost:3000 and hit enter. You should see the following message.
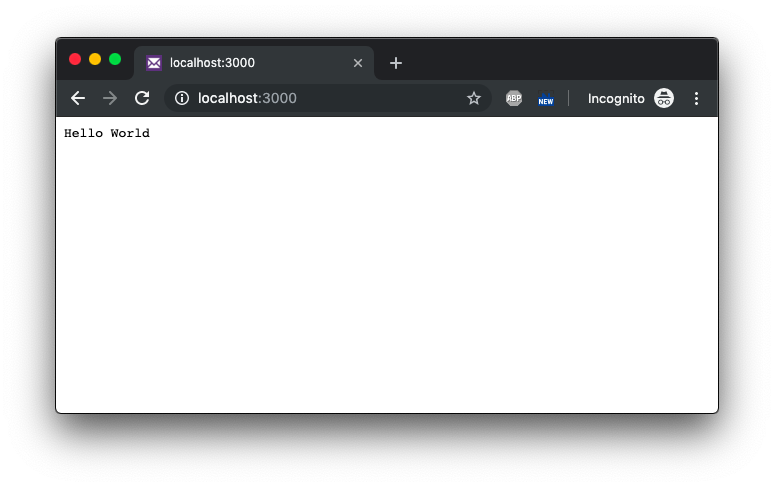
Congratulations!
You have just developed your first Node program.
Our server responds to a simple message as a text, however, in practice we need to handle different types of responses.
Let’s look over some of the common response types.
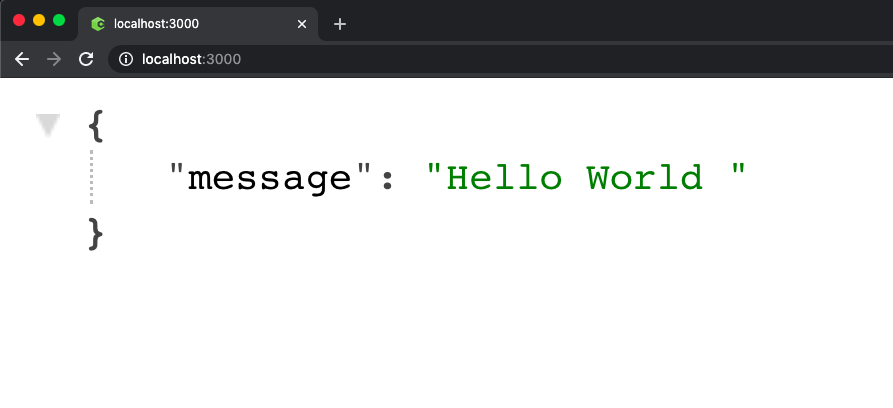
One of the most common responses that you need to handle while developing a Node application is JSON.
Here is how you can send JSON responses.
const http = require("http");

const hostname = "localhost";

const port = 3000;

const server = http.createServer((req, res) => {

 res.statusCode = 200;

 res.setHeader("Content-Type", "application/json");

 res.end('{ "message" : "Hello World " }');

});
server.listen(port, hostname, () => {
console.log(`Server running at http://${hostname}:${port}/`);
});
If you run this code, and navigate to the browser, you should see the following response.
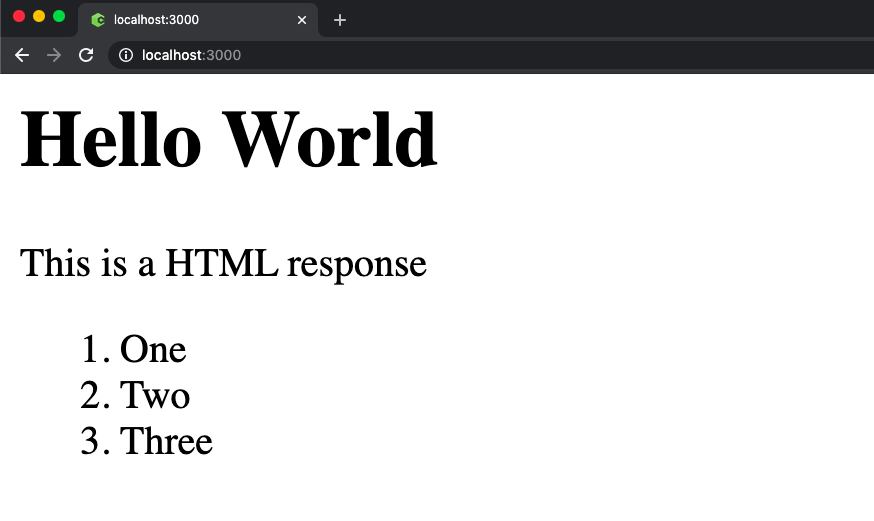
Let’s look over how to send HTML as a response.
const http = require("http");

const hostname = "localhost";

const port = 3000;

const server = http.createServer((req, res) => {

 res.statusCode = 200;

 res.setHeader("Content-Type", "text/html");

 res.end(

   "
Hello World
This is a HTML response
- One
- Two
- Three
"
);
});
server.listen(port, hostname, () => {
console.log(`Server running at http://${hostname}:${port}/`);
});
When you run this code, you should see the following response.
Awesome.
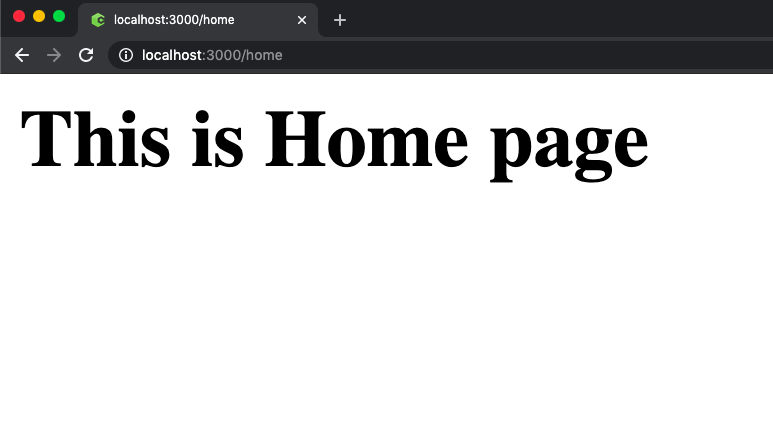
Let’s go ahead and create different routes to support multiple responses.
Check out the code shown below.
const http = require("http");

const hostname = "localhost";

const port = 3000;

const server = http.createServer((req, res) => {

 res.statusCode = 200;

 res.setHeader("Content-Type", "text/html");

 switch (req.url) {

   case "/home":

     res.writeHead(200);

     res.end("
This is Home page
");
break;
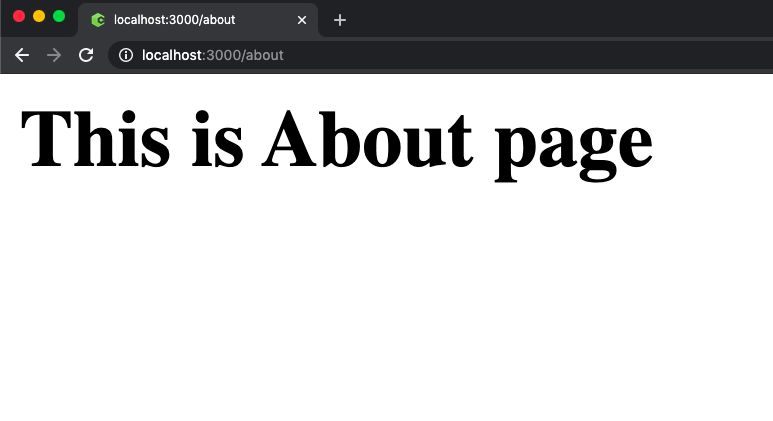
case "/about":
res.writeHead(200);
res.end("
This is About page
");
break;
default:
break;
}
});
server.listen(port, hostname, () => {
console.log(`Server running at http://${hostname}:${port}/`);
});
As you can see, we are using switch cases to determine different routes and on each route, we are sending different responses to each route.
Navigate your browser to localhost:3000/home to view the response.
Navigate your browser to localhost:3000/about to view the second response.
Awesome. We built a simple web server in Node. Let’s jump to the next step.
Step 3: Node modules and NPM
Node modules are the basic building block of the Node program.
The node module is a set of functions that can be reused in your application.
Node has built-in modules as well as you can create your node modules.
Some of the famous built-in node modules are fs, net, http, and many of the popular modules such as express, nodemailer built on top of these built-in modules.
We can install node modules using the node package manager or called npm.
You can install node modules using the following command.
Open your terminal/command prompt and run this command.
npm install
Or
npm i
For example:
npm install express
You can also install the module and write it in your package.json file using the following command.
npm install --save express
Or
npm i --S express
You can use the following command to uninstall node modules.
npm remove
If you want to remove the module entry from the package.json file, use this command.
npm remove --save
You can create your own node module as well. All you need to do is create a function and export it for the reusability.
For example, consider this code which can act as a node module.
const calc = (a,b,p) => {

    if(a || b || p ) {

        return "Please provide all parameters";

    }

    switch(p) {

        case '+': {

            return a+b;

            break;

        }

        case '-': {

            return a-b;

            break;

        }

        case '*': {

            return a*b;

            break;

        }

        case '/': {

            return a/b;

            break;

        }

        default:{return;}

    }

}

exports.calc=calc; //very important line
You can reuse this module in your code like this:
var dt = require('./mymodule');

console.log(dt.calc(10,20,'+'));
This is a really simple example. However, this gives an idea about how to create node modules. If you are interested in more detailed information, visit this tutorial.
Node modules are managed by the file called package.json. This file contains the list of the packages your project is using along with the version number etc.
A typical package.json file looks like this:
{

 "name": "codeforgeek-app-server",

 "version": "1.0.0",

 "description": "",

 "main": "app.js",

 "scripts": {

   "start": "node app.js"

 },

 "keywords": [],

 "author": "",

 "license": "ISC",

 "dependencies": {

   "async": "^3.1.0",

   "axios": "^0.19.0",

   "bcrypt": "^4.0.1",

   "chalk": "^2.4.2",

   "connect-redis": "^4.0.4",

   "cors": "^2.8.5",

   "express": "^4.17.1",

   "mongodb": "^3.2.7",

   "nconf": "^0.10.0",

   "nodemailer": "^6.3.0",

   "pug": "^2.0.4",

   "reading-time": "^1.2.0",

   "redis": "^2.8.0",

   "winston": "^3.2.1"

 }

}
We also specify details such as project name, version, entry file of the project in the package.json.
All the dependencies that are installed using npm install command are listed in the package.json. You should always maintain the updated version of package.json while dealing with the packages.
Let’s jump to the next step.
Step 4: File system module.
The fs module provides an API for interacting with the file system of your operating system. To use this module, require it in your code like this:
const fs = require('fs');
There are lots of methods provided under this node module to perform various tasks such as creating files, writing data into a file, reading data from files, etc.
You can use fs.readFile() or fs.readFileSync() method to read files in Node.
For example: Using the readFile() method.
const fs = require('fs');

fs.readFile('./lorem.txt', (err, data) => {

  if(err) {

    return console.log('Error occurred while reading file');

   }

  console.log(data.toString());

});
Using the readFileSync() method.
const fs = require('fs');

const data = fs.readFileSync('./lorem.txt'); console.log(data.toString());
The simplest approach to check whether the file exists or not is by using the readFile() function.
However, this function does open the file descriptor and occupies some memory too.
If you just want to check the file existences in the system, I highly recommend the access() function. Here is the code:
const fs = require('fs');

const path = './config.js';

fs.access(path, fs.F_OK, (err) => {

  if (err) {

    console.error(err);

    return;

  }

});
The file system module provides three methods to create files:
- fs.open()
- fs.writeFile()
- fs.appendFile()
fs.open() method opens a new file or creates a new empty file if it does not exist in the specified path.
It takes the second parameter which acts as a flag such as w for writing, w+ for reading and writing, etc. Code:
const fs = require('fs');

fs.open('file.txt', 'w', (err, file) => {

  if (err) {

    throw err;

  }

  console.log('Saved!');

});
fs.writeFile() method allows you to create or replace files with the content.
If a file exists, it will replace the content with the provided content and if the file does not exist, it will create it.
const fs = require('fs');

fs.writeFile('file.txt', 'Hello Word!', (err) => {

  if (err) {

    throw err;

  }

 console.log('Saved!');

});
fs.appendFile() method appends the provided content at the end of the file.
const fs = require('fs');

fs.appendFile('file.txt', ' Hello World', (err) => {

  if (err) {

    throw err;

  }

  console.log('Updated!');

});
To delete a file, we can use fs.unlink() method.
const fs = require('fs');

fs.unlink('file.txt', (err) => {

  if (err) {

    throw err;

  }

  console.log('File deleted!');

});
To rename a file, we can use the fs.rename() method.
const fs = require('fs');

fs.rename('newfile.txt', 'oldfile.txt', (err) => {

  if (err) {

    throw err;

  }

  console.log('File Renamed!');

});
You can also copy files using the fs.copy() method.
const fs = require('fs');

fs.copyFile(file.txt', 'copyfile.txt', (err) => {

  if (err) {

    throw err;

  }

  console.log('File is copied!');

});
Let’s jump to the next step.
Step 5: Express framework
Express is a popular framework to develop web applications in Node.
Express is widely used and can be used to develop web applications such as Web Server, REST API Server, Streaming engine, etc.
In this section, we are going to learn about express and we will create a simple web server with different routes.
Terminologies we will use in this section are:
- route: This means an endpoint. for example facebook.com/profile so the profile is a route.
- middleware: A set of functions that will be executed in the chosen order.
Let’s begin.
Create a new folder and switch to it using a terminal or command prompt.
Create a new node project using the following command.
npm init --y
This will create a sample package.json for your project. To install the express module, run the following command.
npm install --save express
The latest version of the express framework will be installed in your project. Now create a new file and name it app.js. In this file, we will write our web server using express.
const express = require('express');

const app = express();
app.listen(process.env.port || 3000);
console.log('Web Server is listening at port '+ (process.env.port || 3000));
In the code shown above, we have required the express module and created a new instance of it.
In the end, we have started our Server using the listen() function.
Routers are simply an endpoint of a server.
For example, facebook.com/codeforgeek, here the codeforgeek is a route.
We need to create routers in our web application to serve different requests. We will create the following routes in our web application.
- home
- profile
- login
- logout
Express routers allow us to serve different HTTP methods such as GET, POST, PUT, DELETE, HEAD. Here is how to create a router.
const express = require('express');

const app = express();

const router = express.Router();
router.get('/home', (req,res) => {
res.send('Hello World, This is home router');
});
router.get('/profile', (req,res) => {
res.send('
Hello World, This is profile router
');
});
router.get('/login', (req,res) => {
res.send('
Hello World, This is login router
');
});
router.get('/logout', (req,res) => {
res.send('
Hello World, This is logout router
');
});
app.use('/', router);
app.listen(process.env.port || 3000);
console.log('Web Server is listening at port '+ (process.env.port || 3000));
Let’s run our application, save the file, and run the code using the following command.
node app.js
You should see the following message in the terminal.

Open your browser and visit the routes.

Here is the profile page.

You can also send HTML/JSON/XML as a response.
Express provides middleware function support. Middleware functions as the name suggests can be used to make changes in the request/response lifecycle of the express. There are five types of middleware functions in the express.
- Application middleware
- Router middleware
- Error-handling middleware
- Built-in middleware
- Third-party middleware
Application middleware
We can use middleware in the application object of the express. For example:
const express = require('express');

const app = express();
app.use((req, res, next) => {
console.log('Time:', Date.now());
next();
});
app.listen(process.env.port || 3000);
console.log('Web Server is listening at port '+ (process.env.port || 3000));
Router middleware
In a similar way as application middleware, we can use router middleware. For example:
const express = require('express');

const app = express();

const router = express.Router();
router.use((req, res, next) => {
console.log('Time:', Date.now());
next();
});
router.get('/home', (req,res) => {
res.send("ok")
});
app.use('/', router);
app.listen(process.env.port || 3000);
console.log('Web Server is listening at port '+ (process.env.port || 3000));
error-handling middleware
We can use this middleware to catch errors.
app.use((err, req, res, next) => {

  res.status(500).send('Something broke!')

});
Learn more about this function here.
Built-in middleware
Express provides some middleware by default such as static, JSON, etc.
Third-party middleware
We can use third-party middlewares such as body-parser. Here is how we can install third-party middleware.
npm install body-parser
To use this middleware, we need to require our code and load it.
const express = require('express');

const bodyParser = require('body-parser');

const app = express();

const router = express.Router();
router.get('/home', (req,res) => {
res.send('
Hello World, This is home router
');
});
router.get('/profile', (req,res) => {
res.send('
Hello World, This is profile router
');
});
router.get('/login', (req,res) => {
res.send('
Hello World, This is login router
');
});
router.get('/logout', (req,res) => {
res.send('
Hello World, This is logout router
');
});
// add middleware before routes
app.use(bodyParser.json());
app.use('/', router);
app.listen(process.env.port || 3000);
console.log('Web Server is listening at port '+ (process.env.port || 3000));
If you are interested in creating your middleware, I recommend you this article.
We can handle sessions in Express using express-session middleware. We can use this middleware to create, track, and delete sessions.
npm install --save express-session
To use this module in our code, load this as a middleware.
app.use(session({secret: 'some secrets'}));
Now, we can use req.session object to create, track, and delete sessions.
To learn more about the session, please read this article.
We can also use external stores such as Redis to store session values instead of storing them in memory.
Let’s jump to the next step and learn about the integration of databases with Node.
Step 6: Databases – MySQL, MongoDB, PostgreSQL and Redis.
The database is an integral part of any application. You must know how to use it with Node to build a complete application.
We are going to cover the following databases in this section:
- MySQL
- MongoDB
- PostgreSQL
- Redis
Let’s begin with MySQL.
MySQL
MySQL is a very popular SQL database. In this section, we will learn how to connect, query, and use it with NodeJS.
MySQL is a very popular database and has been used in millions of applications. We can use MySQL with Node as well.
We need to install the module name as MySQL to use it with the MySQL database.
You need to have the MySQL database installed in your system before proceeding.
To install the node module to connect with MySQL:
npm install --save mysql
Here is how we can establish a connection to the MySQL engine.
const mysql = require("mysql");
const pool = mysql.createPool({
connectionLimit: 100,
host: "localhost",
user: "root",
password: "",
database: "database_name",
debug: false,
});
pool.query("SELECT * from
if (err) {
console.log("error occurred during the connection.");
}
console.log(rows[0]);
});
You can execute the queries such as INSERT, UPDATE and DELETE in a similar fashion. Learn more in detail about using Node and MySQL.
Let’s learn about MongoDB.
MongoDB
MongoDB is a very popular NoSQL database. Learn how to connect, query, and use it with NodeJS.
MongoDB is one of the most popular general-purpose NoSQL database engines.
To integrate MongoDB with Node, you need to install the MongoDB database in your system.
Click here to visit the official site and download the latest version of MongoDB.
Assuming you have MongoDB installed, let’s install the MongoDB driver for Node.
npm install --save mongodb
We need to require the module and then connect to the MongoDB instance. Here is the code.
const mongo = require("mongodb");

const url = "mongodb://localhost:27017/test";
mongo.connect(url, { useNewUrlParser: true }, (err, db) => {
if (err) {
console.log(err);
process.exit(0);
}
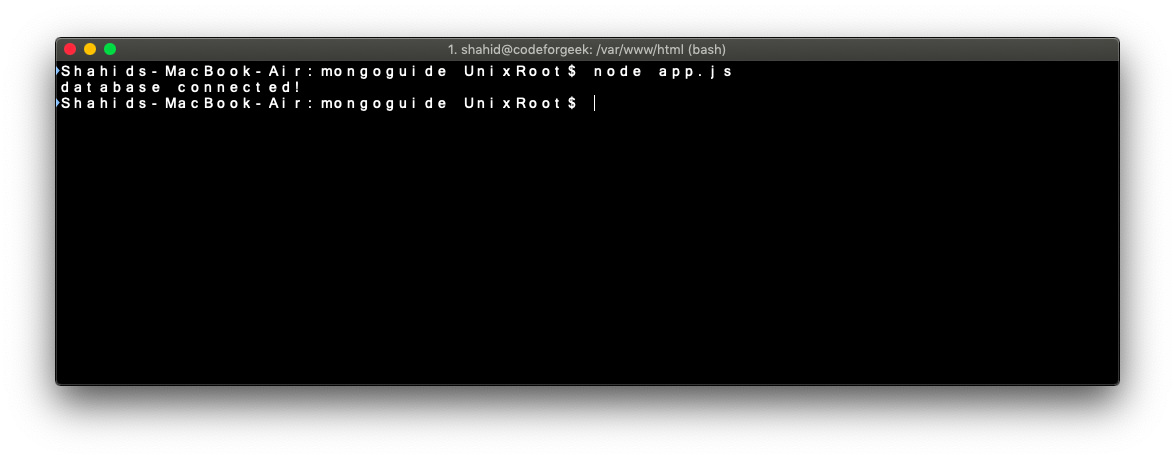
console.log("database connected!");
db.close();
});
MongoDB runs on port 27017. We can connect to any database we like to work with.
In the code shown above, we are connecting to the test database.
We are using the connect() method to establish a connection with the database. Save the code above in a file called ‘app.js’ and run the file:
node app.js
You should see output similar to this:
In order to store data in the MongoDB database you need to create a collection.
Think of collection as a table in the SQL database. You can either create a collection in the MongoDB shell or you can do it in code. Here is how you can do it in code.
const mongo = require("mongodb");

const url = "mongodb://localhost:27017/";
mongo.connect(url, { useNewUrlParser: true }, (err, db) => {
if (err) {
console.log(err);
process.exit(0);
}
console.log("database connected!");
var dbo = db.db("test");
dbo.createCollection("customers", (err, result) => {
if (err) {
console.log(err);
process.exit(0);
}
console.log("collection created!");
db.close();
});
});
Let’s try to add some data in the MongoDB collection.
MongoDB stores data in a JSON format. JSON is a key-value based data format widely used across various layers of software.
const mongo = require("mongodb");

const url = "mongodb://localhost:27017/";

mongo.connect(url, { useNewUrlParser: true }, (err, db) => {

 if (err) {

   console.log(err);

   process.exit(0);

 }

 let data = { id: 100, name: "Shahid" };

 var dbo = db.db("test");

 console.log("database connected!");

 dbo.collection("user").insert(data, (err, result) => {

   if (err) {

     console.log(err);

     process.exit(0);

   }

   console.log("records added.");

   console.log(result);

   db.close();

 });

});
You can also search for the data inside the collection using the findOne() function.
const mongo = require("mongodb");

const url = "mongodb://localhost:27017/";
mongo.connect(url, { useNewUrlParser: true }, (err, db) => {
if (err) {
console.log(err);
process.exit(0);
}
let data = { id: 100, name: "Shahid" };
var dbo = db.db("test");
console.log("database connected!");
dbo.collection("user").findOne({}, (err, result) => {
if (err) {
console.log(err);
process.exit(0);
}
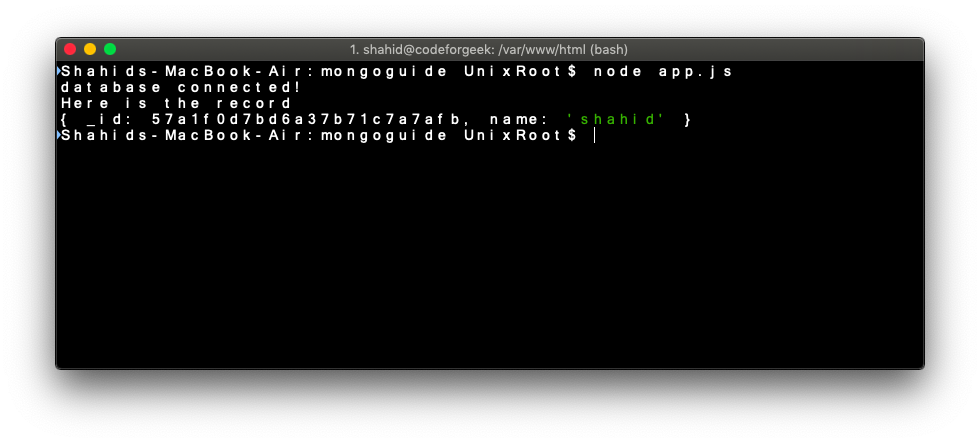
console.log("Here is the record");
console.log(result);
db.close();
});
});
After running the code above, you should see a record similar to this.
You can also perform tons of other operations such as query(), sort(), delete() etc. Learn more about MongoDB here.
Let’s proceed towards the next database, PostgreSQL.
PostgreSQL
PostgreSQL is a very popular SQL database. Learn how to connect, query, and use it with NodeJS.
PostgreSQL, also referred to as Postgres, is a free and popular relational database system.
Postgres competes with relational databases like MySQL, SQL Server, or MariaDB.
You need to have Postgres installed in your system to continue with this tutorial. Visit the official download page to install Postgres to grab a copy and install Postgre in your system.
We need to create a user credential in Postgres in order to connect to the database. Connect to Postgres using the default credentials. Run this command in your terminal.
psql postgres
Create a new user.
CREATE ROLE codeforgeek WITH LOGIN PASSWORD 'somepassword'
Give permission to the new user.
ALTER ROLE codeforgeek CREATEDB;
Now, exit from the current session and login again with your new user credentials.
psql -d postgres -U codeforgeek
Create a new database.
CREATE DATABASE users;
Switch to a new database.
c users;
Create a new table.
users=> CREATE TABLE profile (

  ID SERIAL PRIMARY KEY,

  name VARCHAR(30),

  email VARCHAR(30)

);
Insert some records.
INSERT

INTO profile (name, email)

VALUES

('Jerry', '[email protected]'),

('George', '[email protected]');
Let’s connect to it using our Node program. Install the dependency.
npm install --save pg
Create an app.js file and add the following code in it.
const Pool = require("pg").Pool;

const pool = new Pool({

 user: "codeforgeek",

 host: "localhost",

 database: "users",

 password: "somepassword",

 port: 5432,

});
// read information from table
pool.query("SELECT * FROM profile ORDER BY id ASC", (error, results) => {
if (error) {
console.log(error);
return;
}
console.log(results);
});
// add a new user profile.
const name = "Shahid";
const email = "[email protected]";
pool.query(
"INSERT INTO profile (name, email) VALUES ($1, $2)",
[name, email],
(error, results) => {
if (error) {
console.log(error);
return;
}
console.log(results);
}
);
We created a new Pool connection to Postgres. We first executed a SELECT query using the pool.query() method. The pool connection automatically returns the connection to the pool after executing the query.
Let’s proceed towards the final database in the section.
Redis
Redis is the high-performance in-memory database used as a data structure store. Redis supports hash, strings, lists, and other complicated data structures by maintaining very high performance.
Redis along with Node.js can be used to solve various problems such as cache server or message broker.
You can install Redis in your system by following the official installation guides.
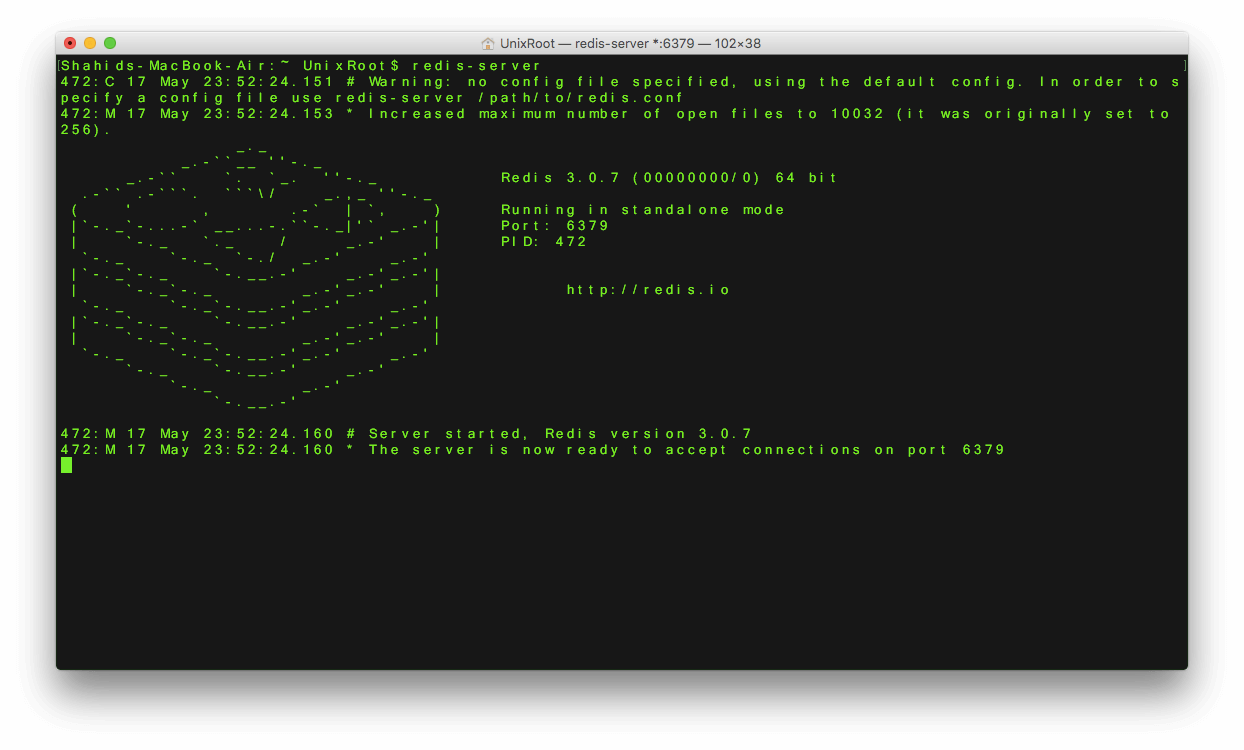
Once installed, you can run the Redis server using the following command.
redis-server
You should see the following in your terminal.
To access the Redis command-line interface, run the following command from a separate terminal.
redis-cli
To configure Redis with Node, we need to install the Redis driver.
npm i --S redis
Here is the sample code to connect to the Redis server.
var redis = require('redis');

var redisClient = redis.createClient({host : 'localhost', port : 6379});
redisClient.on('ready',function() {
console.log("Redis is ready");
});
redisClient.on('error',function() {
console.log("Error in Redis");
});
When you run this command, you should have a connection with the Redis.
You can use set(), get() and other Redis commands to perform various operations.
To dig deeper into Redis, you can visit this tutorial.
Step 7: Deploying Node application to a Cloud Server
Let’s learn how to deploy our Node application. I deploy all my projects on DigitalOcean. I highly recommend it to developers. If you have never tried DigitalOcean, give it a shot with a $10 discount for the first month.
Click here to go to the DigitalOcean droplet creation screen.
Choose a $5 plan and create the droplet. After creating a droplet wait for some time, DigitalOcean will send you an email containing the credentials. Login to your droplet using the following command.
ssh username@dropletip
Provide the password given in the email and you are good to go.
Once you are logged in, update the system using the following command.
sudo apt-get update
Install Git.
sudo apt-get install git
Install the latest Node on your Server.
curl -sL https://deb.nodesource.com/setup_12.x | sudo -E bash -
sudo apt-get install -y nodejs
Install the PM2 process manager.
npm install -g pm2
Our server is ready to host our Node applications.
Github is a code hosting platform. Learn how to host your code in the Github platform.
Let’s push our code to Github. Go to Github.com and create a new repository.
Copy the repository path. Assuming you have Git installed in your machine. Switch to the project directory and execute these commands one by one.
git init

git add .

git commit - m "first push"

git remote add origin << github repo URL >>

git push origin master
Login to your server using SSH.
ssh yourusername@dropletIP
Clone the Github project.
git clone
Switch to the project directory.
cd project_name
Install dependencies.
npm install
Run the Node project using PM2.
PM2 is a process management tool for Node. Using PM2 we can ensure 99% uptime of your application.
pm2 start file_name.js
Test your application using Droplet IP and port on which your application is running.

Awesome. You have successfully developed and deployed your application. Here is another article related to deployment of application in the production server.
Download this tutorial in a PDF format
I have created a PDF format of this Node js tutorial for beginners. You can visit this page to download the book.
Further Study
We have written a lot of Node js tutorials on different topics, listing some of the best articles for you to read it further.
Building Email Verification System Using Node and Redis
Microservices Architecture with Node.js
Load Balancing Node.js Application Servers with Nginx
Building a URL Shortener with Node.Js and Redis
Load Balancing Node.js Application Servers with Nginx