New to Rust? Grab our free Rust for Beginners eBook Get it free →
Building Email Verification System Using Node and Redis


You need signup verification that cannot leak user data through the link itself. This tutorial builds link-based email verification with Node.js, Express, Redis token expiry, and nodemailer, and every command below ran on Node 26 against a live local Redis.
How email verification works with Redis
When a user signs up, the server mints an opaque token, stores it in Redis beside the address, and emails a link holding that token and nothing else.
Opening the link tells the server to look up the token and mark the address verified. The token is deleted in the same step, so each link dies after one use while Redis TTL clears unclaimed ones with no cleanup job.
Project setup
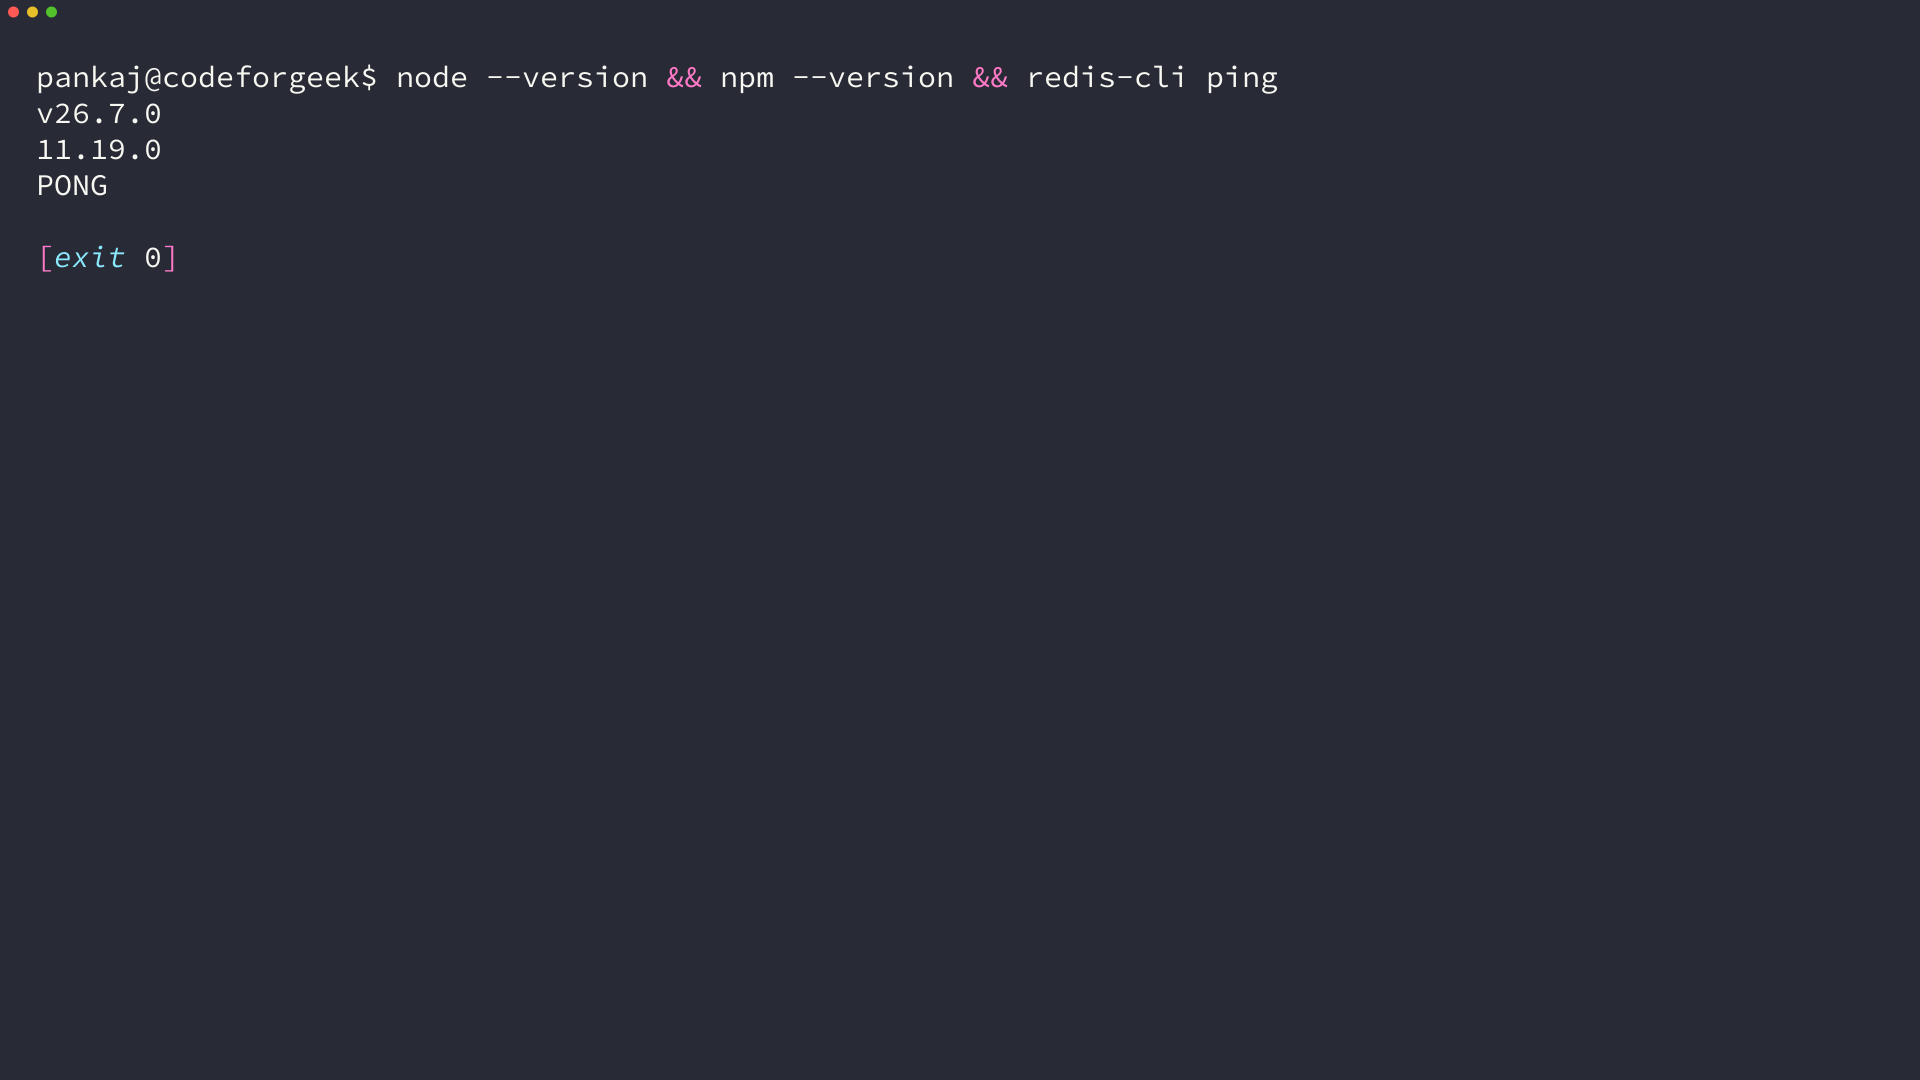
You need Node 18 or later and a local Redis on its default port. I ran this refresh on Node 26 with a local Redis answering PONG.
If Redis is new to you, read the Redis installation tutorial first, which covers the server start and the first commands you will use here.
Prerequisites
Install Node from the official download page and start Redis with redis-server. Confirm both before continuing.
The screenshot below shows the exact check on the shared CodeForGeek server. Node prints its version, npm prints its own, and Redis answers PONG.
Install dependencies
Create a project folder and install the current releases of each library. Express routes the flow, the official Redis client stores tokens, nodemailer sends mail, helmet and CORS (Cross-Origin Resource Sharing) set safe headers, express-rate-limit throttles auth endpoints, and validator checks addresses.
mkdir email-verify-redis && cd email-verify-redis

npm init -y

npm install express redis nodemailer helmet cors express-rate-limit validator
This refresh was tested against express 5, redis 6, and nodemailer 10. Never pin these to old releases to dodge an API change.
The code below targets the current client API, where you create a client and connect explicitly before issuing commands. That explicit connect is the biggest difference from the Redis v2 calls the old version of this post used.
Folder structure
Keep the demo small. One server file plus a tiny signup page is enough to prove the flow.
email-verify-redis

|-- node_modules

|-- index.html

|-- app.js

|-- package.json
Environment variables
Sender identity and port belong in the environment, never in source.
const PORT = process.env.PORT || 3000;
Mail credentials follow the same rule in the sending section. Nothing secret ever ships inside app.js.
The signup page holds one form that posts an address to request-verification and shows the message returned. Keep it unstyled for the demo, since its only job is proving the API works from a browser origin.
Why Redis holds the token
Most short tutorials sign a JWT and drop it in the link, which works until the token lands in server logs, browser history, or a referer header. Anyone holding the link owns the verification.
Redis inverts the design. The URL carries randomness while everything meaningful stays behind your firewall with a countdown attached, so the link is worthless without the server-side record.
Links leak
Every hop logs URLs, from proxies and analytics to shared screenshots.
Anything confidential inside a link should be treated as public. A signed JWT in the query string exposes its payload to every system that stores URLs, and its signature only proves origin rather than hiding content.
The Redis token model
The link carries 32 random bytes encoded for URLs, while the address, creation time, and state live only in Redis under that token.
Stealing the link still requires beating 256 bits of randomness. Revocation becomes a delete call instead of a blocklist you must distribute and maintain, and the record disappears after first use regardless.
TTL as cleanup
Each token key expires after 24 hours and each resend cooldown after 5 minutes. Expiry is a Redis guarantee, not application logic you must remember to run.
The session-store tutorial uses the same expiry idea for login sessions, so learn one TTL habit and both features stay correct.
Generating secure tokens
A token must be unguessable. Encoding the address in base64 is the address in disguise, and a timestamp alone is trivially enumerable.
Node ships crypto for exactly this job, with no dependency to install. Random bytes give you 256 bits an attacker cannot predict.
const crypto = require('crypto');
function newToken() {
return crypto.randomBytes(32).toString('base64url');
}
The base64url encoding keeps the token safe inside query strings with no extra escaping. Call this once per verification request and never derive tokens from user data.
Deriving tokens from the address or the clock lets an attacker precompute candidates, so randomness carries the full security property OWASP asks for in single-use tokens.
Storing tokens in Redis
One token maps to one signup. The value holds the address and creation time, a second key reserves the address against duplicates, and a third enforces the resend cooldown.
All three writes submit together so a crash cannot leave half a signup behind. Either the whole set lands or nothing does, and a KEYS scan of the demo database confirms exactly this layout after each request.
const { createClient } = require('redis');

const redis = createClient();

redis.on('error', (err) => console.error('Redis error:', err.message));

await redis.connect();
const TOKEN_TTL_SECONDS = 24 * 60 * 60;
const RESEND_COOLDOWN_SECONDS = 5 * 60;
const token = newToken();
const multi = redis.multi();
multi.hSet('verify:' + token, { email: normalized, createdAt: new Date().toISOString() });
multi.expire('verify:' + token, TOKEN_TTL_SECONDS);
multi.set('pending:' + normalized, token, { EX: TOKEN_TTL_SECONDS });
multi.set('cooldown:' + normalized, '1', { EX: RESEND_COOLDOWN_SECONDS });
await multi.exec();
The verify key is a hash, so lookup returns the whole record in one call. The pending key answers duplicate checks without scanning.
The cooldown key exists only to expire, so one GET implements the entire resend logic.
Sending the verification email
Nodemailer speaks SMTP (Simple Mail Transfer Protocol) while your code stays transport-agnostic. Point it at Gmail with an app password for development, then swap the transport for SendGrid, Resend, or Postmark in production. The mail-sending tutorial covers Gmail setup in detail.
const nodemailer = require('nodemailer');
const mailer = nodemailer.createTransport({
host: 'smtp.gmail.com',
port: 587,
secure: false,
auth: { user: process.env.MAIL_USER, pass: process.env.MAIL_PASS },
});
const link = req.protocol + '://' + req.get('host') + '/verify?token=' + token;
await mailer.sendMail({
from: '[email protected]',
to: normalized,
subject: 'Verify your email address',
text: 'Confirm your address by opening this link within 24 hours:\n\n' + link + '\n',
});
The template carries the opaque token and states the expiry up front, because users should never wonder how long a link lasts.
Wrap the send in try/catch and return a 500 with a plain message when the provider fails, since a lost email looks identical to a broken flow from the outside. Log the provider error server-side so you can tell a bad credential apart from a rate limit.
For this flow you need an app password, not your account password, since Google blocks plain-password SMTP logins.
Every route below ran against a stream transport that captures mail locally, so no credential appears in any screenshot.
Choosing a production provider
Gmail caps daily sends and flags bulk mail, so it stays a development transport. SendGrid, Resend, and Postmark all offer Node libraries, free tiers for low volume, and dashboards that show bounces.
Switching means replacing the transport config while sendMail calls stay untouched. Pick the provider whose free tier covers your signup rate, then add SPF, DKIM, and DMARC records so verification mail reaches inboxes instead of spam.
Verifying the token
The endpoint fetches the token hash, rejects anything missing, marks the signup verified, and consumes the token in the same write set. Consuming on first use is what makes replayed links harmless.
app.get('/verify', async (req, res) => {

  try {

    const token = req.query.token;

    if (!token || typeof token !== 'string') {

      return res.status(400).json({ error: 'A verification token is required.' });

    }

    const record = await redis.hGetAll('verify:' + token);

    if (!record || !record.email) {

      return res.status(410).json({ error: 'This link is expired or already used.' });

    }

    const multi = redis.multi();

    multi.del('verify:' + token);

    multi.del('pending:' + record.email);

    multi.set('verified:' + record.email, new Date().toISOString());

    await multi.exec();

    return res.json({ message: 'Email verified.', email: record.email });

  } catch (err) {

    return res.status(500).json({ error: 'Could not verify this token.' });

  }

});
A 410 Gone status tells the client the link is dead as opposed to malformed. That distinction drives the frontend message, since an expired link should offer a resend button while a malformed one should not.
Deleting the pending key in the same write set frees the address the moment verification succeeds. The verified key then becomes the long-lived proof that middleware checks on every protected request.
Resend protection and duplicate prevention
Users hammer the resend button, and two signups can claim one address. Both behaviors cost you provider quota and support tickets.
Redis answers both with keys you already designed. The cooldown key throttles, and the pending key detects doubles.
app.post('/resend', authLimiter, async (req, res) => {

  const email = (req.body || {}).email;

  if (!email || !validator.isEmail(email)) {

    return res.status(400).json({ error: 'A valid email address is required.' });

  }

  const normalized = validator.normalizeEmail(email);

  const cooling = await redis.get('cooldown:' + normalized);

  if (cooling) {

    const ttl = await redis.ttl('cooldown:' + normalized);

    return res.status(429).json({ error: 'Wait ' + ttl + ' seconds before requesting another email.' });

  }

  const old = await redis.get('pending:' + normalized);

  if (!old) {

    return res.status(404).json({ error: 'No pending verification for this address.' });

  }

  await redis.del('verify:' + old);

  // mint a fresh token and store it exactly as in the request route

});
Deleting the old token before minting keeps exactly one live link per address. The 429 response includes the remaining wait so the client can show a countdown.
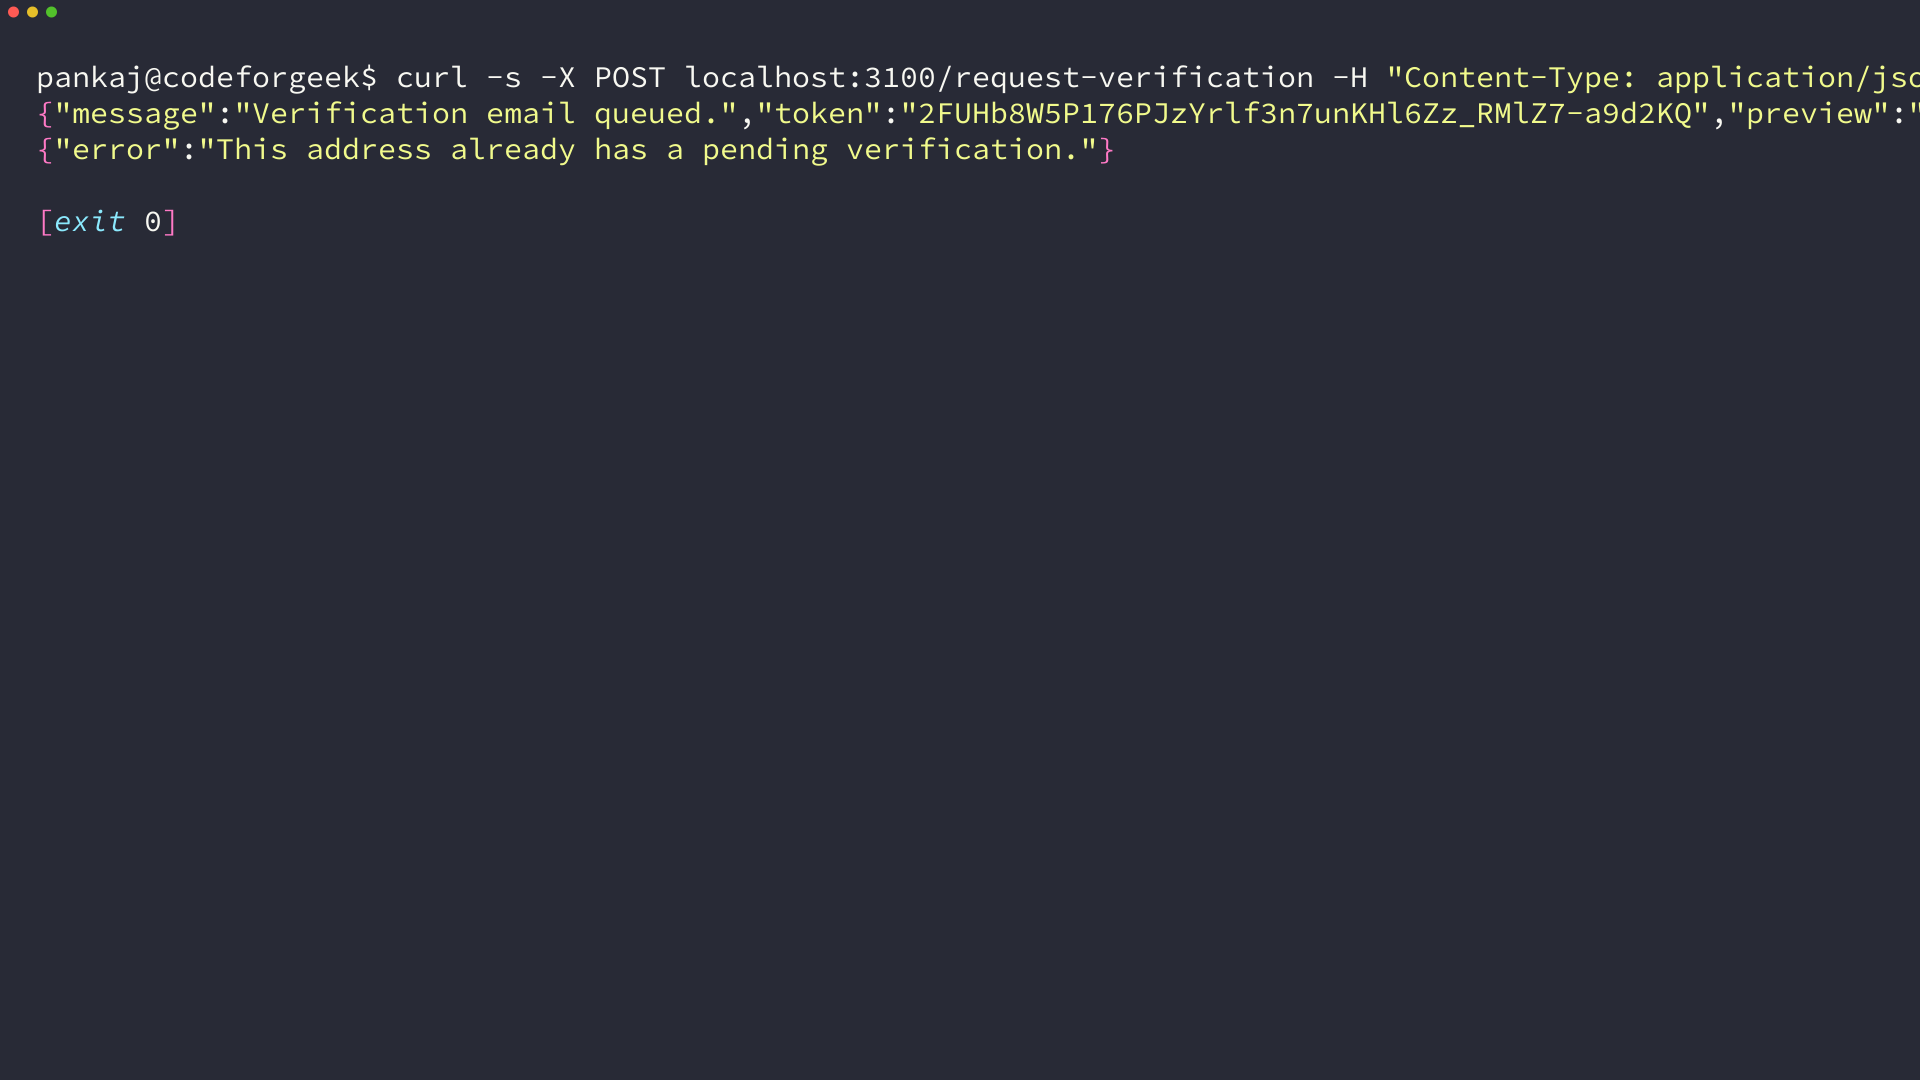
The screenshot below shows a fresh request, the duplicate rejection, and these exact responses from the live demo. The 201 body, the 409 body, and the 429 wait time all came from the running server unedited.
Checking verification status
A single Redis GET gates every protected route in under a millisecond with no database join.
function requireVerified(req, res, next) {

  const email = req.query.email;

  if (!email) return res.status(401).json({ error: 'Sign in first.' });

  redis.get('verified:' + validator.normalizeEmail(String(email))).then((v) => {

    if (!v) return res.status(403).json({ error: 'Verify your email before continuing.' });

    return next();

  }).catch(() => res.status(500).json({ error: 'Status check failed.' }));

}
app.get('/dashboard', requireVerified, (req, res) => {
res.json({ message: 'Welcome to your dashboard.' });
});
A plain status endpoint returning verified, pending, or unknown serves the frontend alongside the middleware, so the signup page can poll for the right call to action.
Unknown deserves its own state rather than collapsing into pending. It tells the frontend the address never started verification, which points the user at signup instead of an inbox that holds nothing.
Poll the status endpoint after signup and after each resend to keep the UI truthful.
Production hardening
Local code is not production code. These four additions close the openings attackers probe first, and each is a few lines.
const helmet = require('helmet');

const cors = require('cors');

const rateLimit = require('express-rate-limit');
app.use(helmet());
app.use(cors({ origin: 'https://example.com' }));
app.use(express.json());
const authLimiter = rateLimit({ windowMs: 15 * 60 * 1000, max: 20 });
app.post('/request-verification', authLimiter, handler);
app.post('/resend', authLimiter, handler);
Helmet sets secure response headers and CORS restricts which origins browsers accept. Replace the example origin with your frontend domain before deploying.
The rate limiter caps each address at 20 auth attempts per 15 minutes, which blunts both resend abuse and token guessing. Validate and normalize every address with validator before it touches Redis, since differently cased duplicates of one inbox are a classic bypass. Serve everything over HTTPS and use a production email provider with SPF, DKIM, and DMARC so verification mail reaches inboxes.
Testing the complete flow
Run the server, request verification, consume the token, and confirm the status flips.
The screenshots beside each step show the terminal output unedited. Every response below came from the demo on Node 26.
redis-server

PORT=3100 node app.js

curl -s -X POST localhost:3100/request-verification -H 'Content-Type: application/json' -d '{"email":"[email protected]"}'
The server answers 201 with the queued message, while a repeat request for the same address returns 409 on the pending key.
Asking for a resend inside the cooldown returns 429 with the remaining seconds. I confirmed the wait value counts down from the 5-minute cooldown by reading the cooldown key TTL directly. The countdown in the 429 body comes straight from that TTL, so the client never guesses.
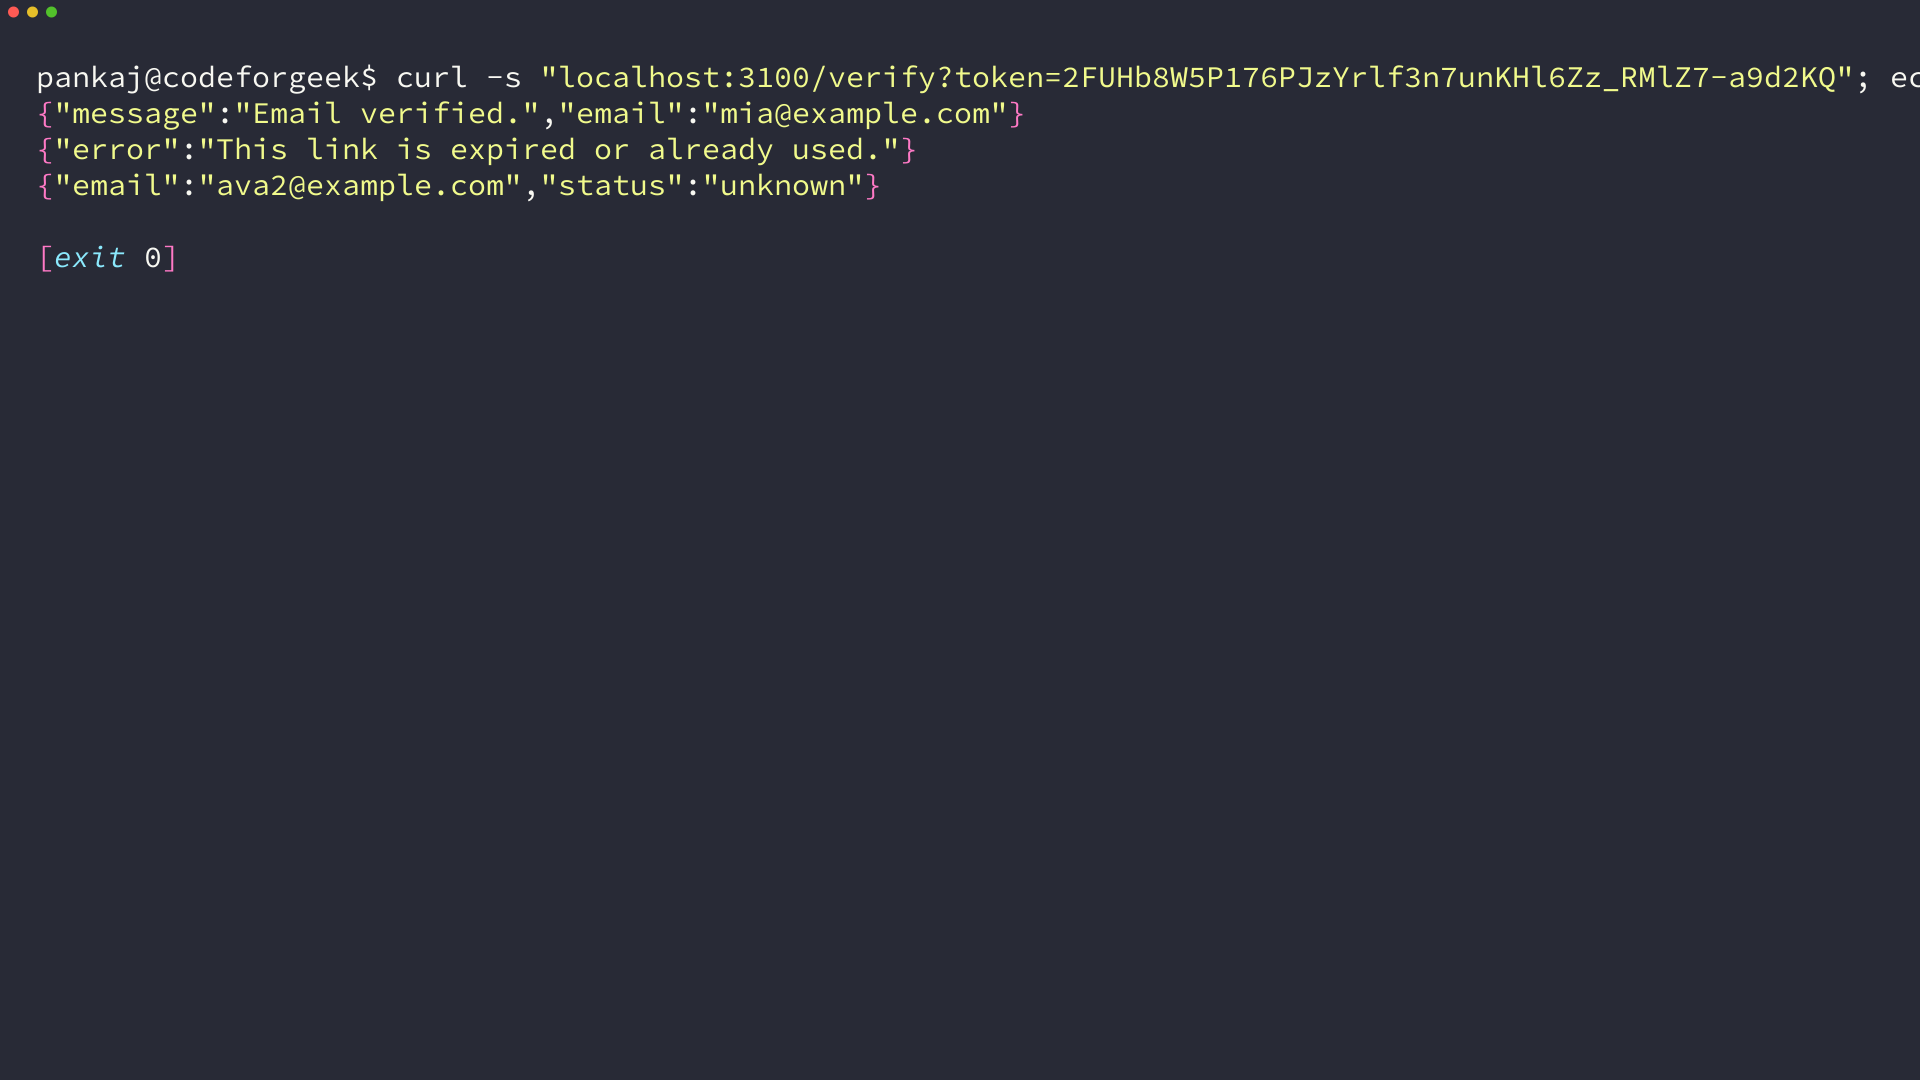
curl -s "localhost:3100/verify?token=TOKEN"; echo

curl -s "localhost:3100/verify?token=TOKEN"; echo

curl -s "localhost:3100/[email protected]"; echo

curl -s "localhost:3100/[email protected]"; echo
The first call verifies the address. The second proves single use with a 410. Status reports verified, and the dashboard opens.
Save one token from your own request run to replay these checks locally.
I confirmed the 86400-second TTL with TTL directly against Redis. Use your own token from the request response in place of TOKEN.
I proved that path by expiring the cooldown key directly instead of waiting out the cooldown, and the server answered with a new token.
Troubleshooting
Four failures cover nearly every support thread this flow produces. Each has a one-command diagnosis.
Redis refuses the connection
The server log prints a Redis error and every route returns 500. Start redis-server and confirm redis-cli answers PONG before restarting Node.
When the client connects before Redis is ready, await redis.connect catches it at boot. Never let the app listen before the store is reachable, since half-started servers produce confusing per-route failures.
Gmail rejects the login
A 535 auth error means the credential is wrong or plain-password login is blocked. Generate an app password in your Google account, export it as MAIL_PASS, and note the demo used a stream transport locally precisely so no credential appears in captured output.
Never paste the app password into source or screenshots.
Tests trip the rate limiter
Rapid curl retries during development return 429 from express-rate-limit rather than your route logic. Wait out the 15-minute window or restart the server with a higher max for local testing.
Keep the production limit at 20 per window on both auth routes, since shipping a raised debug value reopens the guessing attack the limiter exists to stop.
The browser blocks the signup call
A form hosted on another origin gets a CORS error instead of JSON. The demo allows only its own origin, so open the page from the same host or add your frontend domain to the cors origin list.
When curl succeeds and the browser fails, the fault is the origin allowlist rather than the route, so test the API with curl first and the page second.
Every link reports expired
A 410 on a fresh token usually means the verify key never landed. Check that the multi exec awaited and that TOKEN_TTL_SECONDS is positive.
Read the key back with redis-cli before clicking the link. When the hash exists with an 86400 TTL, the storage path is correct and the fault sits in the emailed URL instead.
Frequently asked questions
How do I implement email verification for new members in Node.js. Create a signup route that mints a random token, stores it in Redis with a 24-hour TTL, emails a link holding only the token, then verifies and consumes the token on click. This tutorial implements exactly that flow.
How do I send a verification email in Node.js. Use nodemailer with an SMTP transport, Gmail plus an app password for development and a dedicated provider in production. The sending section above shows the transport config and template.
Should the verification token live in the URL or in Redis. Keep only an opaque token in the URL and the address plus state in Redis. URLs leak into logs and history, while Redis records expire and die after one use.
How do I stop attackers from spamming verification emails. Put express-rate-limit on both auth routes and keep the Redis resend cooldown per address. The limiter blocks IP-level floods while the cooldown stops inbox-level abuse, and both responses tell the client when to retry.
Conclusion
You now have verification that keeps secrets out of the link, expires tokens without cron jobs, throttles resends, blocks duplicates, and gates routes in one Redis lookup. The companion GitHub repo holds the full demo, and the original YouTube walkthrough shows the flow on screen.
Extend it next with signed sessions once the address is verified, picking up where the session tutorial ends.