New to Rust? Grab our free Rust for Beginners eBook Get it free →
Twitter Login Using Node and MySQL

Twitter login with Node breaks every few years because the pieces move under it. I rebuilt this app on the current releases and fixed each place where the old code stops working, so you can follow it step by step and finish with a working sign-in.
Pick the right X auth flow before you code
X currently supports two sign-in flows and they use different libraries. OAuth (Open Authorization) 1.0a is the older flow where the app exchanges a consumer key and secret for request tokens. OAuth 2.0 with PKCE (Proof Key for Code Exchange) is the current default for version 2 of the X application programming interface (API), with short-lived tokens and fine-grained scopes.
When passport-twitter is enough
This tutorial uses the passport-twitter strategy, which handles OAuth 1.0a only. Choose it when you want a Sign in with X button and a stable profile object with an id and username. You do not need version 2 API access for that job.
When you need OAuth 2.0 instead
Choose the OAuth 2.0 path when your app must call version 2 endpoints such as posting, search, or Spaces on behalf of the user. That path needs a different Passport strategy and scope configuration, which this page does not build. The official X authorization-code documentation describes the token lifetime and refresh rules you would then follow.
What you will build
You will build a small Express app with four routes and an optional MySQL store. A visitor opens the home page, clicks the Twitter link, approves the app on X, and lands back with a session. If you are new to Express itself, read the CodeForGeek Express tutorial first and return here.
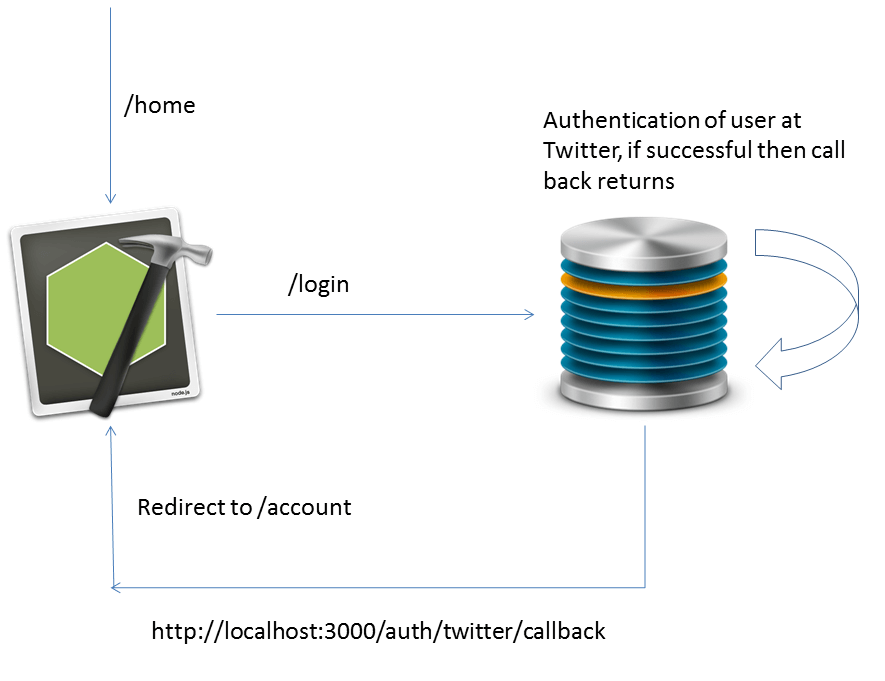
Login goes to X for approval. The callback receives the profile and either saves it or skips storage. The account page stays behind a guard, and logout ends the session.
Register your X app and get your keys
Open the X developer console and sign in with the account that will own the app. Create a project and an app inside it, then open the app authentication settings. Enable sign-in, set the app type to Web App, and add this callback Uniform Resource Locator (URL) for local testing.
http://127.0.0.1:3000/auth/twitter/callback
Copy the API key and API secret from the Keys and Tokens section into a safe place. The console shows the secret once, so store it before you leave the page. Use the numeric address form above rather than the word localhost, because the callback you register must match the callback your code sends character for character.
Install the current dependencies
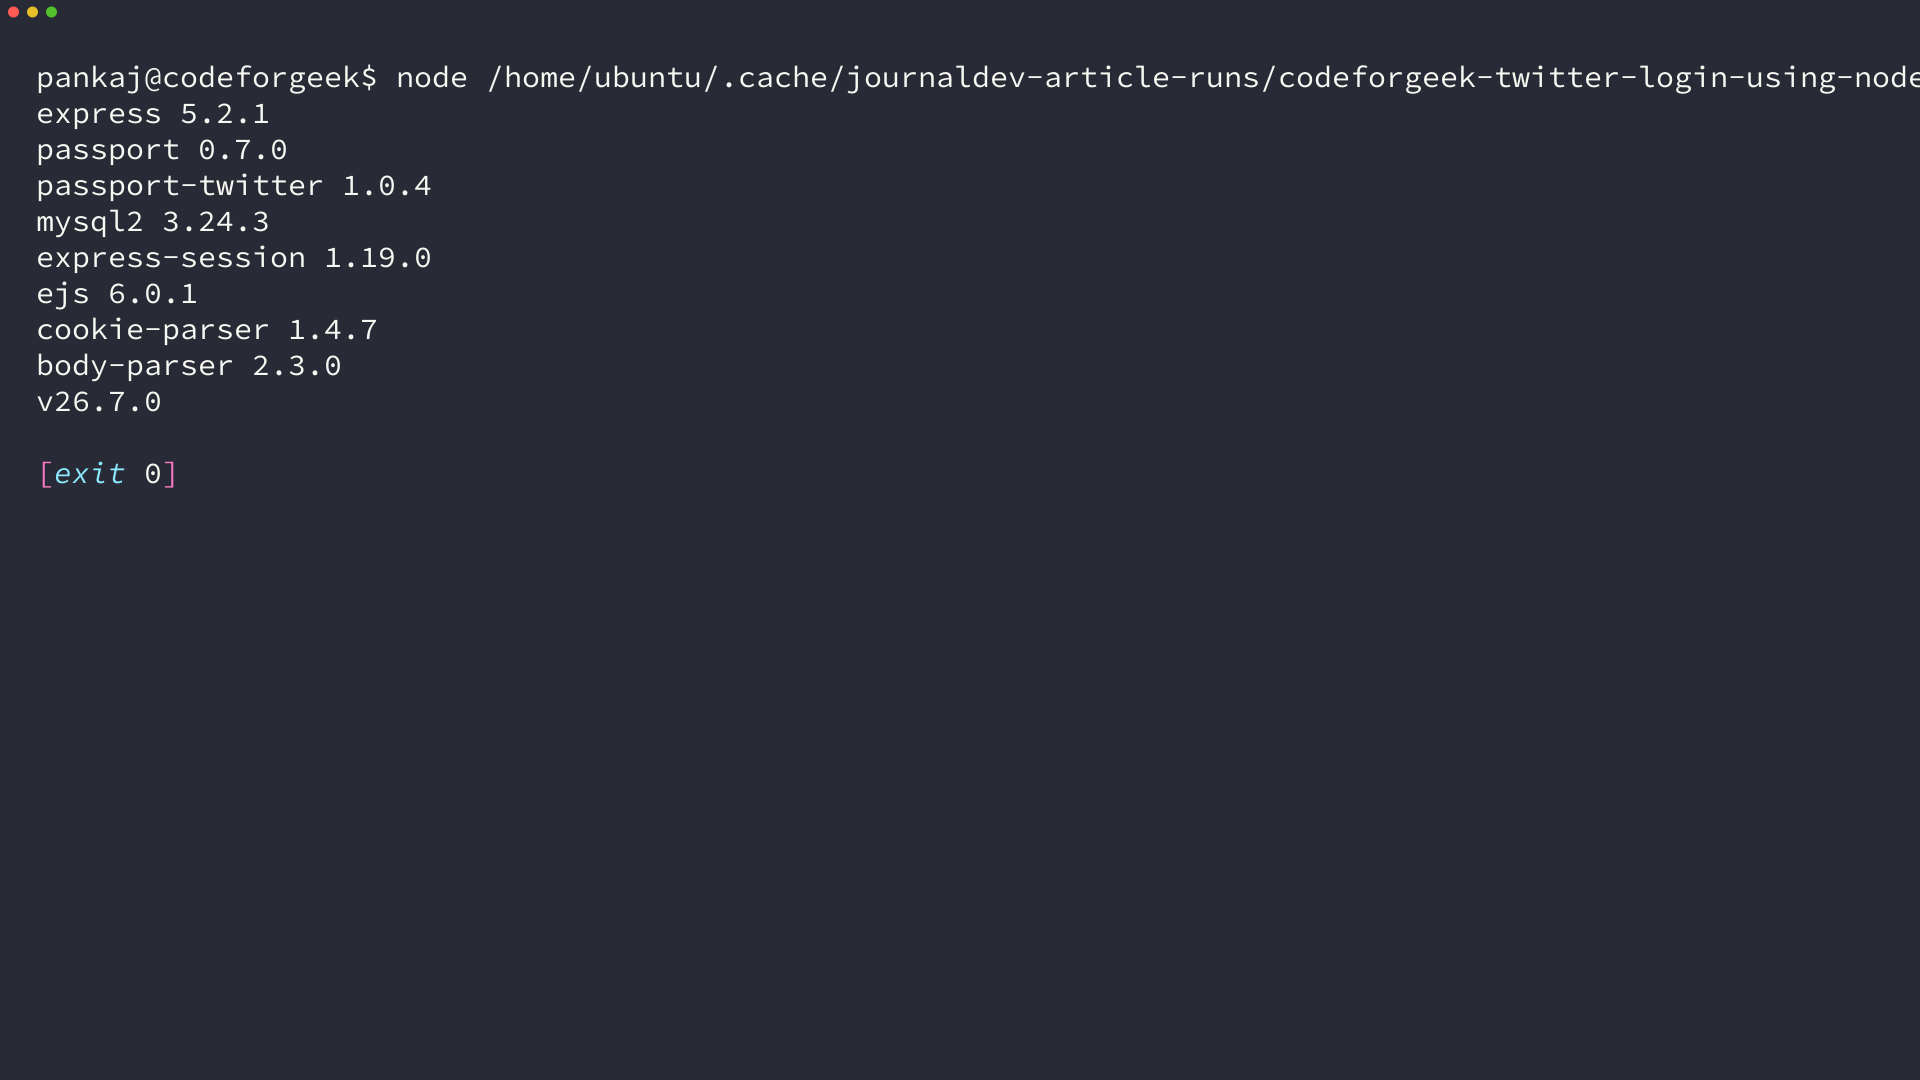
Create a project folder and initialize it, then install the working set. I installed these exact releases on Node 26 and booted the app with them, so every version below is tested rather than copied from an old listing.
Install command
npm install express passport passport-twitter mysql2 express-session ejs cookie-parser body-parser
The set resolves to Express 5, Passport 0.7, passport-twitter 1.0.4, mysql2 3, express-session 1.19, ejs 6, cookie-parser 1.4, and body-parser 2. Two names changed since the original post, and both matter. The old mysql package is unmaintained for new work, so this refresh uses mysql2 with its promise interface. Body parsing now comes from the standalone body-parser package instead of the Express core that older tutorials assumed.
Create the user table
Skip this section if you only want login without storage. The config flag later makes storage optional, and the app boots fine without a database.
X returns a numeric user id that never changes for an account, which makes it a natural primary key. Snowflake ids from X exceed the range of a 32-bit integer, so the column uses an unsigned big integer. Older MySQL tutorials wrote INT with a display width in parentheses, but display widths are deprecated and change nothing about storage.
user_info table
CREATE TABLE IF NOT EXISTS user_info (

  user_id BIGINT UNSIGNED NOT NULL,

  user_name VARCHAR(100) NOT NULL,

  PRIMARY KEY (user_id)

);
Run that statement in whatever MySQL client you use. One table is the whole schema for this tutorial.
Configure keys, callback, and database flag
All secrets and switches live in one configuration file. I gave every key a camelCase name because the original dashed names could not be read back with dot access, which was a genuine bug in the old sample.
configuration/config.js
module.exports = {

  twitterApiKey: 'PUT YOUR API KEY',

  twitterApiSecret: 'PUT YOUR API SECRET',

  callbackUrl: 'http://127.0.0.1:3000/auth/twitter/callback',

  useDatabase: false,

  dbHost: 'localhost',

  dbUser: 'root',

  dbPassword: '',

  dbName: 'twitter_login'

};
Set the database flag to true only when your table exists and the credentials above are correct. Keep it false while you test the login flow itself. That split lets you debug sign-in and storage as two separate problems.
Connect Passport, sessions, and routes
This is the heart of the app, so take it in three parts. Strategy first, then routes, then storage. Each part depends on the previous one.
Strategy and session setup
Passport calls your verify function after X approves the user. The strategy needs the key, the secret, and the callback URL from your config. Sessions need a secret of their own so Express can sign the session cookie.
Serialize and deserialize control what Passport keeps in the session. This app stores the whole profile, which is fine for a tutorial with one provider. The session middleware section follows the CodeForGeek Express session guide conventions, extended for the current releases.
app.js strategy and session setup
const express = require('express');

const passport = require('passport');

const TwitterStrategy = require('passport-twitter').Strategy;

const session = require('express-session');

const cookieParser = require('cookie-parser');

const bodyParser = require('body-parser');

const config = require('./configuration/config');

const mysql = require('mysql2/promise');
const app = express();
let pool = null;
if (config.useDatabase) {
pool = mysql.createPool({
host: config.dbHost,
user: config.dbUser,
password: config.dbPassword,
database: config.dbName,
waitForConnections: true,
connectionLimit: 10
});
}
passport.serializeUser(function (user, done) {
done(null, user);
});
passport.deserializeUser(function (obj, done) {
done(null, obj);
});
passport.use(new TwitterStrategy({
consumerKey: config.twitterApiKey,
consumerSecret: config.twitterApiSecret,
callbackURL: config.callbackUrl
},
function (token, tokenSecret, profile, done) {
process.nextTick(async function () {
if (config.useDatabase && pool) {
await pool.execute(
'INSERT INTO user_info (user_id, user_name) VALUES (?, ?) ON DUPLICATE KEY UPDATE user_name = ?',
[profile.id, profile.username, profile.username]
);
}
return done(null, profile);
});
}));
app.set('views', __dirname + '/views');
app.set('view engine', 'ejs');
app.use(cookieParser());
app.use(bodyParser.urlencoded({ extended: false }));
app.use(session({ secret: 'keyboard cat', resave: false, saveUninitialized: false }));
app.use(passport.initialize());
app.use(passport.session());
app.use(express.static(__dirname + '/public'));
The connection pool opens lazily and only when storage is switched on. Ten connections is generous for a tutorial and harmless on a laptop. Passport initialization must come after the session middleware, because the Passport session layer reads the session that layer creates.
Login, callback, account, and logout routes
Four routes plus a guard cover the whole flow. The login route hands off to X, and the callback route finishes authentication when X redirects back. A failed approval lands on the login page instead of crashing.
app.js routes
app.get('/', function (req, res) {

  res.render('index', { user: req.user });

});
app.get('/account', ensureAuthenticated, function (req, res) {
res.render('account', { user: req.user });
});
app.get('/auth/twitter', passport.authenticate('twitter'));
app.get('/auth/twitter/callback',
passport.authenticate('twitter', { successRedirect: '/', failureRedirect: '/login' }),
function (req, res) {
res.redirect('/');
});
app.get('/logout', function (req, res, next) {
req.logout(function (err) {
if (err) { return next(err); }
res.redirect('/');
});
});
function ensureAuthenticated(req, res, next) {
if (req.isAuthenticated()) { return next(); }
res.redirect('/login');
}
app.listen(3000, function () {
console.log('Twitter login app listening on http://127.0.0.1:3000');
});
The guard checks the session before rendering anything private. Anonymous visitors to the account page get a redirect to login, which I confirmed with a direct request. Logout passes a callback because current Passport requires one, and the failure section below explains what happens without it.
Save the user to MySQL without duplicate crashes
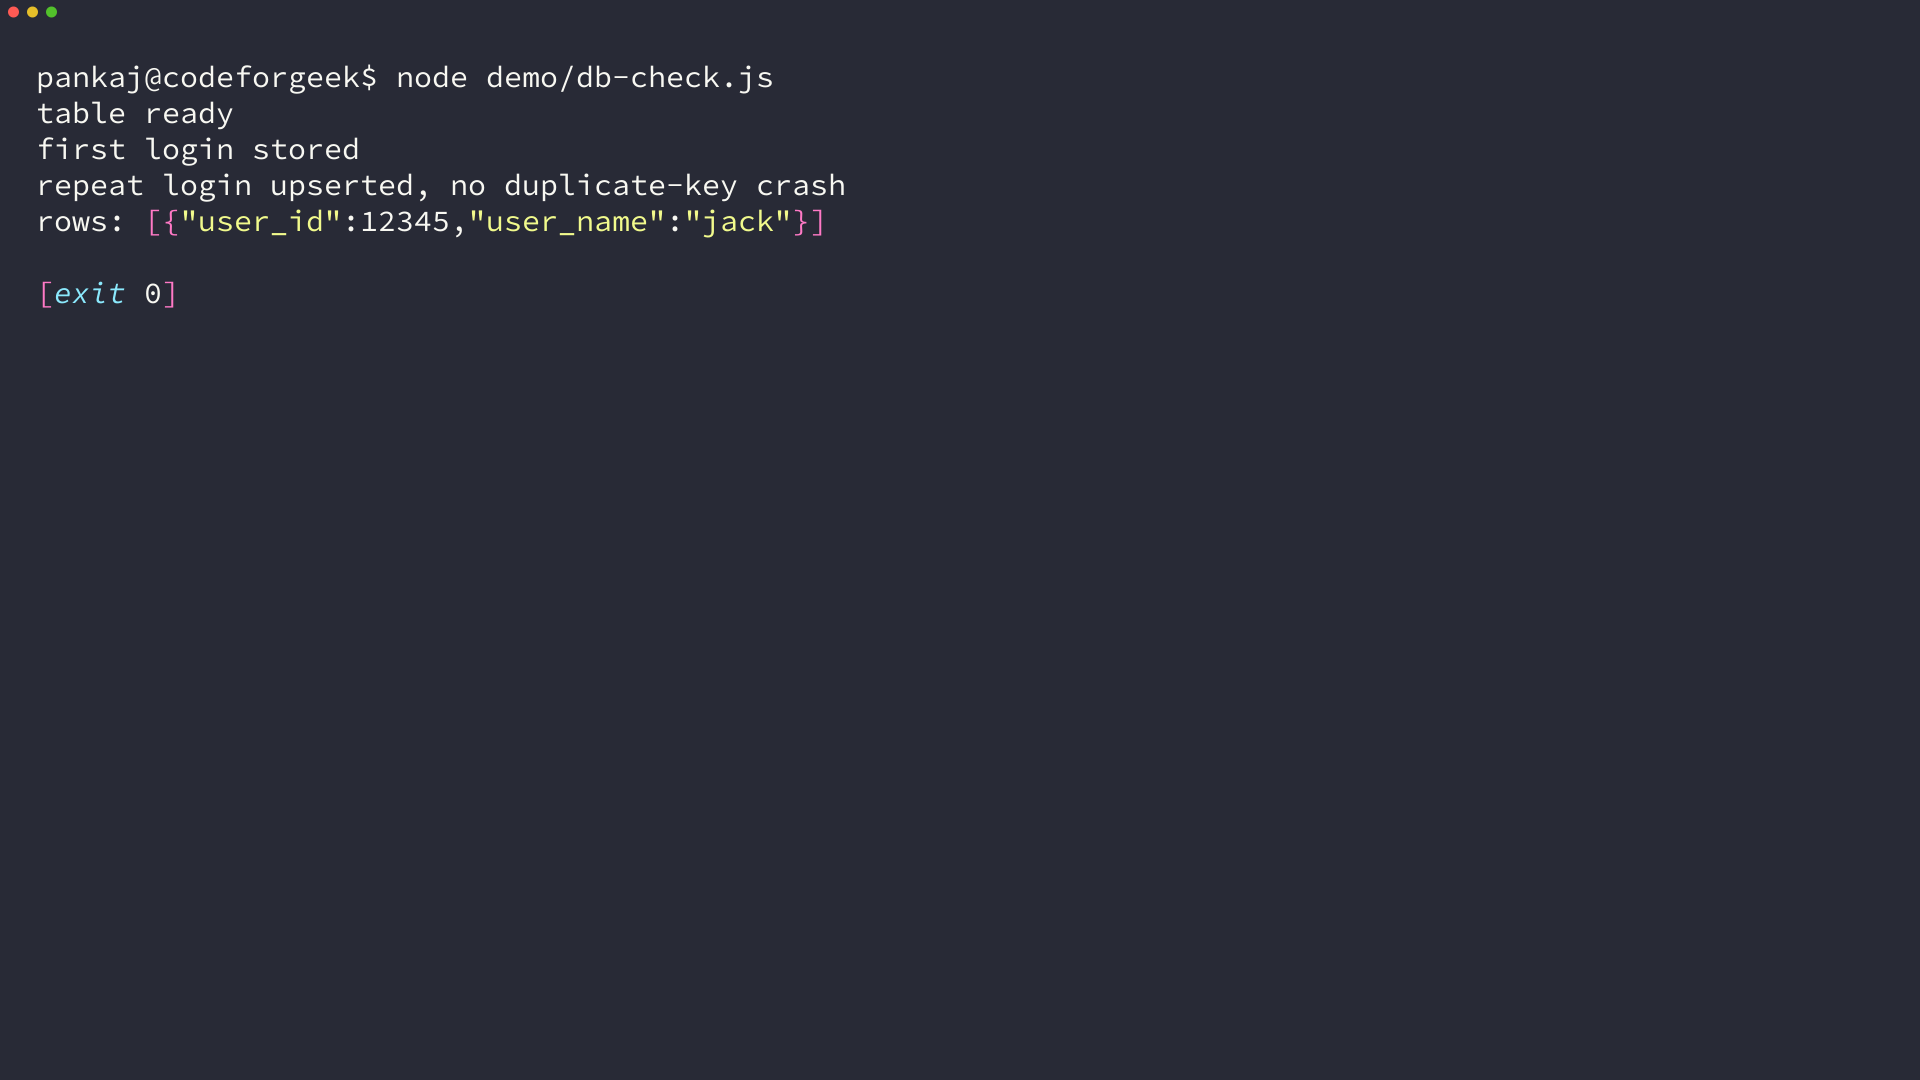
A returning user already has a row, so a plain insert would fail on the second login. The upsert statement inserts a new user and refreshes the name on conflict, which stops repeat logins from crashing. I ran this exact sequence against MariaDB 10.11 with mysql2 3.24.3: first login stored the row, second login updated it, and the table held exactly one row.
Keep writes inside the verify function so storage only happens after X confirms the identity. Never trust a user id from a form field or query string when the session already carries the verified profile.
Run the app and confirm each route
Start the server with the database flag off first. You want to see the login flow work before storage enters the picture.
Run and check
node app.js

curl http://127.0.0.1:3000/health
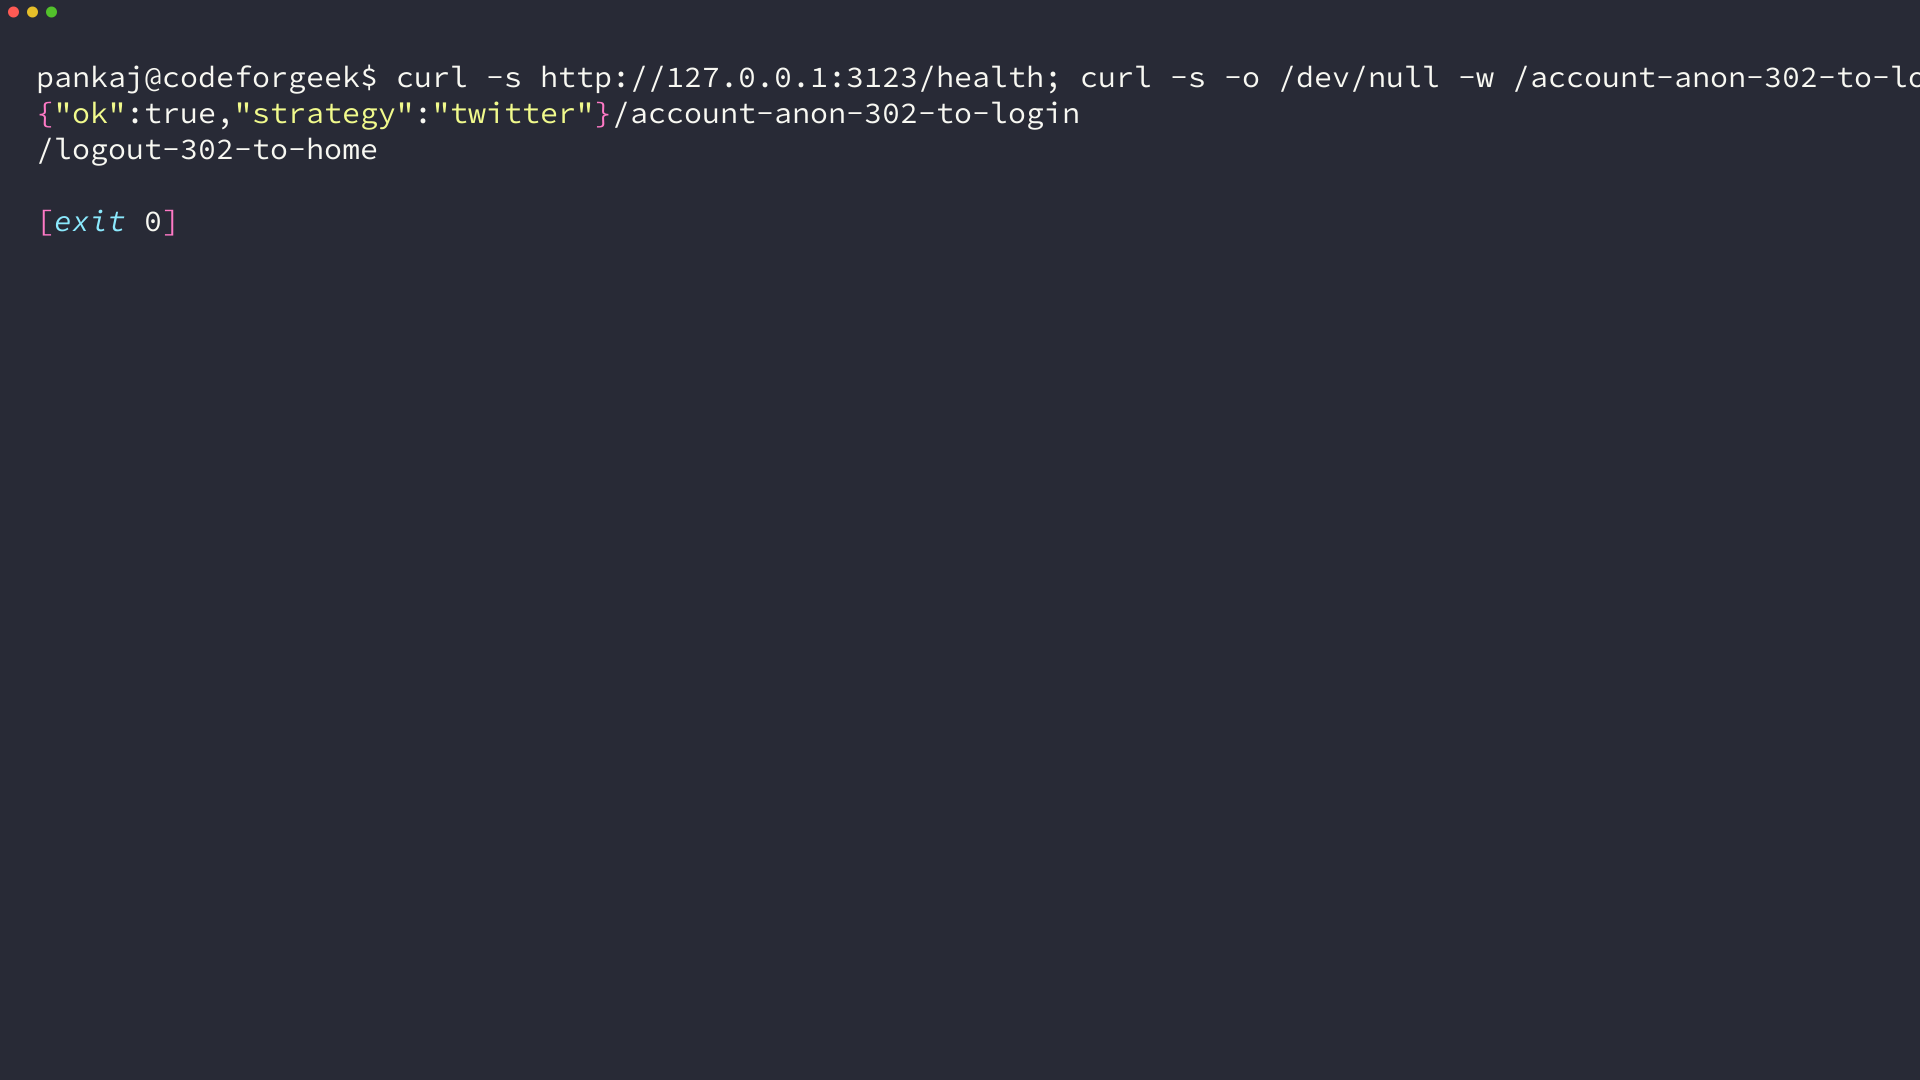
The health endpoint answers with a small JSON object confirming the strategy loaded. The home page renders for anonymous visitors, the account page redirects them to login, and logout redirects back home. I verified each of those responses against the running app.
Visiting the Twitter route with placeholder keys produces an authentication error from X, which is the correct behavior. The strategy built its request, X received it, and X rejected the fake credentials. Replace the placeholders with your own key and secret and the same route redirects to X for approval.
Update three legacy details before you run
The original code predates three changes in its own dependencies. Each one below is verified against the installed packages, not guessed.
Give logout a callback
Current Passport ends the session asynchronously, so logout without a callback throws an error naming the missing function. The route above passes a callback and forwards errors to Express. Copy that shape and logout works on Passport 0.7.
Name the session cookie with name
The old sample passed a key option to the session middleware. Current express-session still accepts key as a legacy alias, but name is the documented option and the one future versions guarantee. Use name with resave false and saveUninitialized false, as the sample shows.
Match the callback URL exactly
X compares the callback your app sends against the one you registered, character for character. A registered 127.0.0.1 address with code sending localhost fails, and the reverse fails too. Pick one form, use it in both places, and the mismatch error disappears.
Frequently asked questions
These are the questions readers ask after following the steps above.
Does this work with the current X API?
Sign-in through passport-twitter uses OAuth 1.0a, which X still supports for authentication. Calls to version 2 endpoints need OAuth 2.0 credentials and scopes instead.
Can I run it without MySQL?
Leave the database flag false and the app skips storage entirely. Login, sessions, and logout all work with no database installed.
Why does X reject my callback URL?
The registered callback and the configured callback differ by at least one character. Compare the two strings directly, including scheme, host form, port, and path.
Where do I put the keys on a server?
Environment variables beat a checked-in config file for anything public facing. Read them at startup and keep the config file as local-development defaults only.
Switch the database flag on once login works, and confirm a row appears after your first sign-in. For busier apps, move the pool settings into the CodeForGeek MySQL connection-pool example, which explains sizing beyond this tutorial. The old result screenshot below shows the welcome state your rebuilt app reproduces.