
New to Rust? Grab our free Rust for Beginners eBook Get it free →
Inter Process Communication (IPC) in Node.js: 4 Easy Ways
Did you know that it is possible to achieve Inter-process communication between Node.js processes? We can make different Node.js processes to communicate and share data. We can make different parts of our Node.js app talk to each other. In this article, let’s explore more about IPC, what is the need for IPC and different popular ways to achieve it.
Inter Process Communication (IPC)
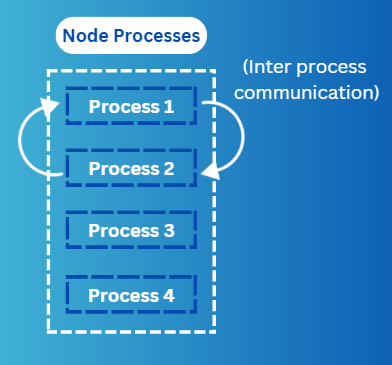
The word Inter Process Communication itself suggests its meaning i.e. it is the phenomenon of communicating among different processes. IPC in Node.js is how different parts of a Node.js application talk to each other. It involves exchanging messages or data between these parts to make the application run efficiently, taking advantage of Node.js’ non-blocking and asynchronous design for parallelism.
This communication improves how Node.js applications use resources and scale effectively. One process can communicate with another, use its function and resources and also allow the other process to load its resources and function, which makes the work collaborative and easy.
Methods of IPC in Node.js
There are several ways to achieve IPC in Node.js, some of the most useful methods are described below with their practical use in applications.
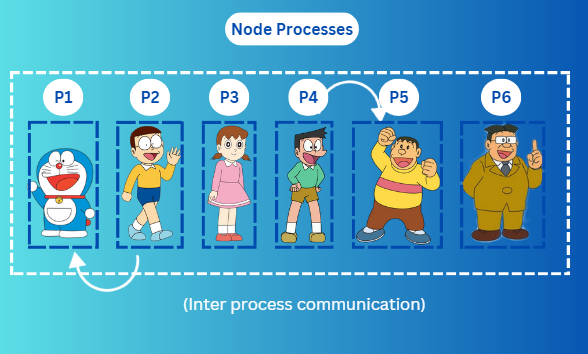
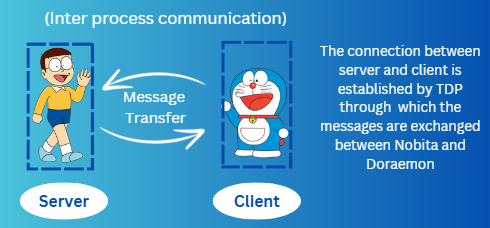
Was ‘Doraemon’ your favourite childhood cartoon too? Today, we will use its characters as different Node processes in a project and try to establish communication between them using IPC.
1. IPC Using “node-ipc” Module
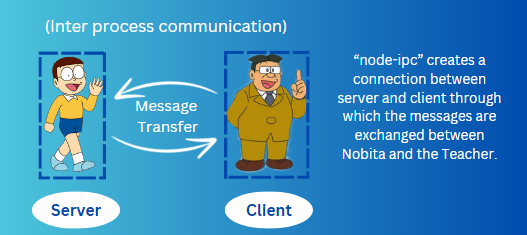
node-ipc is a Node.js library for inter-process communication (IPC). It enables communication between different Node.js processes on the same machine using sockets. The library simplifies the exchange of messages and data between these processes straightforwardly. Since this is not a core module, we need to install it before we use it in our project using the Node Package Manager. Let’s see how we can implement this library in our code to achieve IPC.
Example:
Step 1: Firstly we will create our Node.js project having package.json using:
npm init -y
Step 2: Then to install the “node-ipc” module, run the following command:
npm install node-ipc
This will add node_modules and package-lock.json files to the project.
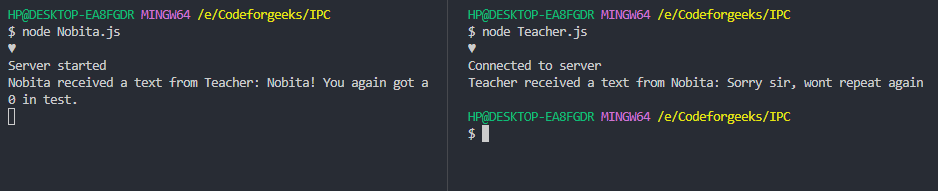
Step 3: Now we will create two JS files, let’s call them Nobita.js and Teacher.js which are basically the server and client respectively:
//Nobita.js
const ipc = require('node-ipc').default;

ipc.config.id = 'server';
ipc.config.retry = 1500;
ipc.config.silent = true;

ipc.serve(() => {
    ipc.server.on('message', (data, socket) => {
        console.log(`Nobita received a text from Teacher: ${ data }`);
        ipc.server.emit(socket, 'message', 'Sorry sir, wont repeat again ');
    });
});

ipc.server.start();
console.log('Server started');
Explanation:
- It imports the ‘node-ipc’ library and configures server settings.
- Sets up a server using ipc.serve() and defines a callback for the ‘message’ event.
- When a message is received from the client, it logs the message and emits a response to the client.
- Starts the server and logs a message indicating that the server has started.
//Teacher.js
const ipc = require('node-ipc').default;

ipc.config.id = 'client';
ipc.config.retry = 1500;
ipc.config.silent = true;

ipc.connectTo('server', () => {
    ipc.of.server.on('connect', () => {
        console.log('Connected to server');
        ipc.of.server.emit('message', 'Nobita! You again got a 0 in test. ');
    });

    ipc.of.server.on('message', (data) => {
        console.log(`Teacher received a text from Nobita: ${ data }`);
        ipc.disconnect('server');
    });
});
Explanation:
- It also imports the ‘node-ipc’ library and configures client settings.
- Connects to the server using ipc.connectTo(‘server’) and defines callbacks for ‘connect’ and ‘message’ events.
- Upon successful connection, it logs a message and sends a message to the server using ipc.of.server.emit().
- Listens for incoming messages from the server and logs the received message.
- Disconnects from the server using ipc.disconnect(‘server’) after receiving a message.
Step 4: We need to run the above two files in separate terminals or you can also achieve this using the Split terminal. Start with running the server and then the client.
Output:
2. IPC Using TCP and UDP
TCP and UDP are transport layer protocols commonly used for communication between Node.js processes. TCP or Transmission Control Protocol provides reliable, ordered communication with a focus on data integrity and sequencing. In contrast, UDP or User Datagram Protocol is a connectionless protocol that sacrifices some reliability for lower latency, making it suitable for real-time communication in distributed systems.
Node.js provides the net module for TCP-based IPC and the dgram module for UDP-based IPC.
The net and dgram are part of core modules so there is no need to install it using npm. Here are some real-life examples of achieving IPC using them.
IPC Using TCP
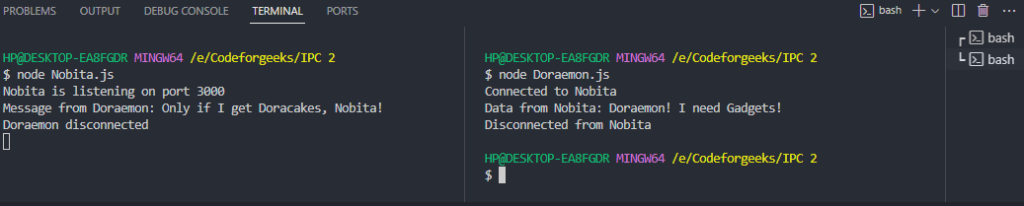
For this example, we will create two files, Nobita.js (server) and Doraemon.js (client).
Example:
//Nobita.js
const net = require('net');
const server = net.createServer((socket) => {
    socket.on('data', (data) => {
        console.log(`Message from Doraemon: ${data.toString()}`);
        socket.write('Doraemon! I need Gadgets!');
    });

    socket.on('connection', () => {
        console.log('Doraemon connected');
    });

    socket.on('end', () => {
        console.log('Doraemon disconnected');
    });
});
server.listen(3000, () => {
    console.log('Nobita is listening on port 3000');
});
//Doraemon.js
const net = require('net');
const client = net.createConnection({ port: 3000 }, () => {
    console.log('Connected to Nobita');
    client.write('Only if I get Doracakes, Nobita!');
});
client.on('data', (data) => {
    console.log(`Data from Nobita: ${data.toString()}`);
    client.end();
});
client.on('end', () => {
    console.log('Disconnected from Nobita');
});
Explanation:
- A TCP server that listens on port 3000 and a TCP client that connects to the server at port 3000 is created.
- The server handles client connections and accepts connections, logs the connection from the client, and logs disconnections.
- The client handles server responses and listens for server data, logs the message, and disconnects when done.
These two files are executed separately in different terminals.
Output:
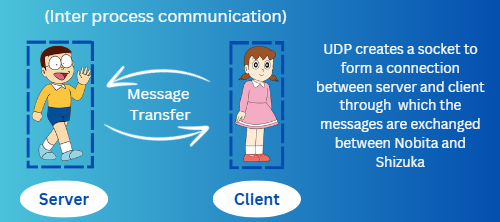
IPC Using UDP
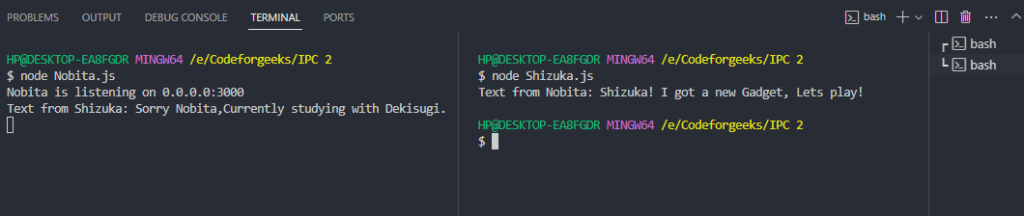
For this example, we will create two files, Nobita.js (server) and Shizuka.js (client).
Example:
//Nobita.js
const dgram = require('dgram');
const server = dgram.createSocket('udp4');
server.on('message', (msg, rinfo) => {
    console.log(`Text from Shizuka: ${msg.toString()}`);
    server.send('Shizuka! I got a new Gadget, Lets play!', rinfo.port, rinfo.address);
});
server.on('listening', () => {
    const address = server.address();
    console.log(`Nobita is listening on ${address.address}:${address.port}`);
});
server.bind(3000);
// Shizuka.js
const dgram = require('dgram');
const client = dgram.createSocket('udp4');
client.on('message', (msg, rinfo) => {
    console.log(`Text from Nobita: ${msg.toString()}`);
    client.close();
});
client.send('Sorry Nobita,Currently studying with Dekisugi.', 3000, 'localhost', (err) => {
    if (err) {
        console.error(err);
    }
});
Explanation:
- UDP server and UDP client are created using the ‘dgram’ module. The server listens on port 3000 and logs the server address.
- When a message is received, the server logs the text, sends a response to the client and specifies the recipient’s address and port.
- The client sends a message to the server at port 3000 on ‘localhost’. It listens for a response from the server, logs the received text, and closes the client connection.
Output:
3. IPC Using Child Processes
In Node.js, child modules are independent processes made with the child_process module. They run separately, enabling tasks to happen in parallel. Inter-process communication methods, like spawn or fork in child_process, help the main and child modules communicate, allowing them to exchange data and coordinate in Node.js applications.
If you wish to know more about this, do read – NodeJS Child Process – A Complete Guide
To achieve IPC we need to make two files, one must be the parent and one must be the child.
Example:
Let’s take an example to clarify things, here we will make two files Sunio.js (parent) and Gian.js (child).
// Sunio.js
const { fork } = require('child_process');
const childProcess = fork('Gian.js');
childProcess.once('message', (message) => {
  console.log(`Sunio received a text from Gian: ${message}`);
});
childProcess.send('Noooooo!');
// Gian.js
process.once('message', (message) => {
    console.log(`Gian received text from Sunio: ${message}`);
  });
process.send('I will give a singing concert today!, do come.');
Explanation:
- The child_process module is used by the parent process to fork a child process (Gian.js).
- The Parent process listens for a single message event from the child process, logs the received text from Gian, and sends the message.
- The child process listens for a single message event from the parent (Sunio.js), logs the received text from Sunio, and sends the message back to Sunio.

Now to see the results, we will only run the Parent process i.e. “node Sunio.js“
Output:

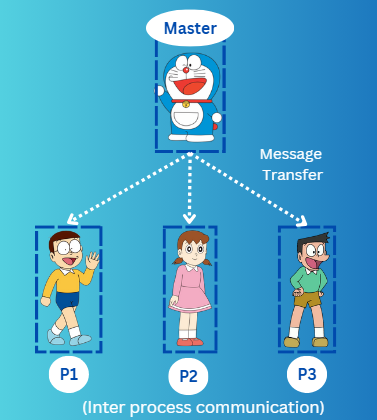
4. IPC Using Cluster Module
In Node.js, the Cluster module enables the creation of multiple processes to distribute the workload. It uses IPC (Inter-Process Communication) to share server ports, enhancing performance by utilizing all available CPU cores.
In simple words, we will have a Master process that will control the number of small worker processes. Let’s understand it better by an example, consider “Doraemon” to be the Master and the other characters to be the worker process. It is possible that each worker process can send a request or commute with the master and vice-versa.
Example:
For this example, we will create one single file Gadget.js (Master process).
// Gadget.js(Master process)
const cluster = require('cluster');
const os = require('os');
if (cluster.isMaster) {
  for (let i = 1; i <= 3; i++) {
    cluster.fork({ workerId: i });
  }
  const workerNames = {
    '1': 'Nobita',
    '2': 'Shizuka',
    '3': 'Sunio'
  };
  cluster.on('message', (worker, message) => {
    if (process.argv[2] && worker.id === parseInt(process.argv[2])) {
      const workerName = workerNames[process.argv[2]] || `Worker ${worker.id}`;
      console.log(`${workerName} (ID: ${worker.id}) said: ${message}`);
      worker.send('Oh no!, I lost my pocket, I cant help.');
    }
  });
  cluster.on('exit', (worker, code, signal) => {
    console.log(`${workerNames[worker.id] || `Worker ${worker.id}`} (ID: ${worker.id}) died. Forking a new one.`);
    cluster.fork({ workerId: worker.id });
  });
} else {
  const workerId = process.env.workerId;
  const workerNames = {
    '1': 'Nobita',
    '2': 'Shizuka',
    '3': 'Sunio'
  };
  console.log(`${workerNames[workerId] || `Worker ${process.pid}`} (ID: ${workerId}) started`);

  let message;
  switch (workerId) {
    case '1':
      message = 'Doraemon,I need the Any-where-door!';
      break;
    case '2':
      message = 'Doraemon,I need the small light!';
      break;
    case '3':
      message = 'Doraemon,I need the bamboo-coopter!';
      break;
    default:
      message = 'Unknown request';
  }
  process.send(message);
  process.on('message', (message) => {
    console.log(`Doraemon replied to ${workerNames[workerId] || `Worker ${process.pid}`} (ID: ${workerId}): ${message}`);
  });
}
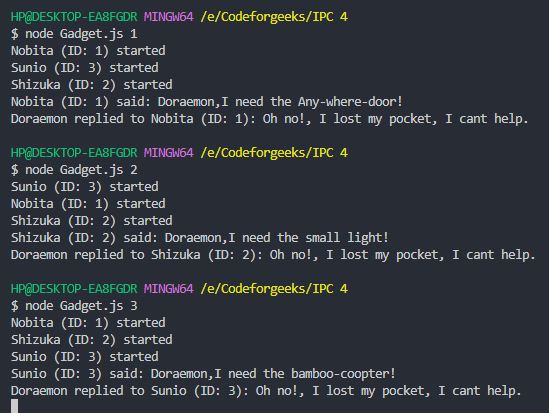
Explanation:
- It uses the ‘cluster’ module to create three worker processes (Nobita, Shizuka, Sunio) with distinct IDs.
- Then it defines worker names for each ID and handles messages from workers.
- On worker exit, logs the event and forks a new worker to replace the exited one.
- Each worker identifies itself with a specific ID and logs its start.
- Sends a specific message to Doraemon based on its ID.
- Listens for messages from Doraemon and logs the responses.
Now we run the project using the command “node main.js 1”, then the response for Nobita would be printed, same is followed with Shizuka and Sunio.
Output:
Summary
In this article, we learned about the Inter-Process Communication (IPC) in Node.js, where different parts of your application can talk to each other. IPC facilitates efficient communication and collaboration between processes, improving resource utilization and scalability. We got to learn about popular IPC methods like node-ipc, TCP, UDP, Child Processes, and Cluster module. Also, we went into practical examples using characters from ‘Doraemon’ to understand how these methods work and enhance your Node.js applications.
Further Reading – Kill All Instances of a Node.js Process Using Command Line: A Beginner’s Guide
Reference


