New to Rust? Grab our free Rust for Beginners eBook Get it free →
Express Tutorial for Beginners: A Node.js Web Framework

Express is one of the most popular web application frameworks for Node.js, which is used to write backend code for creating web applications up to 10 times faster. It comes with a robust set of features that are really useful while developing full-blown Node.js applications. Express is popular for its simplicity and ease of use. You can even create dynamic web applications by integrating a template engine with Express.
In this ExpressJS tutorial, we will see a comparative guide on Express. If you are someone who is not even familiar with node.js, no need to worry, we will start from Stretch!
In this Node.js tutorial for beginners, we are going to cover the following topics:
- Node.js Basic Concepts
- Installing Node.js in your system
- Express Framework
- Express Routers
- Express Middlewares
- Creating a Web Server using Express.
- Express Sessions.
- Express File uploads
- Database integration in Node.js.
- Deployment of Node.js applications.
Let’s begin.
Node.js Basic Concepts
Node.js is a JavaScript runtime that allows you to write JavaScript for creating back-end services. We can create services like APIs, Web and Mobile Applications using it. Many big companies use Node.js to build their application such as Netflix, PayPal, Uber, etc.
Node.js runs on top of the V8 engine i.e., the chrome runtime engine that compiles the JavaScript code in the native machine code followed by the custom C++ code.
Some of the features of Node.js are given below:
- In Node.js we write JavaScript code, so for a JavaScript developer, it is very easy to use.
- Node.js has many modules, you can use them to make our projects even better.
- In Node.js you can write the code both synchronously and asynchronously.
- We can literally create any application using Node.js.
- On top of all the features, Node.js provides a fast execution which makes it the best for writing server-side code.
Installing Node in your system
To install Node.js in your system. Head over to the official website of the Node.js downloads page and download its setup file based on your operating system.
However, I highly recommend you install Node using the Node version manager. It’s software that allows you to quickly switch between the Node.js version based on your needs. Click here to navigate to the article to install Node using NVM.
After installing it, to make sure that Node.js is installed properly open the command prompt and type the command:
node --version
If it returns a version then it means that it has been successfully installed on your system.
Using Node.js Express Framework
Using Express you can build Node.js web applications in a few lines of code. Let’s create a simple application that displays Hello World on the browser.
Create a new folder and locate it inside a terminal and execute the below command below:
npm init --y
NPM stands for Node Packages Manager, by which we can install any Node.js module. This command will initiate NPM for our project.
To install the latest and most stable version of Express in your project, run the command:
npm install --save express
Upon execution of this command, you will have the express framework installed in your project.
Open the project inside a code editor, and create an app.js file to write the following code:
const express = require('express');
const app = express();

app.get('/', (req, res) => {
  res.send("Hello");
});

app.listen(process.env.PORT || 3000, () => {
  console.log('Web Server is listening at port ' + (process.env.PORT || 3000));
});
Run the code using the command:
node app.js
Navigate your browser to localhost:3000 to view the response of the web server.
If you find the above code confusing, we have explained this line by line in another tutorial NodeJS: Installation, Setup and Creating Hello World Application in NodeJS.
Express Routers for creating Modular Web Applications
Routers serve as endpoints of a server. For instance, in the URL “https://facebook.com/codeforgeek”, here the codeforgeek is a route that is handled by a router.
We can perform various operations on routes using HTTP methods such as GET, POST, PUT, and DELETE.
Let’s learn by doing it. Refer to the code shown below:
const express = require('express');
const app = express();
const router = express.Router();
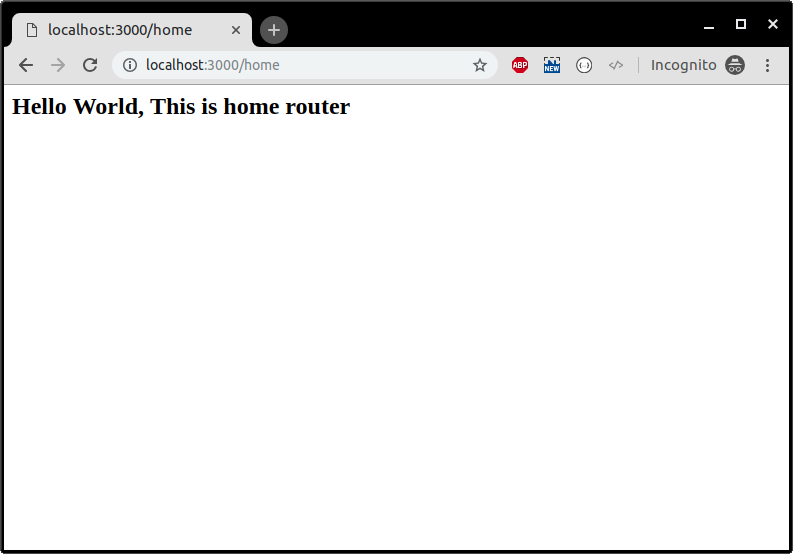
router.get('/home', (req, res) => {
res.send('Hello World, This is home router');
});
router.get('/profile', (req, res) => {
res.send('Hello World, This is profile router');
});
router.get('/login', (req, res) => {
res.send('Hello World, This is login router');
});
router.get('/logout', (req, res) => {
res.send('Hello World, This is logout router');
});
app.use('/', router);
app.listen(process.env.PORT || 3000, () => {
console.log('Web Server is listening at port ' + (process.env.PORT || 3000));
});
Run the code using the command:
node app.js
You should see the following message in the terminal.
Web Server is listening at port 3000
Open your browser and visit the routes.
You can also handle other HTTP methods such as GET and POST. You can also send HTML/XML as a response in your routes.
Express Middlewares for extending Functionality
Middleware functions as the name suggests can be used to make changes in the request/response lifecycle of the express. Middleware functions execute before sending the response back to the user. You can use multiple middleware functions chained together and they execute in order.
There are five types of middleware functions in the express.
- Application middleware
- Router middleware
- Error-handling middleware
- Built-in middleware
- Third-party middleware
We can use application middleware using the instance of the express as shown below:
const express = require('express');
const app = express();

app.use((req, res, next) => {
  console.log('Time:', Date.now());
  next();
});

app.listen(process.env.port || 3000);

console.log('Web Server is listening at port '+ (process.env.port || 3000));
In a similar way to application middleware, we can use router middleware.
const express = require('express');
const app = express();
const router = express.Router();

router.use((req, res, next) => {
  console.log('Time:', Date.now());
  next();
});

router.get('/home', (req, res) => {
  res.send("ok");
});

app.use('/', router);

app.listen(process.env.PORT || 3000, () => {
  console.log('Web Server is listening at port ' + (process.env.PORT || 3000));
});
We can also use this middleware to catch errors.
app.use((err, req, res, next) => {
  res.status(500).send('Something broke!')
});
Learn more about this function by reading this article.
Express provides some middleware by default such as express.static(), express.json() and express.urlencoded().
We can also use third-party middleware built by awesome developers.
Here is how we can install third-party middleware.
npm install --save body-parser
Here is how we can use this third-party express middleware:
const express = require('express');
const bodyParser = require('body-parser');
const app = express();
const router = express.Router();

router.get('/home', (req, res) => {
  res.send('Hello World, This is home router');
});

router.get('/profile', (req, res) => {
  res.send('Hello World, This is profile router');
});

router.get('/login', (req, res) => {
  res.send('Hello World, This is login router');
});

router.get('/logout', (req, res) => {
  res.send('Hello World, This is logout router');
});

// Add middleware before routes
app.use(bodyParser.json());
app.use('/', router);

app.listen(process.env.PORT || 3000, () => {
  console.log('Web Server is listening at port ' + (process.env.PORT || 3000));
});
Make sure that the order of middleware is right. Lots of developers making this mistake. Express will execute the middleware in the order it is initialized.
Express Sessions Management
Session management is a crucial part of the web application. We can use third-party middleware to achieve the session functionality in Express.js.
Install the required middleware:
npm install --save express express-session body-parser
Here is a sample code to achieve sessions in Express:
const express = require('express');
const session = require('express-session');
const bodyParser = require('body-parser');
const router = express.Router();
const app = express();

app.use(session({ secret: 'ssshhhhh', saveUninitialized: true, resave: true }));
app.use(bodyParser.json());
app.use(bodyParser.urlencoded({ extended: true }));

var sess; // global session, NOT recommended, only for demonstration purposes

router.get('/', (req, res) => {
  sess = req.session;
  if (sess.email) {
    return res.redirect('/admin');
  }
  res.send('Ok');
});

router.post('/login', (req, res) => {
  sess = req.session;
  sess.email = req.body.email;
  res.end('done');
});

router.get('/admin', (req, res) => {
  sess = req.session;
  if (sess.email) {
    res.write(`Hello ${sess.email}`);
    res.end('Logout');
  } else {
    res.write('Please login first.');
    res.end('Login');
  }
});

router.get('/logout', (req, res) => {
  req.session.destroy((err) => {
    if (err) {
      return console.log(err);
    }
    res.redirect('/');
  });
});

app.use('/', router);

app.listen(process.env.PORT || 3000, () => {
  console.log(`App Started on PORT ${process.env.PORT || 3000}`);
});
In the code shown above, there are four routers.
- The first is used to render the home page.
- The second router is used for a login operation. We are not doing any authentication here for the sake of simplicity.
- The third router is used for the admin area where the user can only go if he/she is log-in.
- The fourth router is for session destruction.
In a production scenario, we should always use an external session store so that sessions are not shared for every user ( Like we did above for the sake of an explanation ).
Read this article to build a session-based application using external session stores such as Redis.
There is another alternative to sessions that is widely used in mobile applications. It’s a token-based authentication. We have covered token-based authentication in detail in this article.
File uploads using Express
To handle file uploads in the Express framework, we need to use the popular node module called multer.
Install multer using the following command:
npm install --save express body-parser multer
Refer to the code below to handle file uploads in the Express framework:
var express = require("express");
var bodyParser = require("body-parser");
var multer = require('multer');

var app = express();
app.use(bodyParser.json());

var storage = multer.diskStorage({
  destination: function (req, file, callback) {
    callback(null, './uploads');
  },
  filename: function (req, file, callback) {
    callback(null, file.fieldname + '-' + Date.now());
  }
});

var upload = multer({ storage: storage }).array('userPhoto', 2);

app.post('/api/photo', function (req, res) {
  upload(req, res, function (err) {
    if (err) {
      return res.end("Error uploading file.");
    }
    res.end("File is uploaded");
  });
});

app.listen(3000, function () {
  console.log("Working on port 3000");
});
First, we initialized the multer with the disk storage i.e. we are going to save our files in the machine where our Node server is running.
var storage = multer.diskStorage({
  destination: function (req, file, callback) {
    callback(null, './uploads');
  },
  filename: function (req, file, callback) {
    callback(null, file.fieldname + '-' + Date.now());
  }
});

var upload = multer({ storage : storage }).array('userPhoto',2);
The userPhoto is the key that should be used in the HTML file element as an ID.
Then, we simply called this function in the router.
upload(req,res,function(err) {
  if(err) {
    return res.end("Error uploading file.");
  }
  res.end("File is uploaded");
});
Read this article to learn about file uploads in Express in more detail.
Database Integration in Node.js
The database is an integral part of any application. You must know how to use it with Node to build a complete application.
Let’s begin with interfacing Node with MySQL.
MySQL is a very popular database and has been used in millions of applications. We can use MySQL with Node as well. We need to install the module name myself to use it with the MySQL database.
First, you need to install the MySQL server in your system.
Install the mysql module:
npm install --save mysql
Assuming you have MySQL running in your system, you can use the following code to connect to it:
const mysql = require("mysql");

const pool = mysql.createPool({
  connectionLimit: 100,
  host: "localhost",
  user: "root",
  password: "",
  database: "database_name",
  debug: false,
});

pool.query("SELECT * FROM table_name LIMIT 10", (err, rows) => {
  if (err) {
    console.log("Error occurred during the connection.");
  }
  console.log(rows[0]);
});
Replace the database and table name with the actual one in your system.
You can execute queries such as INSERT, UPDATE, and DELETE in a similar fashion. Learn more in detail about using Node and MySQL.
Deployment of Node applications
Once you are finished with your application, it’s time to test it out on the cloud server. We recommend using DigitalOcean for this. It’s easy, affordable, and made for developers.
For learning the step-by-step process, check out: How to Deploy Node js to DigitalOcean Cloud Server
Conclusion
Well, this is a comprehensive tutorial, and it’s understandable that there may be some aspects that are challenging to understand at once. It is completely normal that not everything is understood immediately because learning takes time and practice. Additionally, it also difficult for us to explain each and every code in detail in one tutorial. However, we have provided relevant tutorials for each section so that you can go deeper and understand the specific topics better.
Node.js and Express are vast topics, but our tutorial has simplified them to make them more accessible. We encourage you to visit our website and explore these topics further, and pursue a career in web development.