Have you ever launched a website on Heroku and gotten stuck with the “Web process failed to bind to $PORT within 60 seconds of launch” error? Heroku is a powerful web tool that has proven to be one of the best places to deploy your Node.js applications. However, sometimes, while launching your application, you might face errors and issues. This error is one of them. So, no need to sweat over it. In this article, we will discuss the given error, when you might come across it, and possible solutions for the same.
Overview of Heroku
Founded in 2007 by James Lindenbaum, Adam Wiggins and Orion Henry, Heroku is a cloud-based platform famous for the deployment, management, and scaling of web applications. It is a platform-as-a-service (PaaS) environment that provides the facility to host applications on its platform, supporting various languages. It focuses on reducing server management complexities and tends to help developers focus on writing code rather than managing servers.
Some of the key features of Heroku are:
- With Heroku, deploying an app is as easy as pushing code to a Git repository.
- Heroku provides easy scaling options.
- It supports a variety of programming languages, including but not limited to Ruby, Node.js, Python, Java, and PHP.
- Heroku manages the platform updates and database backups reducing the burden on the developers.
- Comes with addon services like databases, caching systems, monitoring tools, and more.
Interested to know more about Heroku? Follow this article – How to Deploy Angular App on Heroku
Understanding the Error Message
The error message ‘Web process failed to bind to $PORT within 60 seconds of launch’ indicates that when we try to start a website or web application, there is a problem connecting it to the internet. It couldn’t establish a connection on the specified ‘$PORT’ within the first 60 seconds after launching.
This error message might sound complex, but in simple terms, it means your website couldn’t start up properly. Think of $PORT as a virtual door that your website needs to open to communicate with the world. An error with $PORT is like saying, “Oops, the door got stuck, and we couldn’t open it in time!” But don’t worry, we have solutions to oil that virtual hinge and get your website swinging open smoothly.
When you deploy your Node.js application on Heroku, this error might show up if your code is error-prone.
Error Occurrence Example
Let’s take an example of an application and try to launch it over Heroku.
Following is the structure of our project:

In the given application, we have installed the express library. We have an index.js file with the following content:
const express = require('express');
const app = express();
const port = 3000;

app.get('/', (req, res) => {
  res.send('Hello, Heroku!');
});

app.listen(port, () => {
  console.log(`Server is running on port ${port}`);
});
Now if you know about Heroku, you must also be known to something known as a Procfile. A Procfile is a configuration file used in web development, particularly on platforms like Heroku, to declare the commands that should be executed to run the application.
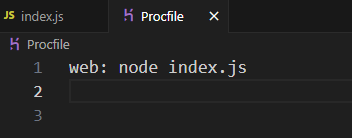
Here is the content of the Procfile:
web: node index.js
Now to deploy the given application, we run the following commands in sequence:
1. To login into Heroku:
heroku login

2. Provide a name for our application:
heroku create codeforgeek

3. To add all the files in our current directory (the entire project) to the git staging area:
git add .
4. To commit the changes to our local git repository:
git commit -m "Initial commit"
5. To push our local git repository to Heroku’s remote repository or to deploy our application:
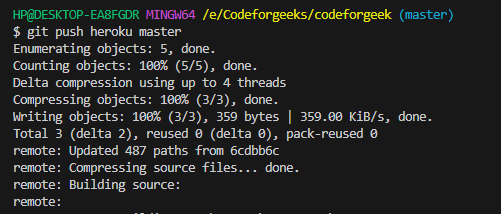
git push heroku master

After we run the deployment command, Heroku will attempt to build and deploy our application. If there’s an issue with binding to the port within the specified time frame or if our code is error-prone, the error will trigger during the deployment process.
Alternatively, if it has been deployed, we can check for errors by running the following command:
heroku logs --tail

This command will list all the logs of deployment.

Now if we check the logs, we see the error message “Web process failed to bind to $PORT within 60 seconds of launch”. This means there is some fault in our code so let’s investigate what can be the causes of this error occurrence.
Error Causes
The error occurred due to the following possible reasons:
- This error can occur if the port is already in use, perhaps another process or application is already using the specified port.
- Heroku already assigns a port with the ‘$PORT’ environment variable, the error happens if it is not used properly within the code.
- The error occurs if there is a Hardcoded Port in the Code as it might clash with the dynamically assigned port on the hosting platform.
- Heavy Dependencies take time to initialize, it may exceed the 60-second limit and hence the error occurs.
Steps to Fixing the Error
Now that we know the possible reasons for the error happening, let’s discuss some troubleshooting ways to solve it.
1. Check for “process.env.PORT”
In web development, process.env.PORT refers to an environment variable indicating the port number for a server to handle incoming HTTP requests. It is very important to ensure that we don’t have a hard-coded port number, as Heroku dynamically assigns the port.
With this error, it’s important to make sure your application code properly uses process.env.PORT to dynamically connect to the assigned port. When we closely recheck our code in the index.js we see that we have forcefully assigned a port and the usage of “process.env.PORT” is missing.
Now that we have known our mistake, let’s correct our code by adding “process.env.PORT” in it:
const express = require('express');
const app = express();
const port = process.env.PORT || 3000; // Use dynamic port or fallback to 3000

app.get('/', (req, res) => {
  res.send('Hello, Heroku!');
});

app.listen(port, () => {
  console.log(`Server is running on port ${port}`);
});
After changing the code, we will commit the updated changes to our local Git repository:
git add .
git commit -m "Corrected code"
Then we will push the changes to Heroku:
git push heroku master
This will trigger a new deployment on Heroku with the modified code.
After the deployment is complete, we will see the logs to verify that our update is successful and the error is resolved:
heroku logs --tail

In the terminal logs, we will see that the error no longer exists and the server is running on the port assigned by Heroku i.e. 53562 in this case.
2. Utilizing Procfile
A Procfile (process file) is a configuration file used by platforms like Heroku to define the commands executed by the app during startup. It’s a plain text file named Procfile, with no file extension, found in your application’s root directory.
This file outlines the processes to run when deploying your app. It is necessary that we have a Procfile at the root of our project with the correct command to start our application.
A Procfile usually contains process types and their commands. In the case of a web application, the key process type is often ‘web,’ and the associated command is how your web server starts.
Here’s what a Procfile looks like for a Node.js application with Express:

If your application is not set up correctly in the Procfile to read and utilize the $PORT environment variable, you may face the mentioned error.
3. Configuring Dependencies
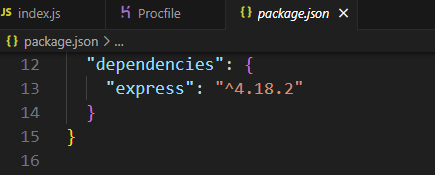
Verify your package.json file for all required dependencies. Make sure you have ‘express‘ or another web server framework listed as a dependency. Ensure your Express application is set up to use the assigned port dynamically and optimize the startup process, including dependencies, to launch within the allotted 60 seconds.

Also if we have all the necessary dependencies, it is equally important to remove the unnecessary ones such as heavy dependencies.
In web development, a ‘heavy dependency’ refers to elements like large libraries, complex frameworks, or external services that significantly affect the startup time or resource usage of an application. Heavy dependencies contribute to delays in the application’s startup process. If the startup time exceeds the allotted 60 seconds, it can result in the mentioned error.
Here are some quick fixes to deal with heavy dependency:
- Use Webpack to bundle heavy frontend dependencies (like JavaScript libraries).
- Audit Dependencies to check for needless packages that are consuming high resources, using commands like:
npm ls
yarn list
- Also, check for duplicates and find light alternatives to Replace Heavy Dependencies.
- Use lazy loading for specific parts of your application and load dependencies only when required, not during the initial startup.
- Use tree-shaking to eliminate dead code and reduce the size of your bundled files.
Conclusion
We hope that after reading the above content, you are clear to resolve the error “Web process failed to bind to $PORT within 60 seconds of launch”. There can be many distinct reasons why a port cannot bind in a limited time frame of 60 seconds. We have tried to discuss the most possible reasons with their most suitable solutions which have proved helpful in resolving the error.
Read More:
- Set Up an Nginx Reverse Proxy on Linux with Node.js Application
- Resolving ‘SyntaxError: Cannot use import statement outside a module’


