
New to Rust? Grab our free Rust for Beginners eBook Get it free →
How to Build a Todo App with NodeJS (Express & EJS)

Hey developers, in this tutorial I will teach you the entire process of building a to-do list application using Node.js, but why are we learning to create this project?
Creating a project like a todo list application involves not only basic knowledge but also complex concepts like the view engine, parsing incoming data, rendering data from client to server, handling forms, performing CRUD operations and much more. These complex concepts help you extend your Node.js skills, and if you are already good at them, this single project helps you revise them all in one go.
Now that you have a reason to get started, let’s start with what functionality our final project will have.
If you are interested in creating APIs – RESTful API Using Node.js and Express.js
Features of a Todo List Application
In simple teams, the todo list app is used to manage everyday tasks. The project we will create in this tutorial using NodeJS will have the following characteristics:
- Display Task
- Add Task
- Delete Task
To make the project less complex and simple for beginners we will not use MongoDB, MySQL or any type of database, we will only use arrays to store the todos. Also, we will not use CSS but you can add it later if you want.
Creating a Todo List Application
We will use one of the most popular Node frameworks Express with EJS as the templating engine to integrate JavaScript into HTML. While it is better to know what they are before starting, it is not so mandatory. Below is the step-by-step process for creating the todo list app with Node.js.
Project Setup
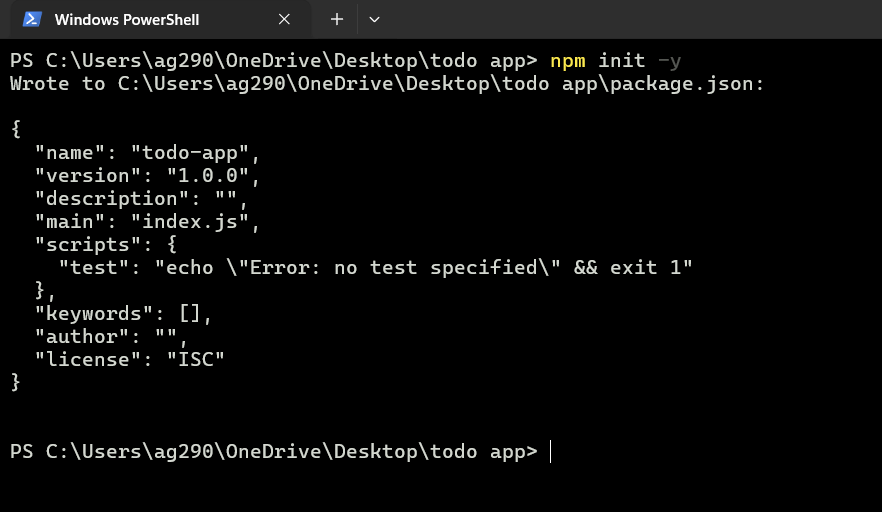
Create a project folder then locate the folder in the terminal and execute the below command to initiate NPM.
npm init -y
NPM stands for Node Package Manager used to install different NodeJS packages. We have a separate tutorial on NodeJS NPM if you want to read.
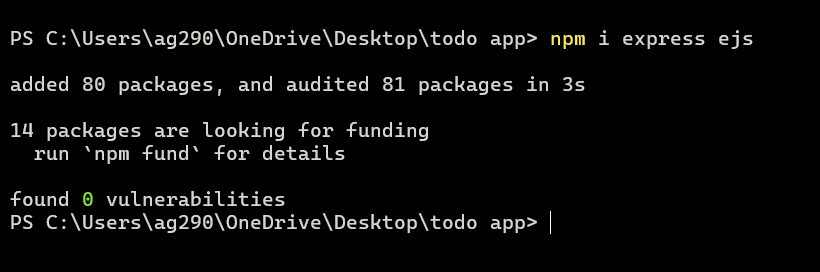
Install Modules: Install Express and EJS modules inside the project folder using the below command.
npm i express ejs
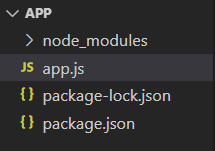
Project Folder
The project contains a JavaScript file “app.js”, where we will write code for creating the application, a package.json and package-lock.json file which includes the information regarding the modules installed in our project, and a node_modules folder which contains the actual module installed inside our projects.
Importing and Configuring Modules
Import Express: Inside the “app.js” file, import the Express module and create an instance “app” using it.
const express = require("express");

const app = express();
Import EJS: Use EJS as middleware for the view engine.
app.set("view engine", "ejs");
Now, it is required to create a folder with the name “views”, which contains the HTML file, the HTML files require to have the extension “.ejs” rather than “.html”.
Create Todos Array: Create an array containing predefined tasks to showcase to the user.
const todos = [{
        todoId: "1",
        todoTask: "Code",
    },
    {
        todoId: "2",
        todoTask: "Sleep",
    },
    {
        todoId: "3",
        todoTask: "Coffee",
    }
];
Getting Form Data: In the upcoming step, we have to create a functionality to enter data in a form to add a task. Below is the code to use express middleware in order to handle the incoming form data.
app.use(express.json());
app.use(express.urlencoded({extended: true}));
Rendering Todo Tasks
Use the get() method to create a home route, represent “/” which is the application’s default page, and then define the functionality to send the todos array to an HTML file “index.ejs”.
app.get("/", function (req, res) {
    res.render("index", {
        data: todos,
    });
});
Inside the “index.ejs” file we have to fetch every single element from the array. For this, we can use a loop to iterate through the array, select every single element one by one, and insert it as table data in a row of the HTML table.
<!DOCTYPE html>
<html>

<head>
    <title>Todo List</title>
</head>

<body>
    <h2>Todo List</h2>
    <table>
        <tr>
            <th>Id</th>
            <th>Task</th>
            <th>Delete</th>
        </tr>
        <% data.forEach(element => { %>
        <tr>
            <td><%= element.todoId %></td>
            <td><%= element.todoTask %></td>
        </tr>
        <% }) %>
    </table>
</body>

</html>
Adding New Task to the List
To add a task to the todos array, we have to set up a form inside the “index.ejs” file.
<form action="/" method="POST">
    <input type="text" name="todoTask" placeholder="Enter Task">
    <button type="submit">Add</button>
 </form>
To handle the form data, we have to create a new route in which we fetch the form data and push it to the todos array.
app.post("/", (req, res) => {
    const inputTodoId = todos.length + 1;
    const inputTodoTask = req.body.todoTask;

    todos.push({
        todoId: inputTodoId,
        todoTask: inputTodoTask
    });

    res.render("index", {
        data: todos,
    });
});
Deleting Task from the List
Create a new form with a button to delete the task when clicked.
<form action="/delete" method="POST">
       <input type="hidden" name="todoId" value="<%= element.todoId %>">
       <input type="hidden" name="todoTask" value="<%= element.todoTask %>">
       <button class="delete" type="submit">❌</button>
</form>
This form gets attached to every task.
<!DOCTYPE html>
<html>

<head>
    <title>Todo List</title>
</head>

<body>
    <h2>Todo List</h2>
    <table>
        <tr>
            <th>Id</th>
            <th>Task</th>
            <th>Delete</th>
        </tr>
        <% data.forEach(element => { %>
        <tr>
            <td><%= element.todoId %></td>
            <td><%= element.todoTask %></td>
            <td>
                <form action="/delete" method="POST">
                    <input type="hidden" name="todoId" value="<%= element. todoId %>">
                    <input type="hidden" name="todoTask" value="<%= element. todoTask %>">
                    <button class="delete" type="submit">X</button>
                </form>
            </td>
        </tr>
        <% }) %>
    </table>
    <form action="/" method="POST">
        <input type="text" name="todoTask" placeholder="Enter Task">
        <button type="submit">Add</button>
     </form>
</body>

</html>
You can see that the form has the task id which is used to know for which task the button gets clicked in order to delete it from the todos array.
Handle the form inside the “app.js” file to delete the task from the todos array.
app.post("/delete", (req, res) => {
    var requestedtodoId = req.body.todoId;
    var j = 0;
    todos.forEach((todo) => {
        j = j + 1;
        if (todo.todoId === requestedtodoId) {
            todos.splice(j - 1, 1);
        }
    });
    res.redirect("/");
});
Finally, create a port to test our application on browsers using the listen() method and pass the 3000 port as an argument.
app.listen(3000, (req, res) => {
    console.log("App is running on port 3000");
});
Running Node.js Script
The application code is written in a single file “app.js” that runs on executing the below command in the terminal.
node app.js
This command will not refresh the application so in case if you make any changes to the code you need to first stop (ctrl + c) and then restart the server again with the same command. We have an interesting article (on nodemon) to solve this problem – Update Code Without Restarting Node Server
Opening the App on a Browser
Enter the below URL inside the search bar of a web browser to open the application.
http://localhost:3000/
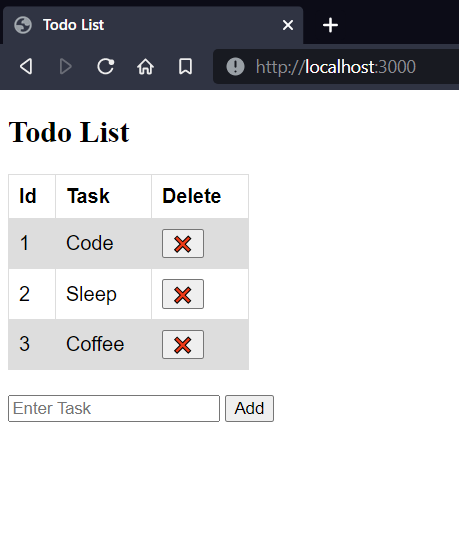
See our app is loaded and working properly on the browser. If you want to demonstrate the project on your system, I have pushed it on GitHub, click here to access it.
Complete Code for a Todo List Application in NodeJS
app.js
const express = require("express");

const app = express();

app.set("view engine", "ejs");

const todos = [{
        todoId: "1",
        todoTask: "Code",
    },
    {
        todoId: "2",
        todoTask: "Sleep",
    },
    {
        todoId: "3",
        todoTask: "Coffee",
    }
];

app.use(express.json());
app.use(express.urlencoded({extended: true}));

app.get("/", function (req, res) {
    res.render("index", {
        data: todos,
    });
});

app.post("/", (req, res) => {
    const inputTodoId = todos.length + 1;
    const inputTodoTask = req.body.todoTask;

    todos.push({
        todoId: inputTodoId,
        todoTask: inputTodoTask
    });

    res.render("index", {
        data: todos,
    });
});

app.post("/delete", (req, res) => {
    var requestedtodoId = req.body.todoId;
    var j = 0;
    todos.forEach((todo) => {
        j = j + 1;
        if (todo.todoId === requestedtodoId) {
            todos.splice(j - 1, 1);
        }
    });
    res.redirect("/");
});

app.listen(3000, (req, res) => {
    console.log("App is running on port 3000");
});
index.ejs
<!DOCTYPE html>
<html>

<head>
    <title>Todo List</title>
</head>

<body>
    <h2>Todo List</h2>
    <table>
        <tr>
            <th>Id</th>
            <th>Task</th>
            <th>Delete</th>
        </tr>
        <% data.forEach(element => { %>
        <tr>
            <td><%= element.todoId %></td>
            <td><%= element.todoTask %></td>
            <td>
                <form action="/delete" method="POST">
                    <input type="hidden" name="todoId" value="<%= element. todoId %>">
                    <input type="hidden" name="todoTask" value="<%= element. todoTask %>">
                    <button class="delete" type="submit">X</button>
                </form>
            </td>
        </tr>
        <% }) %>
    </table>
    <form action="/" method="POST">
        <input type="text" name="todoTask" placeholder="Enter Task">
        <button type="submit">Add</button>
     </form>
</body>

</html>
Summary
In this tutorial, we have explained the steps to make a todo app using Node.js. A todo list application is used to keep track of day-to-day tasks by providing the feature of adding and deleting tasks continually. Building the todo list web application makes you demonstrate your Node.js programming skills as it covers lots of important concepts. Hope you have enjoyed reading the content.
If you are new to Node.js:
- What is Node.js?
- Asynchronous Programming in Node.js – Callback, Promises & Async/Await
- How to send an HTML File in Node.js?
References
For more information, click here


