New to Rust? Grab our free Rust for Beginners eBook Get it free →
Executing Command Line Binaries with Node.js: A Detailed Guide

Executable files that can be run via the command line are known as command line binary. We can create a Node.js script to run such command line programs and potentially handle their input and output. Before we learn how to execute a command line binary in Node, let’s first understand what it means.
What is Command Line Binary?
In computing, a binary file contains machine code instructions that are directly understood by the CPU. Machine code is binary instructions that a computer’s CPU can execute directly. It represents fundamental operations and data manipulations at the lowest level.
A command line binary is a program designed to be run from the command line interface (CLI) of an operating system. Users can run these executable files by typing commands in a terminal or command prompt and providing input parameters and options as necessary.
Examples of Command Line Binary
- Executable binaries in Windows are commonly recognized by their file extension, which is often .exe. For instance, a file named notepad.exe is an executable binary.
- In Unix-like systems such as Linux and macOS, executable binaries may have a custom extension or no extension at all. Examples include ls and grep.
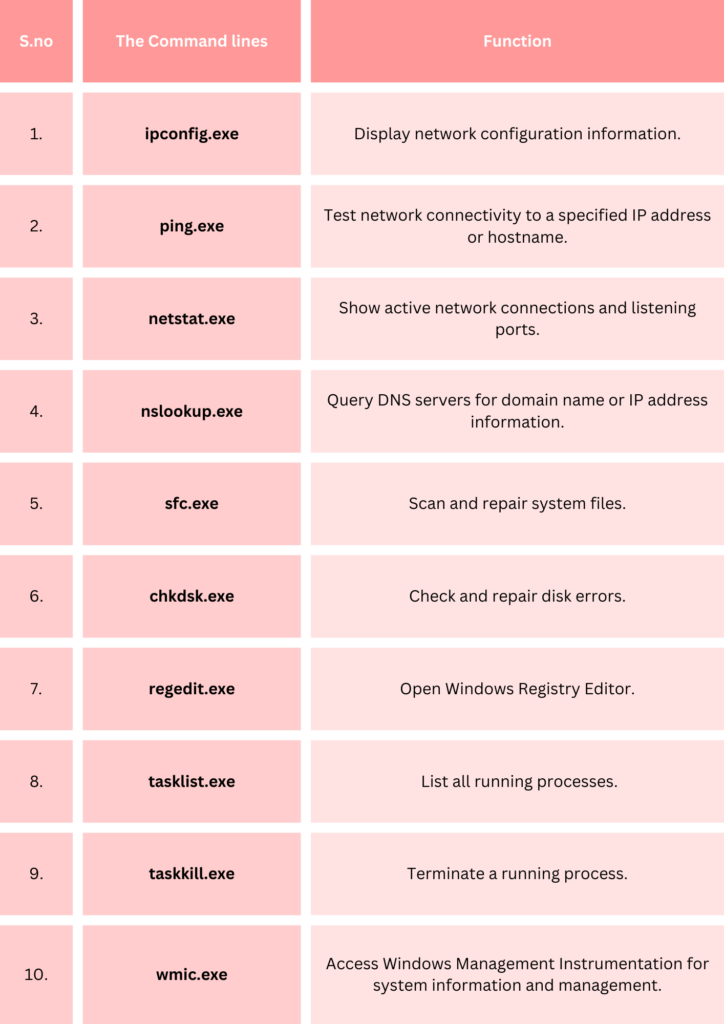
List of some binary files for the Windows command line:
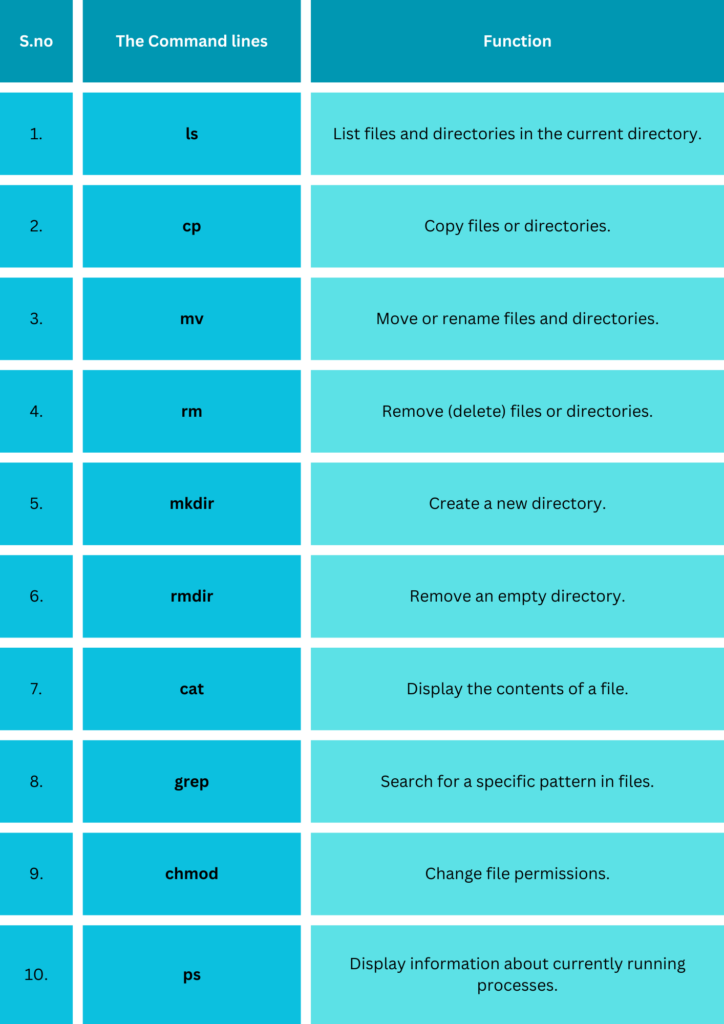
List of some binary files for the Linux command line:
Why Running Command Line Binaries with Node.js?
- Node.js is optimized for I/O processes. However, when an application needs more CPU-intensive work, it may block the main event loop. In such cases, it may be necessary to delegate such work to another process.
- You want to perform batch processing with regular checkpoints and then report the status based on the checkpoint using a Node.js app.
Ways to Execute Command Line Binary in Node.js
Let’s now look at the best ways to execute command line binary with Node.js.
1. child_process.exec()
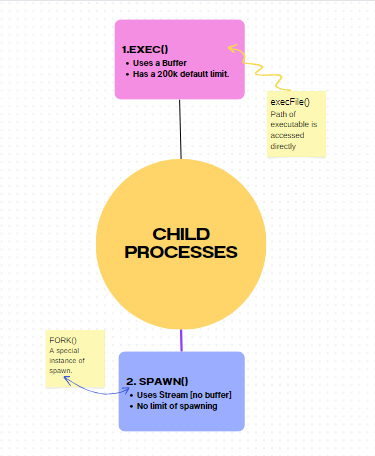
Node.js is a single-threaded process, however, it is possible to create multiple threads simultaneously using the child_process module.
The exec() function creates a new shell and executes a given command. The output from the execution is buffered, which means it is kept in memory (not memory-friendly) and is available for use in a callback.
exec() is a method of running a command line binary in Node.js. We can import the exec function from the child_process module. The callback function of this method has three parameters:
- error: If the command encounters an error, it will be logged as an error in the console.
- stdout: The data on the standard output stream is logged to the console.
- stderr: If there is any data on the standard error stream, it will be logged to the console as an error.
Let’s look over an example to execute a command line binary with exec().
Example:
const { exec } = require('child_process');

const command = 'dir /B /O:N';

exec(command, (error, stdout, stderr) => {
  if (error) {
    console.error(`Error: ${error.message}`);
    return;
  }
  if (stderr) {
    console.error(`stderr: ${stderr}`);
    return;
  }
  console.log(`stdout: ${stdout}`);//Call back function end
});
Here:
- The command string is set to ‘dir /B /O:N’.
- dir is the binary that we want to execute. This command is similar to the Unix command “ls” and is used to list files and directories.
- /B is an argument passed to dir to display only the names of the files.
- /O: N is an argument passed to dir to sort the files by name.
Output:
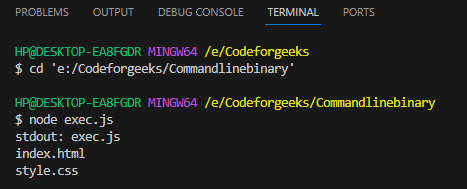
Here:
- The “exec.js”, “index.html” and “style.css” are the files present inside the given directory.
Note:
Please note that the code provided utilises the dir /B /O: N command specific to the Windows command prompt. If you use a different operating system such as Linux or macOS, you may need to modify the command accordingly. On Unix-based systems, the ls command is commonly used.
Additional Details:
The exec() function operates on the buffer and has a default buffer capacity of 200k. However, it is not intended for processes that return large buffers to Node. If the child_process returns anything greater than 200k, it will generate an error message stating “memory buffer exceeded”.
Using util.promisify()
Node.js Promises allow for clean, structured, and asynchronous code. In Node.js, you can use the util.promisify function to convert the way you interact with child_process functions from a callback-based system to a promise-based system. This can make your code easier to read and manage. You can use the .then() and .catch() methods to handle the results of the child processes in a more straightforward way.
Example:
onst util = require('util');
const { exec } = require('child_process');

const promisifiedExec = util.promisify(exec);

async function listFiles() {
  const command = 'dir /B /O:N';

  try {
    const { stdout, stderr } = await promisifiedExec(command);

    if (stderr) {
      console.error(`stderr: ${stderr}`);
      return;
    }

    console.log(`stdout: ${stdout}`);
  } catch (error) {
    console.error(`Error: ${error.message}`);
  }
}

listFiles();
Here:
- The ‘dir /B /O:N’‘ command provides a listing of files and directories in the specified location.
- The execPromise function is created using promisify to convert the callback-based exec function into a promise-based one.
- The executeCommand function runs the dir binary using execPromise and awaits its response.
- The program’s standard output and error messages are printed to the console.
Output:
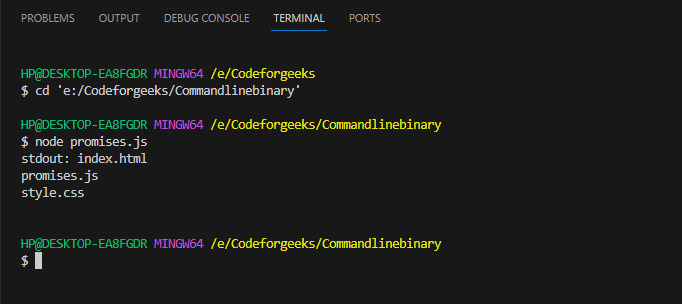
The directory information is printed in the console.
2. child_process.spawn()
The spawn() function allows you to execute a command line binary in a new process. This function uses a stream API, which means that its output is made available through listeners. The result will not be stored in memory, but it can be accessed through the stream listeners that we create in our code.
Let’s look over an example to execute a command line binary with spawn().
Example:
const { spawn } = require('child_process');

const echoCommand = 'echo.exe';
const echoArguments = ['Hello and Welcome to CodeforGeeks'];

const echoProcess = spawn(echoCommand, echoArguments);

echoProcess.stdout.on('data', (data) => {
  console.log(`stdout: ${data}`);
});

echoProcess.stderr.on('data', (data) => {
  console.error(`stderr: ${data}`);
});

echoProcess.on('close', (code) => {
  console.log(`Child process exited with code ${code}`);
});
Here:
- echoCommand is set to echo.exe, which is the executable for the echo command on Windows.
- [‘Hello and Welcome to CodeforGeeks’] are the arguments passed to the echo command.
- The ‘close’ event is used to capture the exit code of the child process. This code can be useful for determining the success or failure of the executed command.
- The spawn function returns a ChildProcess object, which is an instance of the EventEmitter class. This allows you to listen for various events, such as ‘data’, ‘error’, and ‘close’, as demonstrated in the example.
Output:
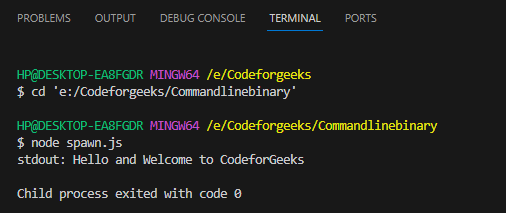
After executing the command, the text that was inputted will be displayed as the output.
The key difference between exec() and spawn() lies in how they return data. The exec() function stores all the output in a buffer, making it more memory-efficient than spawn(). The spawn() streams the output, which is useful when we expect a large stream of data as output from our command.
Conclusion
Command line binaries provide a wide range of functionalities, from basic file operations like copying, moving, and deleting files to advanced tools such as compilers (gcc), databases (mysql), and web servers (nginx). Vital binaries streamline tasks and enhance system admin. CLI empowers intricate workflows for specific computing tasks.
In this article, we have seen two child_process module methods for executing command line binaries: child_process.exec() and child_process.spawn(). Hope you enjoyed reading the content.
Further Study:
Reference
https://stackoverflow.com/questions/20643470/execute-a-command-line-binary-with-node-js


