New to Rust? Grab our free Rust for Beginners eBook Get it free →
Dockerize NodeJS Application: A Step-by-Step Guide

Your `/health` route returns `{“status”:”ok”}` locally, but the same request can get `ECONNREFUSED` when the app runs in a container. I like that the listener address can explain the difference even when the route code stays unchanged.
You can package that handler with Node and run it as a service Docker can expose to the host. The image is the built package, while its container is the running process that serves requests.
What Docker Adds to a Node.js App
A Docker image is a built package of application files and a runtime. A container is the running process created from that image, with its own filesystem and network settings.
Your Dockerfile tells the builder which files to copy and how to start Node.js. The Docker Node.js guide follows this path before adding services such as a database.
| Item | What it does |
|---|---|
| Project files | Source files and configuration selected for the build. |
| Dockerfile | Instructions for assembling the image and starting the app. |
| Image | Built filesystem with the Node.js runtime and app files. |
| Container | Running process created from the image. |
| Published port | Host port forwarded to the app’s listening port. |
The image contains only what the build instructions add. It does not include every file from your computer unless the build context and Dockerfile send those files to it.
What You Need Before Building
Use Docker Engine with its command-line client, plus a Node.js project that starts locally. This example serves a health route on port 3000.
- Install Docker Engine and make sure your account can run Docker commands. Docker’s Linux post-install notes explain the available access options.
- Use Node.js and npm for the local test. The Node.js release page lists Node 24 as LTS.
- Keep the project manifest and source file in one directory so the build can copy them.
- Choose an unused host port. The example maps host port 3000 to container port 3000.
Dockerize and Run the Node.js App
The same small service carries through local testing and the Docker image. I kept it on Node.js’s built-in HTTP module, so the sample needs no third-party package.
Step 1: Create a Node.js service
The service returns JSON from the health route and a JSON 404 for other requests, while its listener accepts traffic on every container interface.
import { createServer as createHttpServer } from 'node:http'
import { resolve } from 'node:path'
import { pathToFileURL } from 'node:url'

export function createServer() {
  return createHttpServer((request, response) => {
    if (request.method === 'GET' && request.url === '/health') {
      response.writeHead(200, { 'content-type': 'application/json' })
      response.end(JSON.stringify({ status: 'ok' }))
      return
    }

    response.writeHead(404, { 'content-type': 'application/json' })
    response.end(JSON.stringify({ error: 'Not found' }))
  })
}

if (process.argv[1] && import.meta.url === pathToFileURL(resolve(process.argv[1])).href) {
  const port = Number(process.env.PORT ?? 3000)
  const server = createServer()
  server.listen(port, '0.0.0.0', () => {
    console.log(`Listening on 0.0.0.0:${port}`)
  })
}
Tests start the exported server on a temporary port. The direct command listens on port 3000 by default and binds to 0.0.0.0 so the container network can reach it.
Add npm scripts for starting the service and running Node’s built-in test runner, then use the test file below to cover the health route and a JSON 404.
{
  "name": "node-docker-example",
  "private": true,
  "type": "module",
  "scripts": {
    "start": "node server.js",
    "test": "node --test --test-reporter=tap"
  }
}
import test from 'node:test'
import assert from 'node:assert/strict'
import { createServer } from '../server.js'

async function startServer(t) {
  const server = createServer()
  await new Promise((resolve, reject) => {
    server.once('error', reject)
    server.listen(0, '127.0.0.1', resolve)
  })
  t.after(() => new Promise((resolve) => server.close(resolve)))
  return `http://127.0.0.1:${server.address().port}`
}

test('GET /health returns a healthy JSON response', async (t) => {
  const baseUrl = await startServer(t)
  const response = await fetch(`${baseUrl}/health`)
  assert.equal(response.status, 200)
  assert.deepEqual(await response.json(), { status: 'ok' })
})

test('unknown routes return a JSON 404', async (t) => {
  const baseUrl = await startServer(t)
  const response = await fetch(`${baseUrl}/missing`)
  assert.equal(response.status, 404)
  assert.deepEqual(await response.json(), { error: 'Not found' })
})
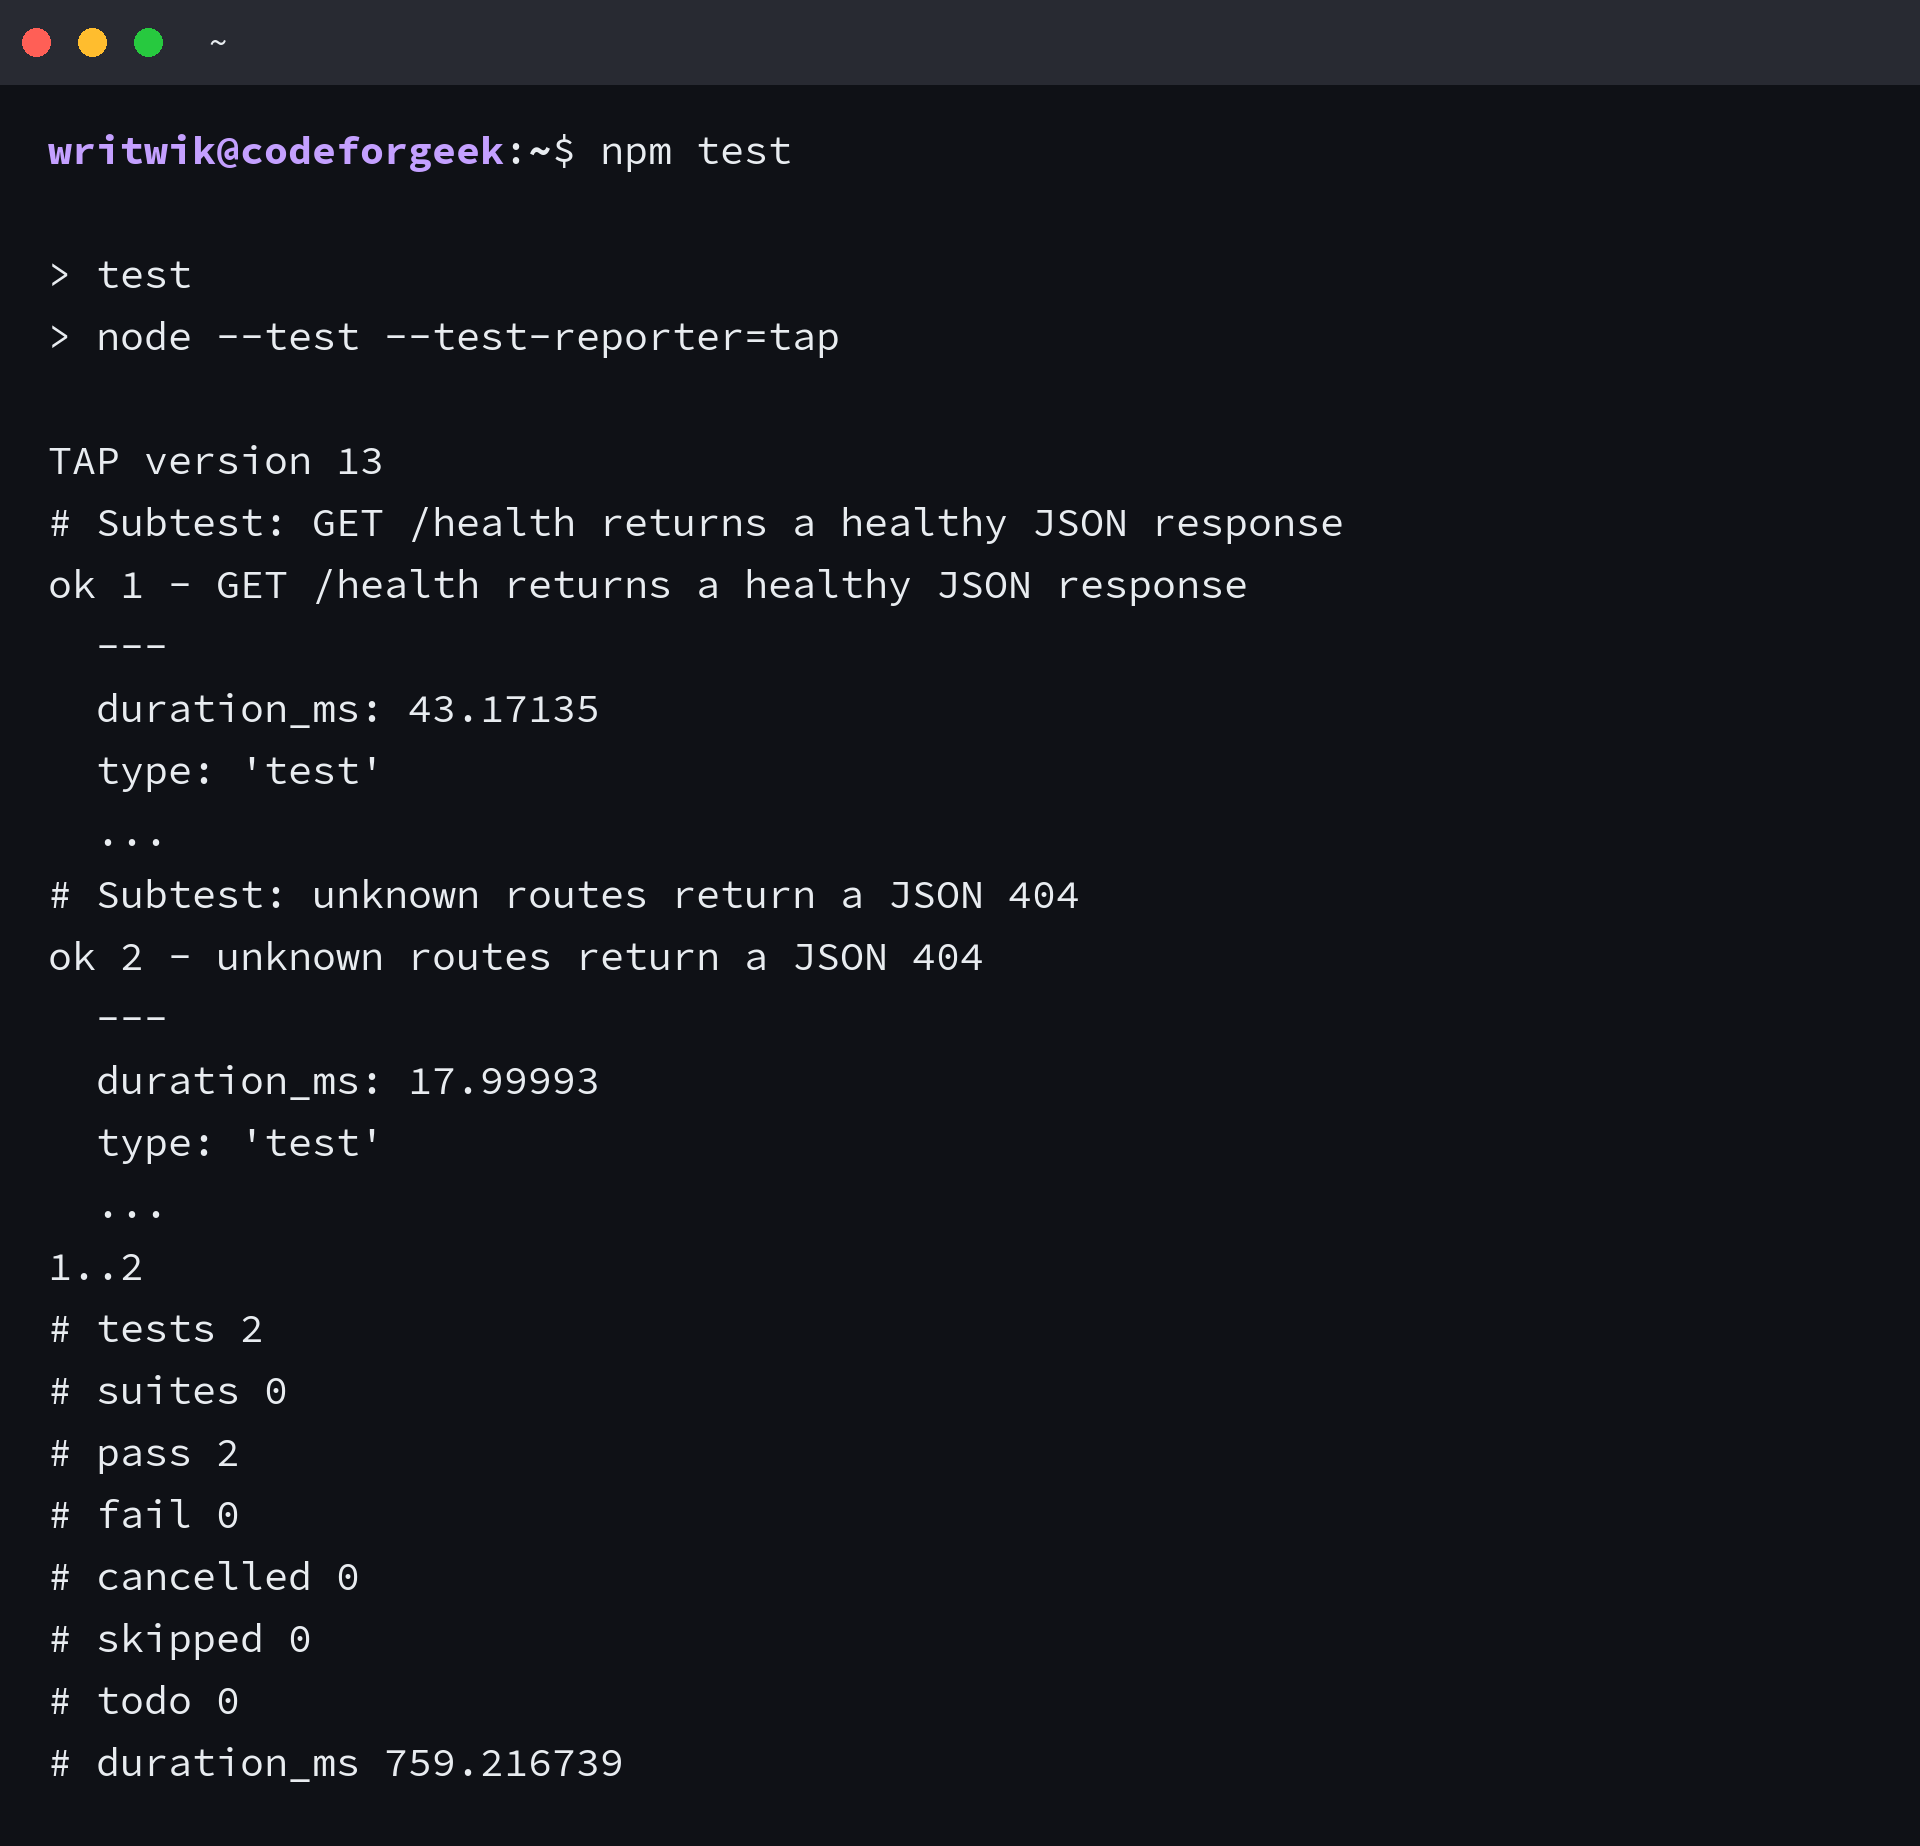
Run the tests before building. Each test owns its server and closes it afterward, so the health check does not need a fixed port or a running background process.
npm test
Step 2: Add the build files
A build context is the set of files Docker can read while building an image. The .dockerignore file removes local-only files from that context.
node_modules
.git
.env
npm-debug.log
Host node_modules can contain platform-specific files and should not replace files installed for the container. Keep .env out of the image too, then provide secrets through your runtime configuration instead.
The official Node.js image includes the Node 24 image tag and a non-root node user. The Dockerfile copies only this sample’s manifest and server file, then runs the service as that user.
FROM node:24
WORKDIR /app
COPY --chown=node:node package.json server.js ./
USER node
EXPOSE 3000
CMD ["node", "server.js"]
The Dockerfile reference defines WORKDIR as the directory for later instructions and COPY as the file transfer step. USER selects the runtime account, while EXPOSE documents a listening port without publishing it to your laptop.
This sample has no external npm dependencies, so it does not install packages during the image build. For an existing project with dependencies, copy its manifest and lockfile into the image and install those packages before copying the remaining source.
Step 3: Check and build the image
Docker build checks validate Dockerfile instructions without producing an image. The ordinary build command assembles the tagged image.
Build checks require Dockerfile syntax 1.8 and Docker Buildx 0.15 or later. Skip this optional check if your builder lacks those requirements, then run the full build.
sudo docker build --check . --progress=quiet
sudo docker build -t node-docker-example .

The screenshot shows a clean Dockerfile check, not an image build or a dependency download.
Step 4: Run the container and check its port
The docker run reference uses the first port for the host and the second for the container, so publish the service when you start it.
sudo docker run --rm -d --name node-docker-example -p 3000:3000 node-docker-example
Open the health endpoint. A response with status 200 and the JSON body below means the request reached the handler.
{"status":"ok"}
The first port belongs to your host, while the second is where Node listens inside the container. Since this container uses –rm, docker stop removes it when you finish.
sudo docker stop node-docker-example
Fix Missing Modules and Refused Connections
“Cannot find module” means Node.js could not resolve an import from the running project. “Connection Refused” means the client could not open a connection to the service.
| Symptom | Check | Correction |
|---|---|---|
| Cannot find module | Does the image contain the package manifest and its dependencies? | Install dependencies during the image build. If a bind mount covers the app directory, it can hide the image’s files and node_modules. |
| Connection refused | Does the server listen on 0.0.0.0 and the same container port in the mapping? | Bind Node to 0.0.0.0, then publish the container port with -p HOST:CONTAINER. |
| Host port is already in use | Is another process using the first port in the mapping? | Choose another host port while leaving the container port unchanged, such as 8080:3000. |
The build context and the running container are separate checks. A file can be absent from the image because it was ignored or never copied, while a bind mount can hide a file that the image contains.
The test screenshot reports a passing health assertion, but a refused connection happens before HTTP. Run this probe against a local port with no listener.
node -e "fetch('http://127.0.0.1:39999').catch(error => console.log(error.cause?.code ?? error.name))"

EXPOSE documents the app’s listening port, while the run-time mapping forwards a host port to it.
A server bound to 127.0.0.1 inside the container cannot accept traffic sent to its container interface. Bind it to 0.0.0.0 instead.
Keep the Image and Container in Sync
A running container uses the files captured when its image was built. After you change the source, build a new image before starting another container.
To keep the app’s internal port at 3000 while testing a different host port, start the rebuilt image with this mapping. Then visit localhost on port 8080.
sudo docker run --rm -p 8080:3000 node-docker-example
Press Ctrl+C to stop the foreground container. The –rm flag removes it after exit.
Dockerizing a Node.js App FAQ
The image tag selects the Node runtime inside the container, while your host Node installation runs local development and tests.
Does the Node.js version on my computer control the container?
No. The Dockerfile base image selects the Node.js runtime inside the container, so the host installation and container runtime can use different versions.
Do I need Docker Compose for one Node.js service?
No. A Dockerfile and docker run are enough for this single service. Use Docker Compose when you need to configure or start multiple services together.