New to Rust? Grab our free Rust for Beginners eBook Get it free →
Login and Registration System Using Node MongoDB and Redis

Login and Registration Systems are the basic components and as a developer, you have to implement such systems for the client projects, open-source projects, or a college project.
In this tutorial, we are going to learn how to build a simple and working login and registration system. We are going to use the following technologies.
- Node – To build a Service
- MongoDB – To store users
- Redis – to handle session
- Bootstrap and jQuery – for a simple front-end
You need the following software installed in your system before proceeding ahead.
- Node v11.15.0 or higher/li>
- MongoDB v4.0.3 or higher
- Redis v3.0.7 or higher
Once you have installed it, we can proceed ahead.
What we are going to build?
We are going to build a simple user login and registration system using Node and MongoDB. Check out the final result.
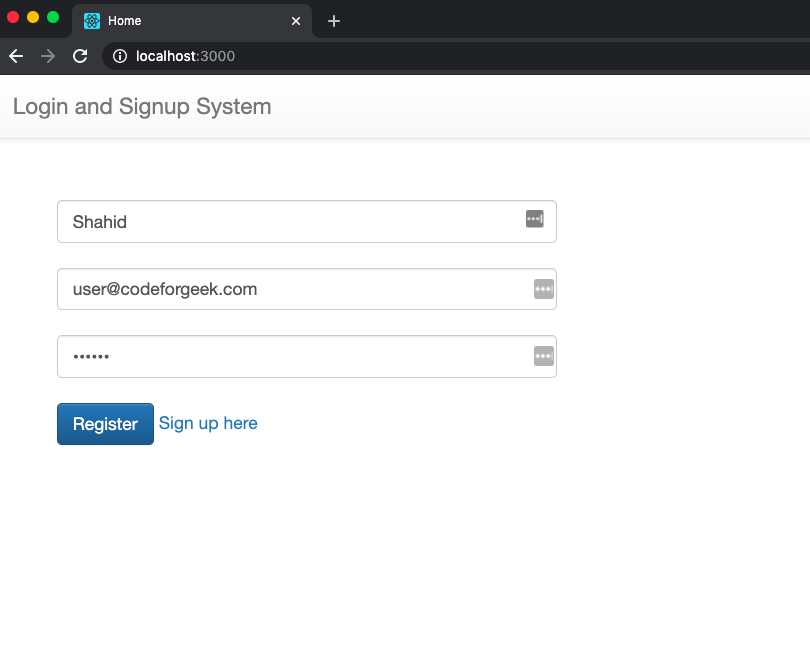
Sign up page
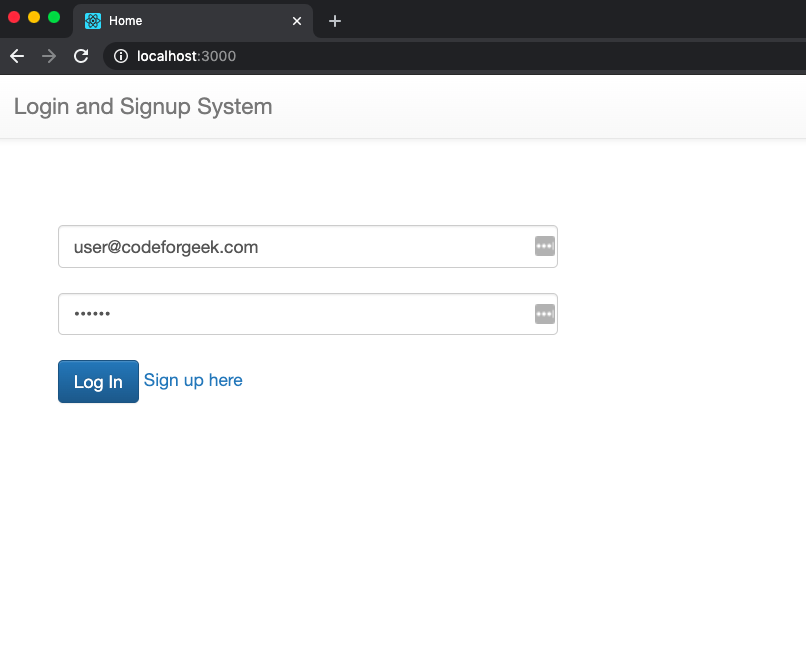
Login page
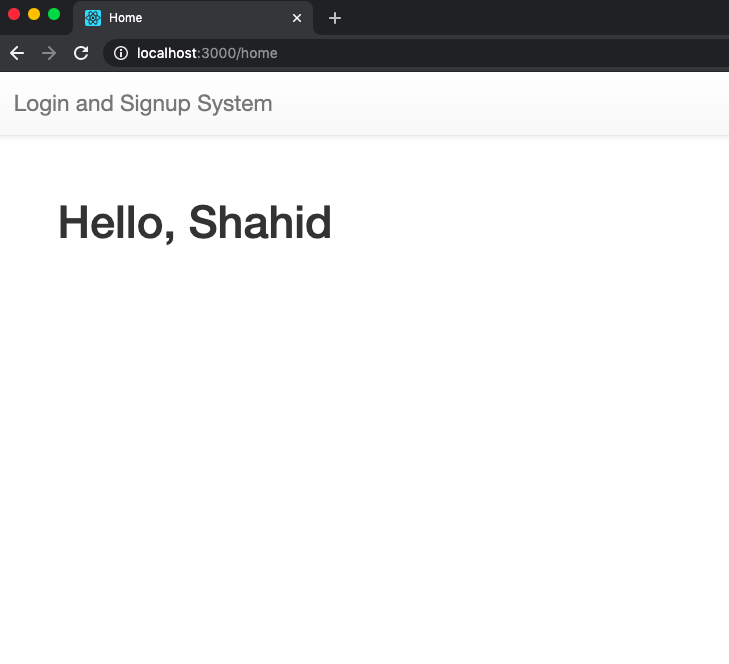
User profile page
I recommend you to clone the repository and refer the code along with the tutorial.
git clone https://github.com/codeforgeek/login-signup-system-mongodb
Let’s begin.
MongoDB and Redis
After installing the MongoDB and Redis, you need to run the database server programs.
To run the MongoDB server program, run the following command.
mongod --dbpath=
To run the Redis server program, run the following command.
redis-server
Let’s proceed ahead and create our service using Node.
Building User Login and Registration System using Node
Create a new Node project using the following command.
npm init --y
Install required dependencies using the following command.
npm install --save express express-session redis connect-redis nconf mongoose body-parser chalk ejs @hapi/joi
Create a new file and name it config.json. We will store the application configuration in this file.
config.json
{

  "mongodbURL": "mongodb://localhost:27017/userDemo",

  "redisHost": "localhost",

  "redisPort": 6379,

  "sessionSecret": "some-secret-hash",

  "port": 3000,

  "env": "development"

}
Next, we will create the entry file i.e app.js.
app.js
const express = require("express");

const session = require("express-session");

const redis = require("redis");

const redisStore = require("connect-redis")(session);

const nconf = require("nconf");

const bodyParser = require("body-parser");

const chalk = require("chalk");

const path = require("path");

const app = express();
// load config file
nconf
.argv()
.env()
.file({
file: __dirname + "/config.json",
});
// connect to redis session store
const redisSessionStore = redis.createClient(
nconf.get("redisPort"),
nconf.get("redisHost"),
{
db: 0,
}
);
redisSessionStore.on("connect", () => {
console.log(
`${chalk.green("✓")} Connected to ${chalk.green("Redis")} Session Store`
);
});
app.use(bodyParser.json());
app.use(bodyParser.urlencoded({ extended: false }));
// session store
app.use(
session({
secret: nconf.get("sessionSecret"),
cookie: {
maxAge: 1000 * 60 * 60 * 24 * 7, // 1 week
},
store: new redisStore({ client: redisSessionStore }),
resave: false,
saveUninitialized: false,
})
);
// set static path
app.set("views", path.join(__dirname, "/views"));
app.engine("html", require("ejs").renderFile);
// routes
app.use("/", require("./routes/static"));
app.use("/users", require("./routes/users"));
// start the app
app.listen(nconf.get("port") || 3000);
console.log("App Started...");
First, we are loading our config.json file. We are going to use the configuration variable throughout the application.
Next, we are making a connection to Redis, and later passing the connection to express session.
In a production environment, you should always use an external session store such as Redis.
Let’s go and create routers of our application, create a new folder and name it routes. Create two new files in it and name it static.js and users.js.
Here is the code of each router file.
static.js
const express = require("express");

const app = express();

const router = express.Router();
// static routes
router.get("/", (req, res) => {
if (req.session.user) {
return res.redirect("/home");
}
res.render("index.html");
});
router.get("/home", function (req, res) {
if (req.session.user) {
return res.render("home.html", { name: req.session.user.name });
}
res.redirect("/");
});
module.exports = router;
static.js
const express = require("express");

const router = express.Router();

const joi = require("@hapi/joi");

const models = require("../models/users");
router.post("/login", async (req, res) => {
try {
const schema = joi.object().keys({
email: joi.string().email().required(),
password: joi.string().min(6).max(20).required(),
});
const result = schema.validate(req.body);
if (result.error) {
throw result.error.details[0].message;
}
let checkUserLogin = await models.verifyUser(result.value);
if (checkUserLogin.error) {
throw checkUserLogin.message;
}
// set session for the logged in user
req.session.user = {
name: checkUserLogin.data.name,
email: checkUserLogin.data.email,
};
res.json(checkUserLogin);
} catch (e) {
res.json({ error: true, message: e });
}
});
router.post("/signup", async (req, res) => {
try {
const schema = joi.object().keys({
name: joi.string().min(3).max(45).required(),
email: joi.string().email().required(),
password: joi.string().min(6).max(20).required(),
});
const result = schema.validate(req.body);
if (result.error) {
throw result.error.details[0].message;
}
let addUserResponse = await models.addUser(result.value);
res.json(addUserResponse);
} catch (e) {
res.json({ error: true, message: e });
}
});
router.get("/logout", (req, res) => {
if (req.session.user) {
req.session.destroy();
}
res.redirect("/");
});
module.exports = router;
We are using the joi module to validate the incoming data from the front-end. If the incoming data is properly validated, we are then calling our database function.
Let’s create our database functions. Create a new folder and name it models. Create a new file and name it connection.js.
connection.js
const mongoose = require("mongoose");

const nconf = require("nconf");

const chalk = require("chalk");
mongoose.connect(nconf.get("mongodbURL"), {
useNewUrlParser: true,
useUnifiedTopology: true,
});
// validate MongoDB connection
const db = mongoose.connection;
// events
db.on("error", () => {
console.log("MongoDB connection error");
process.exit(0);
});
db.once("open", function (callback) {
console.log(
`${chalk.green("✓")} Connected to ${chalk.green("MongoDB")} Store`
);
});
module.exports = {
mongoConnection: db,
};
In the code shown above, we are creating a connection to the MongoDB database specified in the configuration file. After the successful connection, we are exporting the connection variable to be used for querying.
Create a new file and name it users.js in the models directory.
users.js
const bcrypt = require("bcrypt");

const { mongoConnection } = require("./connection");
/**
* @addUser
*/
function addUser(userData) {
return new Promise(async (resolve, reject) => {
try {
// check if user does not exists
let checkUserData = await checkIfUserExists({ email: userData.email });
if (checkUserData.data && checkUserData.data.length > 0) {
// user already exists, send response
return resolve({
error: true,
message: "User already exists with this credentials. Please login",
data: [],
});
}
// generate password hash
let passwordHash = await bcrypt.hash(userData.password, 15);
userData.password = passwordHash;
// add new user
mongoConnection
.collection("users")
.insertOne(userData, async (err, results) => {
if (err) {
console.log(err);
throw new Error(err);
}
//return data
resolve({
error: false,
data: results.ops[0],
});
});
} catch (e) {
reject(e);
}
});
}
/**
* @verifyUser
* @param {*} userData
*/
function verifyUser(userData) {
return new Promise(async (resolve, reject) => {
try {
let userDatafromDb = await checkIfUserExists({ email: userData.email });
if (userDatafromDb.data && userDatafromDb.data.length > 0) {
// user already exists, verify the password
let passwordVerification = await bcrypt.compare(
userData.password,
userDatafromDb.data[0].password
);
if (!passwordVerification) {
// password mismatch
return resolve({
error: true,
message: "Invalid email or password",
data: [],
});
}
// password verified
return resolve({ error: false, data: userDatafromDb.data[0] });
} else {
return resolve({
error: true,
message:
"There is no user exists with this credentials. Please create a new account.",
data: [],
});
}
} catch (e) {
console.log(e);
reject(e);
}
});
}
/**
* @checkIfUserExists
*/
function checkIfUserExists(userData) {
return new Promise((resolve, reject) => {
try {
// check if user exists
mongoConnection
.collection("users")
.find({ email: userData.email })
.toArray((err, results) => {
if (err) {
console.log(err);
throw new Error(err);
}
resolve({ error: false, data: results });
});
} catch (e) {
reject(e);
}
});
}
module.exports = {
addUser: addUser,
verifyUser: verifyUser,
};
In the code shown above, we are adding a new user to our system and verifying it using the email and password combination.
We are using the bcrypt module to generate a password hash and store it in the database and later verify it during the login process.
Next, we need to create a simple user interface to validate our code. I have created a very simple user interface. I am not going to show the code here as it’s very long HTML code, if you want, you can view the code here.
Running our program
Run the program using the following command.
node app.js
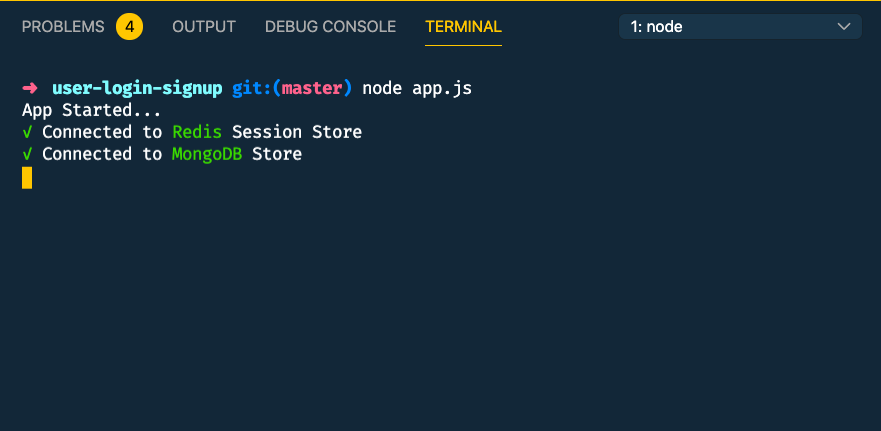
Navigate your browser to localhost:3000 to view the application.
Create a new user.
Login using the credentials.
Check the entry in the database.

User profile page.
What’s next?
We have to build a simple user login and registration system using Node, MongoDB, and Redis. In a production scenario, we may need to develop the user verification feature, forgot password feature, account deletion feature, etc. These features can be built on top of the codebase we have developed together.
Further Study
Building Email Verification System Using Node and Redis
Node js Tutorial for Beginners Step by Step With Examples
Caching a MongoDB Database with Redis