New to Rust? Grab our free Rust for Beginners eBook Get it free →
How to Record Screen in Ubuntu With Kazam


Super+Ctrl+F is Kazam’s shortcut for finishing a recording. I’m glad Kazam separates Screenshot mode from the local video capture you came for.
In Kazam, choose Screencast for a local video and decide what should appear in frame. After capture, save the clip somewhere you can find and play it back.
Kazam on Ubuntu has two install paths
Ubuntu’s archive package is Kazam’s original screencaster, while Kazam2 is a separate project with its own install path and documented Wayland capture support, so I kept their instructions separate.
| Package | What the source lists | Use this page for |
|---|---|---|
| Ubuntu archive Kazam | Version 1.4.5-6 on Ubuntu 24.04 and 1.4.5-6build1 on Ubuntu 26.04 | The apt install and classic interface shown below |
| Kazam2 | A separate project whose repository tags include 2.0.0 | Its own documentation, dependencies, and Wayland instructions |
The screenshots below show Kazam’s classic interface.
Check the desktop session and audio inputs
Open Kazam inside the Ubuntu desktop session that should appear in the recording, and make sure you can install applications from APT. Choose where the finished video should go.
- Choose whether you want one screen, every connected screen, one window, or a selected area.
- Decide whether the recording needs microphone audio or sound from the desktop.
- Use the Ubuntu archive instructions for Kazam. The Kazam2 project documents a different Wayland setup.
Install the Ubuntu package
Install Kazam from the Ubuntu repositories rather than adding a separate PPA. Ubuntu lists it in Universe, and APT resolves its required libraries alongside the package.
sudo apt install kazam
After APT finishes, open Kazam from the applications menu and check that it launches in the desktop session you intend to record. APT installs the version in your Ubuntu release.
Record and save a screencast
Choose Screencast for a local video. Screenshot captures a still image, while Broadcast streams live.
1. Choose a target and inputs
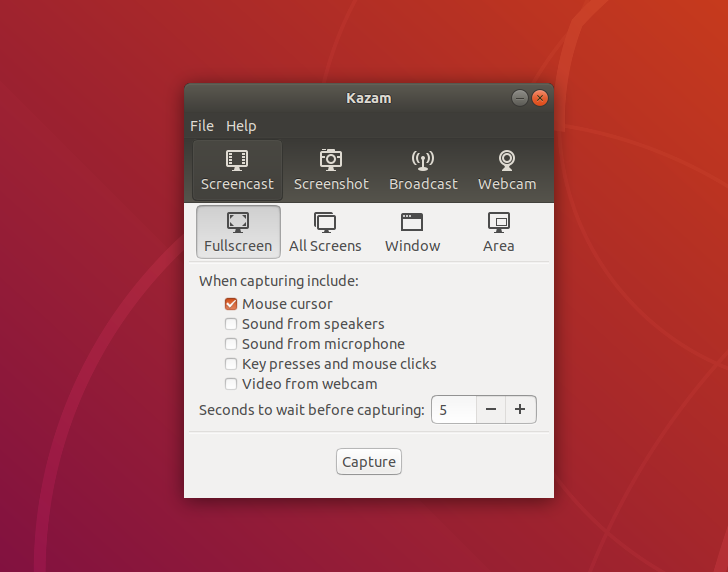
Select a target before capture starts. Use a smaller target for one app or part of the desktop, and enable only the audio or camera sources you need.
| Capture target | What it records |
|---|---|
| Fullscreen | One display |
| All Screens | Every connected display |
| Window | One application |
| Area | A selected rectangle |
2. Start the countdown
With the target and inputs chosen, press Capture to start Kazam’s countdown before the screen is recorded. Use the delay to move the pointer.

3. Finish and save the recording
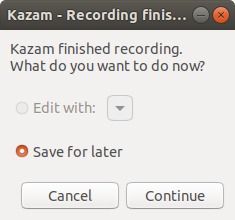
Use Kazam’s indicator menu or Super+Ctrl+F to finish the recording. If automatic saving is off, choose Save for later and Continue, then select the destination folder and file name.
Set audio, file saving, webcam, and broadcast options
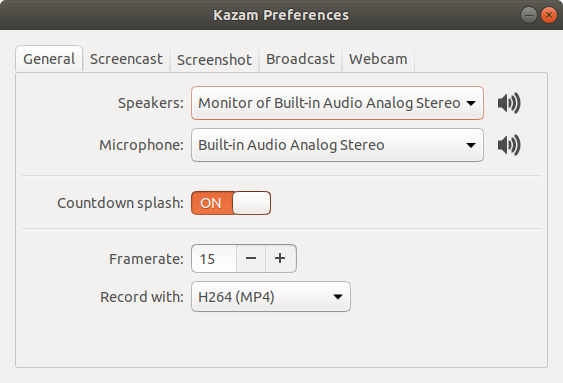
Open File and Preferences before recording to choose audio and video options. Speaker and microphone inputs are separate, and the Ubuntu Kazam manpage says multiple audio streams can be recorded at once.
Use the Screencast tab to set a folder and filename prefix. Kazam opens the save dialog when automatic saving is off.
Enable automatic saving to skip that dialog. Kazam 1.4.5 defaults to Videos when available, then uses Documents or the home folder.
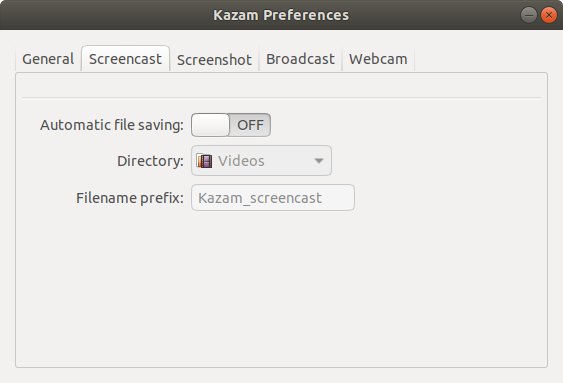
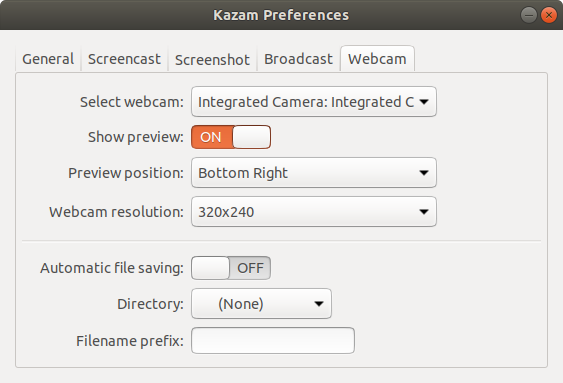
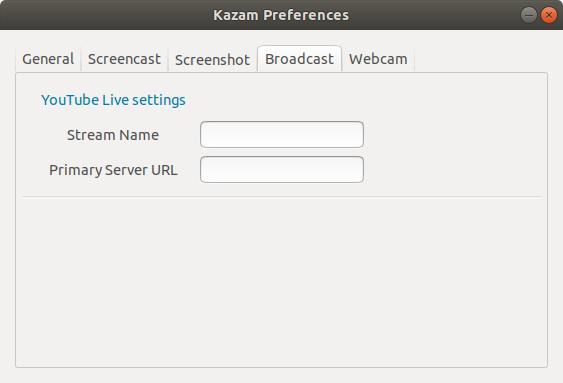
Preferences also separate two optional jobs from a local recording: use the Webcam tab to position a camera preview, or use Broadcast to configure a live stream. The Broadcast panel does not verify a connection.
Use Kazam’s recording shortcuts
Kazam’s shortcut hints list the keys for recording and pausing. Desktop environments can intercept these global combinations.
- Start recording: Super+Ctrl+R
- Pause or resume: Super+Ctrl+P
- Finish recording: Super+Ctrl+F
- Show or hide Kazam: Super+Ctrl+W
- Quit Kazam: Super+Ctrl+Q
Super is usually the key with the Windows logo. If the desktop intercepts a shortcut, use Kazam’s indicator menu to finish or pause the recording.
Fix a missing file or an unresponsive finish action
Kazam 1.4.5 starts with automatic video saving off, so Finish normally opens a dialog where you choose whether and where to save the clip. With automatic saving on, check the configured folder and filename prefix.
| What you see | What to check |
|---|---|
| No prompt after Finish | Check whether automatic file saving is enabled, then look in the configured destination folder. |
| The recording is not in Videos | Open File → Preferences → Screencast and check the directory and filename prefix. |
| A shortcut does nothing | If another desktop shortcut intercepts it, use Kazam’s indicator menu. |
| The capture is blank on Wayland | Check whether the installed app is Ubuntu’s archive Kazam or the separate Kazam2 project. Kazam2 documents a PipeWire plugin and screen-capture portal. The Ubuntu archive manpage does not document that route. |
Kazam2’s project instructions describe the Wayland setup for that project. Do not add its dependencies to the Ubuntu archive package by guesswork.
Save the clip somewhere you can check
The countdown only ends capture. Open and play the saved file before moving on.
apt-cache policy kazam
Run this package check when Kazam’s version or controls do not match the screenshots. Follow the instructions for the version APT lists.
Kazam recording questions
The save dialog and shortcuts cover the usual recording path. These answers clarify the difference between the Ubuntu package and the separate Kazam2 project.
Which codecs can Kazam use?
Ubuntu’s Kazam package lists built-in H264 and VP8 codec support. Check the encoder selected in General preferences before recording.
Can Kazam record speaker and microphone audio together?
Yes. Ubuntu’s Kazam manual says it can record multiple audio streams at once. Select speaker output and microphone input in General preferences.
Is Kazam2 the same package as Kazam in Ubuntu?
No. Ubuntu’s archive package and the separate Kazam2 project have different versions and installation instructions. Use the documentation for the project you install.