New to Rust? Grab our free Rust for Beginners eBook Get it free →
Writing Text on Images Using OpenCV putText()
OpenCV is an excellent library in Python for viewing and editing pictures. Did you know that we can also add text to our images using the putText() method in this great library? Well, there’s no need to worry, as we bring you this article where we discuss in detail this function, the definitions of the parameters it accepts, and also show steps to add text to an image using the given function. So let’s begin.
Introduction to putText() Method
The cv2.putText() method is a part of the OpenCV library, which is used for working with images and videos in Python. This method is specifically used for adding text to images.
Imagine you have a picture, and you want to write some words on it, like a caption. The cv2.putText() method helps you do that in Python code. You tell it what text you want to write, where you want to write it on the image, what font size and color you want to use, and some other details. Then, when you run your code, OpenCV will add that text to your image.
Syntax
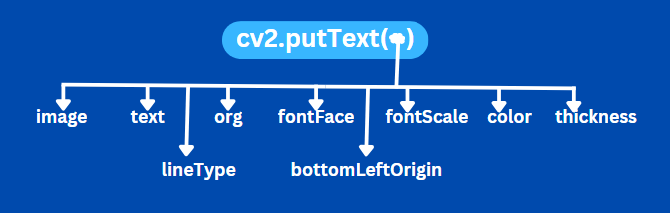
The syntax for the cv2.putText() method in OpenCV (cv2) is as follows:
Parameters
The given method accepts many parameters for the quality and variety of text representation:
cv2.putText(image, text, org, fontFace, fontScale, color[, thickness[, lineType[, bottomLeftOrigin]]])
Now, let’s understand what each parameter means:
- image: This is the picture where you want to add text.
- text: This is the actual words you want to write on the image.
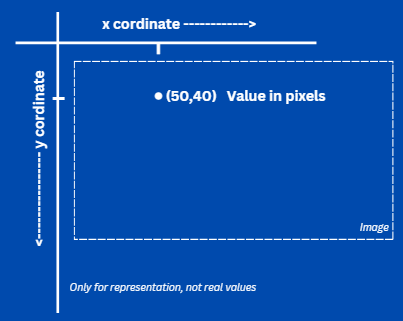
- org: These are the coordinates (x, y) of where the text will start. For Example, (50, 40) means the place where the text will go. The first number, 50, tells how far the text is from the left side of the picture (horizontal position). The second number, 40, tells how far the text is from the top of the picture (vertical position). These numbers are counted in pixels, which are tiny dots forming the picture.
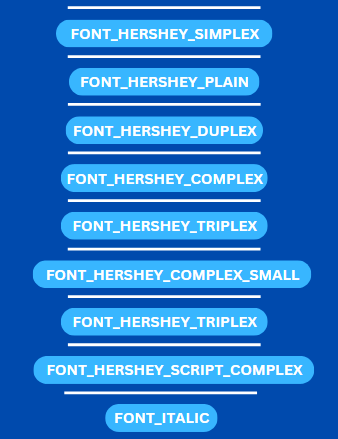
- fontFace: This is the style of the text. You can choose different styles like plain, bold, etc. Only a subset of Hershey fonts https://en.wikipedia.org/wiki/Hershey_fonts are supported. Some of them are:
- fontScale: This is how big or small you want the text to be. A bigger number means bigger text.
- color: This is the color of the text. You choose it using three numbers: one for red, one for green, and one for blue. But remember that it takes color parameters in the BGR (Blue, Green, Red) format.
- thickness (optional): This is how thick you want the lines of the text to be. By default, it’s 1.
- lineType (optional): This tells how the lines of the text should look. By default, it’s set to a normal line.

- bottomLeftOrigin (optional): If you set this to True, it means you’re using a different starting point for the coordinates. By default, it’s False.
Adding Text on Image Using OpenCV putText() Method
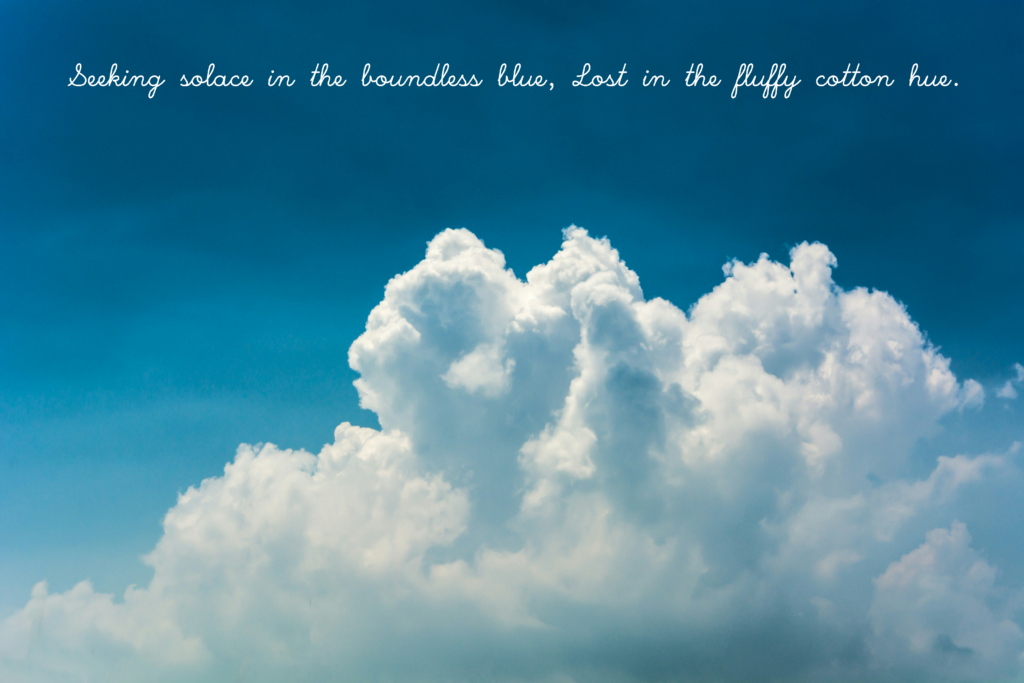
Now that we know about the method to add text into an image, let’s see its implementation with code using an example. Suppose we are given an image like:

Who doesn’t like blue skies with those soft white clouds? This image races my heart, and I want to engrave some message to it, justifying what I feel. So we plan to add a quote related to sky and clouds to make it more aesthetic, like: ‘Seeking solace in the boundless blue, Lost in the fluffy cotton hue.‘ You may go more creative than I do, but let’s try to add this text to the given image.
Step-by-Step Procedure
Let’s see the stepwise method to achieve our aim,
Step 1: Firstly, we will import OpenCV into our environment and then read the example image using the imread() method.
import cv2

image = cv2.imread('sky.jpg')
Step 2: Next, we will define all the parameters that we discussed earlier. We will store the quote in the text variable, specify the coordinates in org, set the font style in font, adjust the size with font_scale, define the color as white in BGR format, and set the thickness to 8.
text = "Seeking solace in the boundless blue, Lost in the fluffy cotton hue."
org = (400, 500)
font = cv2.FONT_HERSHEY_SCRIPT_SIMPLEX
font_scale = 6
color = (255, 255, 255)
thickness = 8
Step 3: Then we will use the cv2.putText method and pass all the parameters into it.
cv2.putText(image, text,org, font, font_scale, color, thickness)
Step 4: Now we will save the new image as ‘Quote.png‘ using the imwrite() method and print a success message.
cv2.imwrite('Quote.png', image)

print("Image saved as 'Quote.png'")
The code writes a large white text on the image ‘sky.jpg‘ positioned at coordinates (400, 500) with the provided text, font, scale, color, and thickness, saving the modified image as ‘Quote.png‘
But wait, this image looks a little incomplete. Let’s add our signature to it so that it mentions the author.
Step 5: Let’s set the parameters for the signature text.
text2 = "-By Snigdha"
org2 = (400, 3700)
color2 = (112,90,9)
Step 6: Now we’ll pass these parameters to a different putText method.
cv2.putText(image, text2,org2, font, font_scale, color2, thickness, cv2.LINE_8,True)
Oops! On running this program, we get a strange inverted kind of text.
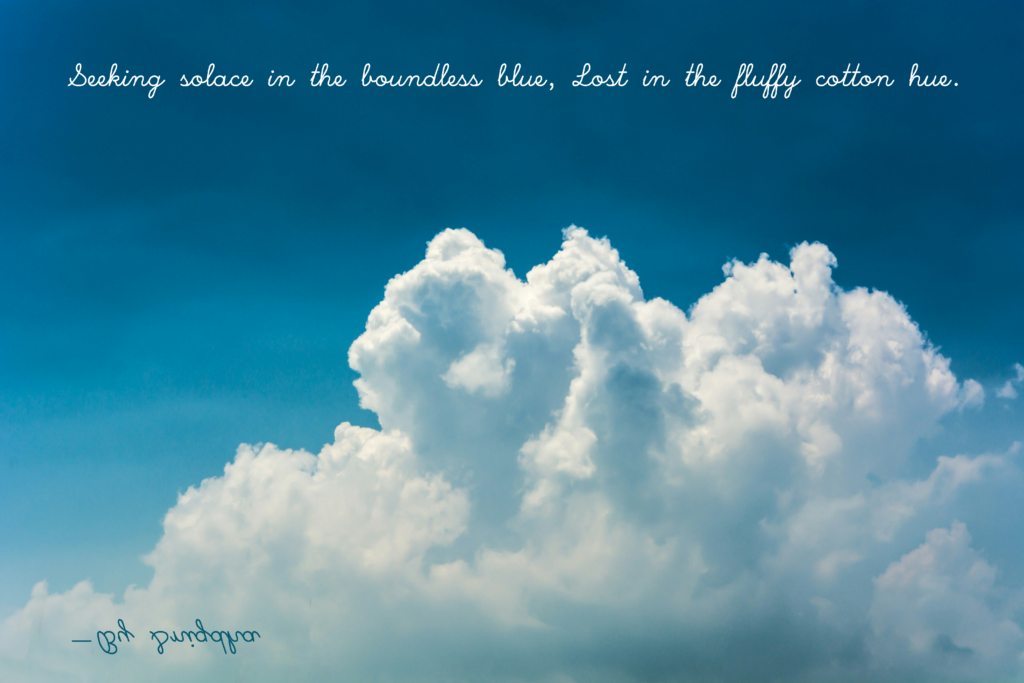
This is because of the ‘bottomLeftOrigin‘ parameter. If you look closely at the code, you will see that this parameter’s value is set to ‘True‘.

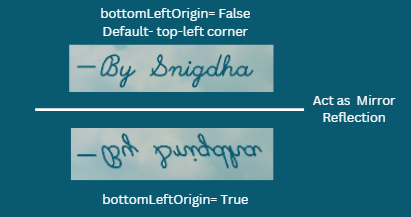
We can either set it to false or remove it to restore the default orientation, which is the top-left corner.
cv2.putText(image, text2,org2, font, font_scale, color2, thickness, cv2.LINE_8)
Complete Code
Here is the complete code to clarify your understanding further.
import cv2

image = cv2.imread('sky.jpg')
text = "Seeking solace in the boundless blue, Lost in the fluffy cotton hue."
text2 = "-By Snigdha"
org = (400, 500)
org2 = (400, 3700)
font = cv2.FONT_HERSHEY_SCRIPT_SIMPLEX
font_scale = 6
color = (255, 255, 255)
color2 = (112, 90, 9)
thickness = 8
cv2.putText(image, text, org, font, font_scale, color, thickness)
cv2.putText(image, text2, org2, font, font_scale, color2, thickness, cv2.LINE_8)
cv2.imwrite('Quote.png', image)
print("Image saved as 'Quote.png'")
Output
Here is a glimpse of our successfully created beautiful quote page.

Summary
Okay, now that we have reached the end of this article, we hope that your understanding has developed to such an extent that you can easily add fonts and text to any image using the putText() method in Python. With the given example and every little detail about the parameters, you are now ready to create your own amazing text-engraved images and quotes.
If you enjoy reading about Python libraries, consider learning about Streamlit in Python.
Reference