New to Rust? Grab our free Rust for Beginners eBook Get it free →
Create a User Management System in NodeJS

This article will teach you a step-by-step guide to creating a User Management System in NodeJS.
Introduction to User Management System
A User Management System can be used to manage users, these users can be employees, students, or any staff of any organization.
Features of a User Management System
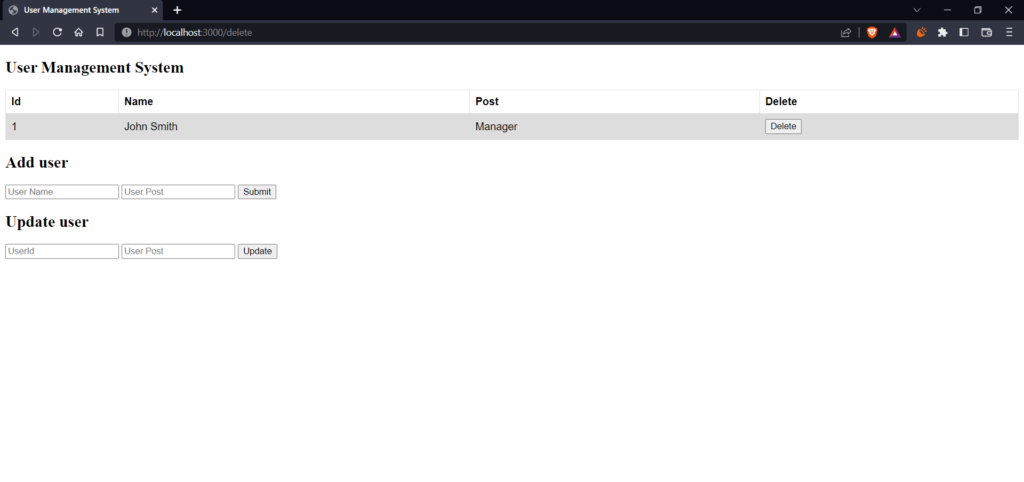
Following are the features of the User Management System
- Display Users
- Add Users
- Remove Users
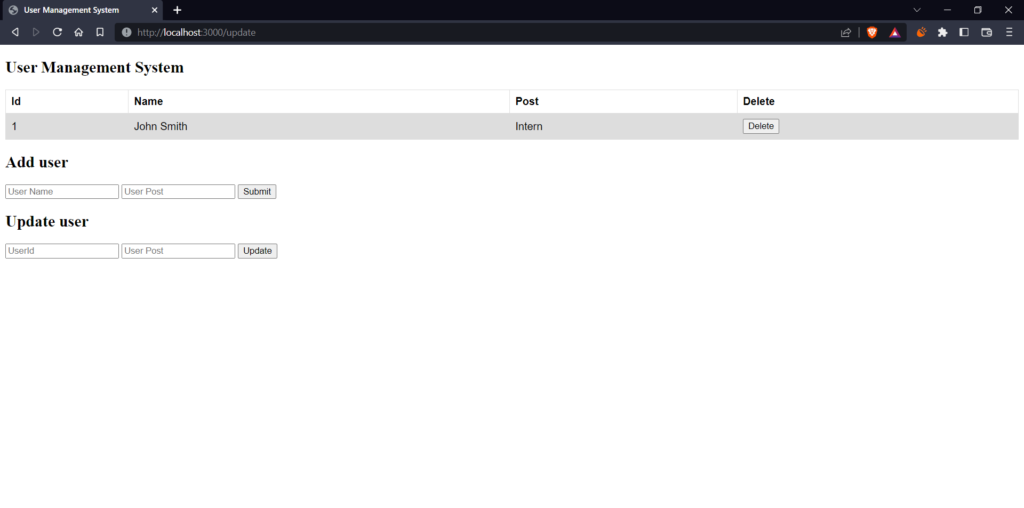
- Updates Roles Assign to Users
Creating a User Management System
Below is the step-by-step guide to creating a User Management System.
Project Structure
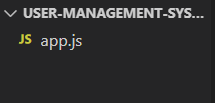
Let’s start with creating a project folder having a file “app.js” to write the NodeJS code for creating the application.
Project Setup
Initiate NPM: It is required to initiate NPM in order to install any NodeJS module. Locate the project folder in the terminal and execute the below command in the terminal to initiate NPM.
npm init -y
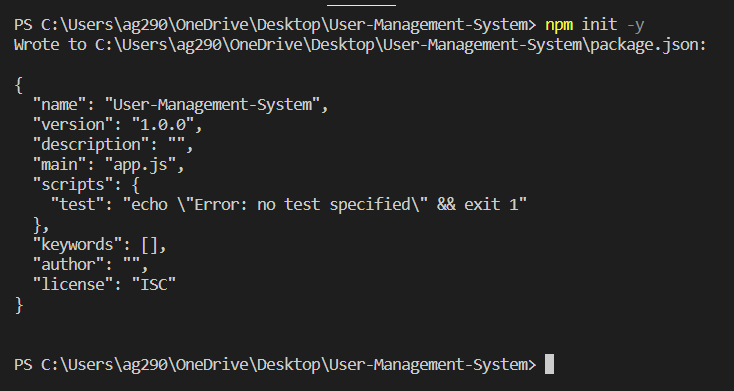
Install Modules: Install Express and EJS modules inside the project folder using the below command.
npm i express ejs

Import Express: Inside the “app.js:” file import the Express module and create an instance “app” using it.
const express = require("express");

const app = express();
Import EJS: Use EJS as middleware for the view engine.
app.set(“view engine”, “ejs”);
Now, it is required to create a folder with the name “views”, which contains the HTML file, the HTML files require to have the extension “.ejs” rather than “.html”.
Create User Array: Create an array containing information regarding different Users.
const users = [{
        userId: "1",
        userName: "John Smith",
        userPost: "Manager",
    },
    {
        userId: "2",
        userName: "Rack Wilson",
        userPost: "Assistant Manager",
    },
];
Getting Form Data: In the upcoming step, we have to let the admin enter data in a form to add users. Below is the code to use express middleware in order to handle the incoming form data.
app.use(express.json());
app.use(express.urlencoded({extended: true}));
Show Users
Use the get() method to create a home route, represent “/” which is the application’s default page, and then define the functionality to send the user array to an HTML file “index.ejs”.
app.get("/", function (req, res) {
    res.render("index", {
        data: users,
    });
});
Inside “index.ejs” fetch all the details. Since we are sending an array to this file that’s why it is required to loop through it to select every single object line by line and insert it as a row in the table.
<!DOCTYPE html>
<html>

<head>
    <title>User Management System</title>
</head>
<style>
    table {
        font-family: arial, sans-serif;
        border-collapse: collapse;
        width: 100%;
    }

    td,
    th {
        border: 1px solid #dddddd;
        text-align: left;
        padding: 8px;
    }

    tr:nth-child(even) {
        background-color: #dddddd;
    }
</style>

<body>
    <h2>User Management System</h2>
    <table>
        <tr>
          <th>Id</th>
          <th>Name</th>
          <th>Post</th>
        </tr>
        <% data.forEach(element => { %>
        <tr>
          <td><%= element.userId %></td>
          <td><%= element.userName %></td>
          <td><%= element.userPost %></td>
        </tr>
        <% }) %>
  </table>
</body>
</html>
Add Users
To add a user we have to set up a form inside “index.ejs” file.
<h2>Add user</h2>

<form action="/" method="post">
    <input type="text" placeholder="User Name"
        	name="userName">
    <input type="text" placeholder="User Post"
            name="userPost">
    <button type="submit">Submit</button>
</form>
To handle the form data we have to create a new route in which we fetch the form data and push it to the user array.
app.post("/", (req, res) => {
    const inputuserId = users.length + 1;
    const inputuserName = req.body.userName;
    const inputuserPost = req.body.userPost;

    users.push({
        userId: inputuserId,
        userName: inputuserName,
        userPost: inputuserPost
    });

    res.render("index", {
        data: users,
    });
});
Remove Users
Create a new form with a button to remove the users when clicked.
<table>
        <tr>
          <th>Id</th>
          <th>Name</th>
          <th>Post</th>
          <th>Delete</th>
        </tr>
        <% data.forEach(element => { %>
        <tr>
          <td><%= element.userId %></td>
          <td><%= element.userName %></td>
          <td><%= element.userPost %></td>
          <td>
                <form action="/delete" method="post">
                  <input type="text" style="display: none;"
                     name="userId"
                     value="<%= element.userId %>">
                  <button type="submit">Delete</button>
                </form>
          </td>
        </tr>
        <% }) %>
</table>
These forms get attached to every user and have the user id to know for which user the button gets clicked.
Handle the form to delete the user whose buttons get clicked.
app.post("/delete", (req, res) => {
    var requesteduserId = req.body.userId;
    var j = 0;
    users.forEach((user) => {
        j = j + 1;
        if (user.userId === requesteduserId) {
            users.splice(j - 1, 1);
        }
    });
    res.render("index", {
        data: users,
    });
});
Updates Roles
Again add a form and create an input to take the new role to assign to a user
<h2>Update user</h2>

<form action="/update" method="post">
     <input type="text" placeholder="UserId"
            name="userId">
     <input type="text" placeholder="User Post"
            name="userPost">
    <button type="submit">Update</button>
</form>
Handle the form to update the roles of users in a separate route.
app.post("/update", (req, res) => {
    const requesteduserId = req.body.userId;
    const inputuserPost = req.body.userPost;

    var j = 0;
    users.forEach((user) => {
        j = j + 1;
        if (user.userId == requesteduserId) {
            (user.userPost = inputuserPost)
        }
    });
    res.render("index", {
        data: users,
    });
});
Complete Code
app.js
const express = require("express");

const app = express();

app.set("view engine", "ejs");

const users = [{
        userId: "1",
        userName: "John Smith",
        userPost: "Manager",
    },
    {
        userId: "2",
        userName: "Rack Wilson",
        userPost: "Assistant Manager",
    },
];

app.use(express.json());
app.use(express.urlencoded({extended: true}));

app.get("/", function (req, res) {
    res.render("index", {
        data: users,
    });
});

app.post("/", (req, res) => {
    const inputuserId = users.length + 1;
    const inputuserName = req.body.userName;
    const inputuserPost = req.body.userPost;

    users.push({
        userId: inputuserId,
        userName: inputuserName,
        userPost: inputuserPost
    });

    res.render("index", {
        data: users,
    });
});

app.post("/delete", (req, res) => {
    var requesteduserId = req.body.userId;
    var j = 0;
    users.forEach((user) => {
        j = j + 1;
        if (user.userId === requesteduserId) {
            users.splice(j - 1, 1);
        }
    });
    res.render("index", {
        data: users,
    });
});

app.post("/update", (req, res) => {
    const requesteduserId = req.body.userId;
    const inputuserPost = req.body.userPost;

    var j = 0;
    users.forEach((user) => {
        j = j + 1;
        if (user.userId == requesteduserId) {
            (user.userPost = inputuserPost)
        }
    });
    res.render("index", {
        data: users,
    });
});

app.listen(3000, (req, res) => {
    console.log("App is running on port 3000");
});
index.ejs
<!DOCTYPE html>
<html>

<head>
    <title>User Management System</title>
</head>
<style>
    table {
        font-family: arial, sans-serif;
        border-collapse: collapse;
        width: 100%;
    }

    td,
    th {
        border: 1px solid #dddddd;
        text-align: left;
        padding: 8px;
    }

    tr:nth-child(even) {
        background-color: #dddddd;
    }
</style>

<body>
    <h2>User Management System</h2>
    <table>
        <tr>
          <th>Id</th>
          <th>Name</th>
          <th>Post</th>
          <th>Delete</th>
        </tr>
        <% data.forEach(element => { %>
        <tr>
          <td><%= element.userId %></td>
          <td><%= element.userName %></td>
          <td><%= element.userPost %></td>
          <td>
                <form action="/delete" method="post">
                  <input type="text" style="display: none;"
                     name="userId"
                     value="<%= element.userId %>">
                  <button type="submit">Delete</button>
                </form>
          </td>
        </tr>
        <% }) %>
  </table>

    <h2>Add user</h2>

    <form action="/" method="post">
        <input type="text" placeholder="User Name"
        	name="userName">
        <input type="text" placeholder="User Post"
            name="userPost">
        <button type="submit">Submit</button>
    </form>

    <h2>Update user</h2>

    <form action="/update" method="post">
        <input type="text" placeholder="UserId"
            name="userId">
        <input type="text" placeholder="User Post"
            name="userPost">
        <button type="submit">Update</button>
    </form>
</body>

</html>
Output
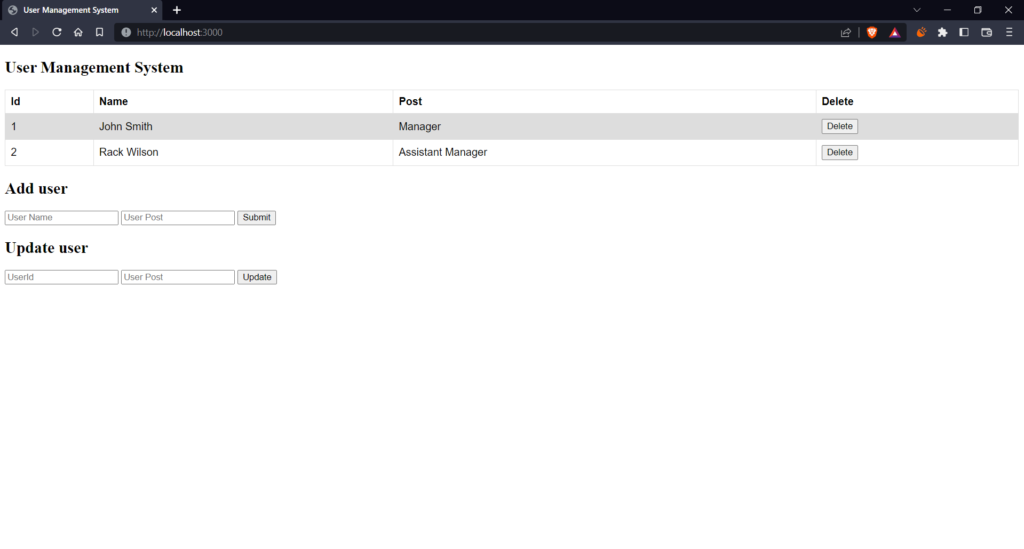

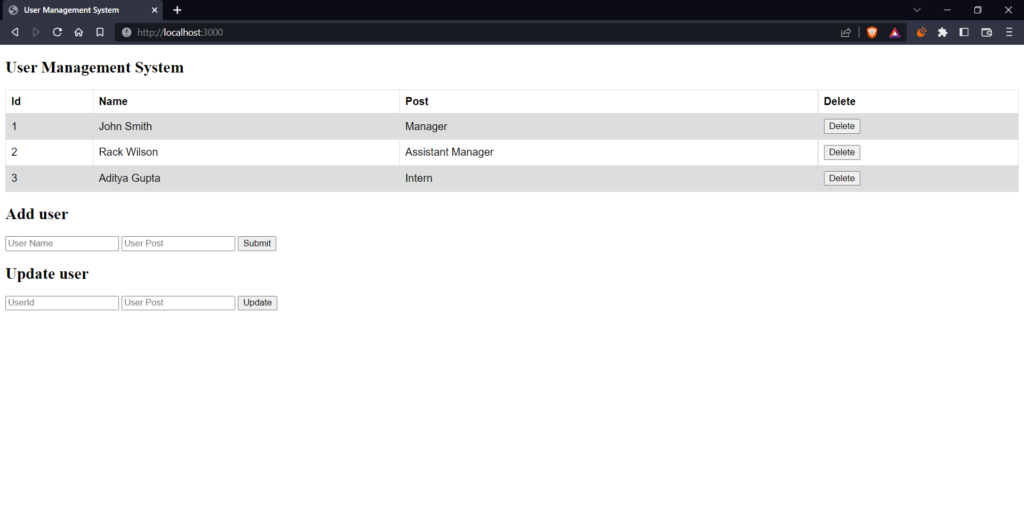

Summary
A User Management System is used to manage users of an organization such as a school, college, company, hospital, etc. A User Management System has the functionality to create a user, delete a user, view all users, update the users, etc. Hope this tutorial teaches you to create the User Management System in NodeJS.
Reference
https://expressjs.com/en/resources/middleware/body-parser.html


