New to Rust? Grab our free Rust for Beginners eBook Get it free →
Installing NodeJS Development Environment in Amazon AWS EC2

Amazon EC2 is a cloud-based hosting service that is free for 1 year for new customers. You can host your website, blog, any experiment project on a dedicated Linux box.
I have been looking for VPS hosting service to host my Node.js demos because shared hosting is still not providing this service. After all my research, Amazon ec2 is my choice.
In this post, I’ll take you through step by step configuration and installation of the Nodejs development environment in the Amazon EC2 Linux box.
NodeJS in Amazon EC2
If you are going to follow each step then completion will take around 30-40 minutes. We are going to cover following steps. If you have done any steps already, I suggest you to jump on the next one.
- AWS account creation at Amazon
- Launch EC2 instance and configure it
- Setup Node.js development environment
Step 1 : Create account at Amazon AWS
Go to Amazon EC2 page and create new account. They will ask you to provide billing information so make sure you have a supported credit card. They won’t charge you for first-year but billing after completion of the free year.
Step 2 : Launch EC2 instance
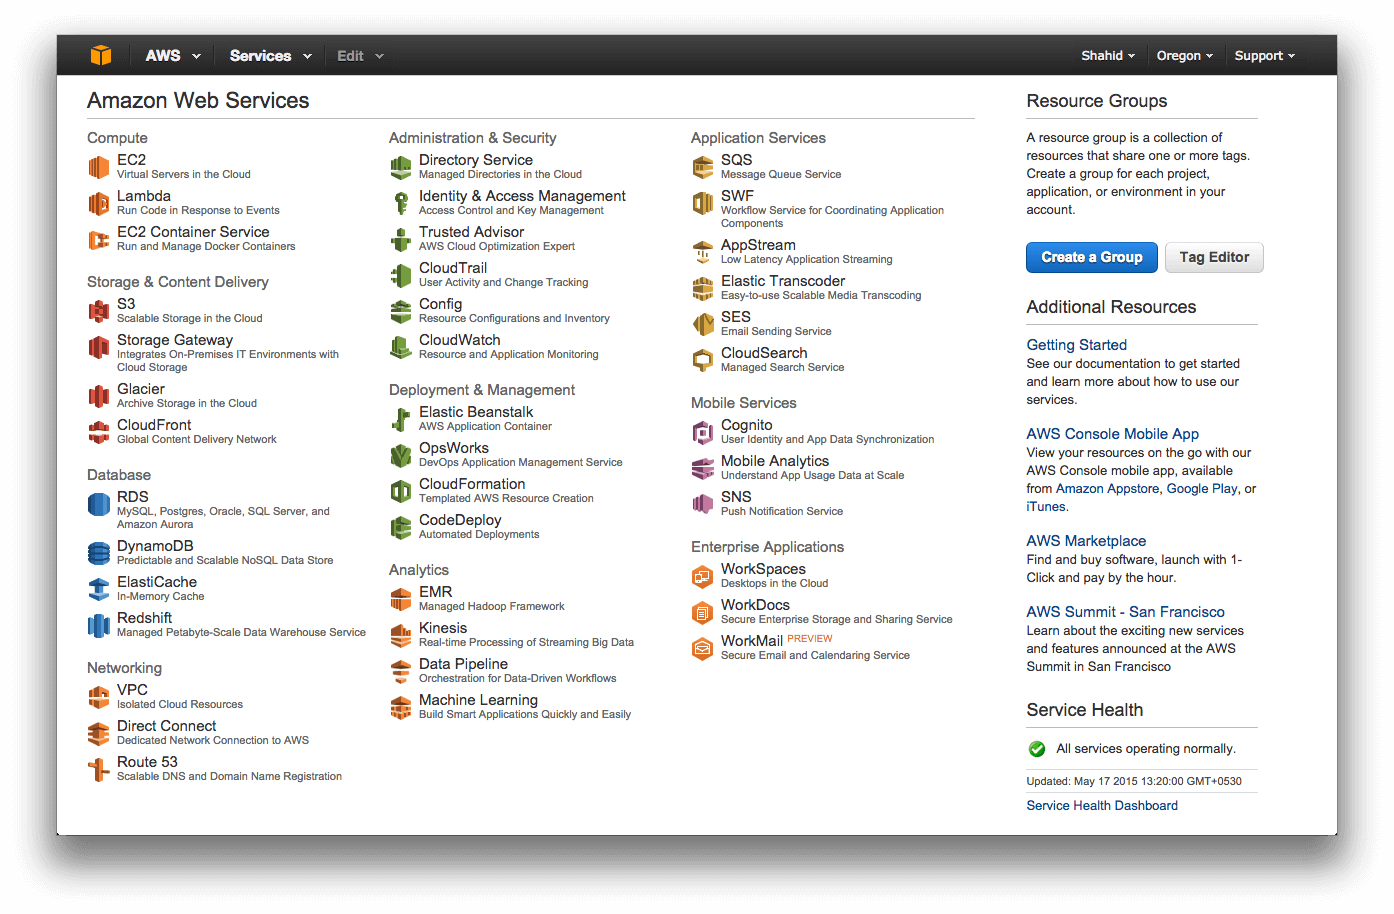
Login to AWS console. You should see a screen like below. Click on “EC2” in the “Compute” section.
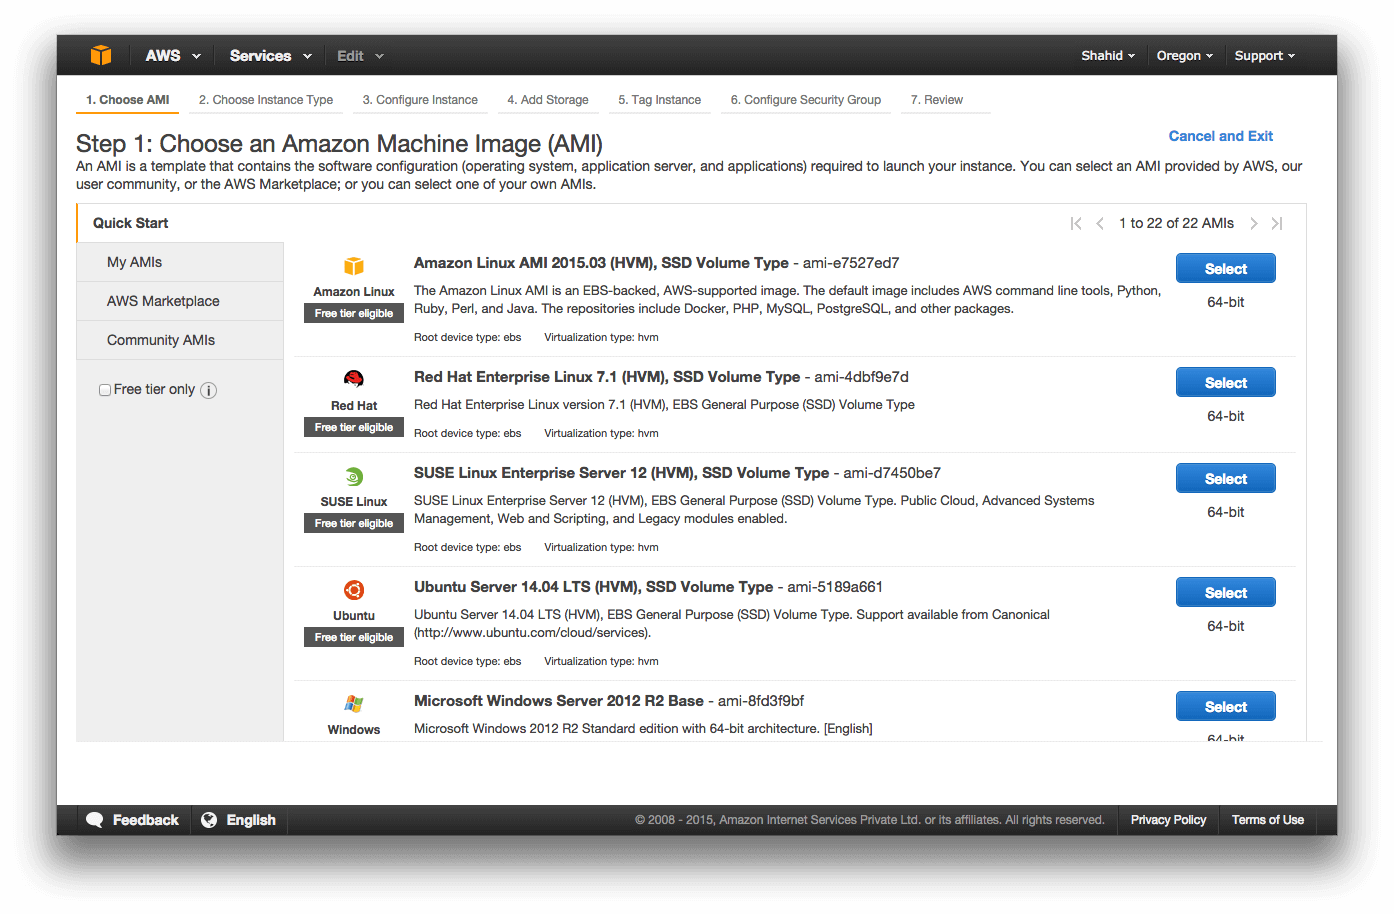
Click on Instances and then click on “Launch Instances”. This will take you to a setup wizard. The first step is choosing an Operating System for your EC2 instance. Choose anyone you are familiar with, I chose Amazon Linux.
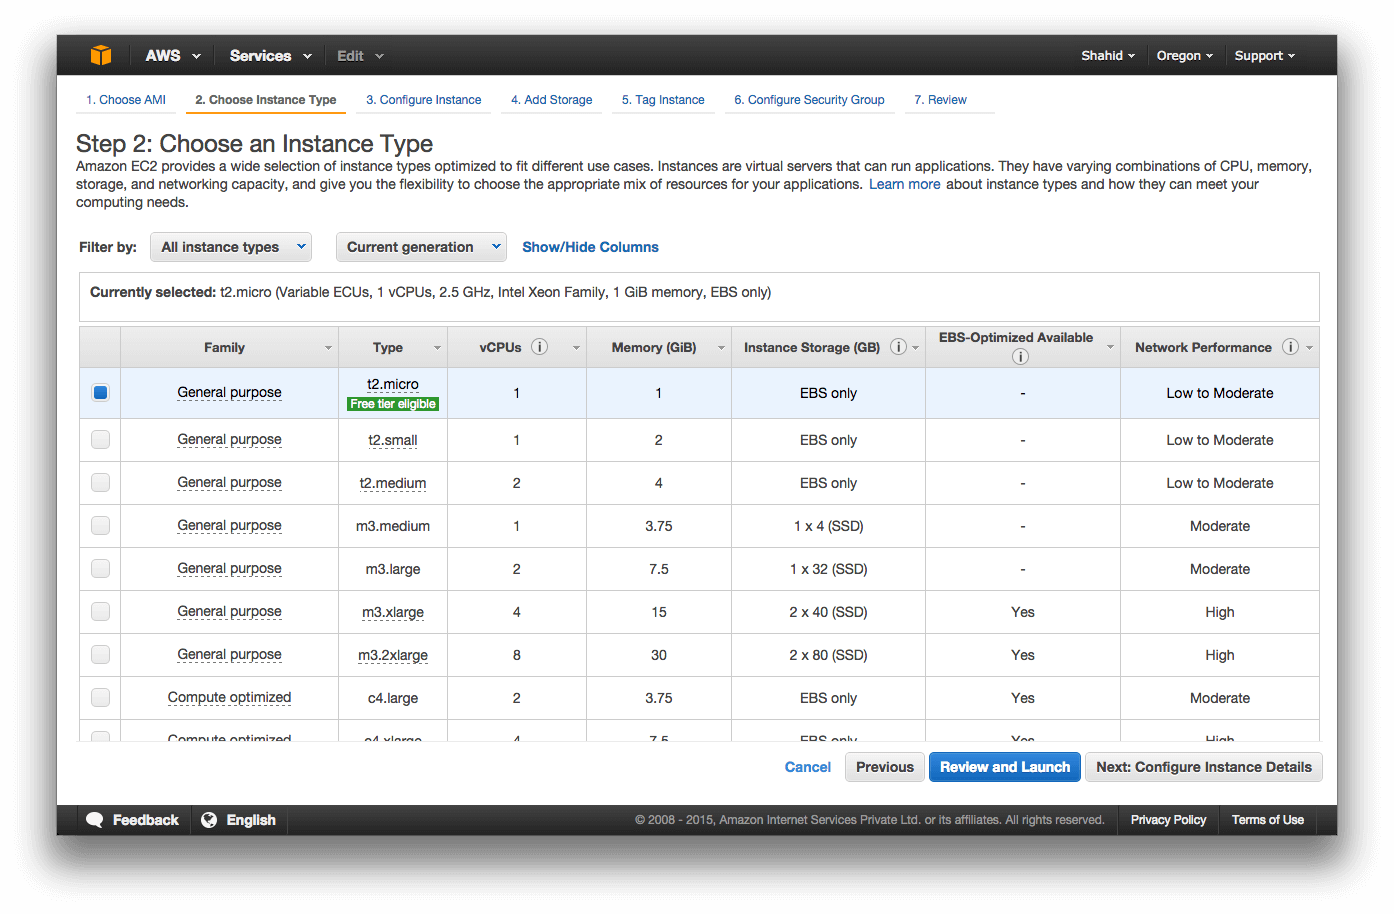
Next, you need to choose the Hardware configuration for your EC2 instance, this is a little technical and choices may vary depending on your need. I chose Intel Xeon 2.5 GHz 1 GB Ram Machine which is default and free for 1 Year.
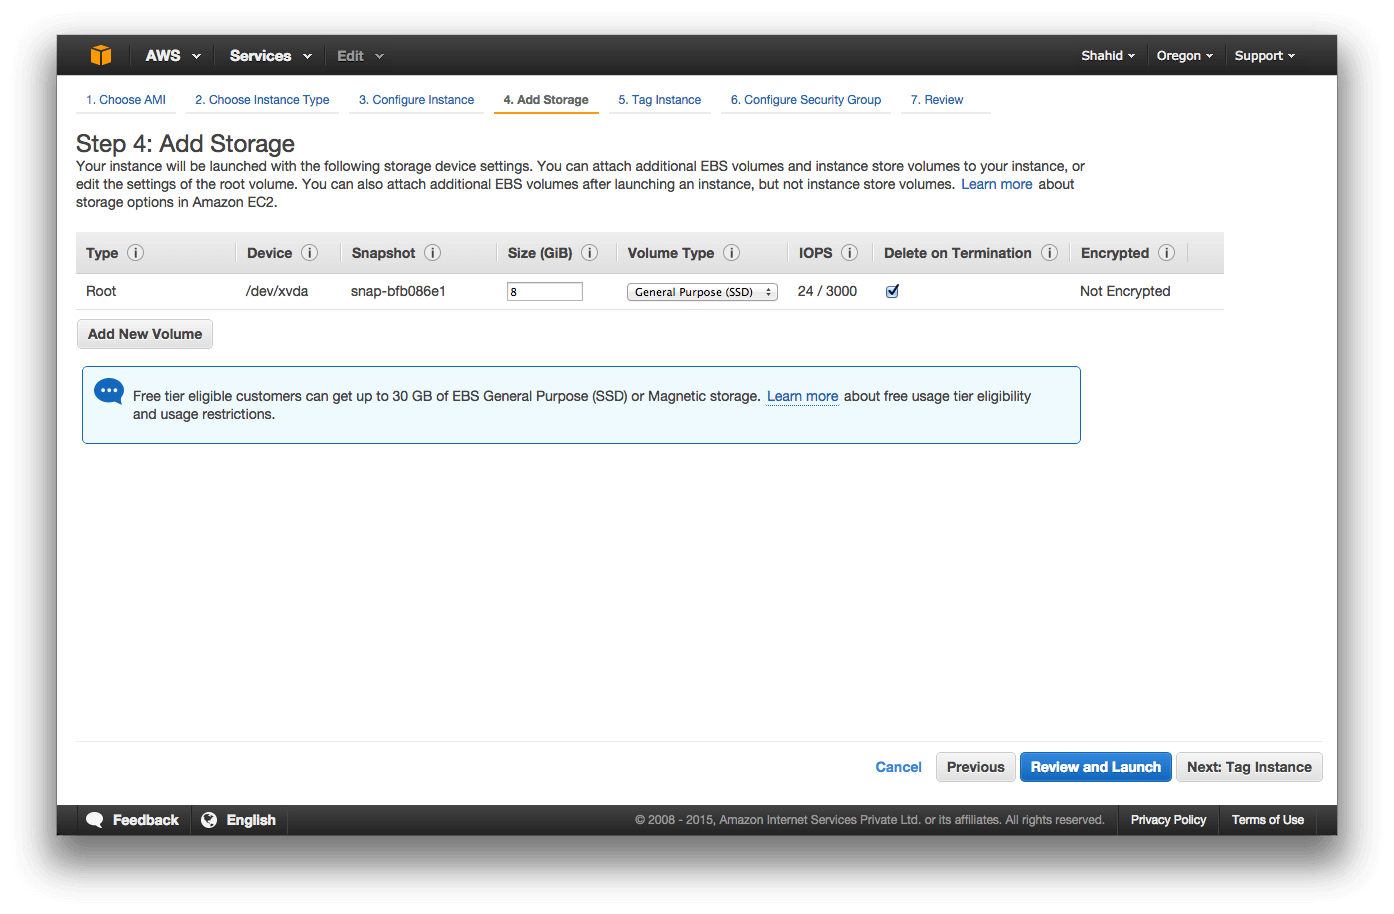
The next step is the configuration of the EC2 instance. Click on Next and you should see the storage configuration screen.
I chose default i.e 8 GB but in the free tier, you can use up to 30 GB storage. If you want more than that, then they will set up billing accordingly and charge from your credit card.
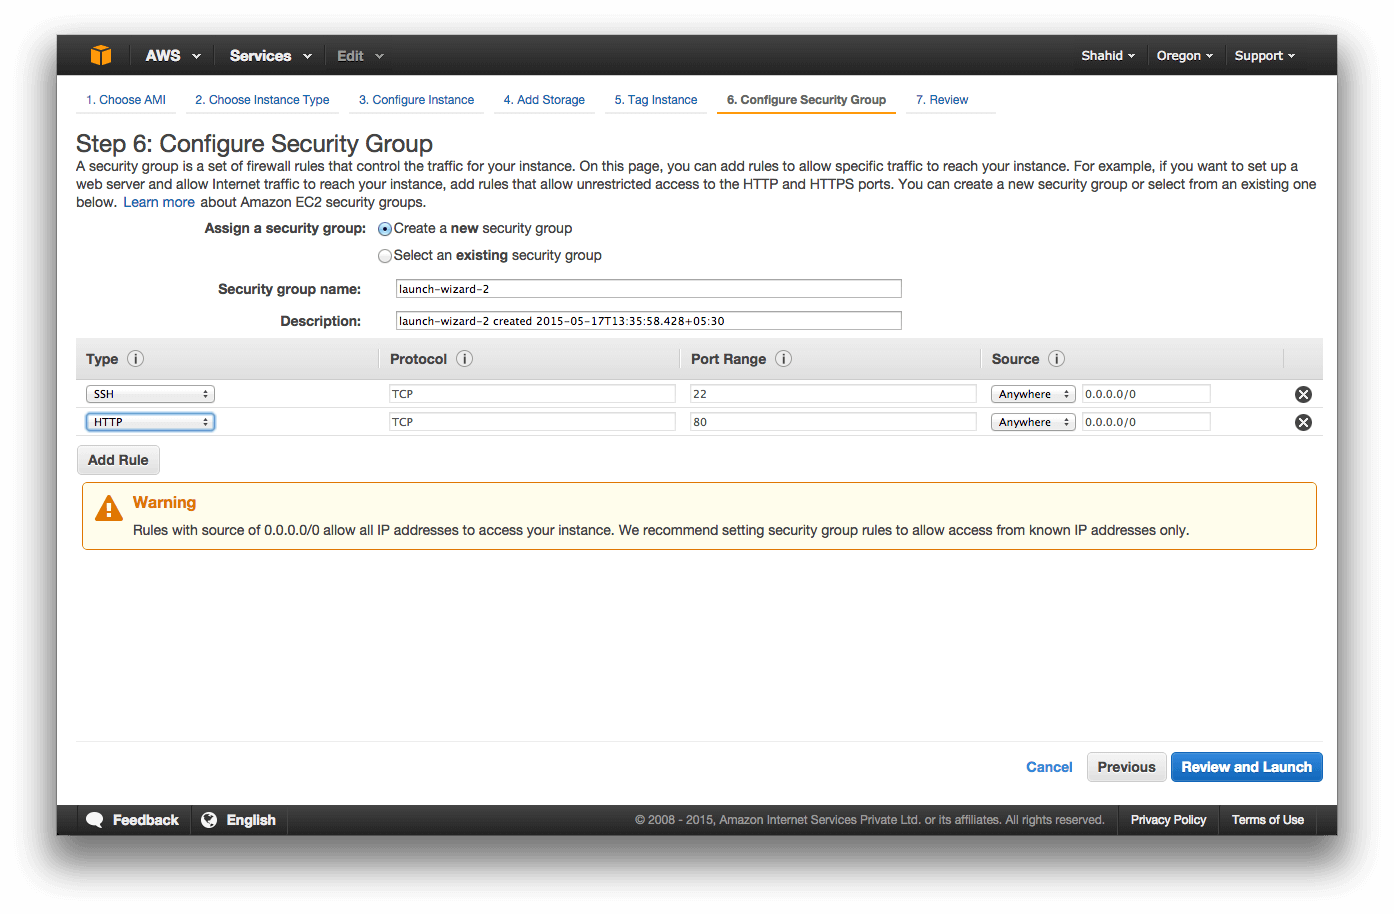
The next step is tagging Instances which is not that important, you can skip it too. The next screen is important which is configuring the security group. In this, you need to allow HTTP port 80 for your web application.
Click on Add rule, choose type as HTTP and it will automatically assign port 80 to it.
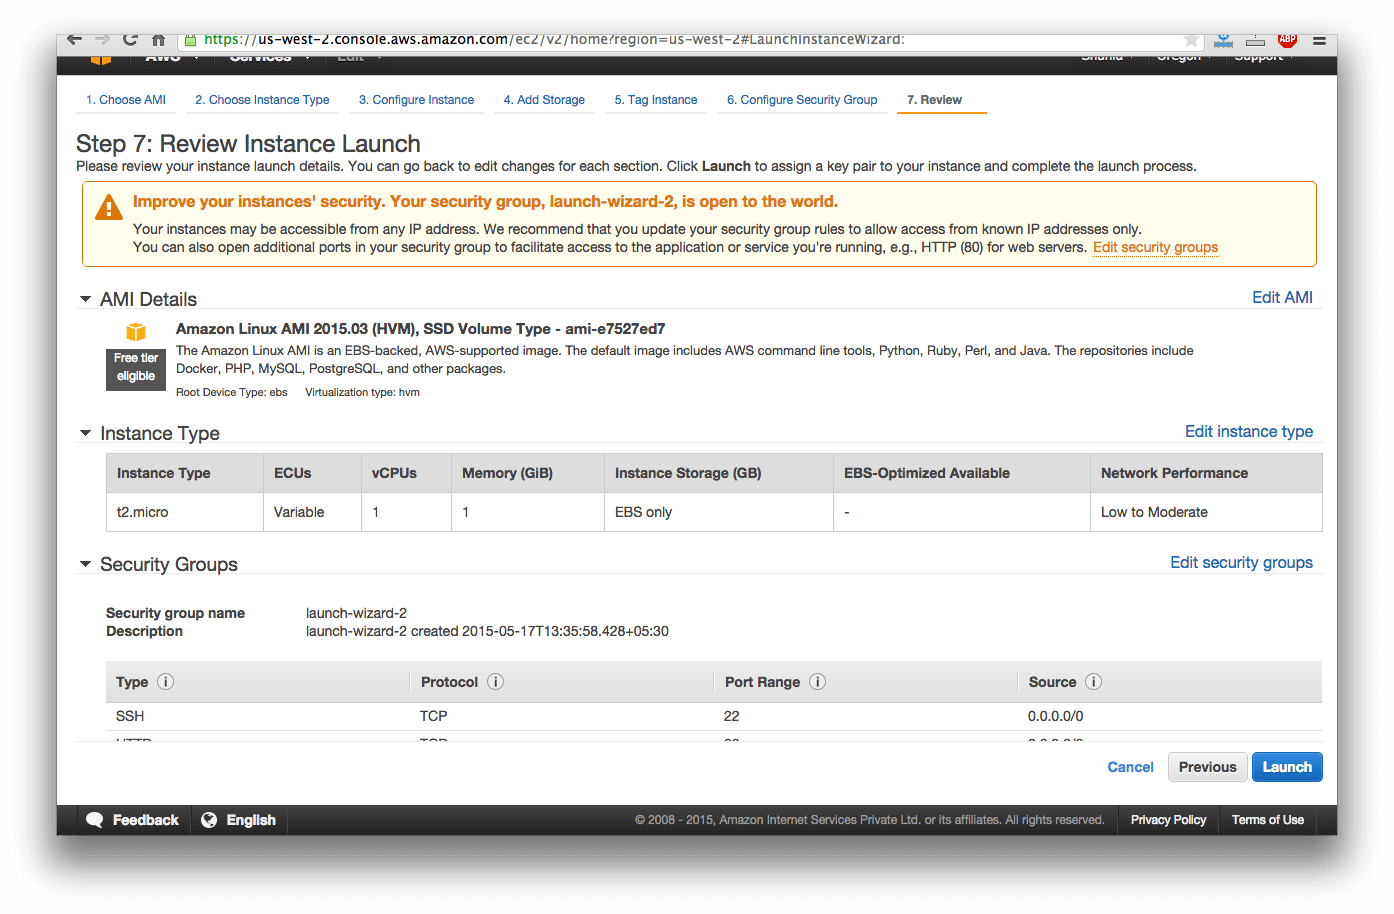
All right, this is it. Review your EC2 instance and click on launch. It will take few minutes to set up and you will see your Amazon EC2 running.
One more thing. Once you click on launch, Amazon will ask you to create key pair which is very important. Select create new pair and give a name to your private key, once done click on “Download keypair” and Launch the instance.
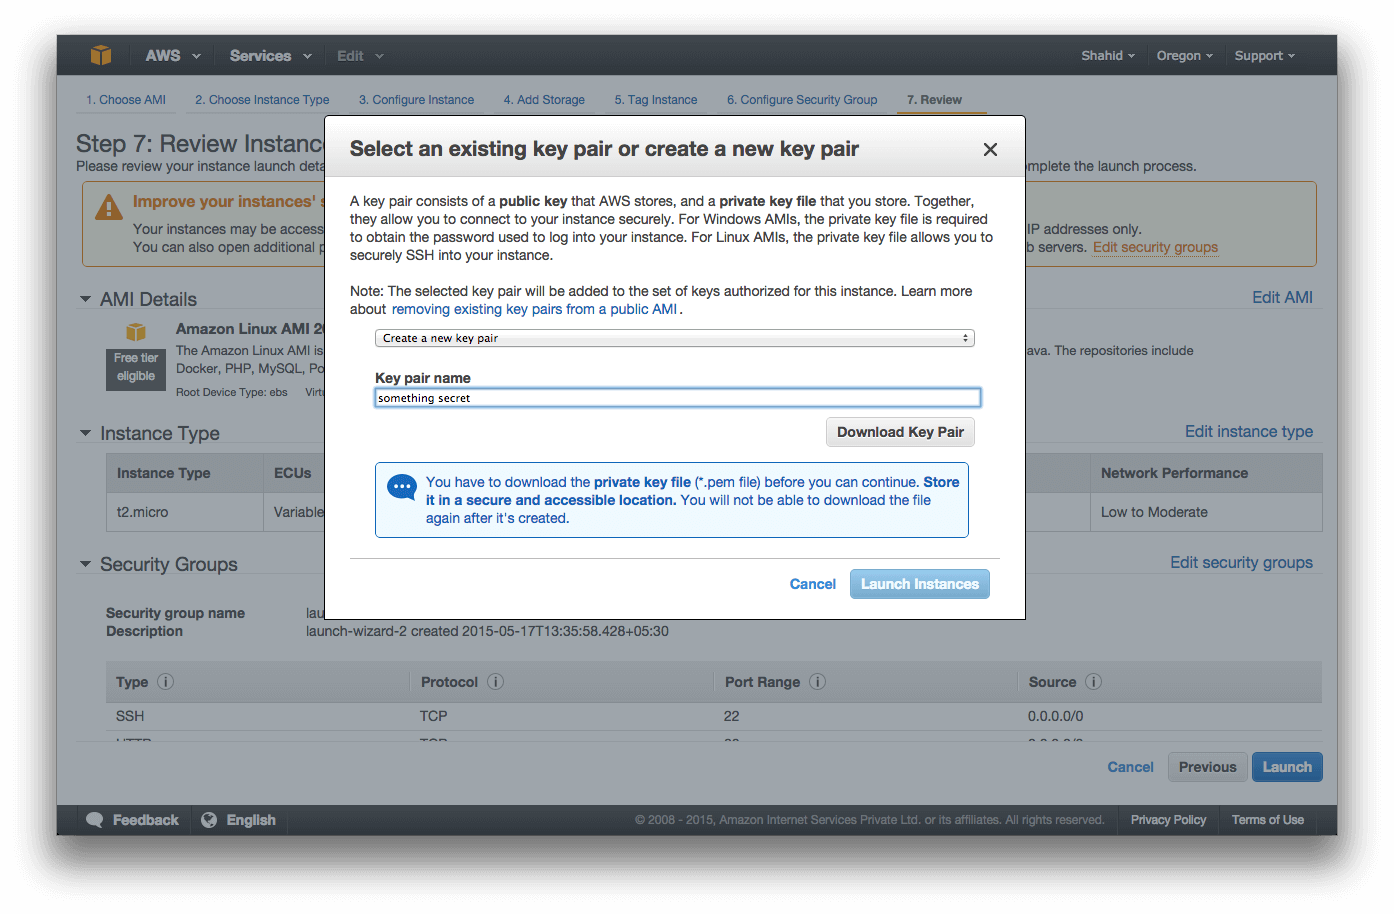
Download this key and store it somewhere, by using this you will be able to connect to your Linux box.
Click on Launch and you should see a similar screen like this in a minute.
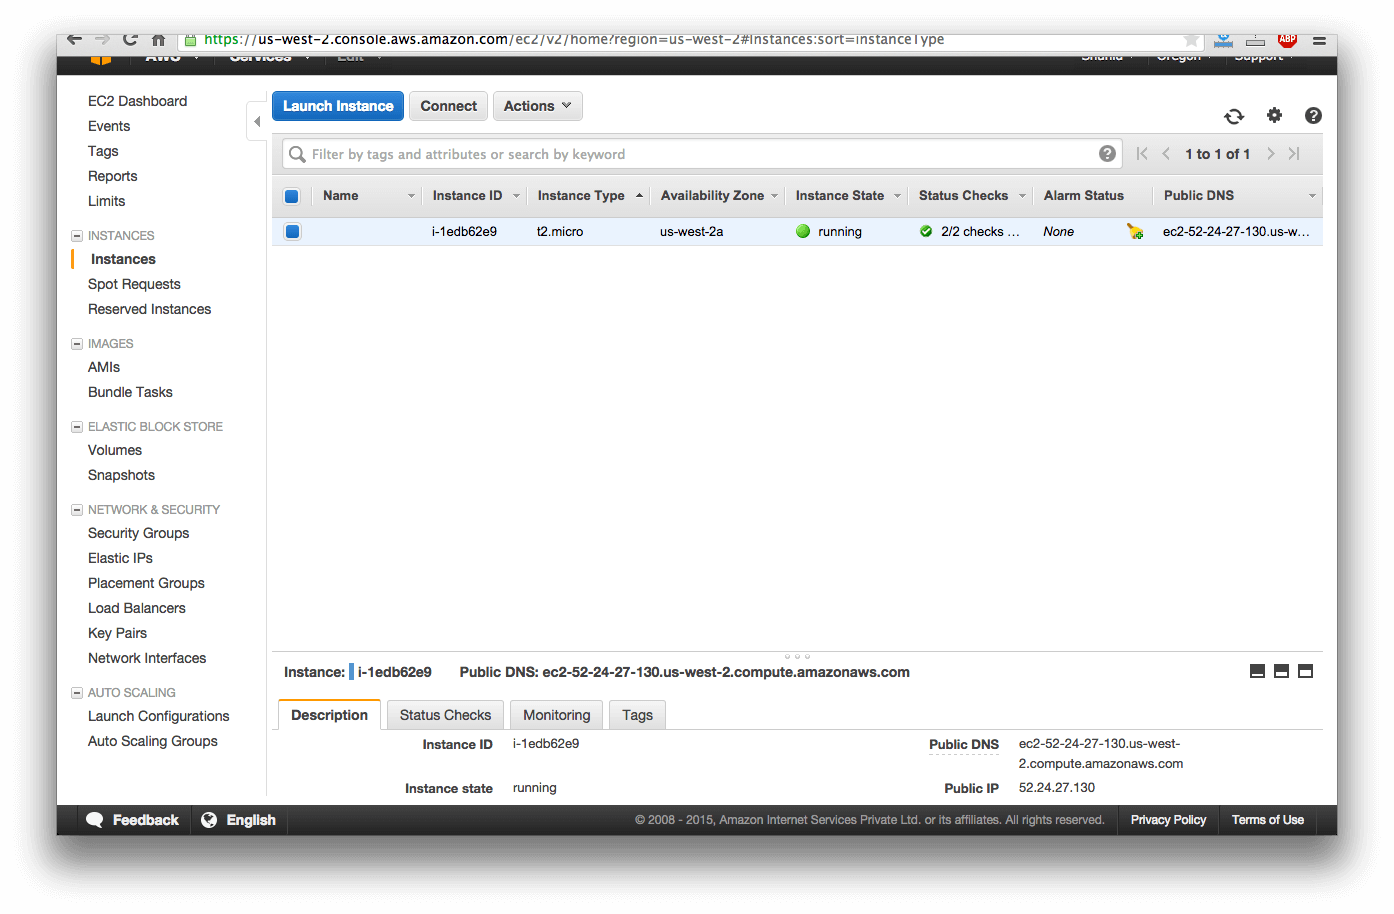
Congratulation! Your Amazon EC2 is up and running.
Connecting to your Amazon EC2 Linux box.
I hope you have downloaded your private key somewhere on your computer. Now if you are using Windows you might need to use Putty. I use Mac and I will show you how to connect using basic SSH using our private keypair. You can use SSH on a Linux machine too.
First of all, copy “Public DNS” from the instance screen shown in step 2. Open up your terminal and switch to the folder where you have downloaded the key file.
First set the access mode to this file to readable to you only else Amazon will not consider this file and gives you a message regarding public mode and threat to security. So run this command.
sudo chmod 400
Now to connect to your Amazon EC2 Linux box, run the following command in your Terminal.
sudo ssh -i ec2-user@
For example:
sudo ssh -i sample.pem [email protected]
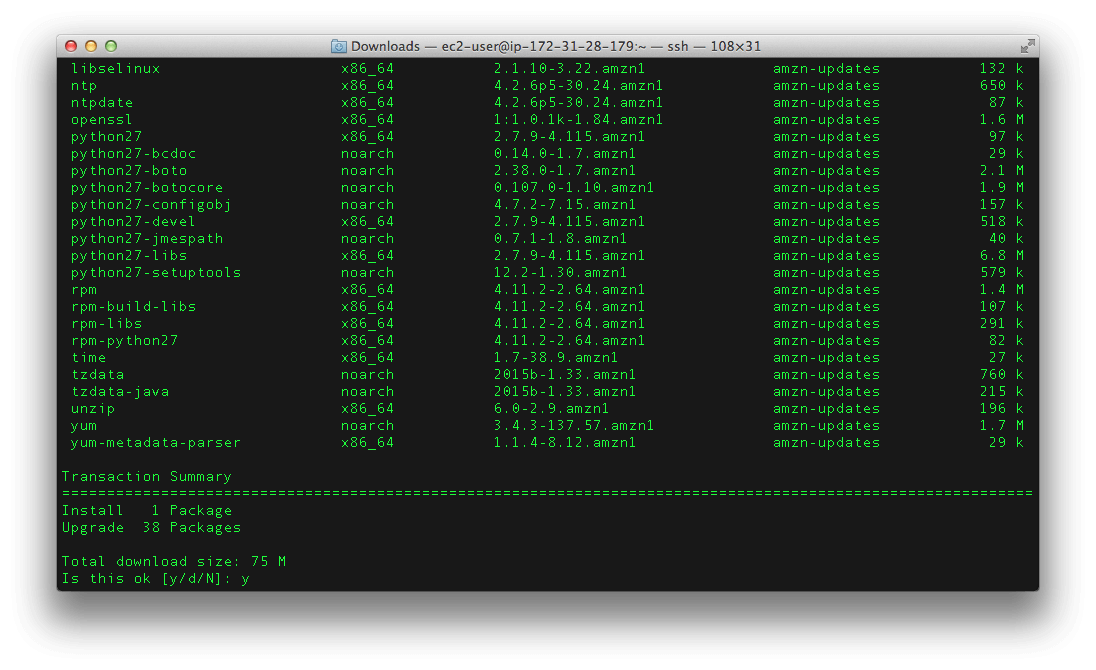
Here is my screen.

All right. You are now connected to your Amazon EC2 box. It’s time to install Node.js and NPM and run a simple Express server.
Installing Node.js and NPM on Amazon EC2
Switch to the home folder using following command.
cd /home/ec2-user/
First of all update the Amazon system using following command.
sudo yum update
This is going to take some time so be patient.
Yum package manager has no direct node.js or node repository so you need to manually download and compile the node.js binary package. This step will take some time so make sure you grab a coffee before starting.
1: Install GCC++ and Make
sudo yum install gcc-c++ make
2: Install openssl-dev
sudo yum install openssl-devel
3: Install git
sudo yum install git
Execute these commands one by one and then run the following.
1: Download the latest version of Node.js
git clone git://github.com/nodejs/node.git
Switch to node folder.
cd node
In order to install Node.js, you need to switch to the latest branch of it. Current stable version at the time of writing this tutorial is v0.12.2.
Run this command to switch to branch.
git checkout v0.12.2
Run following commands one by one.
./configure
make
sudo make install
The above steps will take around 10-15 minutes to complete. Once done you should be able to use node.js in your Amazon EC2 system.
Install NPM
Before installing any node modules in your system we need to add a path where those modules should get installed. To do so, you need to edit sudoers file. Here is how to do so.
sudo su

vi /etc/sudoers
Once VI editor is open, find this line.
Defaults secure_path = /sbin:/bin:/usr/sbin:/usr/bin
Once found, press the “i” key to go in insert mode in VI, and at the end of this line add the following.
:/usr/local/bin
Or replace it with this.
Defaults secure_path = /sbin:/bin:/usr/sbin:/usr/bin:/usr/local/bin
In order to save your changes, press the ESC key and type “wq” and hit ENTER in VI editor.
All right, let’s install the NPM module.
1: Clone the NPM.
git clone https://github.com/isaacs/npm.git
2: Install the NPM.
cd npm

sudo make install
Wait for few minutes and you are done!
Say “Hello World”
Congratulations! We have finally set up and installed the Amazon EC2 and Node.js. It’s time to test the setup. Let’s create one simple project and print “Hello World”.
Create a new folder and switch to that folder. create package.json using VI and paste this code.
package.json
{

"name": "sample",

"version": "0.0.1",

"dependencies": {

"express": "^4.12.3"

}

}
Run npm install to install Express.
Create app.js file and paste following code.
app.js
var express = require("express");

var app = express();
app.get("/",function(req,res){
res.send("
Hello from EC2
");});
app.listen(80);
Run this app using the following command.
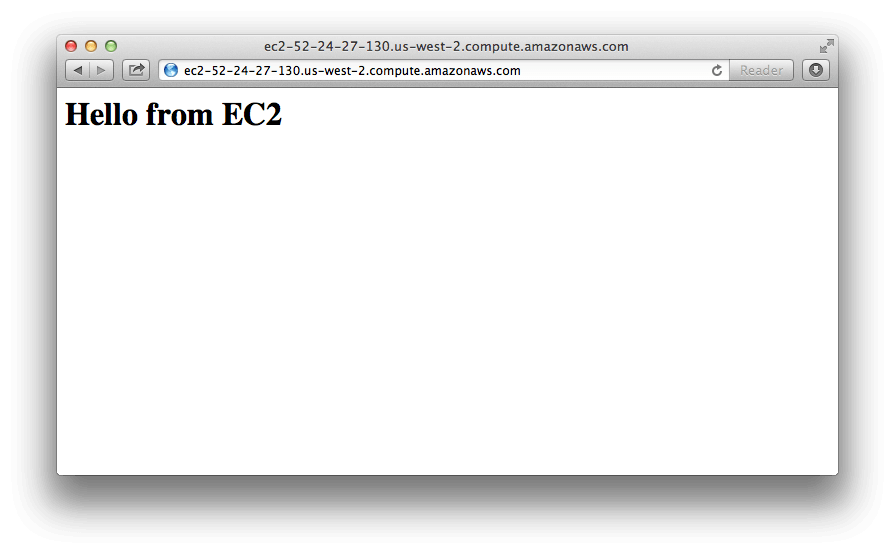
sudo node app.js
Make sure you use SUDO for it. Visit your public DNS and you should see a screen like this.
Conclusion
Amazon is one of the best cloud services provides and above all they let us try their System for free. You can use it to host your project, blog, website, or anything. We have covered almost everything you need to get started but there are still some configurations left like mapping domains to EC2 instances.