New to Rust? Grab our free Rust for Beginners eBook Get it free →
Online Resize Photos for Free

A photo can be ready to upload and still have pixel dimensions that differ from the destination’s instructions. An online photo resizer lets you set new dimensions and export the resized image.
I’ll walk through resizing the photo and checking the exported file against the upload requirements.
TL;DR
Choose the target pixel width and height in the online resizer, keep the aspect ratio locked when you want the original proportions, then resize, download and check the file against the receiving form’s rules.
- Pixel dimensions describe the image grid, while file size describes bytes on disk.
- Changing JPEG quality can change appearance and file size, but it does not set an exact byte limit.
- Use the official upload instructions for the required dimensions, format and size.
What Does Resizing a Photo Online Change?
Resizing changes the pixel grid and can also change the encoded file size. Before using an online tool, decide which one the destination limit actually refers to.
| Term | Meaning | Why it matters |
|---|---|---|
| Pixel dimensions | Width and height of the image grid | Controls the image’s pixel count and shape |
| Aspect ratio | Relationship between width and height | Keeping it avoids stretching |
| File size | Encoded bytes of the saved image | Must fit any upload size limit |
| Format | Encoding such as JPG or PNG | Affects compatibility and features like transparency |
A pixel is one small point in a digital image. Aspect ratio describes how width relates to height, such as 3:2 for a landscape frame. Cropping removes parts of the image to create another shape.
When instructions give maximum width and height rather than one exact size, fit the image inside both limits while preserving its shape. A preset may not do that if its ratio differs from the source. If the form demands exact dimensions, use a crop or an image editor that lets you control the crop area before export.
Print size in inches or millimetres also depends on the resolution used when placing pixels on paper. Changing printed inches alone does not add detail. Follow the printer’s requested dimensions and resolution units.
Rotated phone photos can have orientation metadata that tells some viewers how to display the pixels. If an export appears sideways, use an editor that applies the rotation before resizing, then inspect the saved copy.
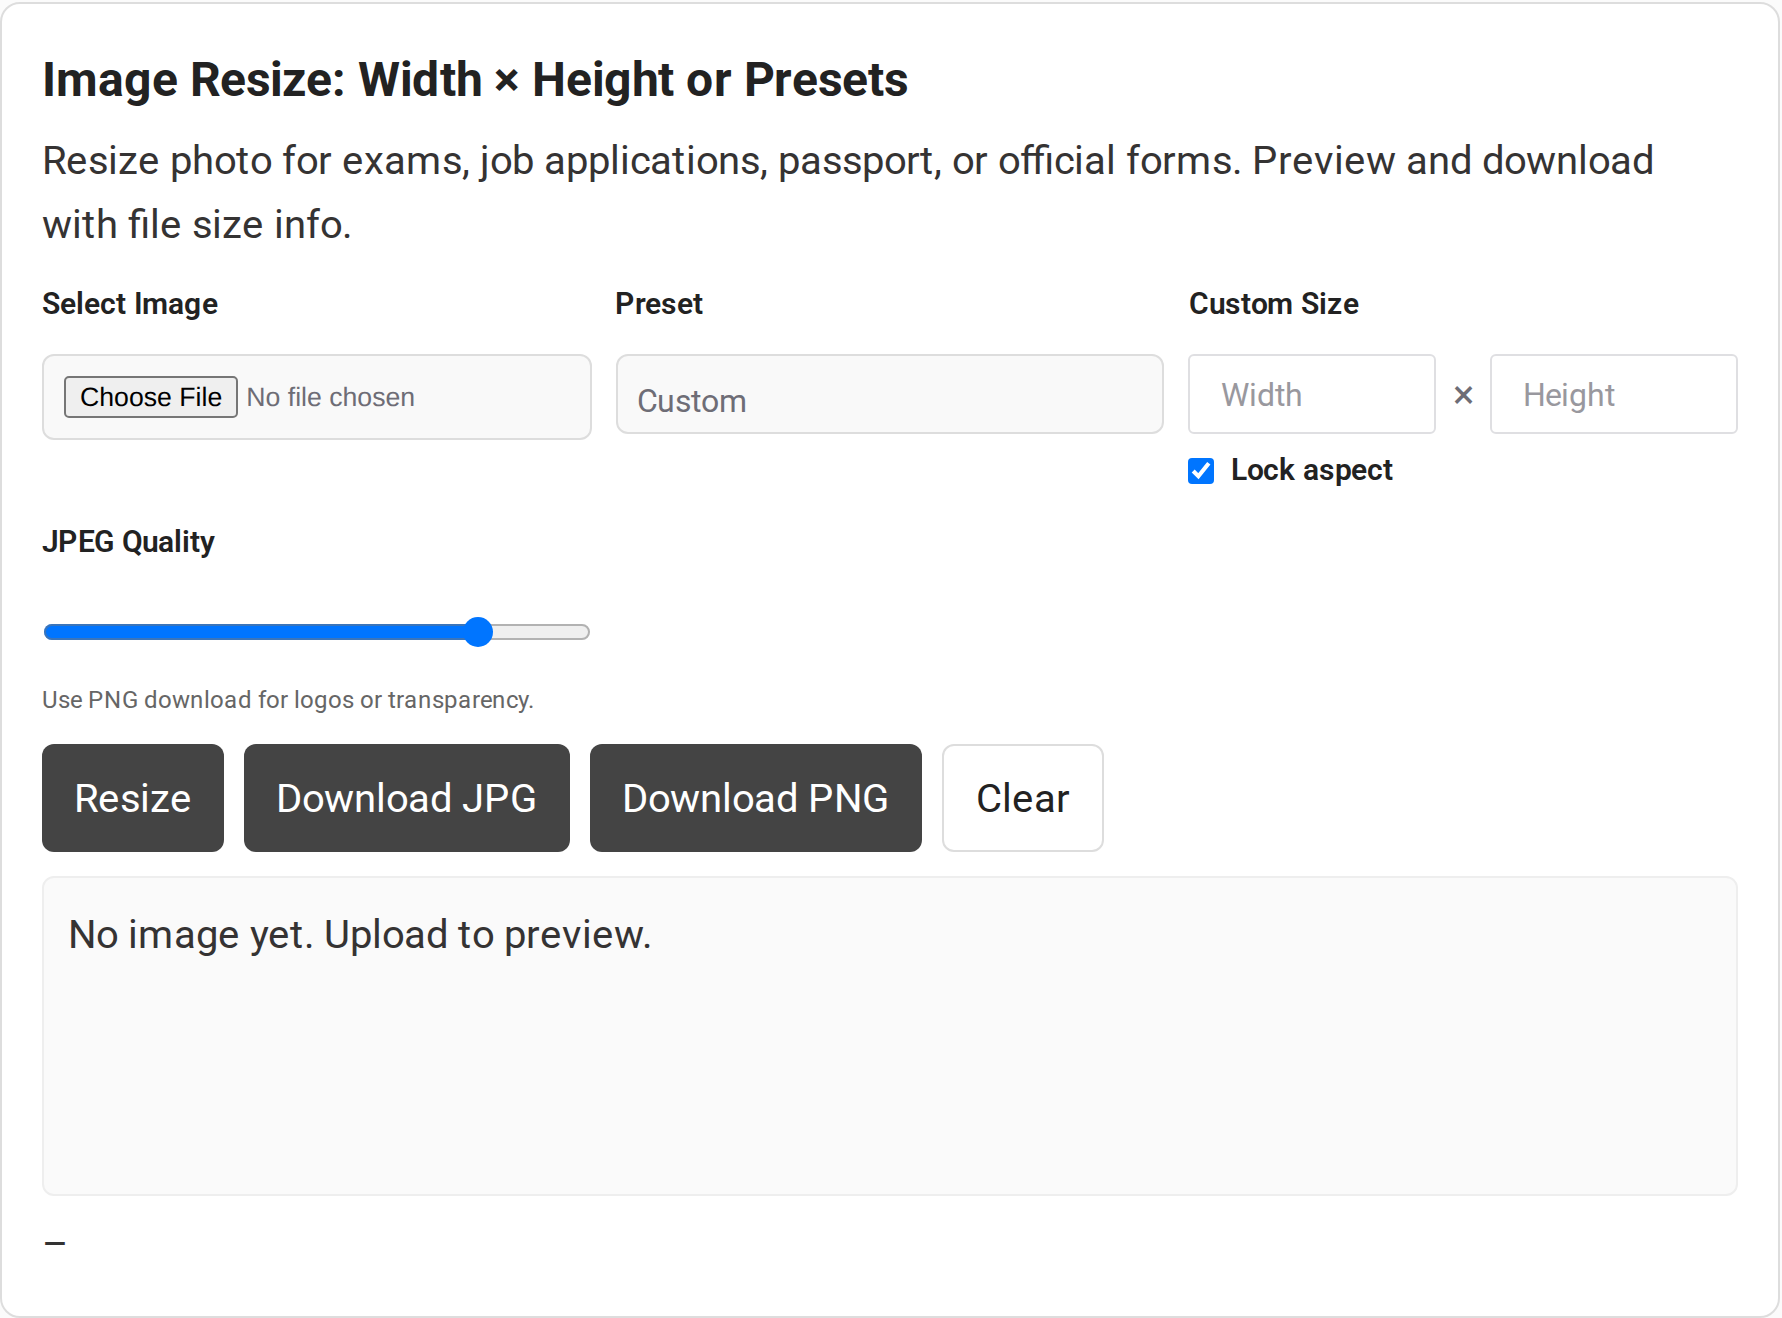
I captured the live resizer controls for this draft. The page shows a file picker, presets, custom dimensions, an aspect-ratio lock, JPEG quality, and JPG and PNG download buttons.
Downscaling reduces the number of pixels and can soften fine detail, especially in text or line art. Enlarging makes each source pixel cover a larger area, so it cannot recreate details the original did not contain. Use the original’s full-resolution copy when the image must remain sharp.
Resolution can mean pixel dimensions, but print workflows may also use pixels per inch. Changing printed inches alone does not add detail. Web forms usually specify pixels, while print services may name dimensions and resolution units.
Browser tools may process a selected image with canvas, which decodes it into pixels before drawing an output canvas. The format and quality used for export affect the saved bytes. This workflow does not prove where the file is processed or how a site handles it, so avoid uploading private photos until you have checked the tool’s privacy information.
How to Resize a Photo Online Step by Step
The tool’s controls set target dimensions and preview the resized result.
Step 1: Find the destination requirements
Before opening the resizer, write down the required dimensions, format and byte limit from the destination’s instructions.
Step 2: Choose the source photo
Select the image with the file picker. The preview and original dimensions help confirm the chosen file. If the preview does not appear, confirm the file opens on your device and try another supported format.
Check the downloaded file after processing. Its properties are more useful than the source estimate.
Check the orientation before export because rotation metadata can display differently across software. For a first resize, choose the highest-quality original available rather than a copy already reduced by a messaging app or social network. Repeated JPEG exports can add compression artifacts, so return to the source image for another attempt.
Use Clear to reset the file picker, dimensions and preview before starting over with another image. The download buttons return to their disabled state until a new resize finishes.
Step 3: Set the target dimensions
The preset menu contains common landscape and square canvases. Use one only if its width and height match the target. Otherwise, enter both values in the custom fields.
The ratio lock uses the source photo’s proportions for custom dimensions. Presets set a new shape directly, so inspect the preview for cropping or stretching before keeping the result.
Use the aspect-ratio lock when the target should keep the original shape. If the receiving form asks for another shape, choose a crop before resizing instead of stretching the image.
Width and height use whole pixels. If preserving the ratio yields a fractional height or width, the tool rounds the other field to a whole number. This can leave a slight ratio difference, but avoids the distortion from unrelated dimensions.
That 1200 × 800 image has a 3:2 ratio. Reducing it to 600 pixels wide while preserving that ratio gives a height of 400 pixels. A 600 × 600 target has a different shape and calls for cropping or another source composition.
Step 4: Resize and review the preview
Select Resize after both target dimensions are set. Review the resulting preview at a useful zoom level. Look for visibly stretched proportions, softness from enlargement, compression artifacts around edges, or a crop that cuts off important detail.
If the tool says to upload an image, return to the file picker and select one first. If it asks for width and height, enter both values or choose a preset before resizing. The JPG and PNG download buttons become available after the resize operation completes.
The tool reports the new width and height plus approximate JPG and PNG sizes after rendering. Those displayed sizes are estimates, so use the downloaded file’s actual details when a strict upload limit applies.
The JPEG quality control changes encoding, but it does not promise a particular byte count. If the export is too large, compare another quality setting and check both visual detail and actual file properties.
For a first export, keep the initial quality setting and compare the preview before lowering it. Compression artifacts can appear around sharp edges and text when quality is reduced. Compare the result at full size before choosing that export.
Step 5: Download and verify the exported file
For many photographs, JPG is a practical choice when the destination accepts it. Use PNG when transparency matters or the upload instructions require it.
After downloading, inspect the file details in an image viewer or your operating system. Compare its measured width, height, format and byte count with the form’s limits.
Label the export with its target dimensions to distinguish it from the source in the upload picker.
Use an image editor first if the photo needs changes to its composition, background or face position. Dimensions alone do not establish acceptance under official photo rules.
What Should You Check After Resizing?
The target’s dimensions and encoded bytes are separate checks. Confirm which limit the form enforces before adjusting the image.
- Check width and height in pixels for the required shape.
- Open file details to read the exported byte size.
- Use only a format listed by the destination.
For official photo uploads, follow the issuing authority’s current rules for framing, background and presentation. A generic dimension change cannot check those visual requirements.
| What you see | Likely cause | What to check |
|---|---|---|
| Photo looks stretched | Target ratio differs from source | Check crop or scaling settings |
| Image looks soft | Source is too small or enlarged | Use a higher-resolution original |
| File exceeds upload limit | Encoded file is too large | Check bytes and use a size-target compressor |
| Transparency is gone | Output format is JPEG | Use PNG if supported |
| Portal rejects the file | Format, dimensions, byte range or photo rules differ | Read the portal’s current requirements and error |
| Preview or download fails | Unsupported file, memory or download issue | Try a smaller image or another supported format |
Check the export’s actual byte count against the destination’s maximum. Lower JPEG quality can reduce bytes but may visibly damage the photo, while changing pixel dimensions changes the image grid. If neither adjustment produces an acceptable result, use a compressor with a stated target or a different editor.
Changing a filename extension does not convert the image data. When a portal rejects a JPG or PNG, export it in an accepted format rather than renaming the file. Keep the original until the replacement has passed the upload check.
Before processing a private image, look for the site’s explanation of upload, storage and deletion. If those details are missing or unclear, choose an offline editor for the sensitive file instead. A browser interface alone does not establish that the image stays on your device.
If you need to reduce a PNG’s file size after resizing, see CodeForGeek’s guide to compressing PNG images with Pillow. It covers compression in Python when the browser export does not meet a file-size limit.
Conclusion: Verify the File Before Uploading
Resize in a browser when you only need new pixel dimensions, then check the downloaded image’s actual properties. When the destination rejects the file, match the correction to the error instead of changing every setting at once.
- Wrong shape: unlock the ratio only if distortion is acceptable, or crop first.
- File too large: reduce JPEG quality carefully or use a compressor with a byte target.
- Unsupported format: export in one of the destination’s accepted formats.
- Image looks soft: return to the original instead of enlarging a reduced copy.
- Tool stalls: try a smaller source file and check that the browser can download files.
For another image task, CodeForGeek’s image-to-PDF converter handles document conversion.
FAQ
These answers cover two common points that are separate from the resizing steps.
How can I reduce an image file size online?
A resizer changes pixel dimensions, while compression changes encoded file bytes. Check the exported file size and use a compressor with an explicit size target if the upload limit is not met.
Will resizing a photo make it meet passport or exam rules?
Not by itself. Check the issuing authority’s current requirements for dimensions, file size, format, framing, background and other photo rules. A generic resizer does not certify compliance.