New to Rust? Grab our free Rust for Beginners eBook Get it free →
How to Replace an HTML Element with replaceWith()

After a task finishes, a page may need to show a new status while keeping its surrounding container. Element.replaceWith() swaps the selected element for a node or text in its parent.
I’ll walk through replacing an element and checking the updated DOM.
TL;DR: Replace an Element with replaceWith()
Call native Element.replaceWith() on the element to remove, then pass the node or text that should take its place in the same parent.
- Select the intended element and handle a missing match before changing the DOM.
- Create an element node when the replacement needs markup or attributes.
- Use the parent or a fresh selector to verify the result because the method returns undefined.
What Does Element.replaceWith() Replace?
Element.replaceWith() replaces its target with the supplied arguments in that target’s parent child list.
A DOM parent is the node that directly contains another node. In markup where main contains a paragraph and a button, main is the parent and the paragraph and button are its children. That vocabulary helps identify the right target before a replacement.
Node is the DOM’s general type for objects in the document tree, while Element is the tagged-node type. The native method accepts Node objects and strings. A string is inserted as text, so characters that look like tags remain visible characters rather than becoming elements.
The method returns undefined. If later code needs the inserted element, keep its variable before the call or find it again from the parent afterwards. The original JavaScript variable can still refer to the removed element, but that reference does not put it back in the document.
Element.replaceWith() changes the browser’s current document tree. Persistence still depends on updating the application state or server data that supplies later renders.
The jQuery method accepts an HTML string and returns the original jQuery collection of removed elements. Check which API a page loads before carrying code between the library method and its browser-native counterpart.
MDN records broad browser availability for this method since April 2018, so compatibility checks matter chiefly for projects that support older browsers.
How to Replace an HTML Element Step by Step
Before replacing a node, select the intended target and create a replacement that fits the same parent-child structure. I ran the full file with Node.js.
Step 1: Select the target element
Use document.querySelector() when one ID, class or other CSS selector identifies the target. It returns the first match or null, which means a selector miss needs a deliberate response before any method call.
The hash prefix in a selector targets an ID, while a period targets a class. Use an ID for one known status element. When a class repeats across cards, scope the lookup to the card that changed so the update stays with that instance.
Run selection after the target markup exists. A correct selector can return nothing before the browser parses the element or before an asynchronous interface adds it.
For several targets, querySelectorAll() returns a static NodeList, so decide how to handle each captured match and query again if a later pass depends on the changed DOM.
Confirm the selected tag and parent in the component being changed, since a broad class selector may also match a navigation item or template element.
Inside an event handler, event.target is the deepest node clicked, while event.currentTarget is the element handling the event. A click on an icon can target that icon instead of its button. Choose the button when the operation should replace the whole control.
Step 2: Create the replacement node
Use document.createElement() with the desired tag, then assign its needed attributes and text before insertion. The example keeps the old paragraph’s ID so later code can select the status message.
Populate the replacement before insertion so its intended text and attributes are set when it enters the document. Create any child elements first when the new structure contains more than one level.
Choose a semantic element for the intended role. A status message can be a paragraph, while a form control should use a suitable control element with its required attributes.
For a replacement input, set its starting value before insertion and retain the label or form association the page relies on. If the task continues in that control, make its next state explicit rather than leaving a generic default.
Replacing a container also leaves its existing children inside the removed node. Move any child whose value or state must survive into the replacement before the call, or rebuild that content from the application’s data. For example, an input may hold text that a user has already entered, so preserve that node when the value must remain.
Step 3: Replace and verify the result
The source file selects the old paragraph, creates its replacement and performs the swap.
const { parseHTML } = require('linkedom');
const { document } = parseHTML('<main><p id="status">Waiting for update</p></main>');
const status = document.querySelector('#status');
const replacement = document.createElement('p');
replacement.id = 'status';
replacement.textContent = 'Update complete';
status.replaceWith(replacement);
console.log(document.querySelector('main').innerHTML);
Run the named source file with the command shown in the terminal capture. Its full output appears below as readable text.
<p id="status">Update complete</p>
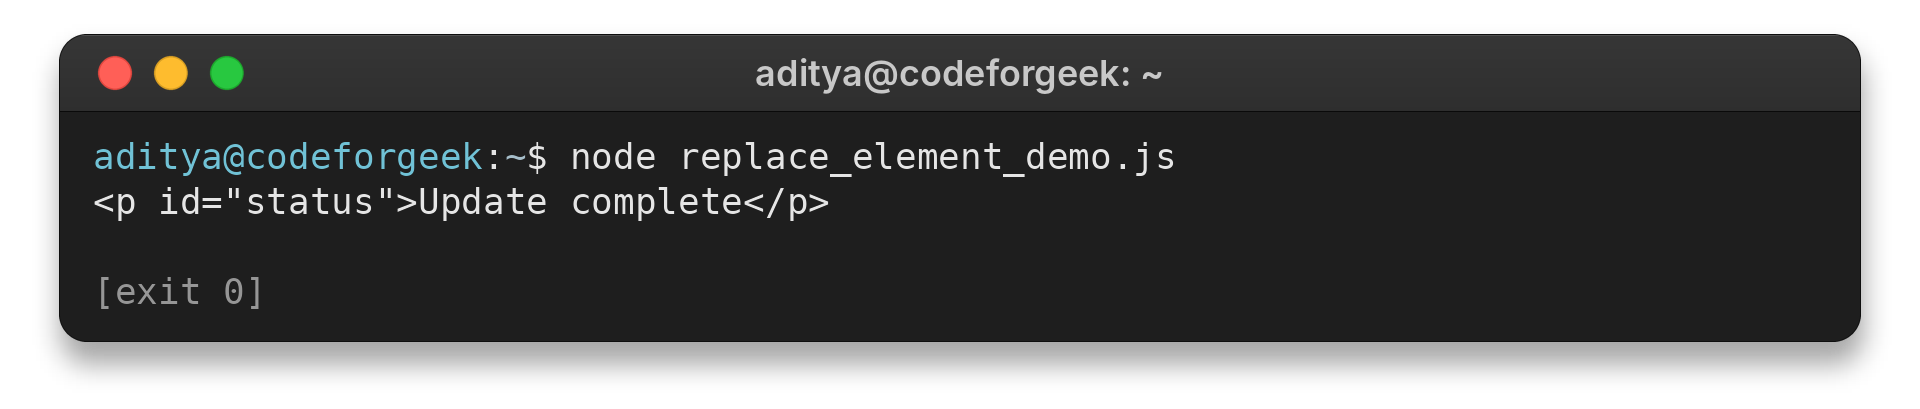
The capture shows the exact command and full output. Because the example logs main.innerHTML, it prints only main’s children. This confirms child markup in the fixture, while a browser test should check appearance and interaction.
The Node.js source imports linkedom to provide a document fixture. In browser code, use the page’s existing document instead of parsing the fixture string.
LinkeDOM supplies a document tree for this command-line demo, but it does not render page layout or CSS. Use a browser test when the question is how the replacement appears in the actual interface.
Common Edge Cases When Replacing Elements
Different DOM assumptions produce different symptoms, so diagnose the observed error before changing replacement logic.
| Case | What you may observe | What to check |
|---|---|---|
| The selector has no match | A null property error appears before replacement | Check the selector spelling and when the script runs |
| The target has no parent | The call has no visible effect in the document | Inspect target.parentNode and attach the node or update its detached container |
| The hierarchy would be invalid | The browser raises a hierarchy error | Check the intended parent-child relationship before insertion |
A target can have a parent inside a detached subtree. The call can update that subtree even though the page shows no change until its container is attached or inspected. This differs from a target whose parentNode is null.
A replacement node that already belongs elsewhere leaves that location when it is inserted at the target. Existing listeners and state remain attached to that node object.
Review IDs before cloning because duplicate IDs can make later selectors ambiguous. A clone does not copy listeners registered with addEventListener(), so attach required handlers to the cloned node.
Pass multiple arguments when one target should become a sequence of nodes with text between them. The method inserts the arguments in order, so two span nodes with a text separator can render as “North and South.” If an array holds the sequence, spread its items into the call and include separators where the rendered text needs them.
A DocumentFragment is another Node you can prepare before the swap. Its children take the target’s position in order, and the fragment is empty after insertion. This is useful when a replacement group is assembled in stages.
When the container should stay, use Element.replaceChildren() to replace its contents. Calling it without child arguments empties that container.
When only the message changes, set textContent on the existing element to keep its attributes and direct listeners. This also removes any child elements, so use it when the message should become plain text.
For authored structure, create the required elements and set their properties directly. If variable input must be parsed as HTML, sanitize it first because parsing and replacing are separate operations. Keep a trusted fixed template separate from user-controlled text so the source of each value stays clear.
A cycle occurs when an ancestor is inserted into one of its descendants, creating a parent-child loop. When structure comes from variable data, handle that specific hierarchy exception. A broad catch can hide a selector failure or a bug in replacement construction.
If a replacement changes an element that receives events, decide whether the new element needs its own event handling. Event listeners attached directly to the removed node do not automatically become listeners on a newly created replacement.
A listener attached to an ancestor can handle events from a replacement if the event bubbles and the handler’s selector still matches. Check that relationship after the swap instead of assuming the old interaction remains active.
If the removed control had keyboard focus, decide where focus should go next. A newly created button or input has its own focus state, so move focus deliberately when the task should continue in that control. Give the replacement an accessible name and the right control type, such as a paragraph for status or a labeled input for data entry.
For a status message announced through a live region, keep the announcement container and change its message when that is the intended interaction. Replacing the live-region container can alter how assistive technology receives the update.
When a framework owns the subtree, update its state through the framework so a later render preserves the change.
Conclusion
Choose the DOM operation by what should remain in the page, then verify the state the next part of the application uses.
MDN’s Element.replaceWith() reference provides examples and compatibility notes, while the WHATWG DOM Standard describes the replacement algorithm. Use those first-party sources when checking a browser-specific edge case. The CodeForGeek guides to jQuery event handlers and removing a table row with JavaScript cover related tasks.
FAQ
These short answers clarify the native method’s input, return value and common no-change cases.
Does replaceWith() accept an HTML string?
Native Element.replaceWith() inserts a string as text. Create elements with DOM methods when the replacement needs markup.
What does Element.replaceWith() return?
The native method returns undefined. Keep a reference to the replacement or query it from the parent after the call.
Why does replaceWith() do nothing?
Check that the selector found a target and that the target has a parent in the document or detached tree.