New to Rust? Grab our free Rust for Beginners eBook Get it free →
Beginner’s Guide to Using Git and GitHub
This tutorial is all about Github – An online source code management system and social code sharing community. Whether you are a computer professional or college kid you should have Github as skills added to your resume.
Git History
Let’s go back to history! We all know about Linux, a revolutionary OS with lots of possibilites. During its development there were thousand’s of developer around globe working on it. Then the need of source code management came and result was a piece of software called ‘Git‘ originally written by super smart guy Linus Torvalds.
External link: Linus torvald explains Git in Google Conference.
GitHub History
Let’s start with GitHub. I am using Ubuntu 18.04 in which Git is placed in Kernel. If you are Mac user then it may be integrated in system (check by typing git on terminal) or you can download it from here.
The same step goes for Windows user’s and people using Windows must download Git first before moving ahead with the tutorial.
External link: Download Git for Mac and Window.
Step 1: Create Account on Github.com
To be able to share your work with others, you have to create an account. The step is simple and very quick because the registration form has only 3 fields. Go to Github.com and create your account.
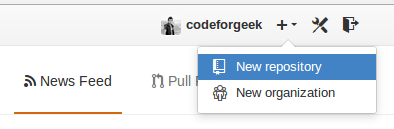
Step 2: Create Repository on Github.
Repository ( or directory, folder, etc) contains your project. You can add, delete, edit and most importantly share the repository. Browse to ‘+’ button on right side of your name in top bar and click on ‘New Repository’.
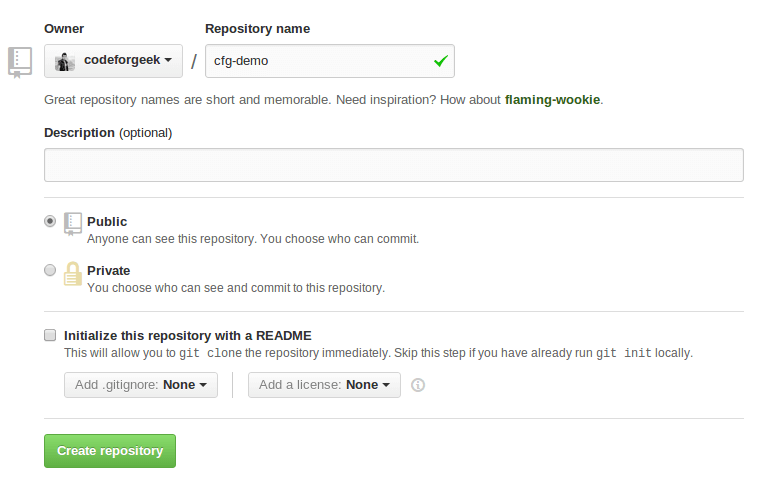
Give it a proper name. Don’t go for a too long one. Then save it and keep the browser tab open. This is what I got.
Step 3: Adding project to Repository
Here comes an interesting part. Let’s add one dummy project into our repository. Create any folder and add any file (text, PHP, HTML, node.js, etc. whichever you want) into it. Once you have done adding the file then follow the steps below.
Open up your terminal or console or command prompt depending upon your operating system. Switch to the folder you have created using CD <Your folder name>.
Type following commands one by one in your terminal. I will explain them in the next section.
git init

touch README

git add .

git commit -m "Hello my first commit"
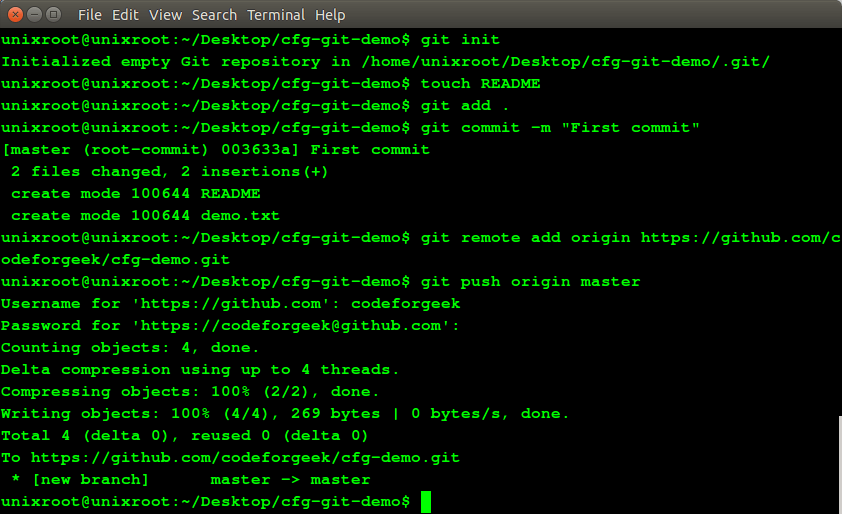
Now following commands are very important and used to upload your project into the repository you have created on Github.
git remote add origin https://github.com/Your_User_name/your_repository_name.git
After this final command to push the changes from local to the remote repository.
git push origin master
It will ask you to provide your username and password which you have used to create the GitHub account. Here is a screenshot for help if you stuck.
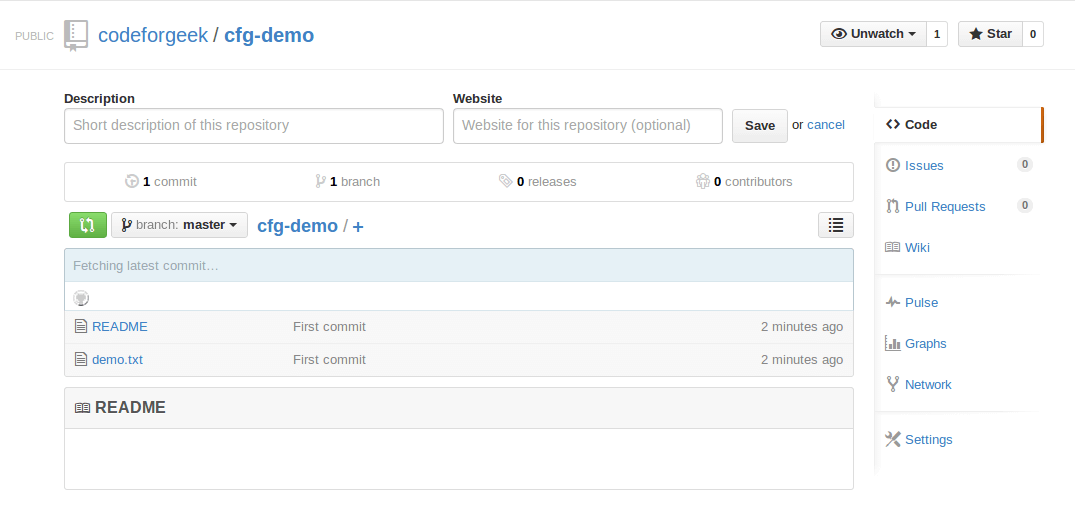
Hey! you are done with adding the repository. Just go to Github.com and check it. Now as promised above, here is an explanation of each command.
The first command starts the Git. The second command creates one file which is required for Github.com. You can edit it and put details about your projects such as installation details or external links or any kind of information you want.
The third command adds all of the files in the current directory (subdirectories are also included if it is there in your project).
Now we have added the files to Git, it’s time to save the changes and commit it. You can relate “commit” operation with finalizing operation, a phase where project is ready to deploy.
In the next two commands, we have pointed our Git to the GitHub repository and Push it into it by providing our valid Github account credentials. After successful execution of the command just refresh the GitHub page and you should see your changes.
If above steps are too long and you prefer video over it then watch it here. Yes this is official CodeForGeek YouTube Channel.