New to Rust? Grab our free Rust for Beginners eBook Get it free →
Constructing your React User Management Infrastructure
As developers, we have always known there is a need for user management for digital networks because we don’t want unauthorized users to have access to the digital assets and maybe some delegated features. We also want to limit the access of users who aren’t authorized to perform all tasks.
User management simplifies the process of managing user access control to various features and tasks. In this article, I will be showing you how user management can be easily incorporated in React using Frontegg.
Being a versatile tool, Frontegg can be used to incorporate password-based and passwordless authentication. Passwordless authentication is particularly useful and is slowly becoming the preferred method of authentication as it makes logging in safer and easier.
Today, we will be discussing managing user access to your application by assigning roles and assigning permissions to these roles using Frontegg.
User Management Made Easy
After your login/signup has been taken care of, you need to manage user access control on your app.
You can first set roles, then set permissions to the roles givens. Basically, in a typical app, we have user and admin roles. Some apps have more roles than these two, but for a simple web app, these are the two basic roles.
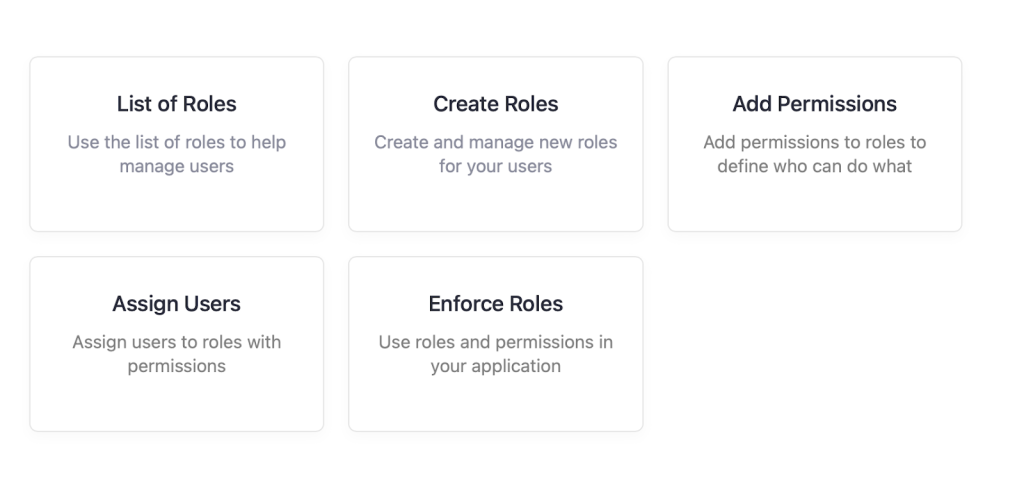
The above is the list of things you can do on Frontegg to give users access on your app. You don’t need to write long code, just check and uncheck!
Log into Your Frontegg Dashboard
First, you need to log into your dashboard where you created your passwordless authentication. Under the option of authentication, you see the option of authorization.
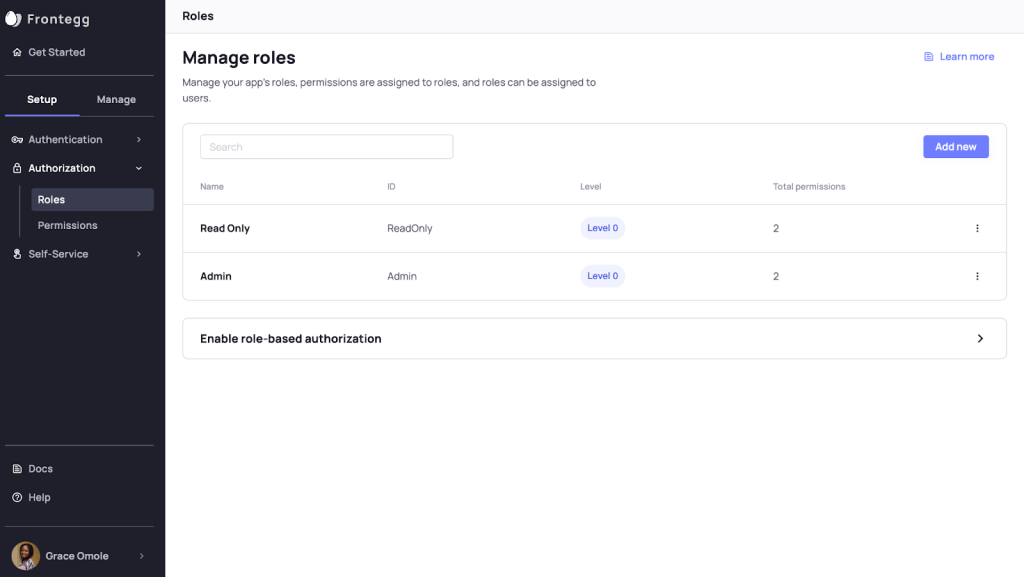
You know the kind of role you want to create: most apps have the admin role and the users’ role. You can add a new role with the add new button to create as many roles as needed for your app.
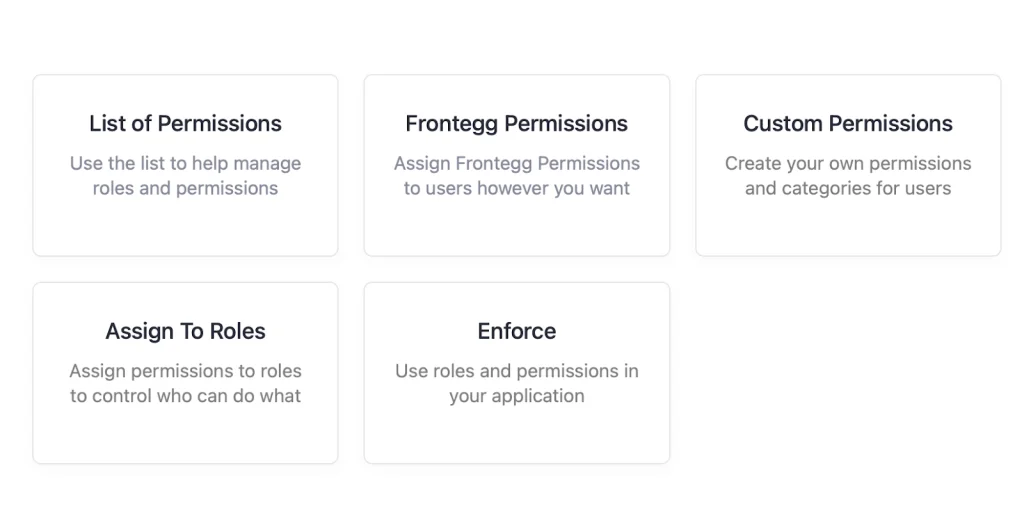
For each role, you can set permissions, i.e., what you want each role to be able to do on your app.
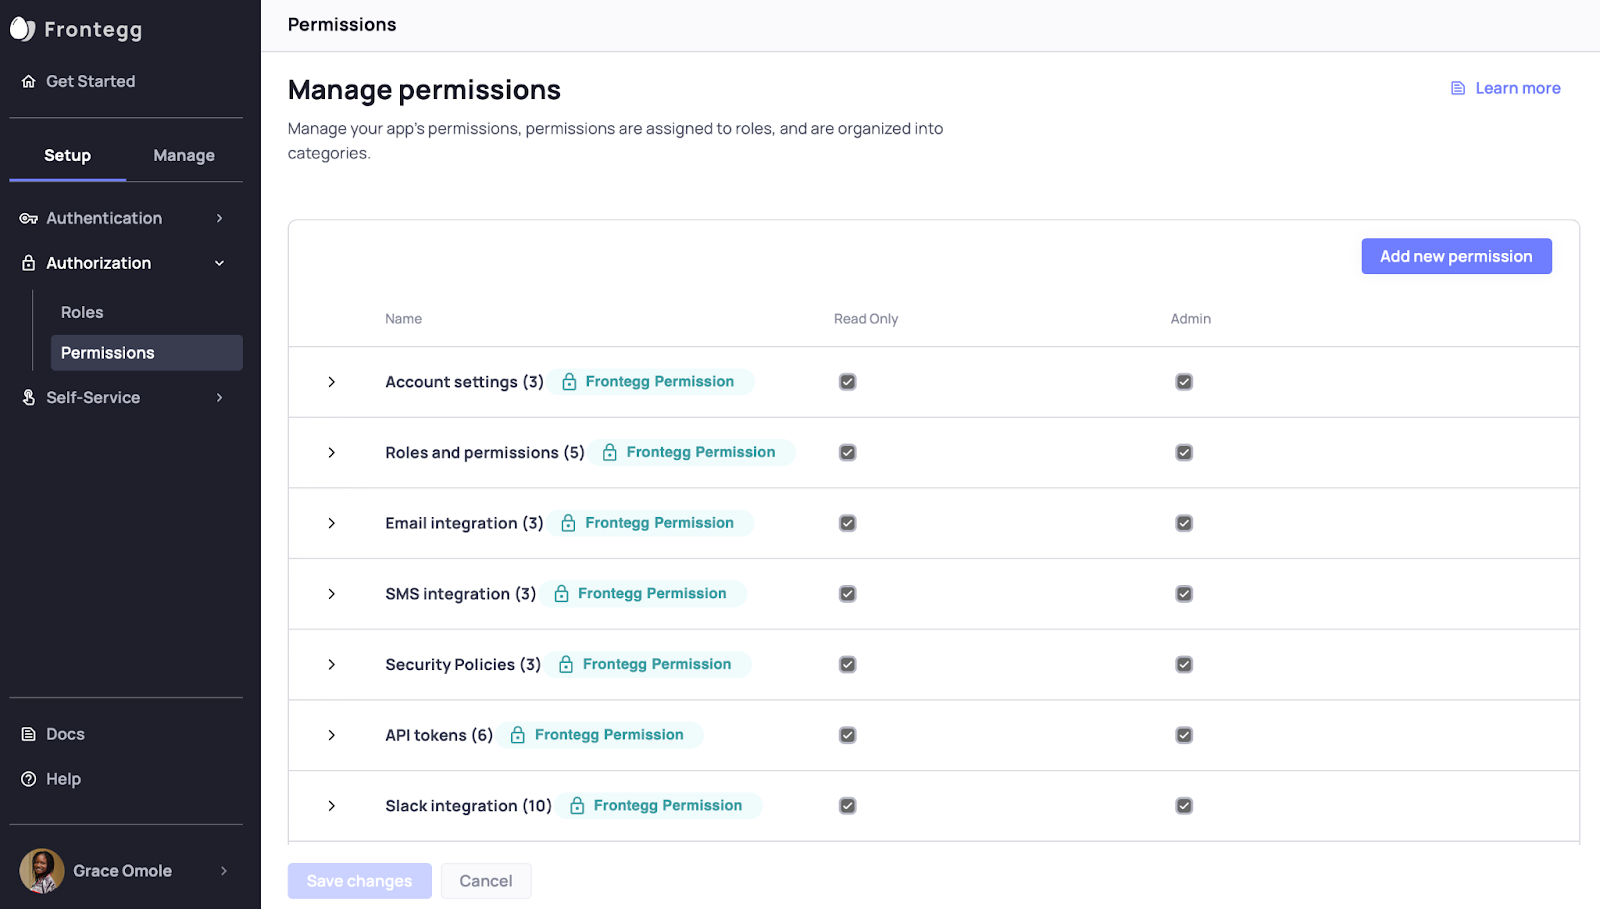
You can add permissions as far as you want for each role that has been created. Permissions can be partly given. For example, you can set it so the user is able to do account settings but not able to change their password. Such things can easily be done on Frontegg.
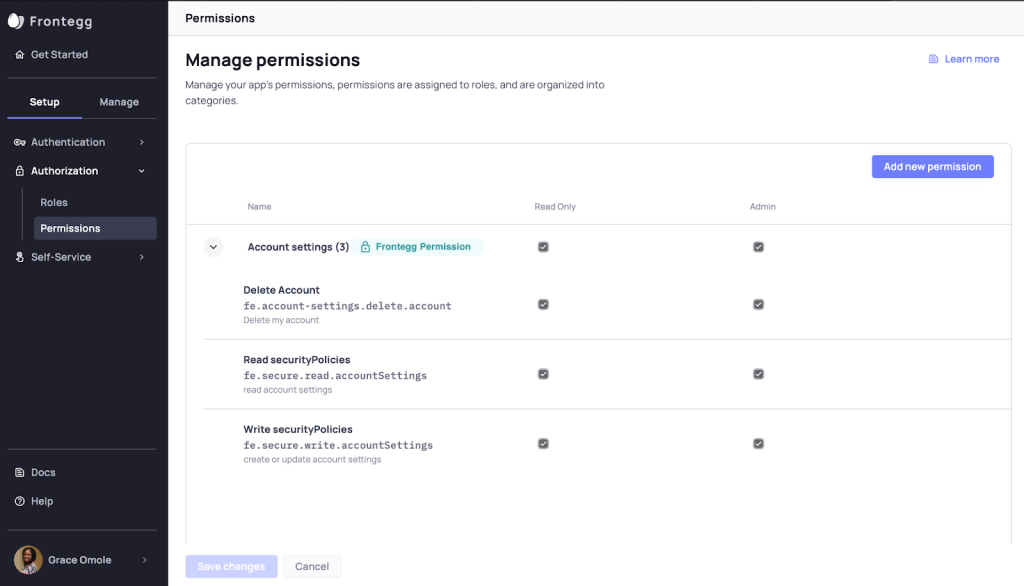
The above image shows how you can limit availability for each permission that you have created.
You just need to know some of the features your app will have and what you want users to be able to do and what not to do and set the roles and permissions on Frontegg accordingly.
Enforce Access Control in React
After creating all roles and permissions on your Frontegg dashboard, you can now implement this in your React app.
yarn add @frontegg/react
In your app, there are some pages you want to show based on the role or user currently on the page. You conditionally display a login screen if the person is not logged in or is not a user.
import { useAuthUser } from "@frontegg/react";
function App() {
// This will redirect to login in case user is not logged in
const user = useAuthUser();
return (
  <div className="App">
    Logged in as {user?.name}
  </div>
); }
export default App;
useAuthUser checks if the user is logged in or not. If the user is not logged in, the hooks redirect the user to the login page.
After the user is logged in, they need to now be classified into a new role, which will have different access permissions. So, they need to gain access to different features or information based on their roles and the access assigned to that role, whether they are users, admins, super admins, etc.
Take the example of LinkedIn. Before you login, you are automatically directed to the login page first. Even when you try to access a profile, you cannot do basic things like add a comment, like a post or send a message. Every time you try to do so, you are prompted to log in. Once you login, your access automatically changes and allows you to do a whole host of things you couldn’t do, including the examples mentioned above.
You can access others’ profiles but cannot edit any information there. But you have edit access on your own profile. Similarly, your contacts can edit their own information but not yours. Your visibility of posts also changes based on your own settings of your LinkedIn profile, the settings others have made on their profiles, the groups you follow and their settings, and so on.
import { AuthorizedContent, useAuthUser } from "@frontegg/react";
function App() {
// This will redirect to login in case user is not logged in
const user = useAuthUser();
return (
  <div className="App">
    Logged in as {user?.name}
  </div>

    <AuthorizedContent requiredRoles={['user']} >
      <div>
          Welcome Grace
      </div>
    </AuthorizedContent>

); }
export default App;
AuthorizedContent checks the roles based on the list of roles you have created on your dashboard.
The above code snippet is just basic. You can tweak it as much as you like and make your application as restricted to people as you want.
Conclusion
Users want secure, frictionless access to their applications so that they can accomplish all that they wish to on the application. This can be achieved easily with user management. Having a good infrastructure for your user management is a key requirement for creating applications. Following the steps and the platform discussed here, you can achieve seamless user management without stress.