New to Rust? Grab our free Rust for Beginners eBook Get it free →
Python Django Framework Tutorial for Beginners – A Beginner’s Guide to start with Django
Django is a python web framework that is used to build web applications. This is a simple yet popular web framework for beginners. A web framework is a server-side application framework which supports the development of dynamic websites as per user requirement. The benefit of a framework is that you don’t have to create the many components of web development. There are many web development frameworks available. Below are a few examples:
- React JS
- Angular
- Ruby on Rails
- Express
But, the question is why Django? So, there are various reasons to choose Django for web development. Django is built on python which is a very popular programming language nowadays. Django is an open-source web framework that is simple yet full of robust features. It follows the principle of DRY (“Don’t Repeat Yourself”). This keeps the code simple and non-repeating by allowing Parent-Child Relationship on web page designs.
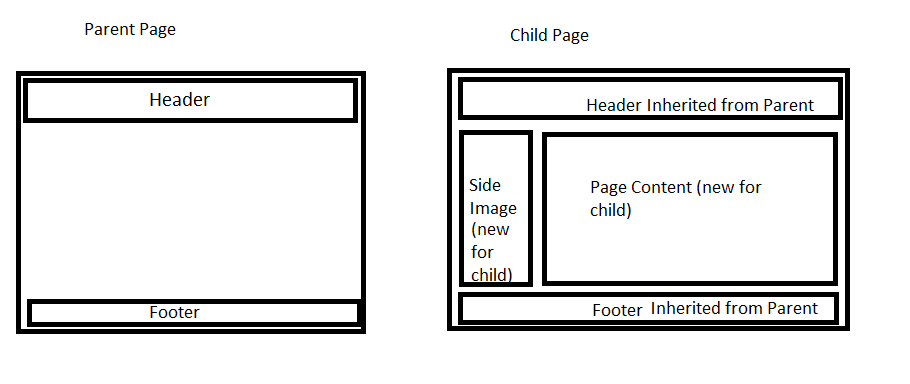
The Parent template contains common items throughout the site. Each child template will inherit common features from the Parent page and add the new elements specific to the page. This is how DRY concepts work here, we do not require to write common code again and again for every page. Django provides tools and functionalities that are related to many common issues associated with Web development, such as security features, database access, sessions, template processing, URL routing, internationalization, localization, and much more. The benefits of the Django framework are as below which makes it more popular and a good option for beginners.
- Fast: Django is a free open source and it supports the fast development of the app.
- Tons of Packages: Django provides more than 116K packages for web development.
- Secure: Django provides security features like automatically escaping all strings, Cross-Site Scripting, and Cross-Site Request Forgery protection, SQL injection, cross-site scripting, user authentication system.
- Scalable: Instagram and Disqus serve millions of users so it is highly scalable.
- Versatile: Django is used to build different sorts of applications – from content management systems to social networks to scientific computing platforms.
- Simpler Syntax
You must be surprised to know that many big websites use Django. Few examples are Instagram, Disqus, Mozilla, Bitbucket, Last.fm, National Geographic.
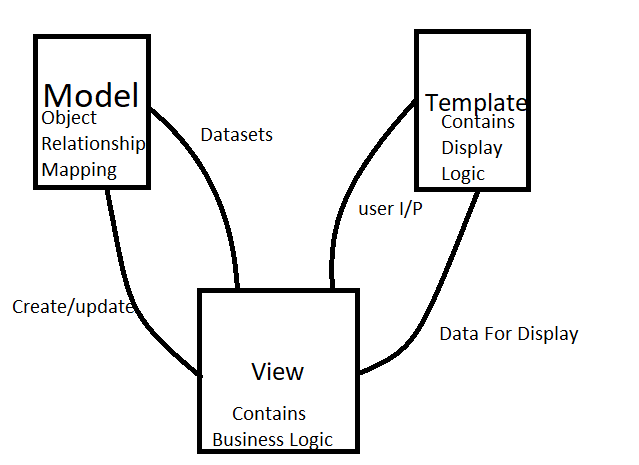
Django Architecture:
Django follows MVT architecture i.e. Model View Template. Django follows the same architecture as MVC (Model View Controller) but with slightly different terminology MVT.
- The model is for storing and maintaining Data. Django’s Object-Relational Mapping (ORM) provides the interface to the application database.
- The template provides display logic. It acts as an interface between the user and your Django application.
- The view manages the application’s data processing, application logic, and messaging. The view contains business logic so major data manipulation logics are written here which template refers to when called through the website.
Have a look at the below image for better clarity on MVT architecture.
Now let’s proceed with practical implementation. We will make a simple web app using Django.
Installation of Django and Prerequisite:
The first thing is to install Django and prerequisite programs on a local machine so that we can work with Django. The step involves the installation of Python, Virtualenv, and Django. I am assuming is that you have already installed Python.
I am using Anaconda Navigator for python which provides Jupyter Notebook which is more user-friendly. It also contains a cmd.exe feature. You can open that if you want to work on the command prompt to run your commands.
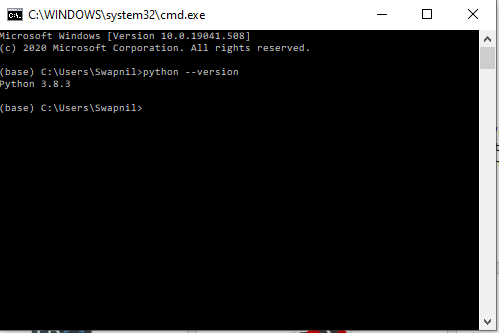
If you are not using Anaconda, you can open the command prompt and verify if python is installed or not. Just to ensure whether python is there in your system, type the below command on the command prompt:
python --version
Output:
Install Virtual Environment:
A Python virtual environment wraps all the dependencies and environment variables that new software into a file system which is separate from the rest of the software on the computer. This is good practice to follow so that every project has a different virtual environment with no dependency on others. There are a few virtual environment tools available for Python. But, virtualenv is simple and easy to use. To install virtualenv, execute the below command in the Command Prompt
pip install virtualenv
you will get a successfully installed message if it is installed successfully. Now onwards, everything which should be installed, including Django, will be installed inside a Virtual Environment. You can create a separate folder named first on the computer. Then, you can organize all your projects and websites. But you can follow the next steps creating the directories as per your choice. The directory can be created using the below commands on the command prompt.
mkdir first

cd first
This folder first is the higher level directory that will store all the files and things related to the first Django project, including its virtual environment.
Run the below command to install inside the first folder:
virtualenv venv
The virtual environment is ready now. The next step is to activate it using the below command:
venv\Scripts\activate
This new venv folder contains a copy of Python inside this folder. After this, activation of the venv environment, will use our local copy, stored inside venv, when we run the python command instead of the other one we installed earlier.
To deactivate the venv run the command below:
venv\Scripts\deactivate.bat
But, since we are going to create a web app, it should be activated only. However, this step “installing virtual environment” is not mandatory, you can skip this if just trying to build simple local applications for learning purpose. But, it is recommended for good practice.
Installing Django framework:
Now, venv is activated, so run the following command to install Django. Even if you have skipped the virtual environment folder venv creation step, you can run the below command to install Django:
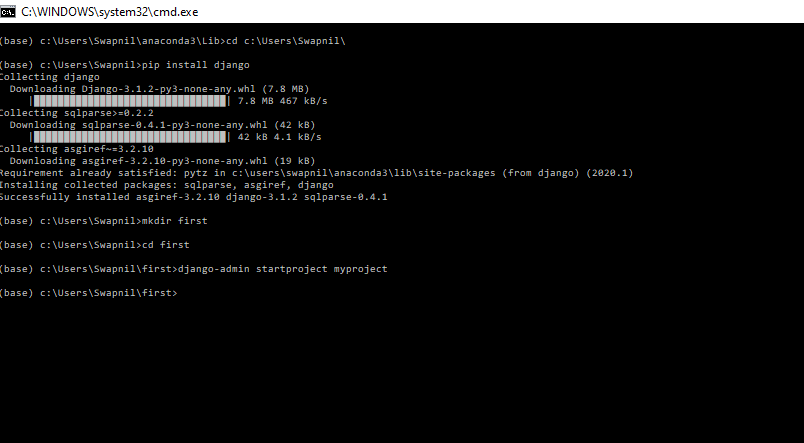
pip install django
We are done with the installation and ready to build a simple web application. So let’s move to the next step.
Build Your First Web Application in Django:
First, create a project for a new web application. Move to the directory where you would like to share your web app code, then run the following command on the command prompt. “first” is the folder which I opted for. If you choose a different name of folder then give folder name instead of “first” in the below command:
django-admin startproject myproject
You will be able to see the newly created myproject folder under the “first” folder, which we created in the previous step using the mkdir command, in your system as below:
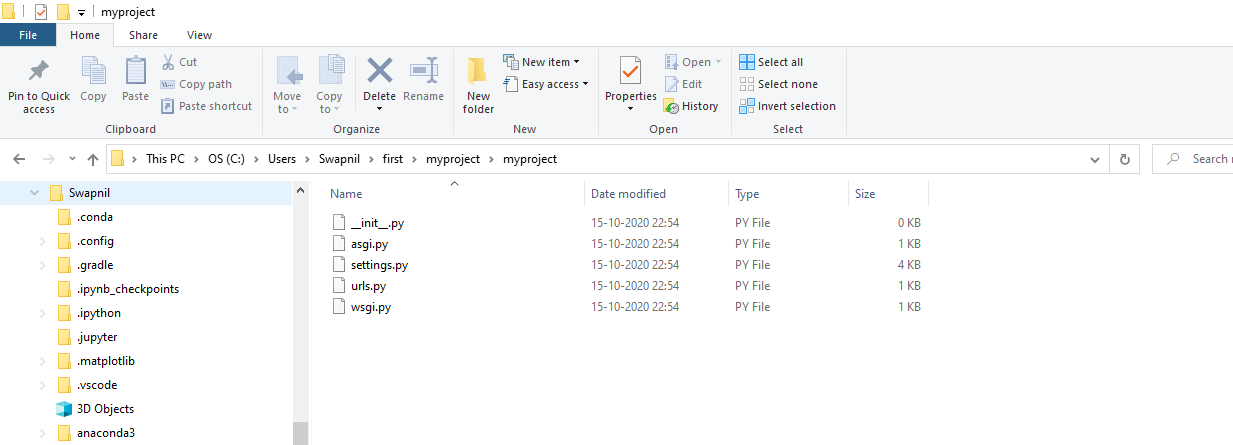
You will see a list of files like _init_.py,urls.py inside the project directory “myproject”. Let’s discuss each file.
manage.py – It is a command-line utility that allows you to interact with this Django project in various ways.
myproject/ – It is the python package of the project. It is used to import other things like myproject.urls.
init.py – Init tells the python that this is to be treated like a python package.
settings.py – This file manages all the settings of your project.
urls.py – This is the main controller file that maps it to your website.
wsgi.py – It serves as an entry point for WSGI compatible web servers.
Now we are going to create a web app. For time being you can think a website is a collection of web apps. So, let’s create an app, But, make sure you are in the same directory as manage.py and then type the below command on the command prompt. You can choose any other app name as well. Provide the chosen app name instead of firstwebapp in the below command.
python manage.py startapp firstwebapp
Now have a look at the ‘firstwebapp directory, some extra files are added in the original myproject. It includes model.py, test.py which are related to your backend databases.
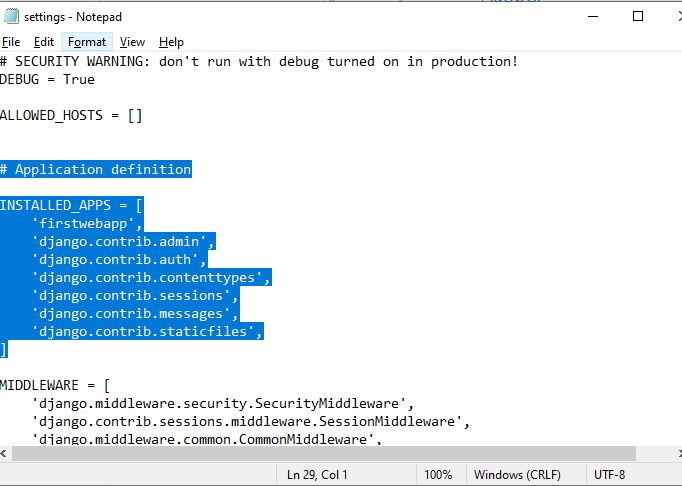
Now our default folders and files are ready. The next step is to import our web application manually inside myproject settings. Open myproject/settings.py and add your app manually. The only thing you need to add here is “firstwebapp ,” i.e. our app name under INSTALLED APPS. Rest other things are already there.
Once settings.py knows that we have our new web app as installed_apps, So now we need to create a view that contains logic on what to do. So, we want to print ‘Hello, My First App !’ when this app is called through the server/browser. You need to open your webapp/views.py and put the below code in it. It is a blank file by default. We are importing Django packages and features.
from django.shortcuts import render

from django.http import HttpResponse

def index(request):

    return  HttpResponse('Hello, My First App !')
This view returns an HTTP response to the browser’s HTTP request. Now, there should be a URL to which this view responds Right? So map this view to a URL. So let’s create a new python file “urls.py” inside our firstwebapp to add URL mapping. In firstwebapp/urls.py include the following code:
from django.conf.urls import url

from . import views

urlpatterns = [

 url(r'^$', views.index, name='index'),

]
We are mapping URL to index view which we have already defined in the views.py file. The URL pattern is in regular expression format where ^ stands for the beginning of the string and $ stands for the end.
The next step is to map the root URLconf to the webapp.urls module. Now open your myproject/urls.py file and verify the below import commands are in the file or not if not add them and write the below code under urlpatterns:
from django.contrib import admin

from django.urls import path

from django.conf.urls import include, url
urlpatterns = [
path('admin/', admin.site.urls),
url(r'^firstwebapp/', include('firstwebapp.urls')),
]
In the above code, we are adding firstwebapp and included the webapp.urls in URL configuration. You have to import django.conf.urls.include and insert an include() in the urlpatterns list. This include() function allows referencing other URLconfs.
The regular expression has a trailing slash “/”, this means whenever Django encounters include(), it chops off whatever part of the URL matched up to that point and sends the remaining string to include URLconf for further processing.
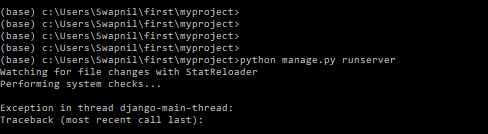
Now the last step is to start the server and see what happens. To start the server, type the below command:
python manage.py runserver
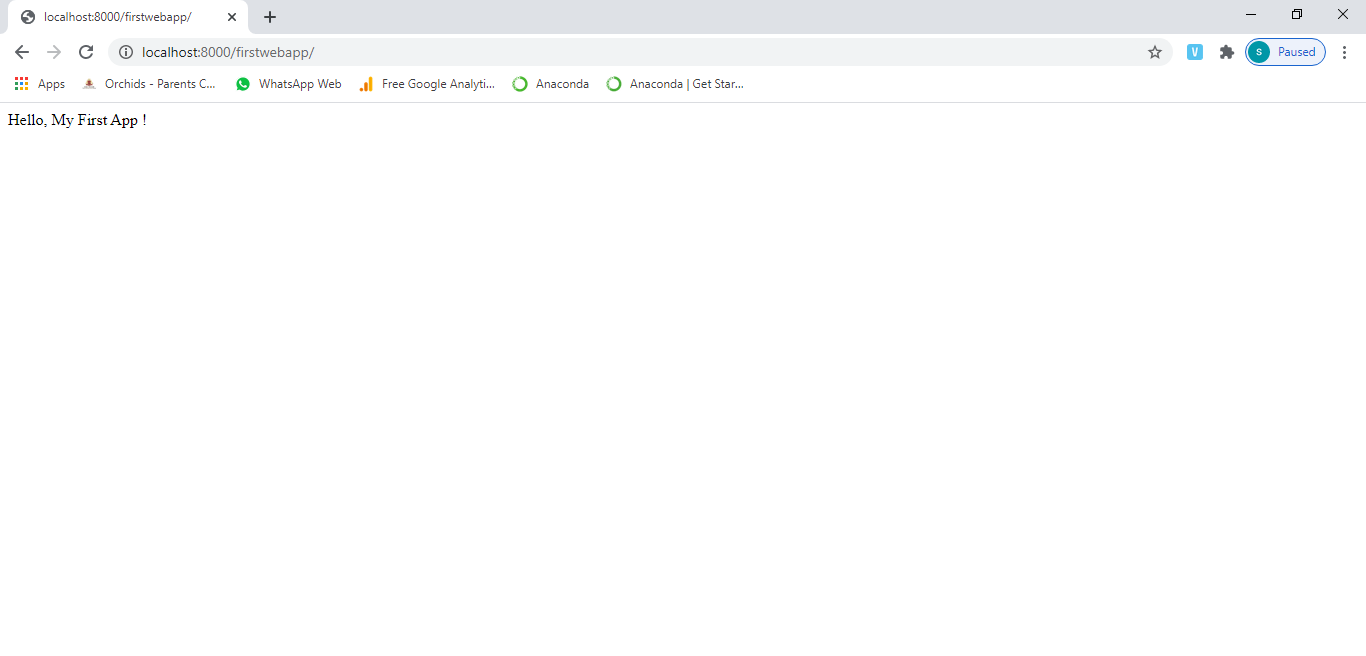
Once the server is up and running, go to http://localhost:8000/webapp/ in your browser, and you will see the text “’Hello, My First App !”, which you defined in the index view.
Conclusion
We have created the first web app using Django. This is the very basic web app development using Django. Django is a very powerful framework for complex websites. You can deep dive into model, view, templates, and URL for complex web site development. Django is a beginner’s web-framework that can handle all of your data in a better way. Django is the 1st Web Framework for Python. This is the reason that it is easy for beginners and yet powerful enough for the professionals.
Further Study
- Top 5 Python Libraries for Machine Learning and Data Science
- Python and MongoDB Tutorial – A Guide to use Python with MongoDB
- Python Data Structures Limitations and Solutions