
New to Rust? Grab our free Rust for Beginners eBook Get it free →
NodeJS Command Line Options
Node.js gives the power to interact with the command line and perform different operations by giving the command line options which can be used for different purposes like running JavaScript code, checking for errors in a particular file or even in a single line, installing dependencies, printing stack traces, etc.
With the wide repository of dependencies in Node.js, any type of application can create either the front-end or back-end. Still, sometimes it is required to interact with the command line.
For example, we want to check for an error in a particular statement of JavaScript, so we have to create a folder then create a file to insert the required code then execute the file, and then it throws the error, but with the help of Node Cl Options, we can do it in a single line of code.
Not only this, there are various CL options provided by Node.js which are handy in performing small operations. Let’s see them one by one with examples.
Before going future make sure that you have node installed on your pc. Here’s how you can install, set up, and run your first nodeJS app.
Different Types of Node Command Line options
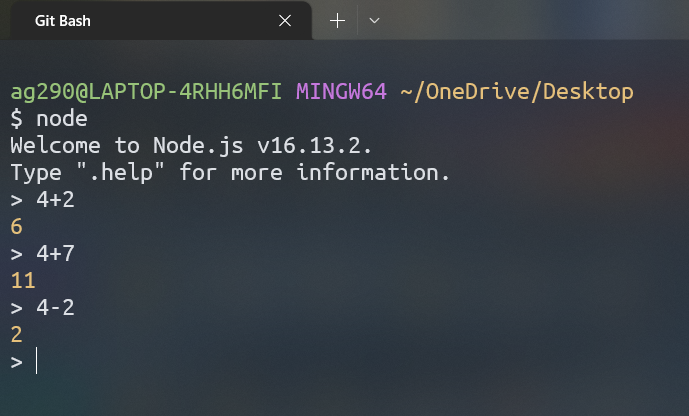
1. REPL
REPL stands for read-eval-print-loop. Node.js provide REPL to run JavaScript directly on the terminal.
Syntax:
node
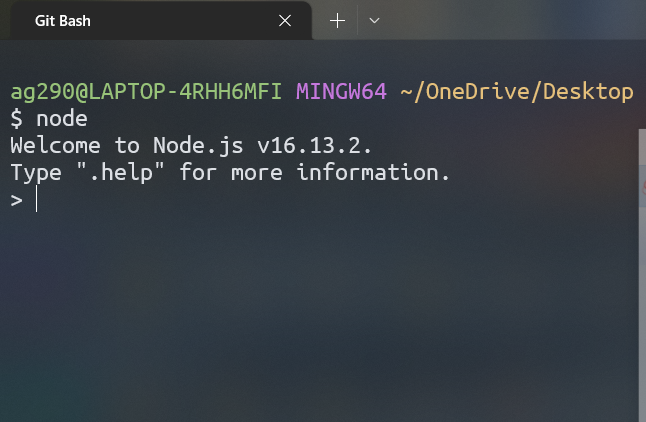
Example:
Let’s type the above syntax in the terminal and then type expressions with an operator and operands and press enter to get the result.
Output:
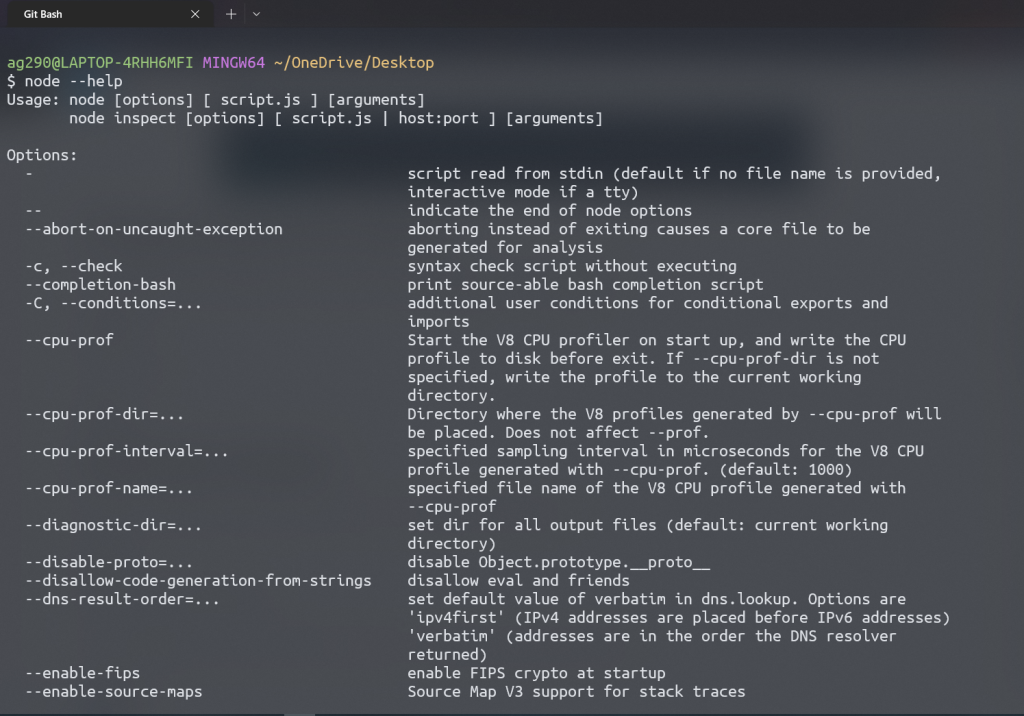
2. Printing Command Line Options
Node CL provides an option to print all the command line options in the terminal.
Syntax:
node --help
Output:
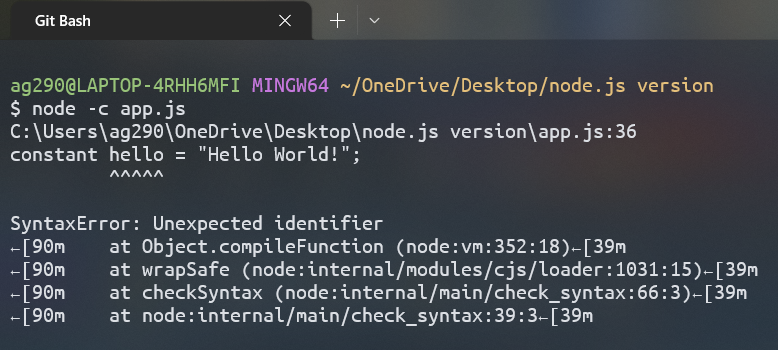
3. Syntax Error Checker
By using Node CL we can check the syntax error of a particular JavaScript file.
Syntax:
node -c javascript-file-name
where javascript-file-name is the name of the file for which you want to check the error.
Example:
We have a file app.js in which we have made a syntax error to check whether this Node Cl option is able to detect it or not.
Output:
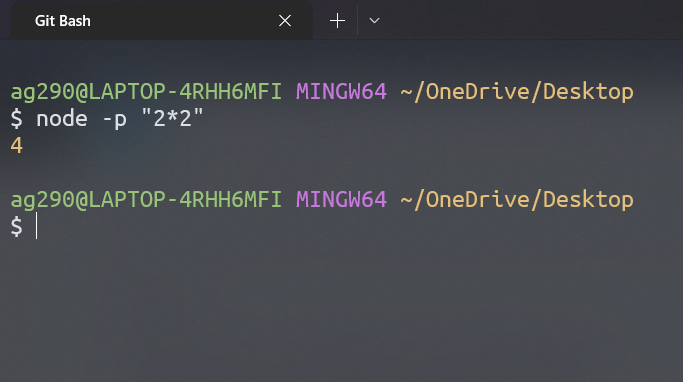
4. Execute and Print the Result
It is a way to execute the statement and print the result in the terminal.
Syntax:
node -p "statement"
Example:
node -p "2*2"
Here we are supposed to get the value 4 as a result of 2 * 2.
Output:
5. Execute and Print the Error
It is a way to execute a statement and print the error it if occurs otherwise it doesn’t print anything.
Syntax:
node -e "statement"
Example:
node -e "1 + q"
Here we are typing a statement with a reference error.
Output:

6. Preloader
Node CL provides a preloader that is used to execute a file before any other file.
Syntax:
node -r priority-file other-file
where the priority-file is the file you want to execute first before the other-file.
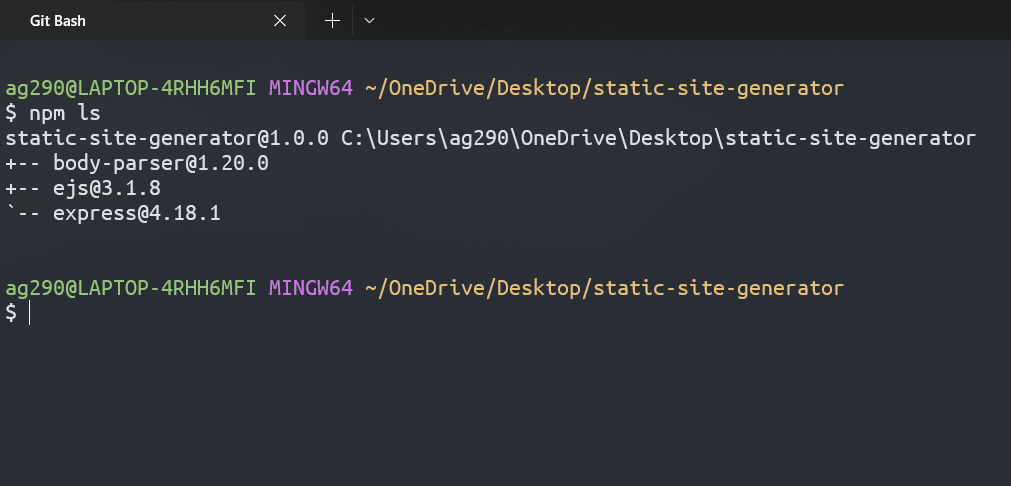
7. List of dependency
Node CL provides an option to print all the dependencies used inside a project.
Syntax:
npm ls
Output:
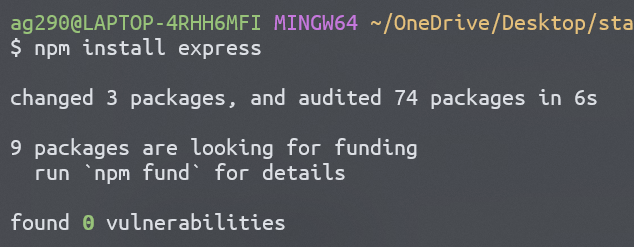
8. Initialize NPM
A standard option that Node Command Line provides is the initialization of NPM which is further used to install dependencies inside the project.
npm init
The dependency can be installed by using the following command.
npm install dependency-name
Where dependency-name is the dependency you want to install inside the application.
Example:
npm install express
Output:
9. V8 CL Options
This option prints v8 command line options.
Syntax:
node --v8-options
Output:

Summary
The Node CL option is a fast way to execute a file, find errors, and get results for various calculations. We can run JavaScript code directly through it on the terminal. When we are maintaining the server made by Node.js, these options become very important, like getting the stack trace, setting priority to execute a file before others, etc. Hope this article helps you to learn Node Command Line Options.
Reference
https://nodejs.org/api/cli.html#options


