New to Rust? Grab our free Rust for Beginners eBook Get it free →
Getting Started with Next.js: A Hello World Application

Next.js is a modern React framework for building web apps efficiently and effectively, which is becoming famous nowadays. It fills the gap that React cannot provide and due to its ability to handle the backend code, it becomes the best solution for building full-stack applications.
In our previous tutorial of this exclusive Next.js series, we learned what each file and folder in a Next.js project means. In this, let’s get started with Next.js by creating a simple Hello World application.
Next.js Hello World Application
Below is the detailed step-by-step procedure to create a Hello World application in Next.js.
1. Initializing a New Next.js Project
Make sure that the Node.js version 18.17 or higher is installed on your system:

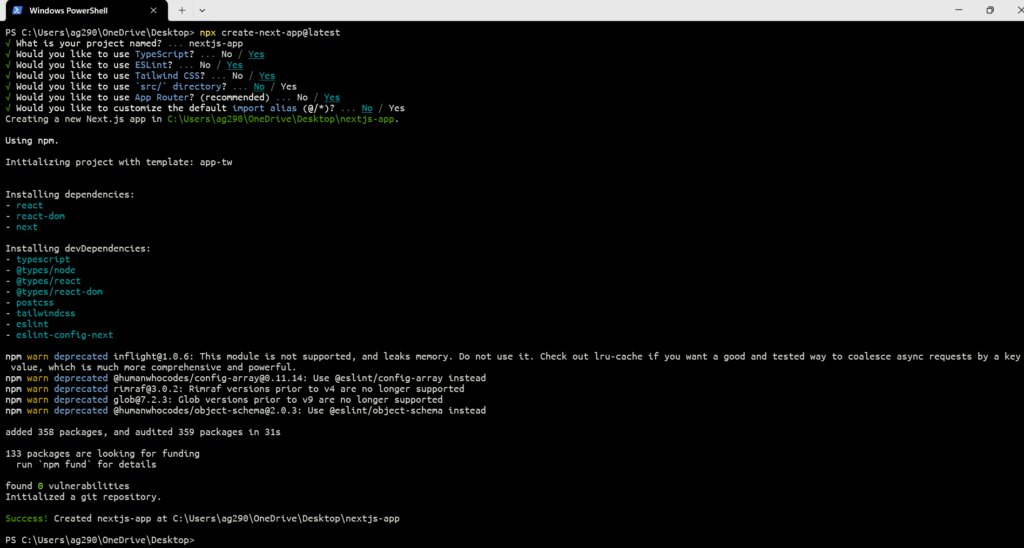
Open the terminal and run the below command to create a Next.js application:
npx create-next-app@latest
Choose any project name you want – all in lowercase, use hyphens (–) for space, and no whitespace.
For the other parameters let’s go with the default option for now. Just check “Yes” for both TypeScript and App Router to follow along with us.

2. Navigating to the Project Directory
Once the project is set up, you will get the exact project path.

Copy the project path and navigate to it:

3. Testing the Application
Now execute the below command to test the application:
npm run dev
Here we are running the development server which listens on http://localhost:3000/, So open the URL in a browser to see the default Next.js welcome page.

In the upcoming steps, we will create another route “/hello-world”, to create our Hello World page, keeping the default route “/” unchanged.
If you want a detailed explanation of the above step, see Next.js Installation.
4. Opening the Project in a Code Editor
Now, open the project folder inside a code editor to edit the code for making our Hello World page.
If you are using VS code, just type “code .” in the terminal to directly open the project folder in the editor.
5. Understanding the App Directory
You are now seeing a lot of files and folders which we already explained in our previous tutorial. One of the main folders we need here is the app.

In the app, we have two important files: layout.tsx and page.tsx.

Each folder in a Next.js application has its own layout and page. The layout (layout.tsx) is like a wrapper that goes with page (page.tsx).
The app/layout.tsx and app/page.tsx are the layout and page for the home route(“/”) and if we want to create another route, like “/hello-world”, we can create a folder of that route name inside this main app directory with its layout.tsx and page.tsx files. In future, if you need another route you have to do the same, this is called file-based routing.
6. Creating the Hello World Folder
Let’s create our “hello-world” folder inside the app directory with both layout.tsx and page.tsx.
layout.tsx:
import React from 'react';
import Head from 'next/head';

const HelloWorldLayout: React.FC = ({ children }) => {
  return (
    <html lang="en">
      <Head>
        <meta charSet="UTF-8" />
        <meta name="viewport" content="width=device-width, initial-scale=1.0" />
        <title>Hello World Page</title>
      </Head>
      <body>
        {children}
      </body>
    </html>
  );
};

export default HelloWorldLayout;
The first two lines are importing statements, importing the React library to create React components and the Head component from Next.js to modify the HTML and use meta tags, titles, and other elements present in the head.
After this, the code creates a component named HelloWorldLayout where the React.FC is a TypeScript type. This component uses children as a prop to inject it inside the HTML. This component returns JSX, representing the structure of the HTML document.
All the code inside this is just basic HTML code.
The last line exported the HelloWorldLayout as the default export allowing other files to import this layout component.
page.tsx:
import React from 'react';
import HelloWorldLayout from './layout';

const HelloWorldPage: React.FC = () => {
  return (
    <HelloWorldLayout>
      <section>
        <h2>Hello, World!</h2>
        <p>This is the HelloWorld page.</p>
      </section>
    </HelloWorldLayout>
  );
};

export default HelloWorldPage;
Most of the things are the same as above. We are creating a component HelloWorldPage, returning JSX that uses HelloWorldLayout and writes some HTML that HelloWorldLayout uses as children for the component.
Output:

*What Next?
Summary
To create a Hello World application using Next.js all we need to do is create a folder called “hello-world” inside the app directory with layout.tsx and page.tsx files. The layout.tsx is like a container that wraps the page.tsx content. We can create our custom layout in layout.tsx then import it and use it inside page.tsx with the HTML content we want to render. This whole process creates a new “/hello-world” route for our Hello World page.
Reference
https://nextjs.org/docs/getting-started/installation


