New to Rust? Grab our free Rust for Beginners eBook Get it free →
Deploying Next.js App to Vercel: A Step-by-Step Guide

In our series on Next.js, we have covered almost all the basics and even explained how to optimise a Next.js app for production. Now the ultimate question is how to deploy it and make it live. Well, just like Next.js made everything easy, it also provides a very simple way to deploy the app using Vercel and GitHub. Let’s learn in this tutorial.
What is Vercel?
Vercel is a cloud platform built by the company that created Next.js, so it is obvious how both are compatible with each other and no additional configuration is required to host a Next.js app. It is not only for small-scale applications but also for large scale and it can host both static sites and serverless functions.
Vercel allows us to host Next.js apps directly from GitHub with automatic deployment on each push, making it super easy to make a local application live in seconds.
Some of the features of Vercel are:
- It provides SSL certificates to make the application HTTPS secure.
- It has a built-in CDN providing content distribution globally with fast load times.
- Vercel also lets us connect custom domains.
- We can also share preview deployments with the team for feedback before going live.
Push Next.js App to GitHub
As we learned, we can deploy our Next.js directly from GitHub, so first we need to push our app to GitHub. Let’s see the process quickly.
Step 1: Create a GitHub account
If you do not have a GitHub account, you can go to the GitHub website to create one.

Step 2: Create a new repository
Next, we need to create a new repository for our Next.js app:
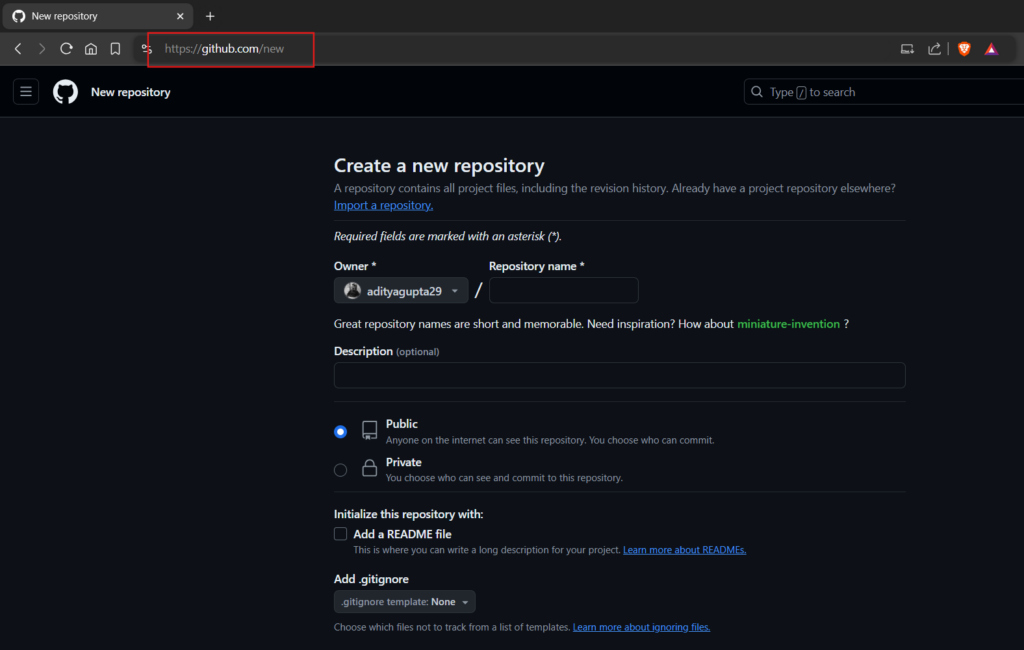
Enter any name for the repository, go with the default options for others and click “Create Repository” button:

Copy the whole snippet to later push the project on GitHub directly from the command line:
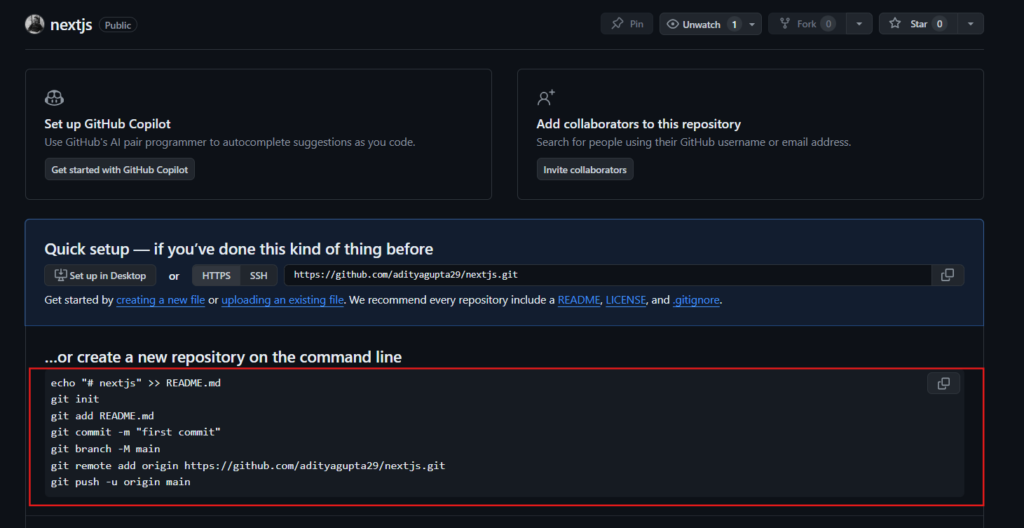
Step 3: Create and test a Next.js Project
Now inside your system, open a terminal and run the below command to create a new Next.js application, if you don’t have one:
npx create-next-app@latest
Choose any project name you want – all in lowercase, use hyphens (–) for space, and no whitespace. For the other parameters let’s go with the default option for now:

Once the project is set up, you will get the exact project path:

Copy the project path and navigate to it:

Now execute the below command to test the application:
npm run dev

Here we are running the development server which listens on http://localhost:3000/:
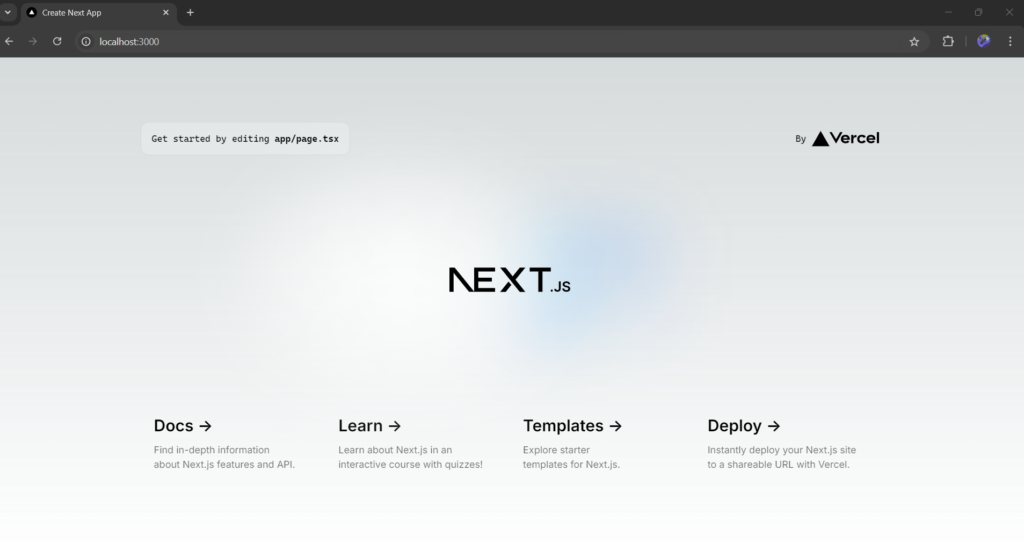
If you want a detailed guide on how to start with Next.js, click here.
Step 4: Push Code to the GitHub repository
It’s time to push the application code to the repository.
Just paste the command we copied earlier:
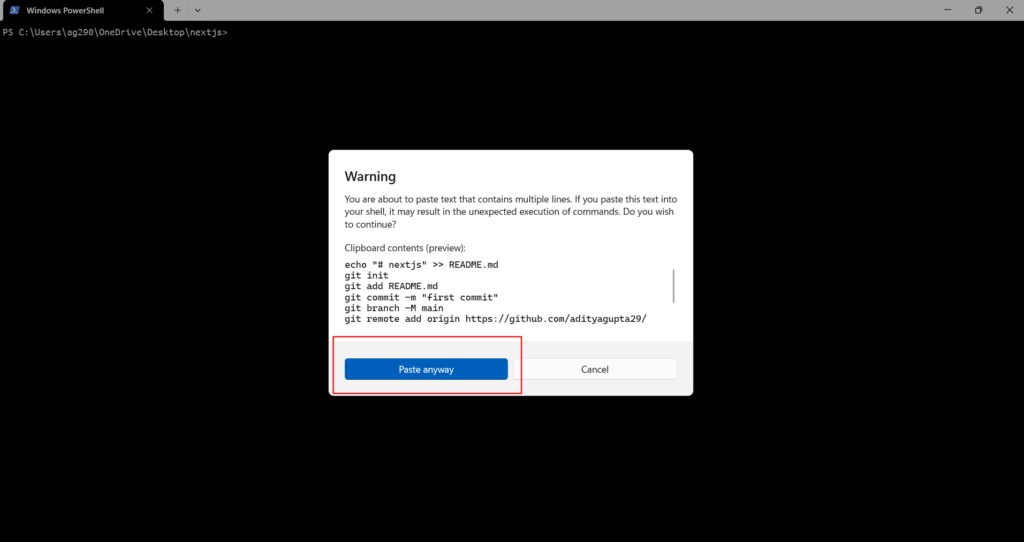
Then hit Enter:
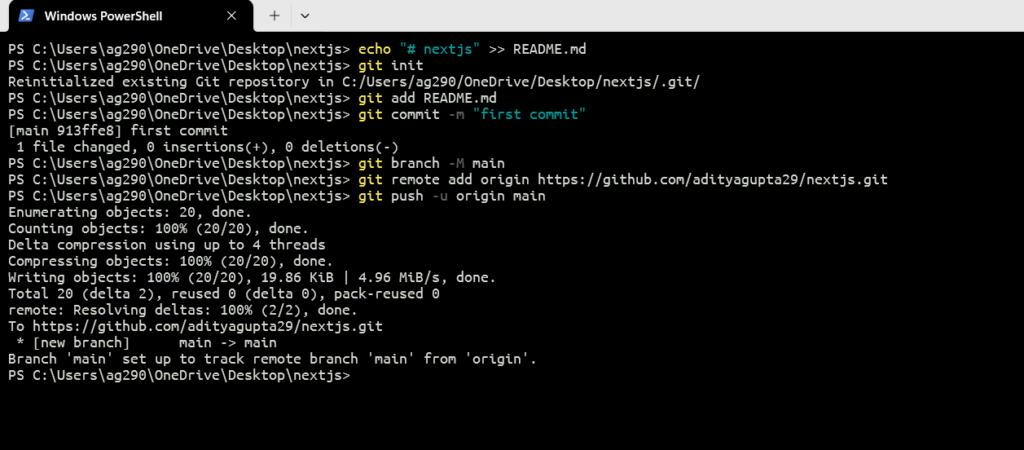
You can now go back to your GitHub repository and you will see all the code of the application that we previously ran locally:
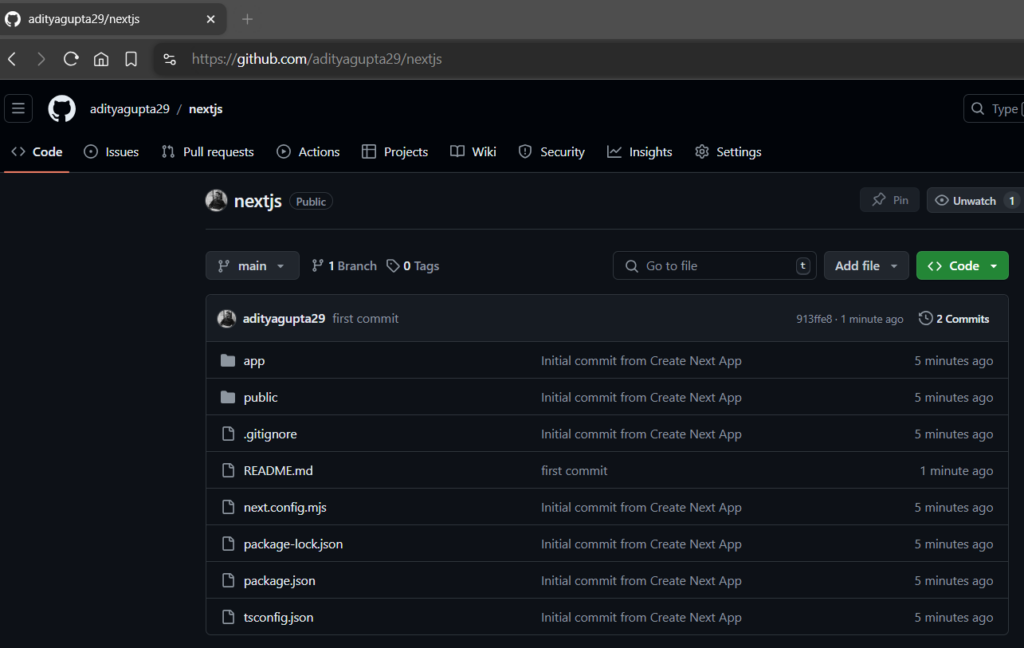
That’s it, we have successfully pushed our Next.js app to GitHub. Now it’s time to deploy it on Vercel.
Deploy Next.js App to Vercel from GitHub
It’s quite easy to deploy a Next.js app to Vercel from GitHub, let’s see how.
Step 1: Setup Vercel
Go to the official Vercel website:

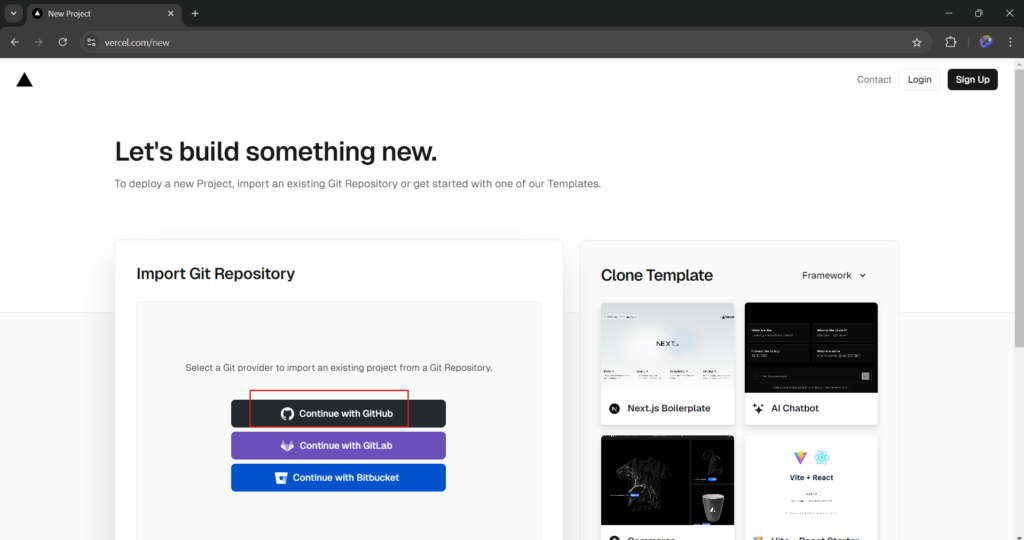
Then to import a Git repository, let’s continue with GitHub:
Connect to GitHub:
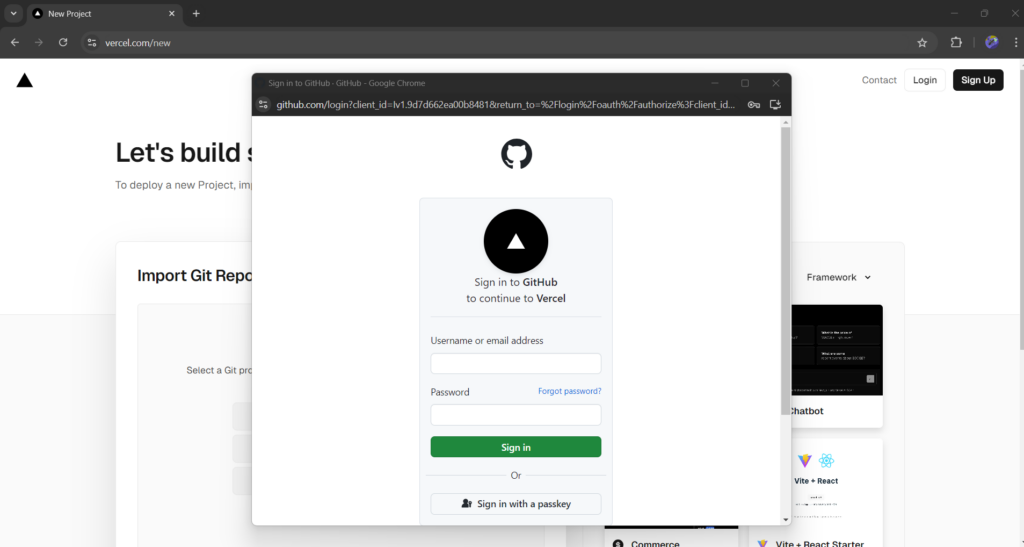
Give required permissions to Vercel:

Step 2: Install Vercel on GitHub
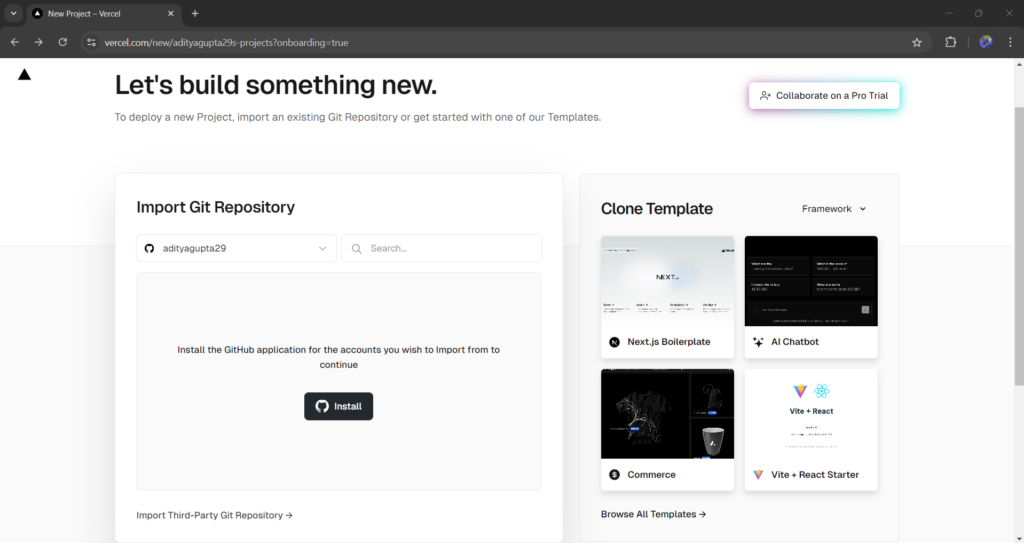
After successfully connecting to GitHub, you will get a page something like this, click on the “Install” button:
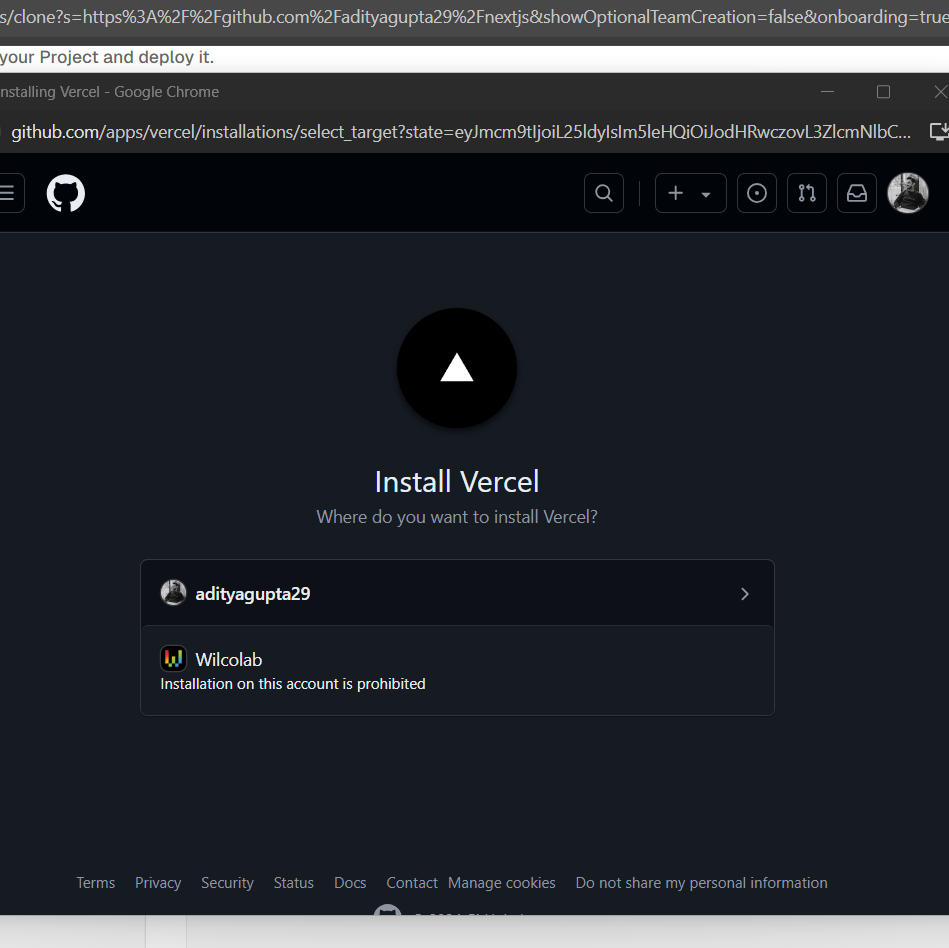
Install Vercel:
Step 3: Import and deploy the Next.js app
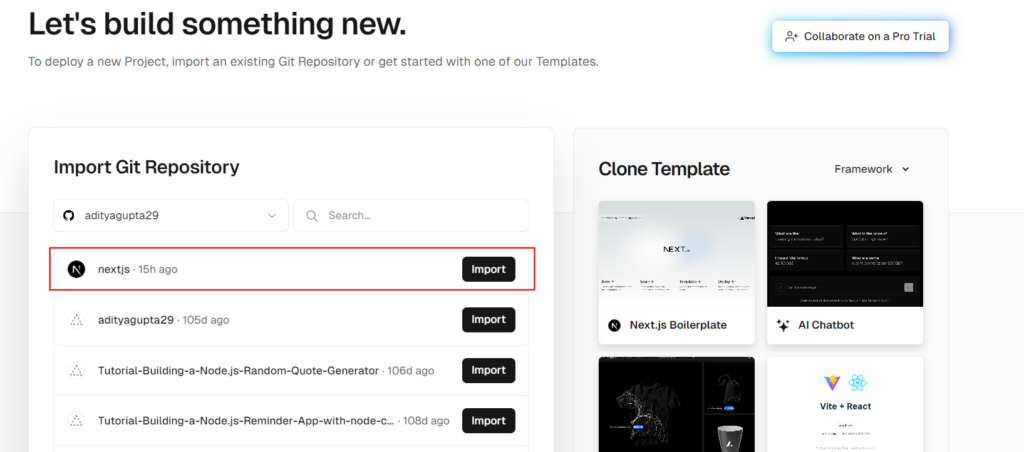
Now, import the Next.js project we just put on GitHub:
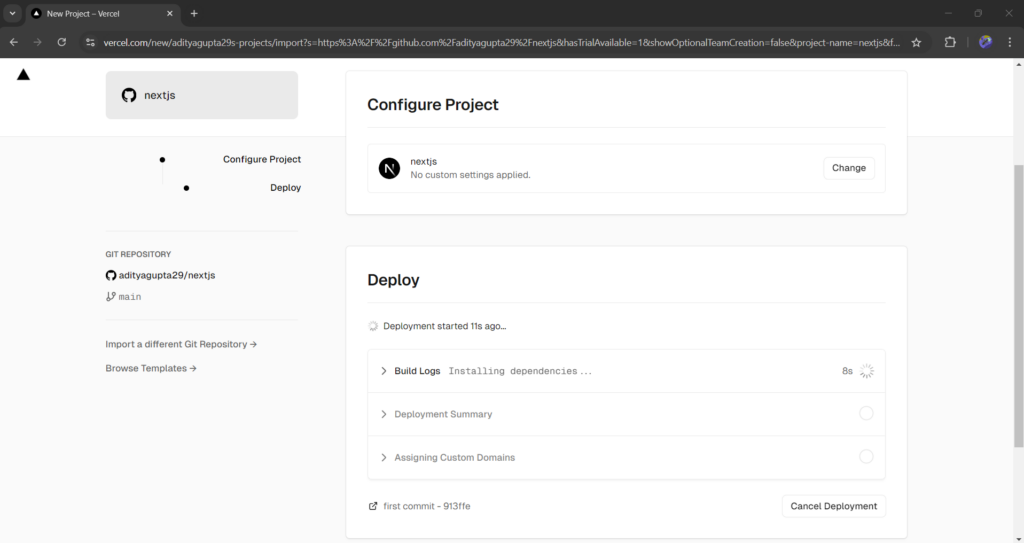
Then click the “Deploy” button:
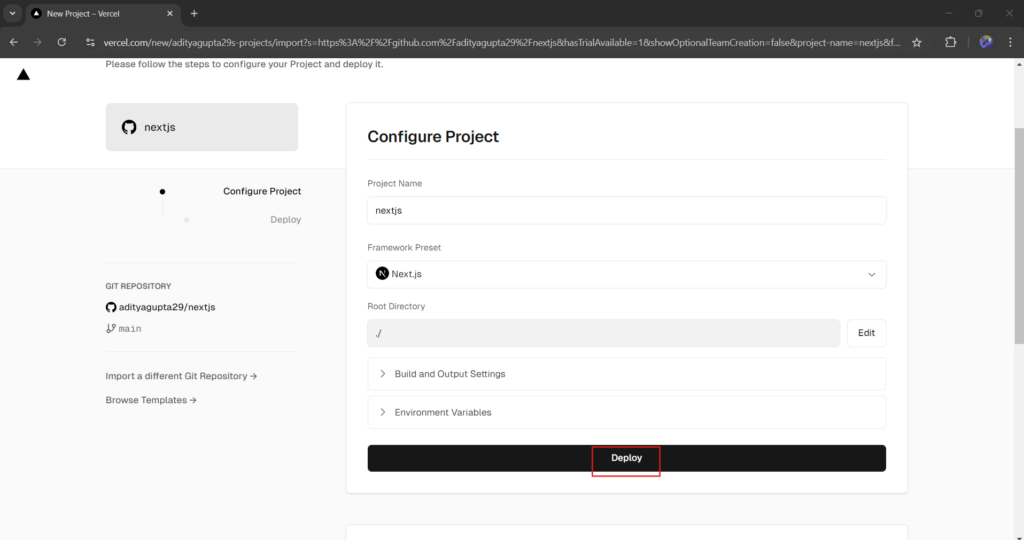
Our app will be deployed within a few seconds:
After deployment, you will see the congratulations page:

Summary
In short, we can deploy a Next.js app to Vercel in three steps: first, create the Next.js app, then push the code to a GitHub repository, and finally, deploy it to Vercel by connecting the GitHub repository. That’s it. The steps might look complicated but trust me, deploying a Next.js app on Vercel is the easiest deployment compared to deploying on other hosting platforms.
Reference
https://nextjs.org/learn-pages-router/basics/deploying-nextjs-app


