New to Rust? Grab our free Rust for Beginners eBook Get it free →
How to Send Ethereum with Node and Web3

In order to send Ethereum from one wallet to another, we need to have the following things in line:
- Generating Ethereum test wallets.
- Funding Ethereum in a test wallet.
- Ethereum blockchain test net environment.
- Program to transfer fund.
Let’s dive in.
Step 1: Generating Ethereum test wallets
We have already covered the Ethereum address generation in this article. Please go through it once. I’ll wait.
Assuming you have at least two Ethereum addresses in the place, one to send and another to receive. Let’s move ahead.
Step 2: Funding Ethereum in a test wallet
To send Ethereum from our account, we need to first add some test Ethereum in our wallet. This test Ethereum is also called “Faucets”.
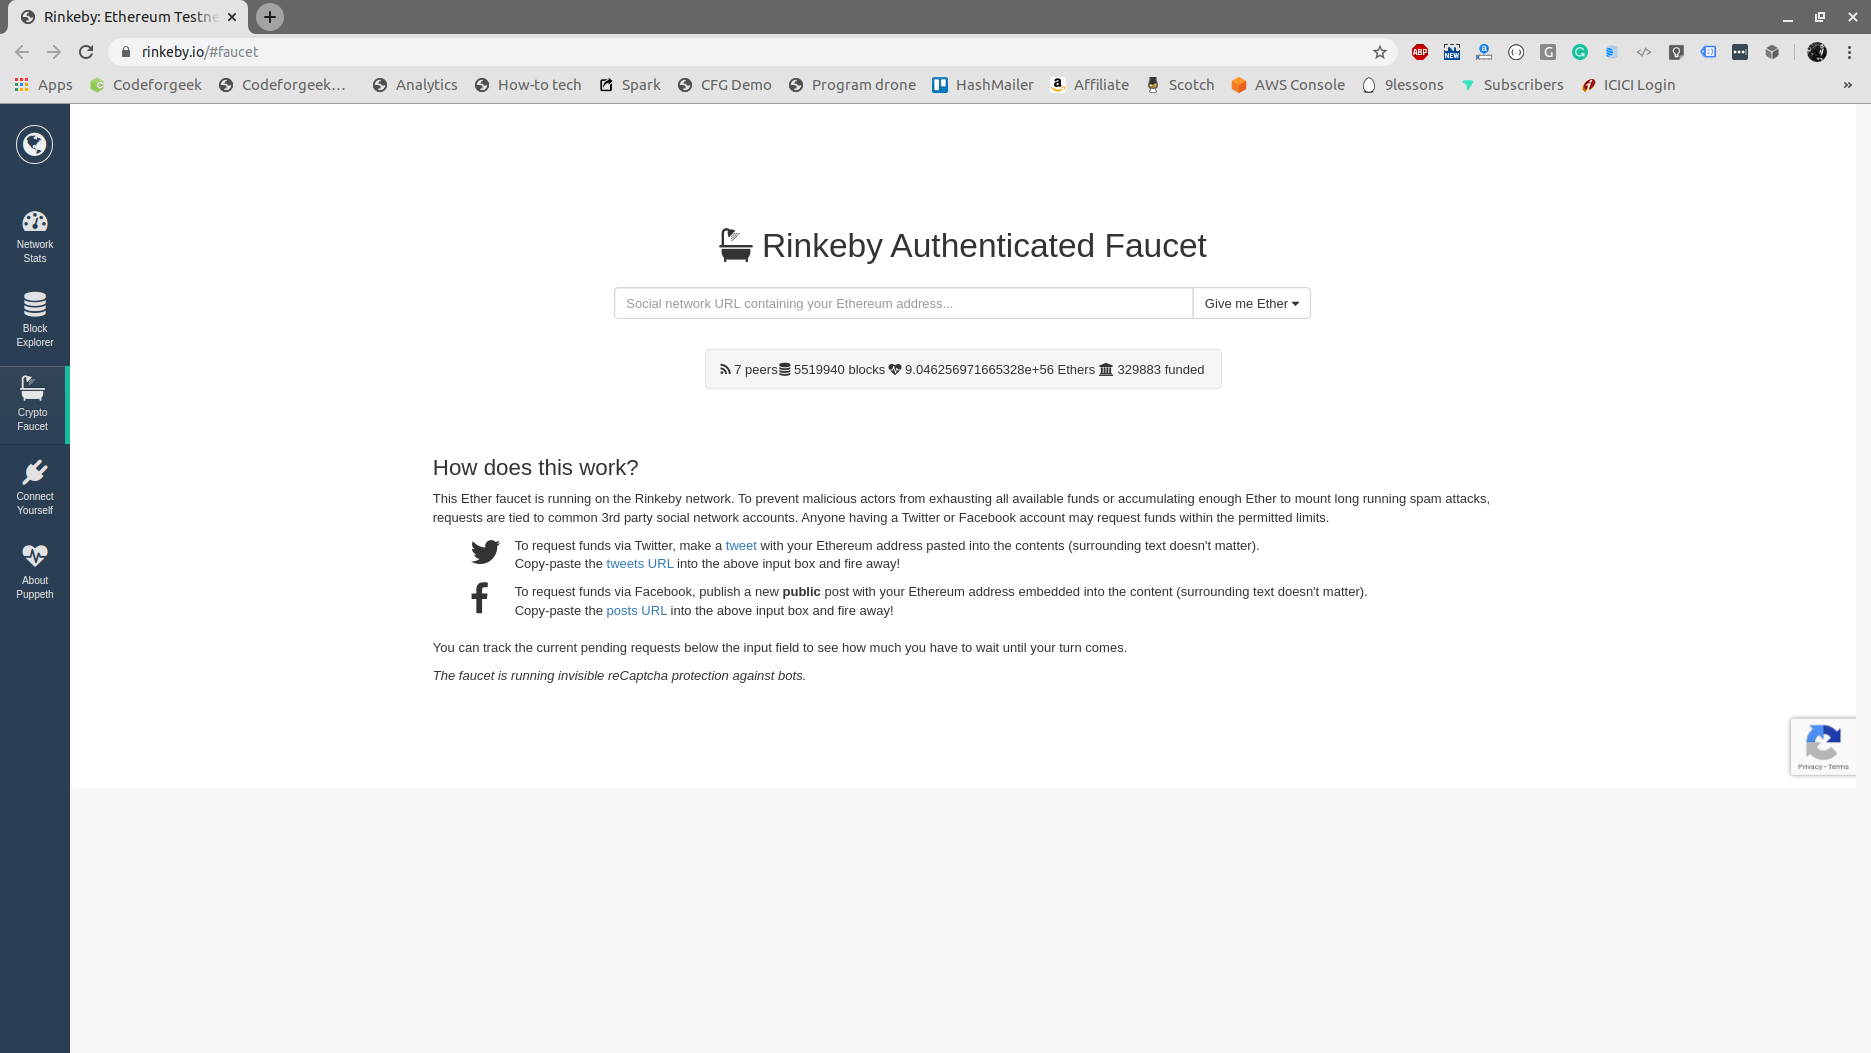
Visit this website to get some test Ethers.

To request funds, you need to first publish a tweet on Twitter containing your Ethereum address and copy/paste the tweet link on the website shown above.
To generate a tweet, click on this link and change the hex address to your Ethereum address.
Copy/paste the tweet link and choose 3 Ethers/ 8 hours option on the website.
That’s it. You will receive 3 test Ethers in your account.
Step 3: Ethereum blockchain Testnet Environment
You require an Ethereum test network where you can record your transaction. You can run a local Ethereum instance or use free services like Infura. I prefer the latter because it’s really easy and free!
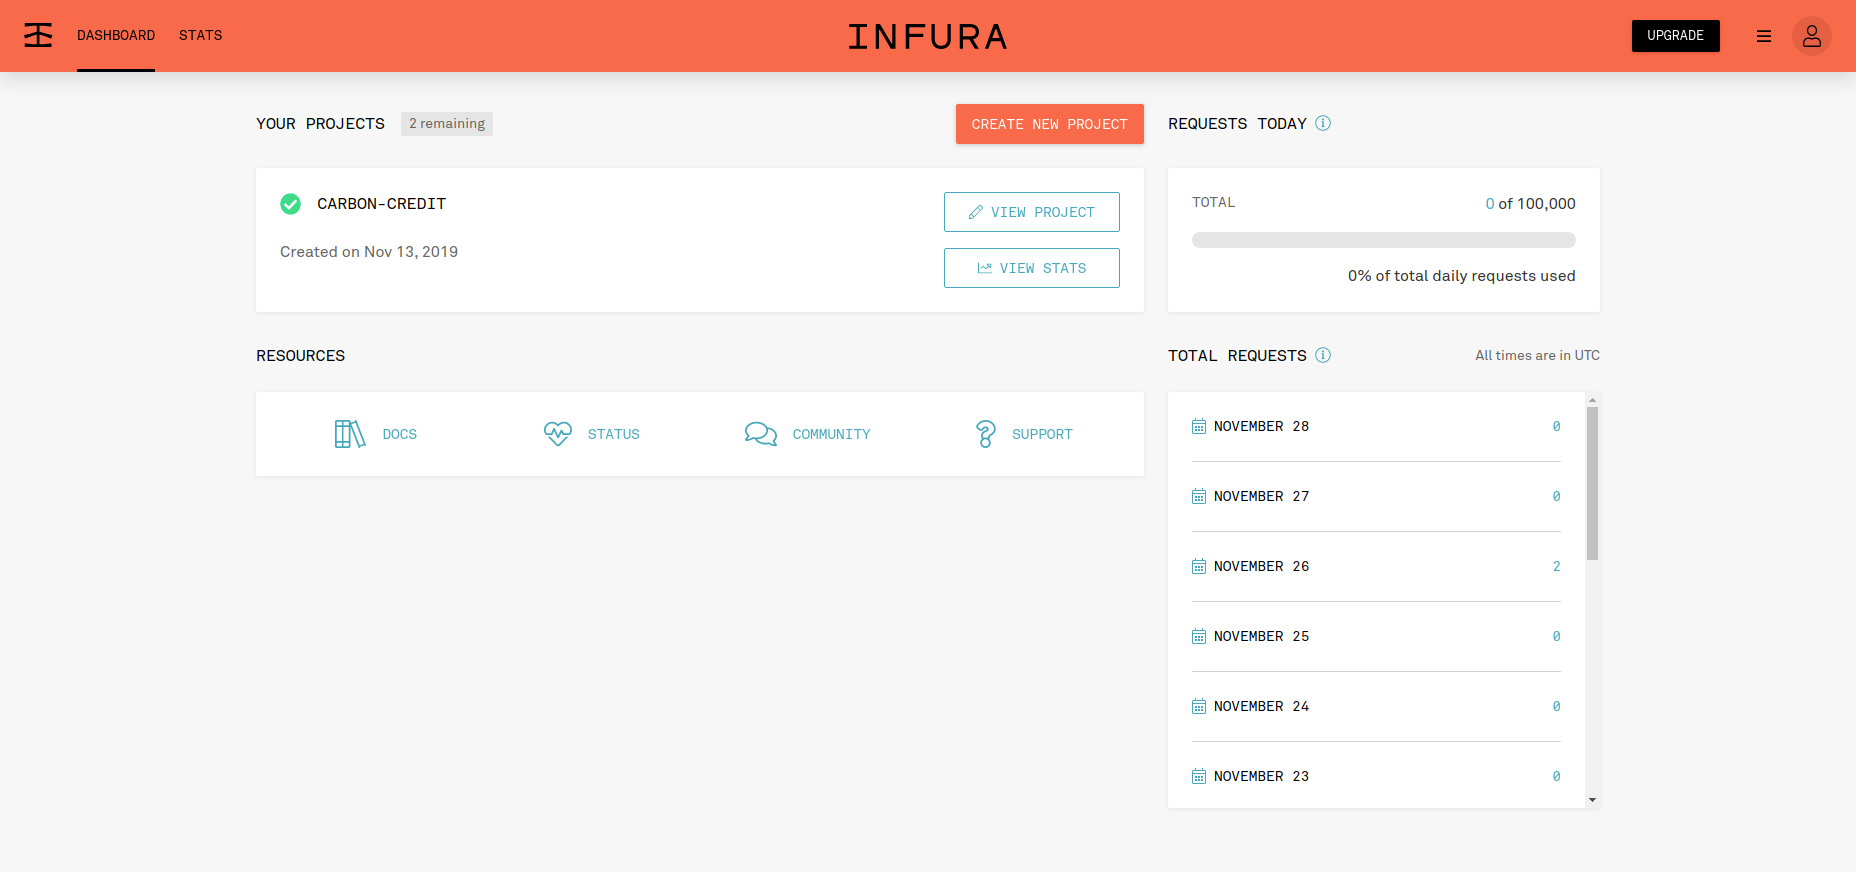
Visit infura.io and create your free account.
Once the account is created, you can create a new project.

You will get the project secret and id. Keep it safe.
Program to transfer fund
Let’s create our program.
Create a new folder and initialize the Node project.
npm init --y
Let’s install the dependencies.
npm install --S [email protected] [email protected] axios
Here is our code.
const Web3 = require("web3");

const EthereumTx = require('ethereumjs-tx').Transaction;

const axios = require('axios');

const ethNetwork = 'https://rinkeby.infura.io/v3/your project id';

const web3 = new Web3(new Web3.providers.HttpProvider(ethNetwork));
async function transferFund(sendersData, recieverData, amountToSend) {
return new Promise(async (resolve, reject) => {
var nonce = await web3.eth.getTransactionCount(sendersData.address);
web3.eth.getBalance(sendersData.address, async (err, result) => {
if (err) {
return reject();
}
let balance = web3.utils.fromWei(result, "ether");
console.log(balance + " ETH");
if(balance < amountToSend) {
console.log('insufficient funds');
return reject();
}
let gasPrices = await getCurrentGasPrices();
let details = {
"to": recieverData.address,
"value": web3.utils.toHex(web3.utils.toWei(amountToSend.toString(), 'ether')),
"gas": 21000,
"gasPrice": gasPrices.low * 1000000000,
"nonce": nonce,
"chainId": 4 // EIP 155 chainId - mainnet: 1, rinkeby: 4
};
const transaction = new EthereumTx(details, {chain: 'rinkeby'});
let privateKey = sendersData.privateKey.split('0x');
let privKey = Buffer.from(privateKey[1],'hex');
transaction.sign(privKey);
const serializedTransaction = transaction.serialize();
web3.eth.sendSignedTransaction('0x' + serializedTransaction.toString('hex'), (err, id) => {
if(err) {
console.log(err);
return reject();
}
const url = `https://rinkeby.etherscan.io/tx/${id}`;
console.log(url);
resolve({id: id, link: url});
});
});
});
}
async function getCurrentGasPrices() {
let response = await axios.get('https://ethgasstation.info/json/ethgasAPI.json');
let prices = {
low: response.data.safeLow / 10,
medium: response.data.average / 10,
high: response.data.fast / 10
};
return prices;
}
async function getBalance(address) {
return new Promise((resolve, reject) => {
web3.eth.getBalance(address, async (err, result) => {
if(err) {
return reject(err);
}
resolve(web3.utils.fromWei(result, "ether"));
});
});
}
transferFund({address: '0x0xxx00000000xx00x0', privateKey: '1x11111111'},{address: '0x0xxx000000000000x00x0x0'},0.10)
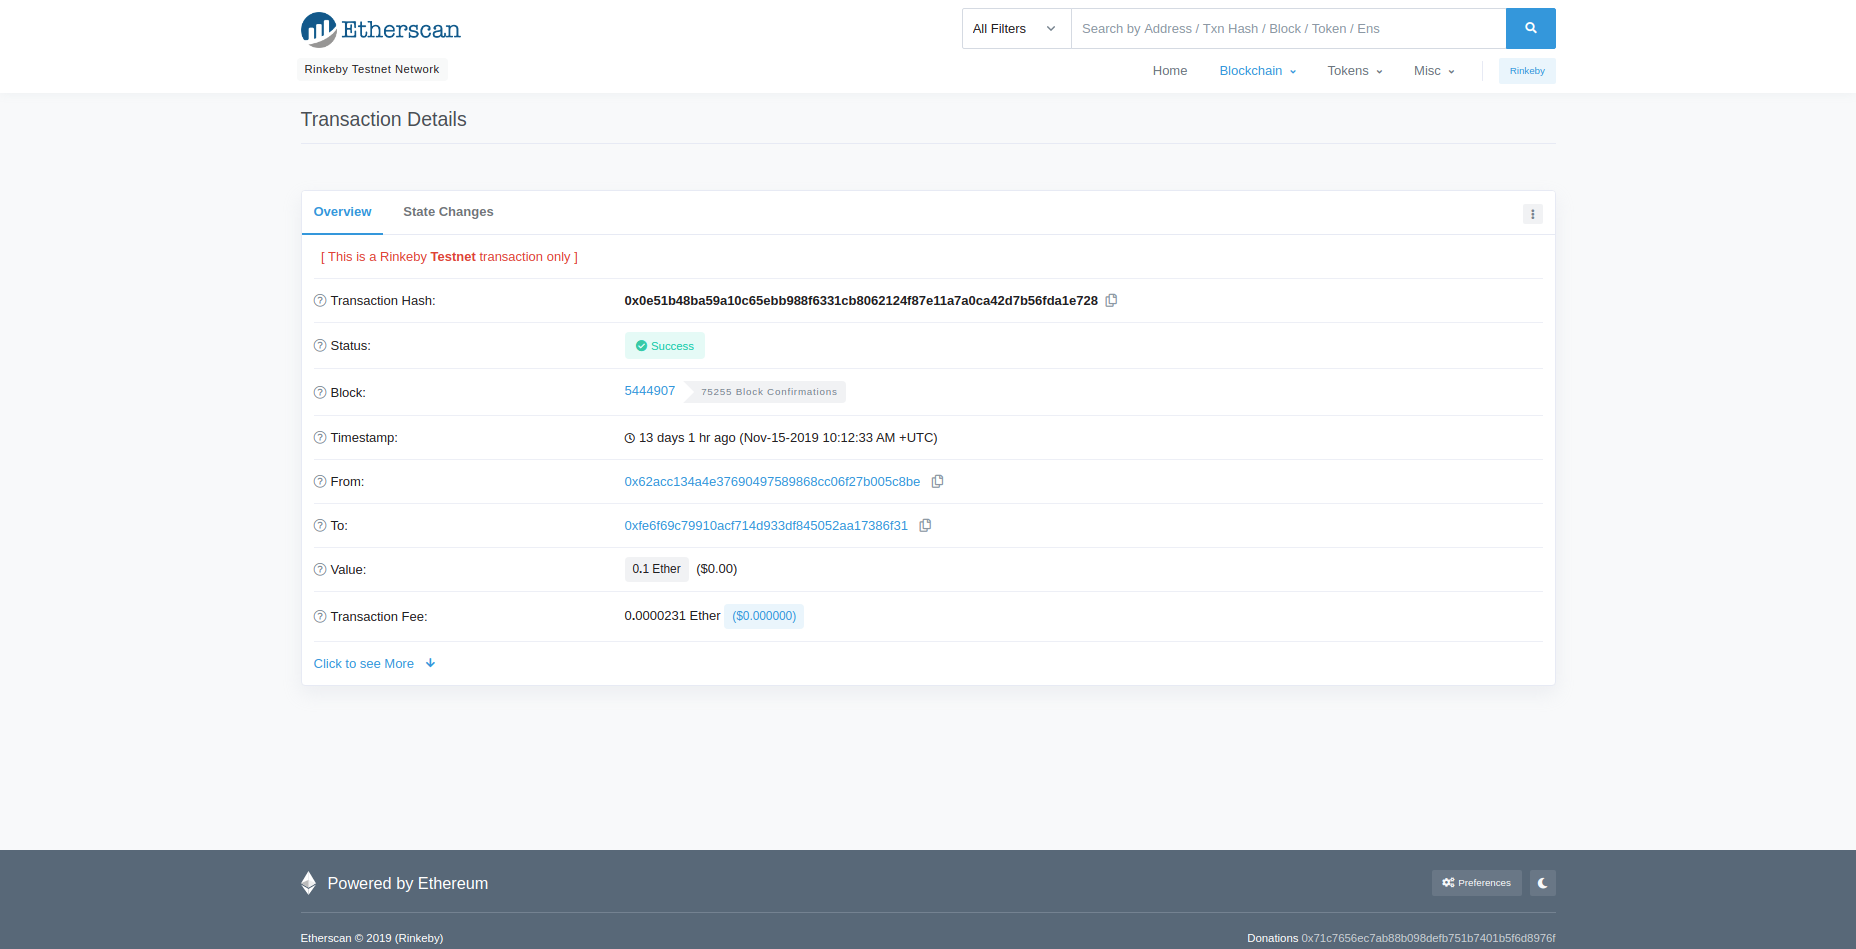
Replace the addresses in the last line of the code to your own address. After running the code, the rinkeby transaction URL would be printed on the screen.

Let’s understand the code.
First, we made a connection to our Ethereum testnet blockchain provided by the Infura.
const ethNetwork = 'https://rinkeby.infura.io/v3/your project id';

const web3 = new Web3(new Web3.providers.HttpProvider(ethNetwork))
Then in the main function, we are first checking if the balance of the sender is not less than the amount intended to send.
Then, we are getting the current gas prices that are required to transfer the Ethereum. We are using a third party API for this purpose.
Finally, we are preparing the transaction payload.
let details = {

    "to": recieverData.address,

    "value": web3.utils.toHex(web3.utils.toWei(amountToSend.toString(), 'ether')),

    "gas": 21000,

    "gasPrice": gasPrices.low * 1000000000,

    "nonce": nonce,

    "chainId": 4 // EIP 155 chainId - mainnet: 1, rinkeby: 4

};
We have specified the receiver address in the transaction payload.
Now, let’s sign the transaction with the senders private key.
const transaction = new EthereumTx(details, {chain: 'rinkeby'});

let privateKey = sendersData.privateKey.split('0x'); //important

let privKey = Buffer.from(privateKey[1],'hex');

transaction.sign(privKey);

const serializedTransaction = transaction.serialize();
In the last function, we are submitting the serialized transaction to our blockchain. If everything is right, you will receive a transaction ID and rinkeby URL to track the mining status of the transaction.
This is it. You have just sent the Ethereum to another address.
Conclusion
Ethereum is really popular due to its widespread developer support and APIs to build apps running on the blockchain platform. In this tutorial, we made a simple application that performs the transfer of Ethereum from one account to another. It’s a simple script written in JavaScript. I hope you got a gist of how to develop applications that run on the blockchain network.


