
New to Rust? Grab our free Rust for Beginners eBook Get it free →
Dockerize NodeJS Application: A Step-by-Step Guide
So you’ve followed through a proper tutorial and built an app in Node and run it on your computer, but you want it to run 24×7 and can’t have the computer open that long! The problem is your computer is even not that powerful to run just a simple app on it 24×7. Here is where Docker comes in. You can install Docker into any machine and run your apps in the background on some remote server! Docker makes it possible to run apps and scripts in an isolated environment that has been made specifically for that operation. So in this article, we’ll be discussing how to dockerize a Node application.
Dockerize a NodeJS Application
You can Dockerize your existing Node.js application in just 4 steps.
Step 1: Install Docker on your Machine
The first thing to do is install Docker into the machine on which you’ll be running the app. For the sake of simplicity, we’ll be using our laptop/ desktop, if you want to fire up a remote server feel free to do so! In a Linux machine all you need to do is go to the terminal and give the command to install docker, for me (I use a Debian-based distro):
sudo apt install -y docker.io
Step 2: Create a Docker File
First, you’ll need an existing project that is written in NodeJS. In this article, we’ll be using the WhatsApp bot we built some time ago. So go ahead and git-clone the repo into a folder somewhere. Now run the following command to create a package.json:
npm init
This will prompt you and take user input for various fields such as the app name, version, description, author etc. Fill it up first and confirm the choices. When you are done you will see a package.json file generated in the folder.
Now create your app, we’ll use the bot.js file as our app entry point. Now create a dockerfile:
touch Dockerfile
Now edit the dockerfile in the following manner:
FROM node:18
#Create a working directory
WORKDIR /usr/src/app
#Install app-dependencies
COPY package.*json ./
RUN npm install
COPY . .
CMD [ "node", "bot.js"]
So first we are importing the node version 18. Then we create a working directory and copy the package.json to the docker. Next, we run the npm install command to install all of the dependencies. Finally, we copy the app files to docker. Next, we run the app using the CMD.
Step 3: Create a .dockerignore File
You can also create a .dockerignore file to ignore copying files that are not useful for running the app. In this context, we don’t need to write the node_modules and the npm-debug.log. So the content in our .dockerignore file would be:
node_modules
npm-debug.log
Step 4: Building and Running the Docker Image
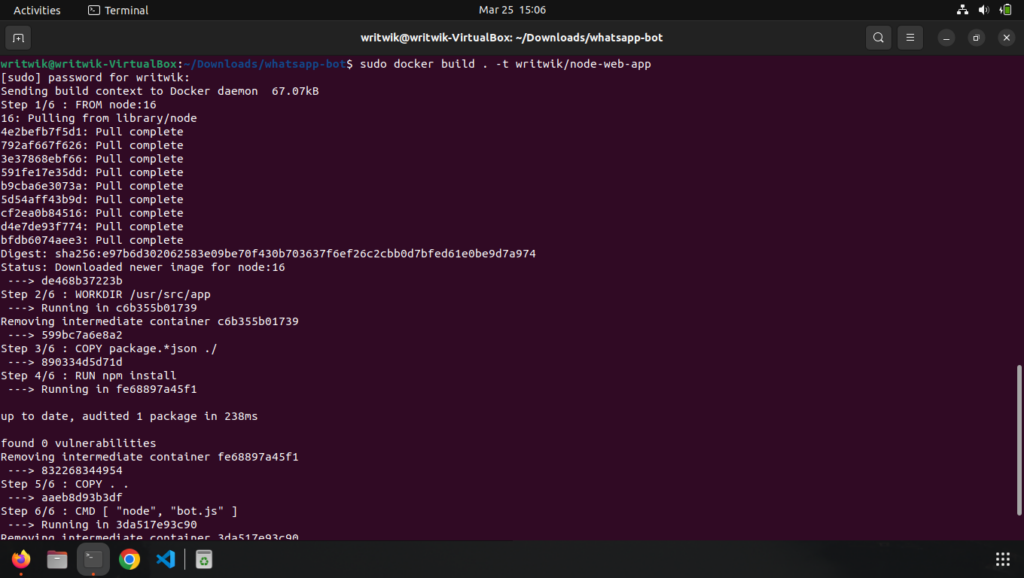
Now to build your image give the following command:
docker build . -t <username>/<app-name>
You’ll see in the terminal output that docker is going through the steps in the Dockerfile we created before. Once it completes all execution, the image is definitely gets created.
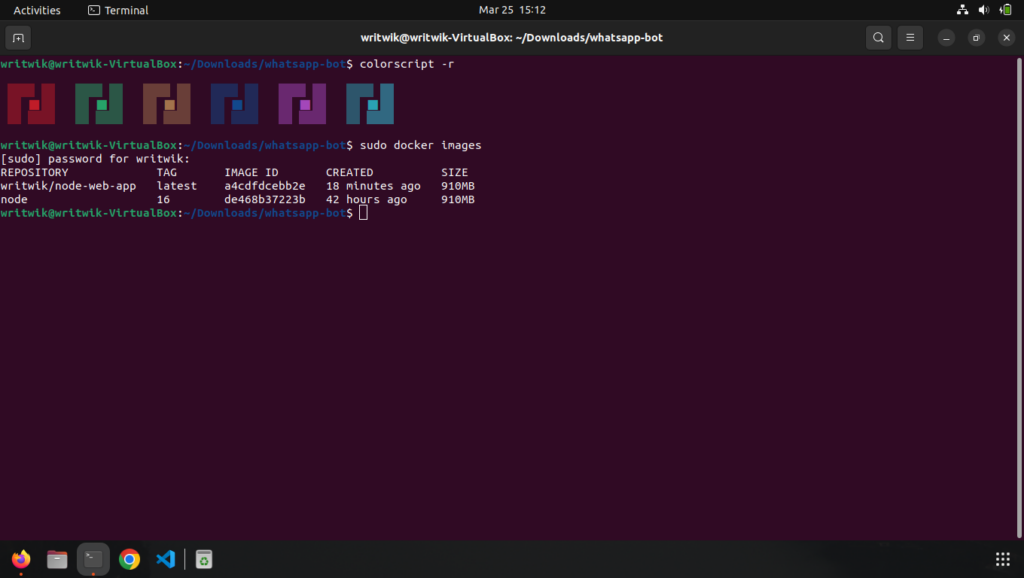
Now run the following command to see the docker-image:
docker images
Now to run the docker simply give the following command:
docker run -d <username>/<app-name>
The -d flag will run the app in a docker container that is detached or runs in the background. Now to get info about running docker instances you can use the following command:
docker ps
Now, finally, if you want to kill a docker instance that is running in the background use the kill command like so:
docker kill <container-id>
Conclusion
In this article, we took a look into how to dockerize your nodeJS applications and run them in the background. Hope this tutorial helps you. For more such awesome tutorials keep looking here at CodeForGeek!
Reference


