New to Rust? Grab our free Rust for Beginners eBook Get it free →
How to Create AI Wrappers Using JavaScript (And Build a Profitable AI Tool)

An AI wrapper connects a focused interface and workflow to a large language model (LLM) through an application programming interface (API), and Google’s July 2026 documentation recommends the Interactions API for this JavaScript build with the Google GenAI software development kit (SDK), a server-side key, and the gemini-3.6-flash model.
What an AI wrapper needs to add
A text box and a model request can prove an idea, but a useful wrapper owns a task such as explaining code, validates the input, shapes the request, and returns an answer in a format that saves a step.
The code explainer stays deliberately small so you can see the boundary between the browser, your server, and Gemini before authentication, billing, and storage make the application larger.
| Layer | Responsibility | Why it belongs there |
|---|---|---|
| Browser | Collect code and display the explanation | Keeps the interaction immediate without exposing a provider key |
| Express server | Validate input and call Gemini | Controls credentials, limits, errors, and provider usage |
| Gemini | Generate the explanation | Handles language generation through one replaceable adapter |
Build the JavaScript code explainer
Create an empty project, then install Express and the current Google GenAI SDK. The package name is @google/genai. Google marks the older @google/generative-ai package as a legacy library.
Install the dependencies
mkdir code-explainer
cd code-explainer
npm init -y
npm install express @google/genai
Set the package type to module and point the start script at server.js. The browser files will live in a public directory served by Express.
{
  "name": "code-explainer-wrapper",
  "private": true,
  "type": "module",
  "scripts": {
    "start": "node server.js",
    "test": "node --test"
  }
}
Keep the Gemini key on the server
The server accepts code at one route, rejects empty or oversized input, and translates provider failures into a stable response for the browser. Google’s API-key guidance says production web apps must not embed provider keys in client-side JavaScript.
import express from "express";
import { GoogleGenAI } from "@google/genai";

export function createApp({ explain } = {}) {
  const app = express();
  app.use(express.json({ limit: "20kb" }));
  app.use(express.static("public"));

  app.post("/api/explain", async (request, response) => {
    const code = request.body?.code?.trim();
    if (!code) return response.status(400).json({ error: "Paste code before running the wrapper." });
    if (code.length > 12000) return response.status(413).json({ error: "Keep the sample under 12,000 characters." });

    try {
      const explanation = await (explain || explainWithGemini)(code);
      response.json({ explanation });
    } catch (error) {
      console.error(error);
      response.status(502).json({ error: "The model request failed. Check the server log and try again." });
    }
  });

  return app;
}

async function explainWithGemini(code) {
  if (!process.env.GEMINI_API_KEY) throw new Error("GEMINI_API_KEY is missing");
  const ai = new GoogleGenAI({ apiKey: process.env.GEMINI_API_KEY });
  const interaction = await ai.interactions.create({
    model: "gemini-3.6-flash",
    input: `Explain this JavaScript for a beginner. Describe the result, then the mechanism.\n\n${code}`,
  });
  return interaction.output_text;
}

if (process.argv[1] === new URL(import.meta.url).pathname) {
  const port = process.env.PORT || 3000;
  createApp().listen(port, () => console.log(`Code Explainer running at http://localhost:${port}`));
}
The SDK reads the key from the server process. Google also recommends restricting keys, monitoring usage, and moving production secrets into a managed secret store.
Add the browser interface
The page needs a text area, one action, a status region, and an output area. The aria labels keep the primary state visible to assistive technology.
<!doctype html>
<html lang="en">
<head>
  <meta charset="utf-8">
  <meta name="viewport" content="width=device-width, initial-scale=1">
  <title>Code Explainer</title>
  <link rel="stylesheet" href="styles.css">
</head>
<body>
  <main class="app">
    <p class="eyebrow">AI wrapper demo</p>
    <h1>Explain JavaScript code</h1>
    <label for="codeInput">Code to explain</label>
    <textarea id="codeInput" spellcheck="false">const total = prices.reduce((sum, price) => sum + price, 0);</textarea>
    <div class="actions">
      <button id="explainBtn">Explain code</button>
      <span id="status" role="status"></span>
    </div>
    <section aria-labelledby="resultHeading">
      <h2 id="resultHeading">Explanation</h2>
      <pre id="result">Run the wrapper to see an explanation.</pre>
    </section>
  </main>
  <script src="app.js"></script>
</body>
</html>
The browser sends code to your own route. It never receives the Gemini key, model identifier, or provider request.
const button = document.querySelector("#explainBtn");
const input = document.querySelector("#codeInput");
const result = document.querySelector("#result");
const status = document.querySelector("#status");

button.addEventListener("click", async () => {
  button.disabled = true;
  status.textContent = "Explaining...";
  result.textContent = "";

  try {
    const response = await fetch("/api/explain", {
      method: "POST",
      headers: { "Content-Type": "application/json" },
      body: JSON.stringify({ code: input.value }),
    });
    const data = await response.json();
    if (!response.ok) throw new Error(data.error || "Request failed");
    result.textContent = data.explanation;
    status.textContent = "Done";
  } catch (error) {
    result.textContent = error.message;
    status.textContent = "Could not explain the code";
  } finally {
    button.disabled = false;
  }
});
Add any styling you want in styles.css. The interaction does not depend on a framework.
Set the key and start the app
Create a Gemini API key in Google AI Studio, restrict it to the Gemini API, and expose it only to the server process. Replace the placeholder before sending a model request.
export GEMINI_API_KEY="paste-your-key-here"
npm start
Open http://localhost:3000, paste a short JavaScript function, and select Explain code. The server supplies the task instruction, sends the code to Gemini, and returns only the explanation.
Test the wrapper without spending model tokens
The execution receipt records a passing HTTP contract on Node.js 26.5.0 with @google/genai 2.13.0 and Express 5.2.1, including the successful adapter response and the empty-input rejection.
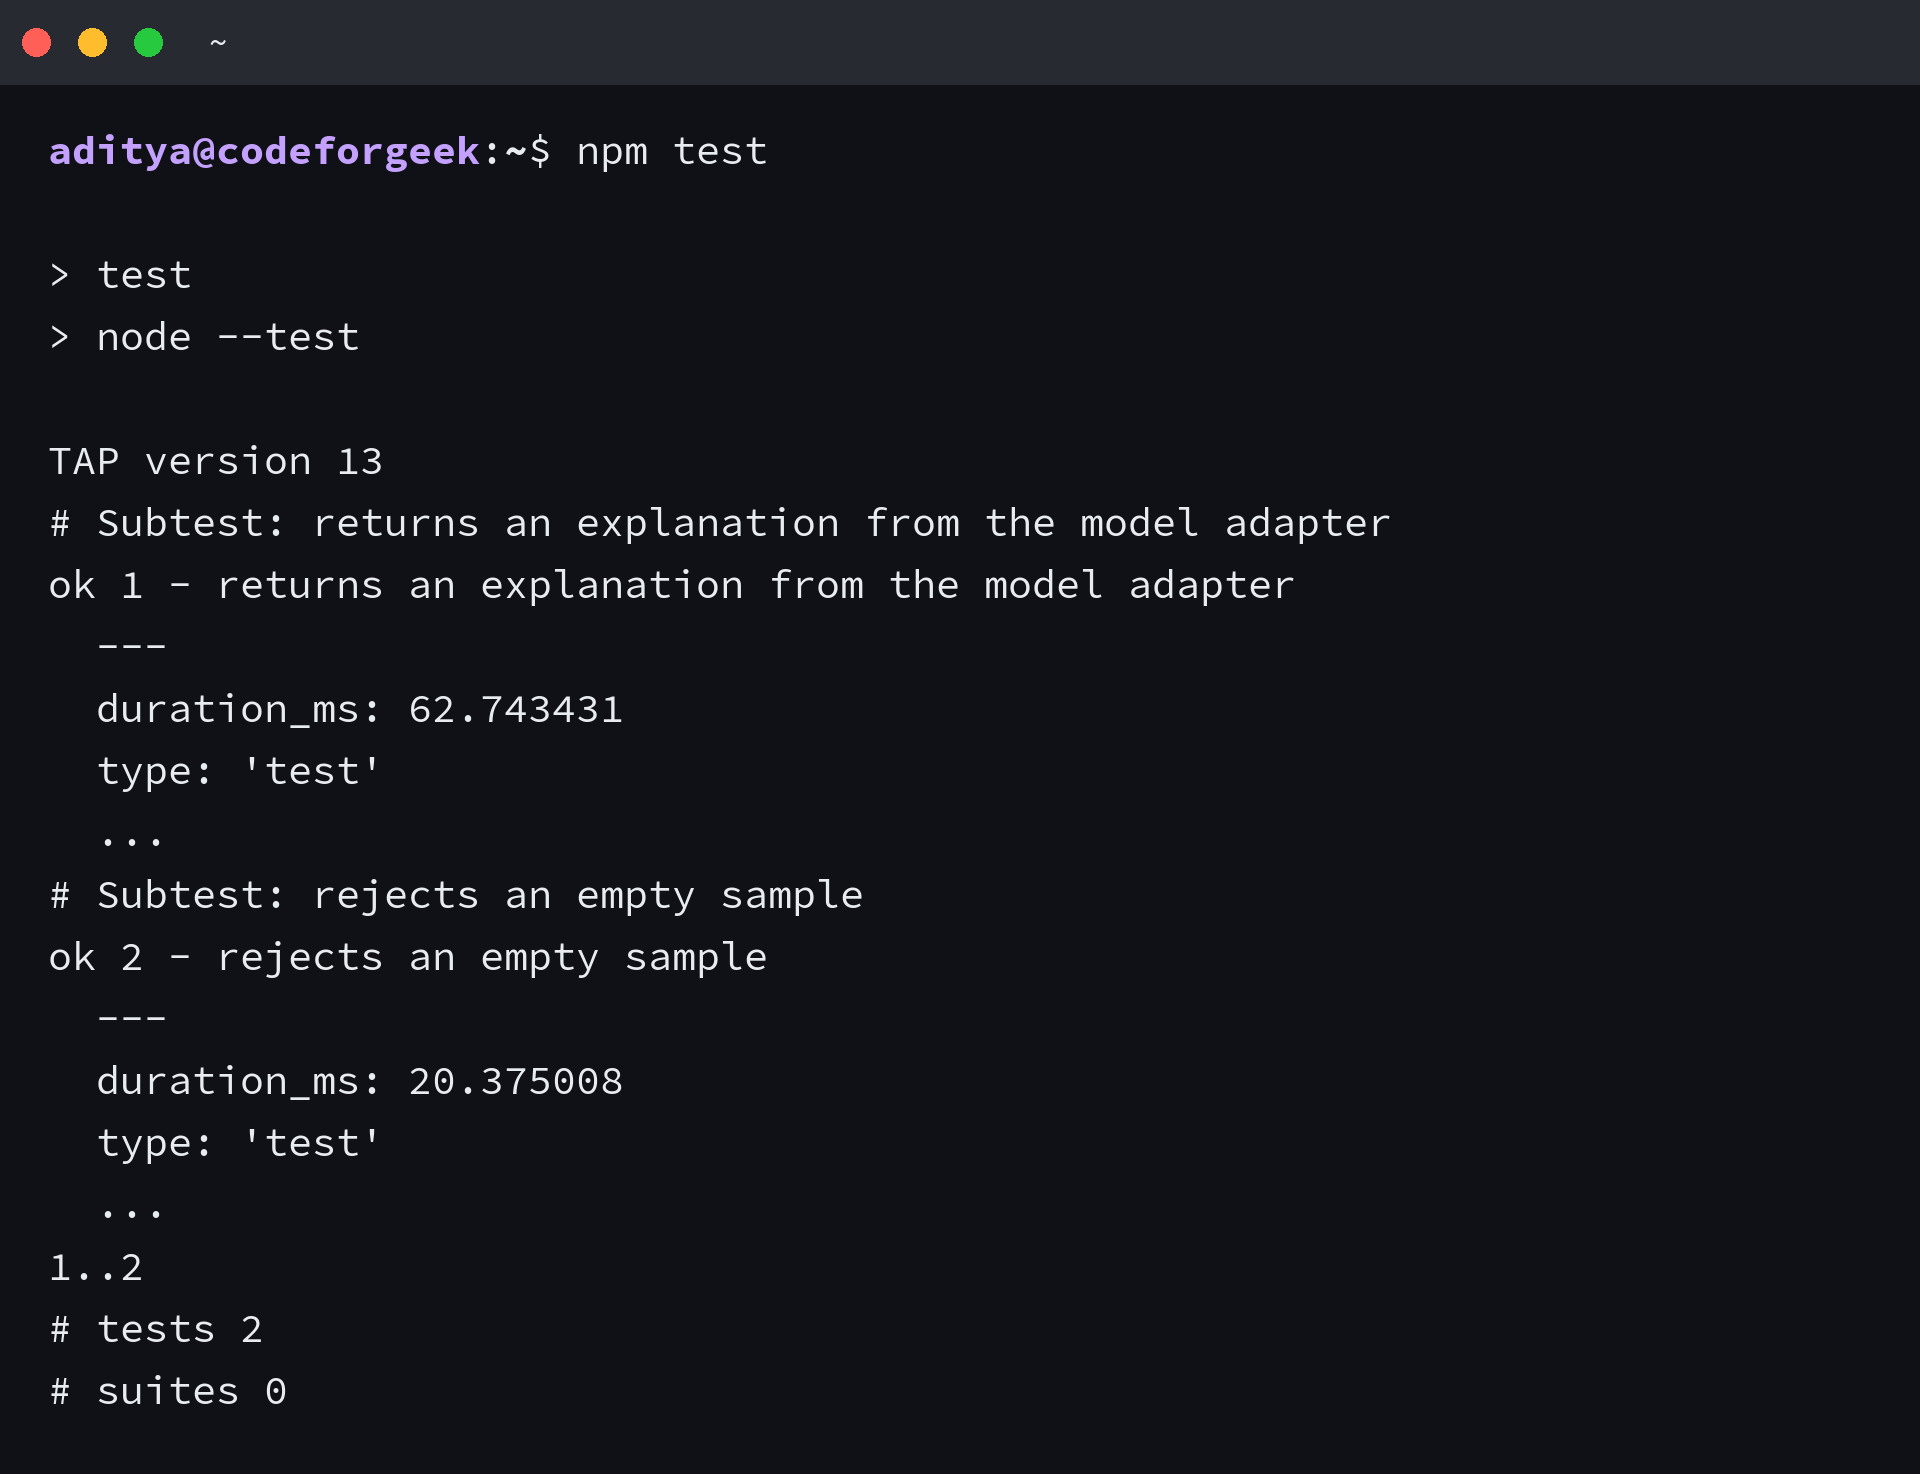
The test injects a deterministic model adapter, which verifies the route and response shape without pretending that a local string came from Gemini. A production-adapter check without a key returned the intended 502 response plus a GEMINI_API_KEY is missing server error.
import test from "node:test";
import assert from "node:assert/strict";
import { createApp } from "./server.js";

async function start(explain) {
  const server = createApp({ explain }).listen(0);
  await new Promise((resolve) => server.once("listening", resolve));
  const { port } = server.address();
  return { server, base: `http://127.0.0.1:${port}` };
}

test("returns an explanation from the model adapter", async (t) => {
  const { server, base } = await start(async () => "reduce() visits each price and accumulates one total.");
  t.after(() => server.close());
  const response = await fetch(`${base}/api/explain`, {
    method: "POST",
    headers: { "Content-Type": "application/json" },
    body: JSON.stringify({ code: "prices.reduce((sum, price) => sum + price, 0)" }),
  });
  assert.equal(response.status, 200);
  assert.deepEqual(await response.json(), { explanation: "reduce() visits each price and accumulates one total." });
});

test("rejects an empty sample", async (t) => {
  const { server, base } = await start(async () => "unused");
  t.after(() => server.close());
  const response = await fetch(`${base}/api/explain`, {
    method: "POST",
    headers: { "Content-Type": "application/json" },
    body: JSON.stringify({ code: "   " }),
  });
  assert.equal(response.status, 400);
  assert.deepEqual(await response.json(), { error: "Paste code before running the wrapper." });
});
A valid provider key was unavailable on the execution server, so the live Gemini success path remains a credential-dependent check. The browser interaction was exercised against the same interface with the deterministic adapter, and its status changed to Done after the result rendered.
Production boundaries you should add next
The backend proxy fixes key exposure, but it does not make the wrapper ready for public traffic. Add controls where your own application can enforce them.
- Authenticate each user before the API route accepts a request.
- Rate-limit by account and IP address, then cap input size and daily model spend.
- Log request IDs, latency, token use, and provider errors without logging private code by default.
- Treat model output as untrusted text. Render it as text unless you sanitize any allowed markup.
- Add deletion and retention controls before storing prompts, code, or explanations.
Google allows the client SDK for local experimentation, then recommends Firebase AI Logic for production client applications or a server-side SDK design when you want your own API boundary.
How a wrapper becomes a business
Completing the request is the technical baseline, and profit depends on whether a narrow group returns often enough to cover acquisition, model usage, support, and infrastructure.
| Question | Measure | Decision |
|---|---|---|
| Does the task recur? | Weekly active users and repeat explanations | Keep the niche only when the same users return |
| Does the wrapper beat a direct prompt? | Completion time, edits after output, and task success | Improve workflow context before adding more models |
| Can revenue cover usage? | Revenue per account minus model and hosting cost | Set quotas or usage-based limits before scaling |
| Can users leave easily? | Exports, integrations, saved preferences, and team workflow adoption | Invest in workflow depth rather than prompt secrecy |
A subscription suits frequent, predictable use. Credits or metered billing fit uneven workloads because the charge follows model consumption, while a team plan needs shared history, permissions, and administration to justify its higher price.
Start with one paid outcome and measure repeat use before building a broad software as a service (SaaS) shell. Payment processing cannot rescue an answer that users can obtain with the same prompt in a general chatbot.
The strongest objection to AI wrappers
A developer can copy the system instruction into Gemini and receive a similar explanation. That objection is correct for this demo, because the code exists to teach the architecture rather than claim defensibility.
A commercial code explainer needs context and workflow that a copied prompt lacks. Repository-aware explanations, team conventions, approved examples, editor integration, feedback on accepted answers, and audit controls can change the user’s result or remove repeated work.
Useful next extensions
Keep the model call behind the explainWithGemini function so you can test routes without a provider charge and replace the provider without rewriting the browser. Add streaming only after the basic request, error, and cost paths are observable.
If your wrapper must take actions instead of returning text, continue with the JavaScript AI agents tutorial. For key creation and account limits, use the Gemini API setup guide and verify the limits shown in your own AI Studio project.
FAQs about JavaScript AI wrappers
What is an AI wrapper?
An AI wrapper is an application layer that gives a model a focused interface, instructions, validation, and workflow for one task.
Can I put a Gemini API key in browser JavaScript?
Do not expose a provider key in a production browser bundle. Send the request through your backend or use Google’s recommended Firebase AI Logic path for production client apps.
Which Gemini API should a new JavaScript wrapper use?
Google’s July 2026 documentation recommends the Interactions API and the @google/genai SDK. Its getting-started example uses gemini-3.6-flash.
Does an AI wrapper guarantee profit?
No. Measure repeat use, task success, acquisition cost, model cost, support cost, and revenue per account before expanding the product.
Run the two contract tests first, then complete one live request with your restricted key. If users return for the same outcome and the margin survives their usage, deepen that workflow before adding another model or a larger feature list.