New to Rust? Grab our free Rust for Beginners eBook Get it free →
Fabric.js – A Complete Guide

Fabric.js is a free, open-source JavaScript library that makes it easy to draw and interact with shapes, text, and images on an HTML5 canvas. It lets you move, resize, and rotate objects, supports animations, and can handle both canvas and SVG formats. It’s great for creating interactive graphics. Let’s learn about it in detail.
Why Do We Need Fabric.js?
Fabric.js makes it easy to work with HTML5 canvas elements. With it, you can create simple shapes like rectangles and circles, as well as more complex things like text and images. You can move, resize, and rotate these shapes by dragging with your mouse, making it great for interactive apps. It also supports features like grouping objects, animations, and colour changes. Plus, it works on mobile devices with touch support. Overall, Fabric.js saves time and effort when creating cool graphics for websites or apps.
Let’s compare creating a circle using the basic HTML5 canvas code and Fabric.js code. In a vanilla HTML5 canvas, we need to define and draw the circle by ourselves. Like:
<!DOCTYPE html>
<html lang="en">
<head>
    <meta charset="UTF-8">
    <meta name="viewport" content="width=device-width, initial-scale=1.0">
    <title>Circle</title>
</head>
<body>
    <canvas id="myCanvas" width="500" height="500" style="border:1px solid #000;"></canvas>

    <script>
      const canvas = document.getElementById("myCanvas");
      const ctx = canvas.getContext("2d");

      //Here we Draw a circle
      ctx.beginPath();
      ctx.arc(150, 150, 50, 0, 2 * Math.PI); // (x, y, radius, startAngle, endAngle)
      ctx.fillStyle = "blue";
      ctx.fill();
      ctx.stroke();
    </script>
</body>
</html>
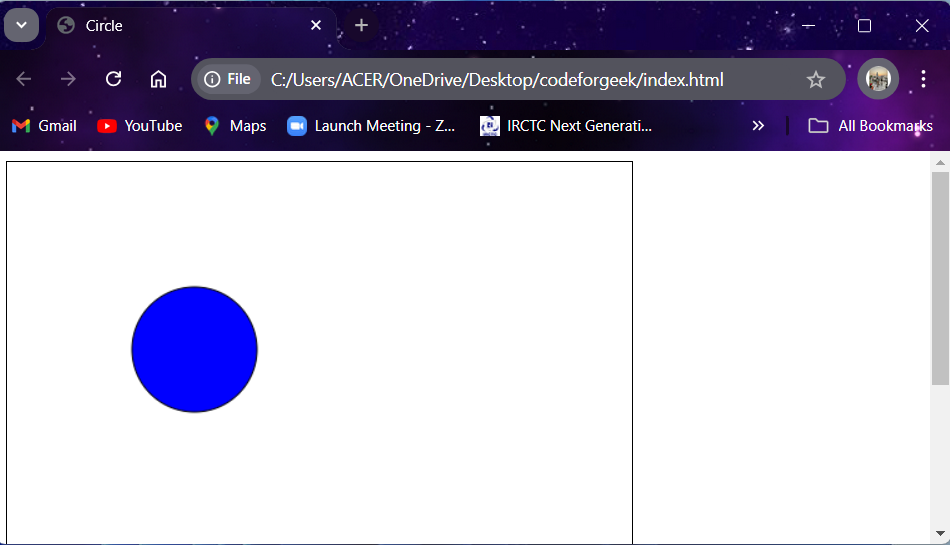
In this code, we have to first access the canvas content and then start drawing a path. We use the arc() function to create a circle, and then we set the colour and fill the shape.
Output:
Now if we use fabric.js, then creating a circle would be simpler and interactive. Let’s see how:
<!DOCTYPE html>
<html lang="en">

<head>
    <meta charset="UTF-8">
    <meta name="viewport" content="width=device-width, initial-scale=1.0">
    <title>Circle with Fabric.js</title>
    <script src="https://cdnjs.cloudflare.com/ajax/libs/fabric.js/3.6.2/fabric.min.js">
    </script>

<body>
    <canvas id="myCanvas" width="500" height="500" style="border:1px solid #000;"></canvas>

    <!-- script after Fabric.js is loaded -->
    <script>
        window.onload = function () {
            // Create a fabric.js canvas
            const canvas = new fabric.Canvas('myCanvas');

            // Create a blue circle
            const circle = new fabric.Circle({
                radius: 50,
                fill: 'blue',
                left: 100,
                top: 100
            });

            // Add the circle to the canvas
            canvas.add(circle);
        };
    </script>
</body>

</html>
In this code:
- The script tag (<script src=”…fabric.min.js”>) loads Fabric.js.
- After the page loads, Fabric.js creates a canvas (new fabric.Canvas(‘myCanvas’)). This tells Fabric.js to control the HTML canvas with the ID “myCanvas.“
- Fabric.js is then used to create a blue circle (new fabric.Circle({…})) with a radius of 50, placed at coordinates (100, 100).
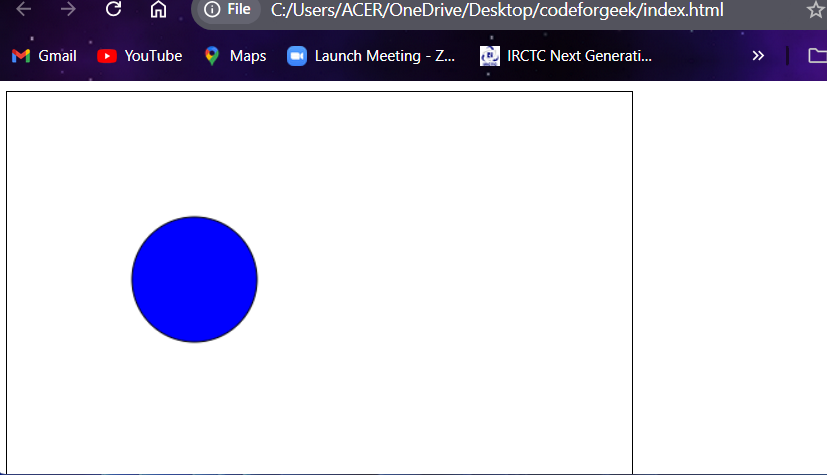
- The circle is added to the Fabric.js controlled canvas using canvas.add(circle).
Output:
Features of Fabric.js
- Shape Control: Easily create, resize, and rotate shapes.
- Grouping: Combine multiple shapes to move or transform together.
- Mobile Support: Works smoothly on mobile devices with touch support.
- Save & Load: Quickly convert canvas designs to JSON and reload them.
- Text & Shapes: Add and edit text, simple shapes, and complex designs.
- Gradients & Filters: Apply colour gradients and image filters.
- Animations: Provides built-in support for animating objects.
- Object Interaction: Move, lock, flip, or drag objects as needed.
- Free Drawing & Erasing: Draw freely on the canvas and erase parts.
- Image & Format Support: Works with JPG, PNG, JSON, and SVG formats.
How to Install Fabric.js
There are many ways by which you can install Fabric.js into your system:
1. NPM: If you are creating a Node.js project, you can install Fabric.js using NPM.
npm install fabric
2. Yarn: It is another package manager like NPM. We can install Fabric.js using Yarn as well.
npm install fabric
3. CDN Link: Using CDN, we don’t need to install anything. We can just link to Fabric.js in our HTML with a <script> tag.
<script src="https://cdnjs.cloudflare.com/ajax/libs/fabric.js/3.6.2/fabric.min.js"></script>
Examples of Using Fabric.js
Now that we know about Fabric.js, let’s see what wonders it brings to us in examples.
Example 1:
We can add simple shapes (objects) like a circle, triangles, and rectangles to our canvas.
<!DOCTYPE html>
<html lang="en">

<head>
    <meta charset="UTF-8">
    <meta name="viewport" content="width=device-width, initial-scale=1.0">
    <title>Circle with Fabric.js</title>
    <script src="https://cdnjs.cloudflare.com/ajax/libs/fabric.js/3.6.2/fabric.min.js">
    </script>

<body>
    <canvas id="myCanvas" width="500" height="500" style="border:1px solid #000;"></canvas>

    <!-- Your script after Fabric.js is loaded -->
    <script>
        window.onload = function () {
            // Create a fabric.js canvas
            const canvas = new fabric.Canvas('myCanvas');

            // Create a blue circle
            const circle = new fabric.Circle({
                radius: 50,
                fill: 'blue',
                left: 100,
                top: 100
            });
            // Create a green triangle
            const triangle = new fabric.Triangle({
                width: 100,
                height: 100,
                fill: 'green',
                left: 250,
                top: 100
            });

            // Create a red rectangle
            const rectangle = new fabric.Rect({
                width: 150,
                height: 75,
                fill: 'red',
                left: 100,
                top: 250
            });
            // Add the shapes to the canvas
            canvas.add(circle);
            canvas.add(triangle);
            canvas.add(rectangle);
        };
    </script>
</body>

</html>
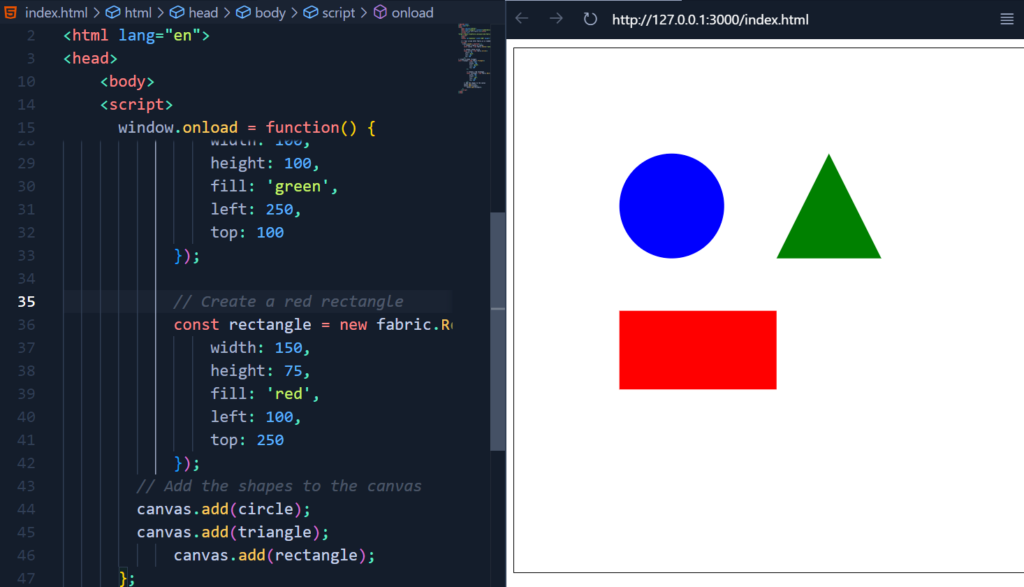
Here, we create the fabric canvas and shape it. We also add customisations like width, height, colour fill, and position. Next, we add them to the canvas using the add method.
Output:
Example 2:
We can add gradient fill to our shapes. We can also set the mixing ratio and number of mixing colours according to our choice. Here is how we do it:
<!DOCTYPE html>
<html lang="en">
<head>
    <meta charset="UTF-8">
    <meta name="viewport" content="width=device-width, initial-scale=1.0">
    <title>Circle with Fabric.js</title>
    <script src= "https://cdnjs.cloudflare.com/ajax/libs/fabric.js/3.6.2/fabric.min.js">
    </script>
    <body>
    <canvas id="myCanvas" width="500" height="500" style="border:1px solid #000;"></canvas>

    <!-- Your script after Fabric.js is loaded -->
    <script>
        window.onload = function() {
            // Create a fabric.js canvas
            const canvas = new fabric.Canvas('myCanvas');
            // Gradient for the circle
            const circleGradient = new fabric.Gradient({
                type: 'linear',
                gradientUnits: 'pixels',
                coords: { x1: 0, y1: 0, x2: 100, y2: 0 }, // Adjust based on the circle's diameter
                colorStops: [
                    { offset: 0, color: 'blue' },
                    { offset: 1, color: 'red' }
                ]
            });
            const circle = new fabric.Circle({
                radius: 50,
                fill: circleGradient,
                left: 100,
                top: 100
            });

            // Gradient for the triangle
            const triangleGradient = new fabric.Gradient({
                type: 'linear',
                gradientUnits: 'pixels',
                coords: { x1: 0, y1: 0, x2: 100, y2: 100 }, // Diagonal gradient
                colorStops: [
                    { offset: 0, color: 'green' },
                    { offset: 0.33, color: 'yellow' },
                    { offset: 0.78, color: 'green' },
                    { offset: 1, color: 'yellow' }
                ]
            });
            const triangle = new fabric.Triangle({
                width: 100,
                height: 100,
                fill: triangleGradient,
                left: 250,
                top: 100
            });

            // Gradient for the rectangle (rainbow)
            const rectangleGradient = new fabric.Gradient({
                type: 'linear',
                gradientUnits: 'pixels',
                coords: { x1: 0, y1: 0, x2: 150, y2: 0 }, // Horizontal gradient
                colorStops: [
                    { offset: 0, color: 'red' },
                    { offset: 0.2, color: 'orange' },
                    { offset: 0.4, color: 'yellow' },
                    { offset: 0.6, color: 'green' },
                    { offset: 0.8, color: 'blue' },
                    { offset: 1, color: 'purple' }
                ]
            });
            const rectangle = new fabric.Rect({
                width: 150,
                height: 75,
                fill: rectangleGradient,
                left: 100,
                top: 250
            });
            // Add the shapes to the canvas
            canvas.add(circle);
            canvas.add(triangle);
            canvas.add(rectangle);
      };
    </script>
</body>
</html>
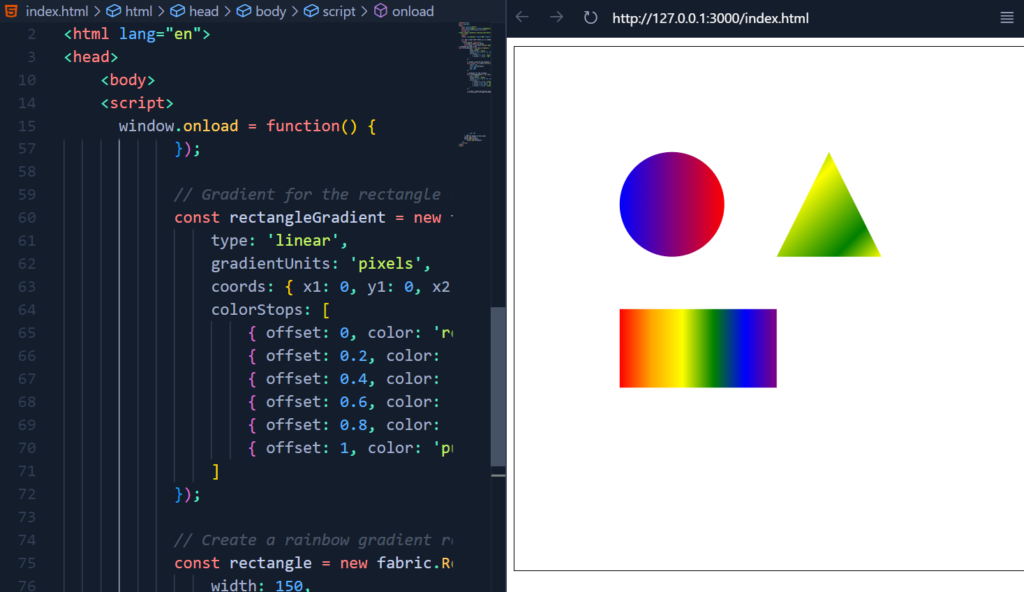
Here we have created different gradient objects for different shapes. (circleGradient, triangleGradient, rectangleGradient). In each gradient object, we have defined its type, coordinates, and offsets for colour mixing and proportion of mixing.
- Gradient for Circle: A linear gradient transitions from blue to red.
- Gradient for Triangle: A linear gradient with a mix of green and yellow.
- Gradient for Rectangle: A horizontal rainbow gradient transitioning through red, orange, yellow, green, blue, and purple.
Output:
Example 3:
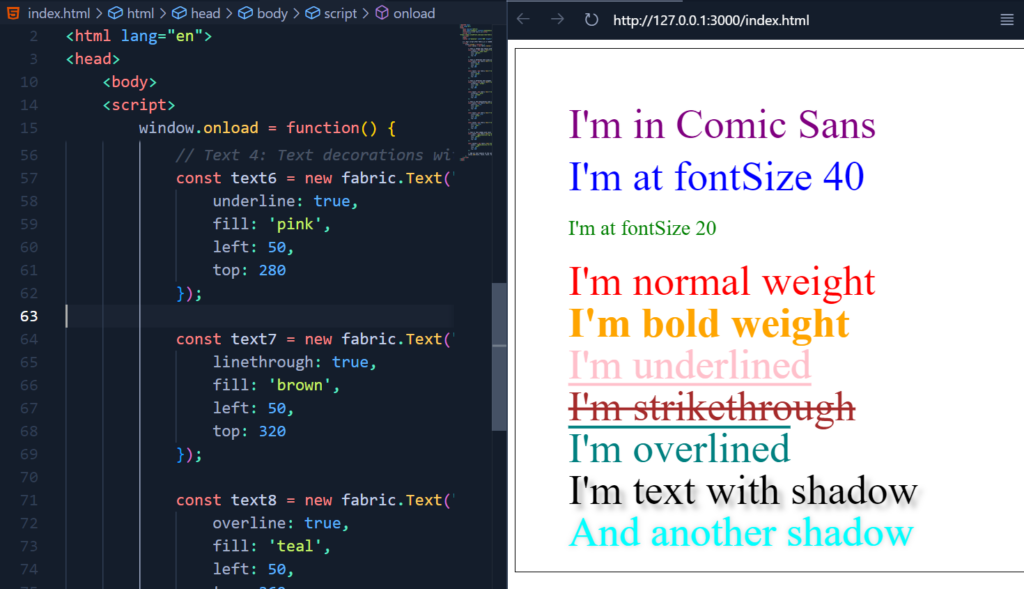
We can add text into Canvas, not just normal text but text with many effects such as font size, font weight, text decoration, shadow, etc. Here is a code displaying ten text messages on the canvas with different effects:
<!DOCTYPE html>
<html lang="en">
<head>
    <meta charset="UTF-8">
    <meta name="viewport" content="width=device-width, initial-scale=1.0">
    <title>Circle with Fabric.js</title>
    <script src=
"https://cdnjs.cloudflare.com/ajax/libs/fabric.js/3.6.2/fabric.min.js">
    </script>
    <body>
    <canvas id="myCanvas" width="500" height="500" style="border:1px solid #000;"></canvas>

    <!-- Your script after Fabric.js is loaded -->
    <script>
        window.onload = function() {
            const canvas = new fabric.Canvas('myCanvas');
            const text1 = new fabric.Text("I'm in Comic Sans", {
                fontFamily: 'Comic Sans',
                fill: 'purple',
                left: 50,
                top: 50
            });
            const text2 = new fabric.Text("I'm at fontSize 40", {
                fontSize: 40,
                fill: 'blue',
                left: 50,
                top: 100
            });


            const text3 = new fabric.Text("I'm at fontSize 20", {
                fontSize: 20,
                fill: 'green',
                left: 50,
                top: 160
            });

            const text4 = new fabric.Text("I'm normal weight", {
                fontWeight: 'normal',
                fill: 'red',
                left: 50,
                top: 200
            });

            const text5 = new fabric.Text("I'm bold weight", {
                fontWeight: 'bold',
                fill: 'orange',
                left: 50,
                top: 240
            });

            const text6 = new fabric.Text("I'm underlined", {
                underline: true,
                fill: 'pink',
                left: 50,
                top: 280
            });

            const text7 = new fabric.Text("I'm strikethrough", {
                linethrough: true,
                fill: 'brown',
                left: 50,
                top: 320
            });

            const text8 = new fabric.Text("I'm overlined", {
                overline: true,
                fill: 'teal',
                left: 50,
                top: 360
            });
            const text9 = new fabric.Text("I'm text with shadow", {
                shadow: 'rgba(0,0,0,0.3) 5px 5px 5px',
                fill: 'black',
                left: 50,
                top: 400
            });

            const text10 = new fabric.Text("And another shadow", {
                shadow: 'rgba(0,0,0,0.2) 0 0 5px',
                fill: 'cyan',
                left: 50,
                top: 440
            });

            // Add all text objects to the canvas
            canvas.add(text1, text2, text3, text4, text5, text6, text7, text8, text9, text10);
        };
    </script>
</body>
</html>
In this example, we have used the following features:
- Font Family: It changes the text font to Comic Sans.
- Font Size: It helps to show two text objects with different font sizes (40 and 20).
- Font Weight: It helps to demonstrate normal and bold text.
- Text Decorations: Texts can be underlined, strikethrough, and overlined.
- Shadow: It helps to add shadow to the text
Output:
Summary
Fabric.js is useful because it makes drawing and editing shapes, images, and text on a canvas easy and interactive. You can move, resize, rotate, and animate objects. It works on both computers and phones, making it a good choice for creating graphics. We have only scratched the surface of what’s possible with fabric. You can create simple or complex shapes and images, then change their position, size, angle, colour, and more, however you want.
- One such design library is Node-Sass, click here to know more about it!
- If you are interested in learning about more such web technologies, then click here!
Reference