New to Rust? Grab our free Rust for Beginners eBook Get it free →
RaspberryPI and Node.js : Step by Step Installation Guide
In this “RaspberryPI and Node.js” series, we are going to first learn about how to install Node.js in RaspberryPI. We will go through each and every step to help you get Node.js running in RaspberryPI.
RaspberryPI hardware is sponsored by Gearbest.com. Check out their website and awesome products at best price and do buy if you need to support our website.
Table of contents
- Hardware requirement.
- Downloading RaspberryPI Operating system.
- Writing RaspberryPI OS to the memory card.
- Booting up RaspberryPI.
- Configuring Raspbian OS.
- Installing Node.js in RaspberryPI.
- Next tutorial.
- Conclusion.
Let’s begin.
Hardware requirement
- RaspberryPI 3B.
- MicroSD card.
- MicroSD card adapter.
- MicroUSB power supply.
- Monitor with HDMI output.
- (Optional) VGA to HDMI converter
- USB keyboard and mouse
- Laptop/Desktop with Mac,Linux or Windows.
Full disclosure: Link attached to the products listed above are affiliate links and if you buy from Gearbest, we will earn few bucks as a commission. Support us if you can and thank you in advance.
Downloading RaspberryPI Operating system
We will use Raspbian – official and supported operating system by RaspberryPI. Visit the official website by clicking here and download the Raspbian Jessie with pixel zip and make sure to not download the lite version.
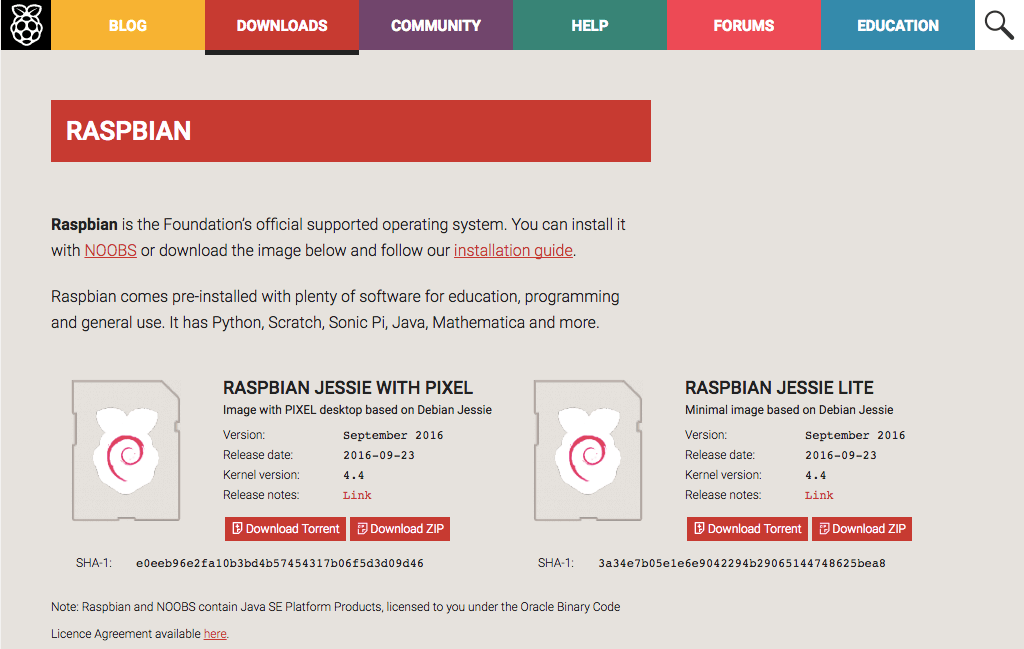
Depending on your internet connection, it may take some time (Not applicable to people work in NASA :P). Go grab a coffee and sit back relax.
Writing RaspberryPI OS to the memory card
Once you complete the download, now you need to write the image file in MicroSD card.
But why?
We need to boot our RaspberryPI using the Raspbian operating system and to do that we need to plug in our MicroSD chip in the RaspberryPI and it will boot the operating system.
You can write the operating system image in MicroSD card using any disk image burning software, however, I recommend using Etcher which is cross platform tool to burn the image file to disk.
Download Etcher for your operating system from here.
Now follow the steps mentioned below to write the disk image in MicroSD card.
- Insert MicroSD card in the card reader. Refer diagram below.
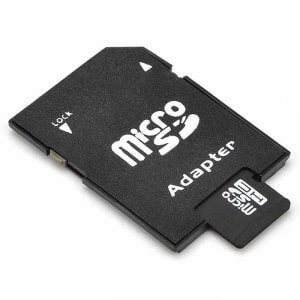
- Insert card reader in your laptop/desktop.
- Open Etcher and select the Raspbian Image you just download, then select your SD card drive and click on Flash button to write the image file in SD card.
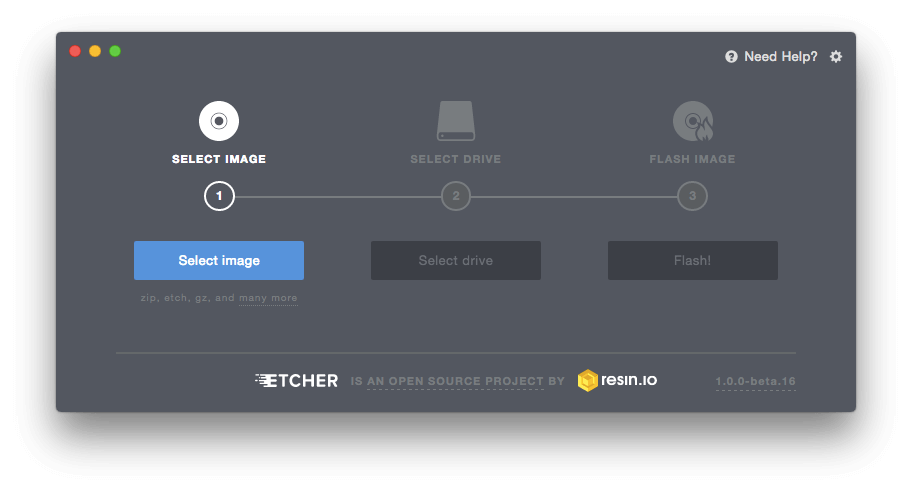
It will take some time to write the image in SD card.
Booting up RaspberryPI
Ok! So we have Raspbian OS flashed in SD card, RaspberryPI along with keyboard,mouse, and monitor.
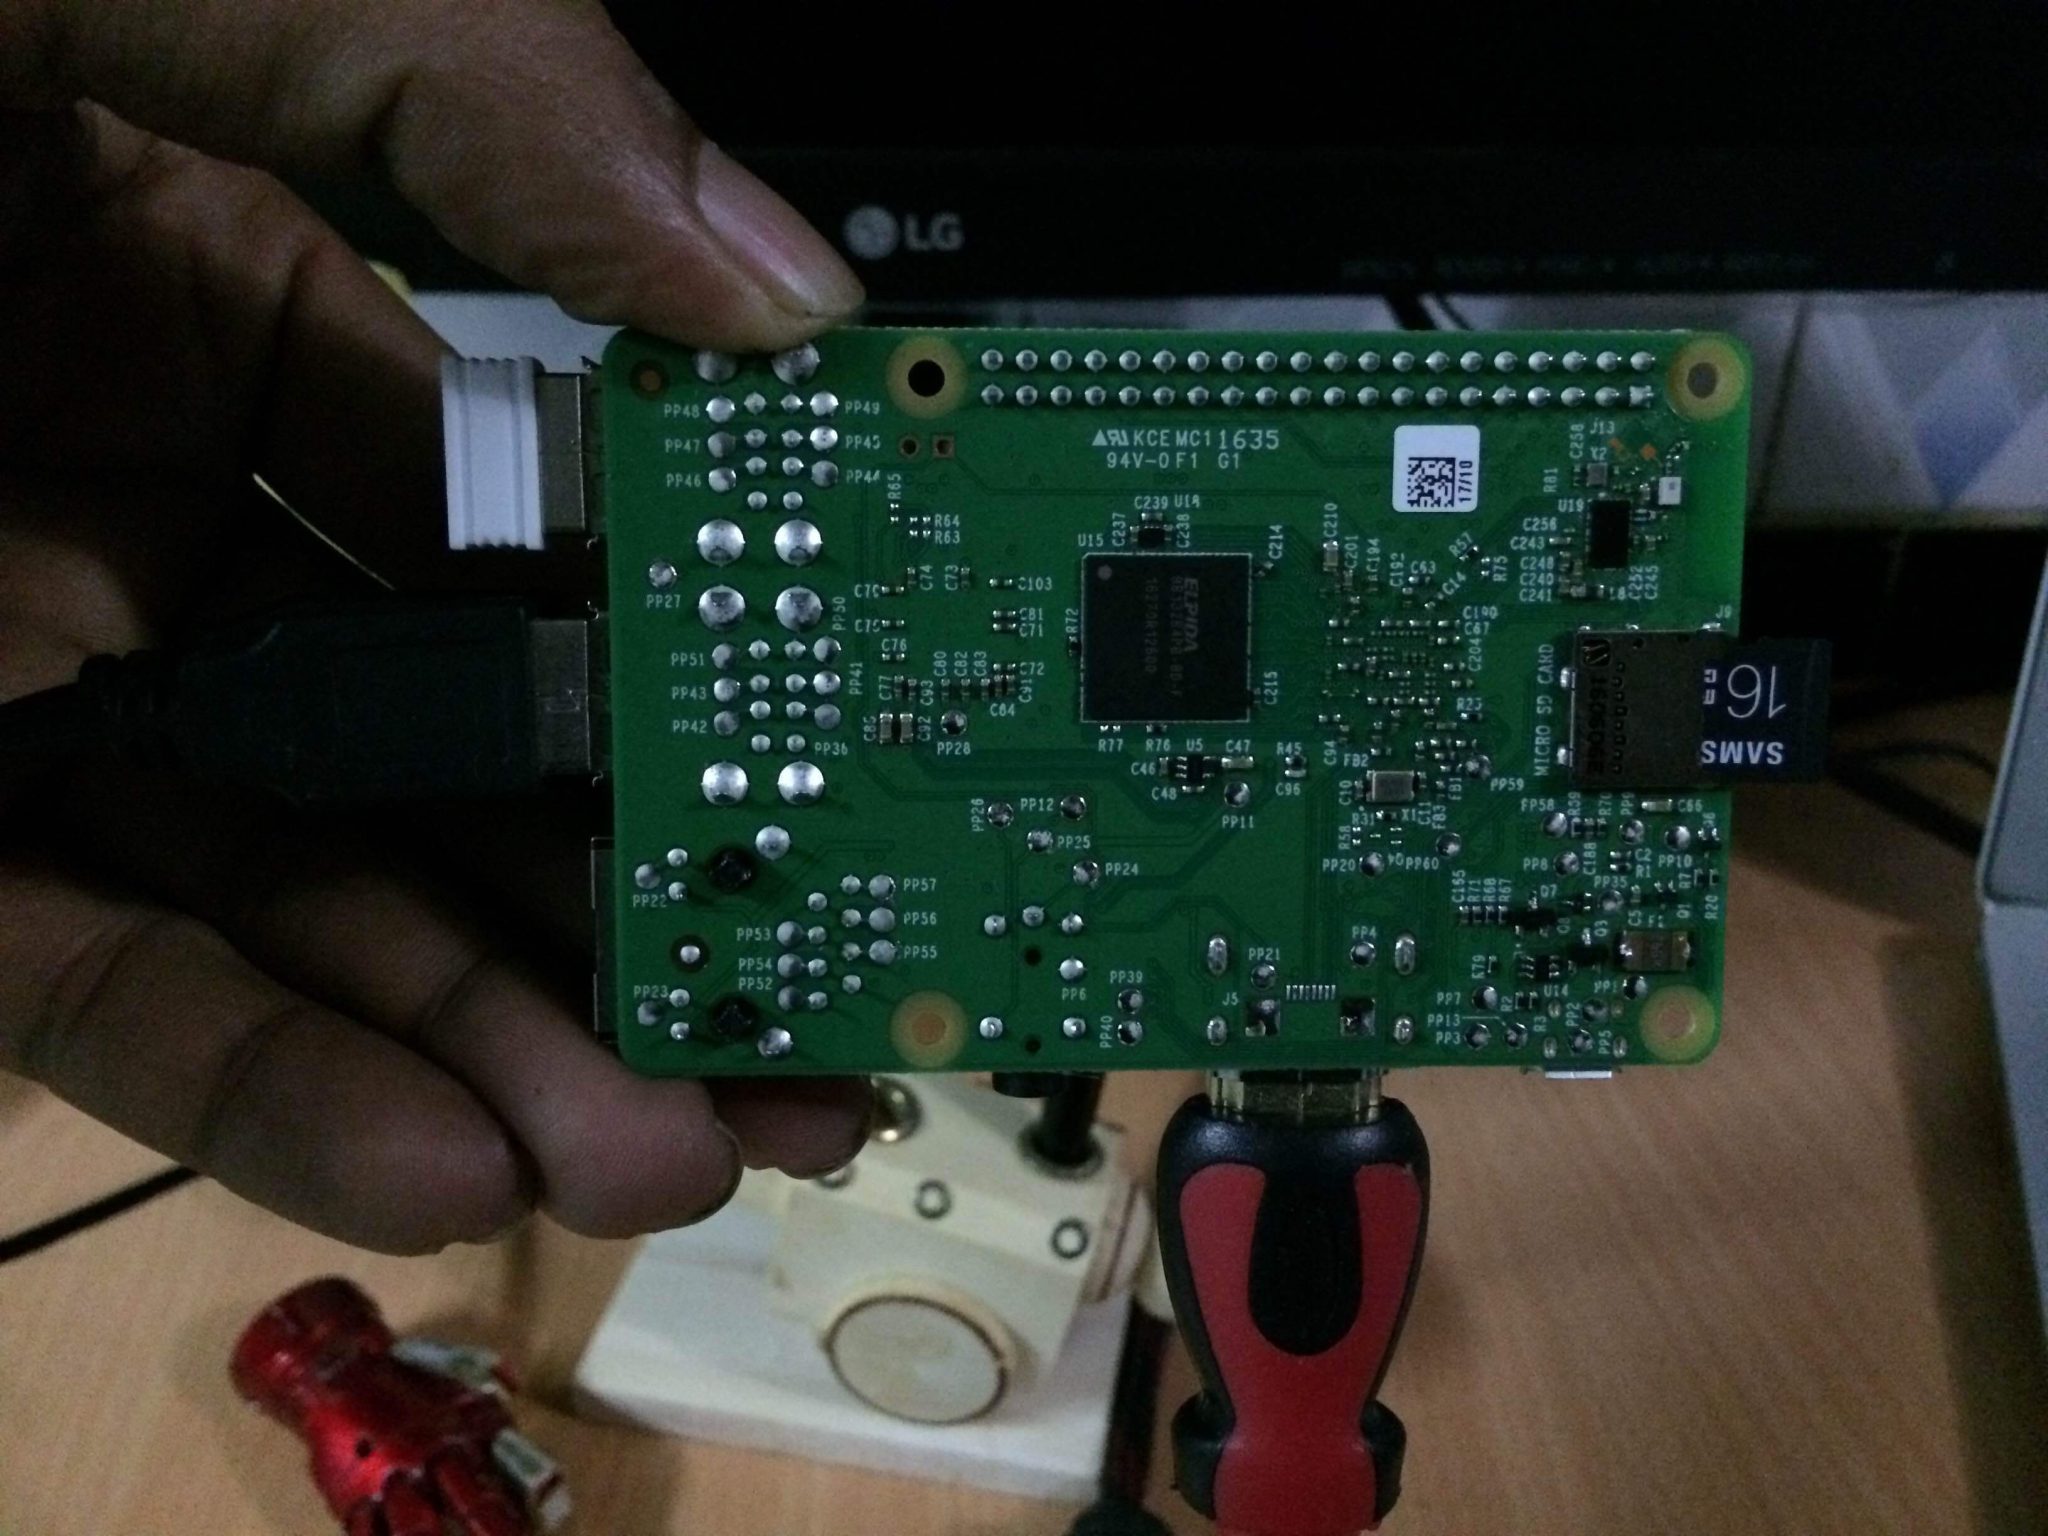
First of all, let’s insert our SD card in RaspberryPI. Turn around the RaspberryPI and on the back side there is small card holder, insert your SD card into the slot, refer image below for reference.
Ok, so we have the SD card in place, let’s connect all of our hardware i.e Keyboard, mouse, and a monitor. Here is the reference image for understanding.
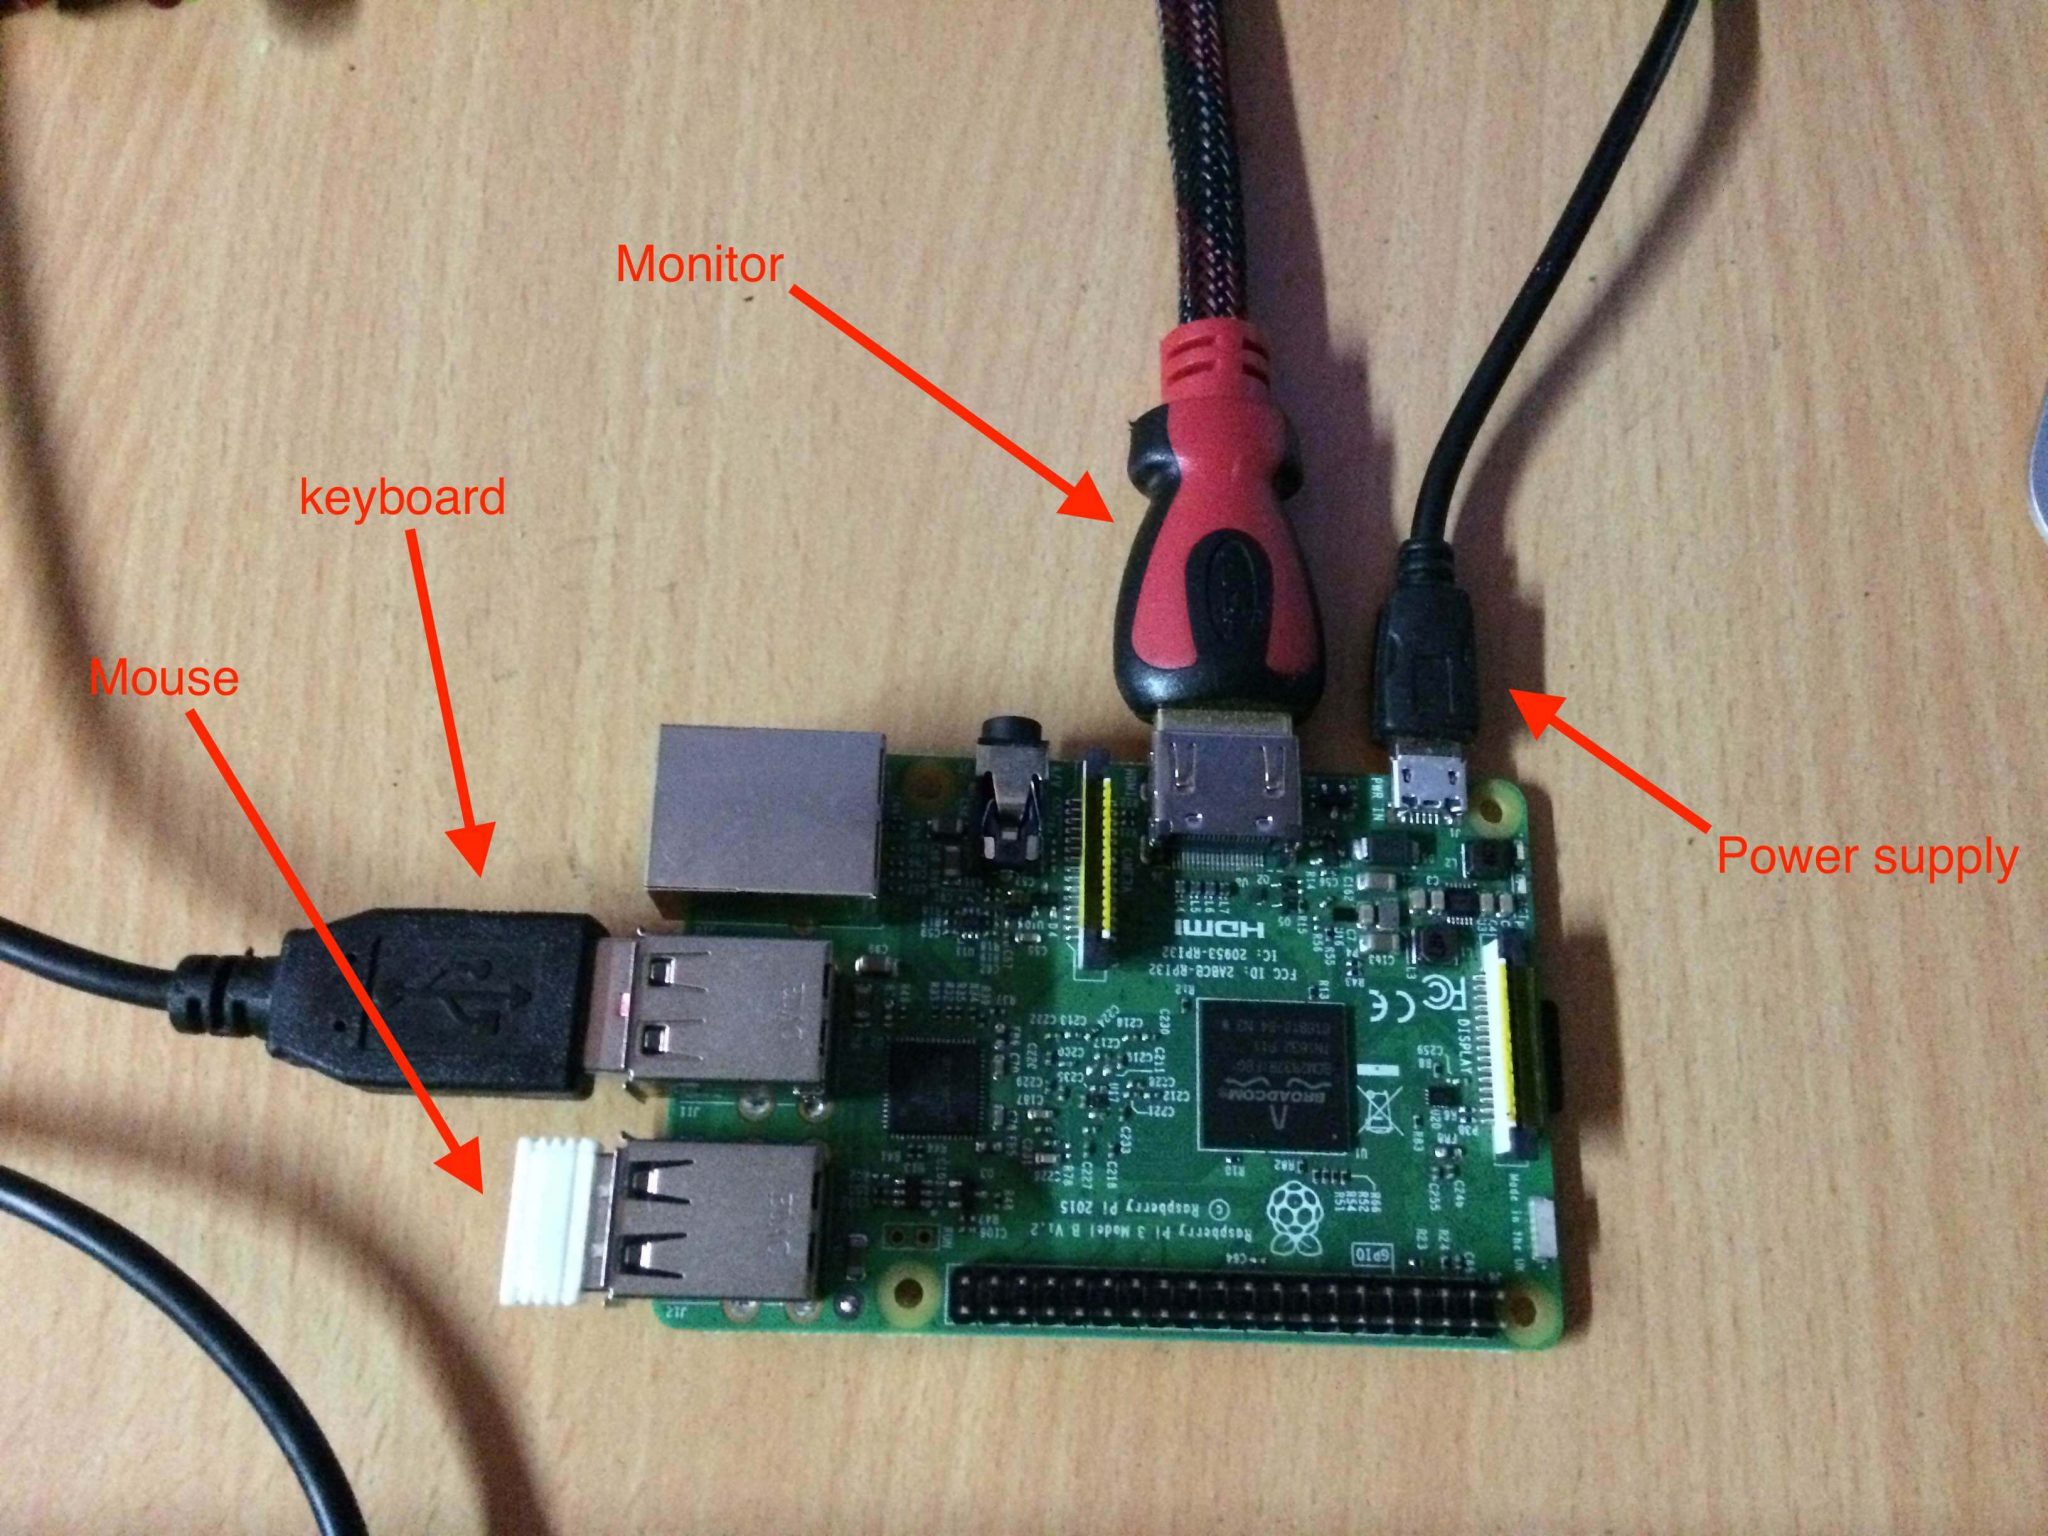
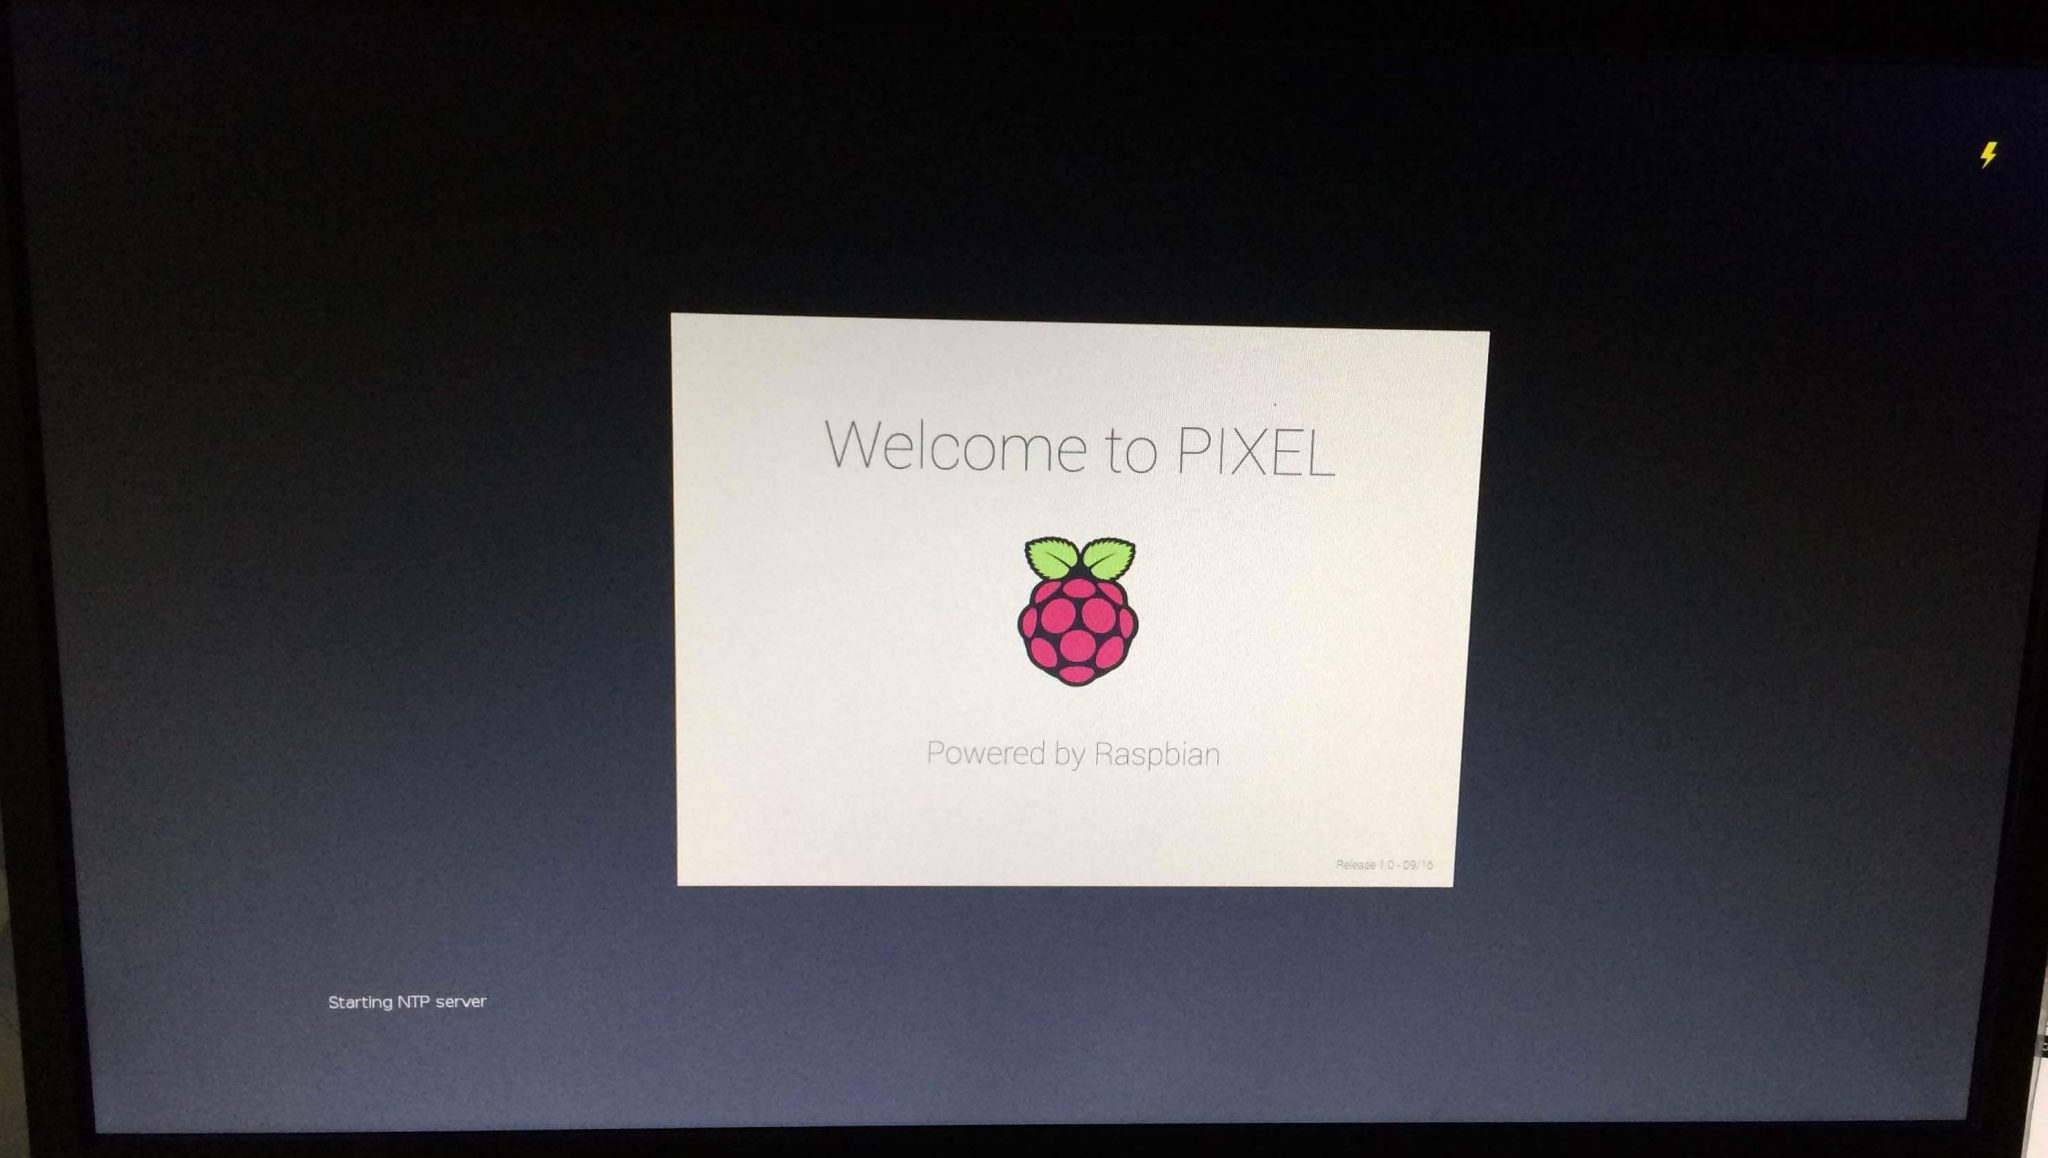
Once everything is connected, plug the power supply USB cable to a power source. I am powering it using my Laptop USB. RaspberryPI will boot and you should see OS booting up in the monitor screen.
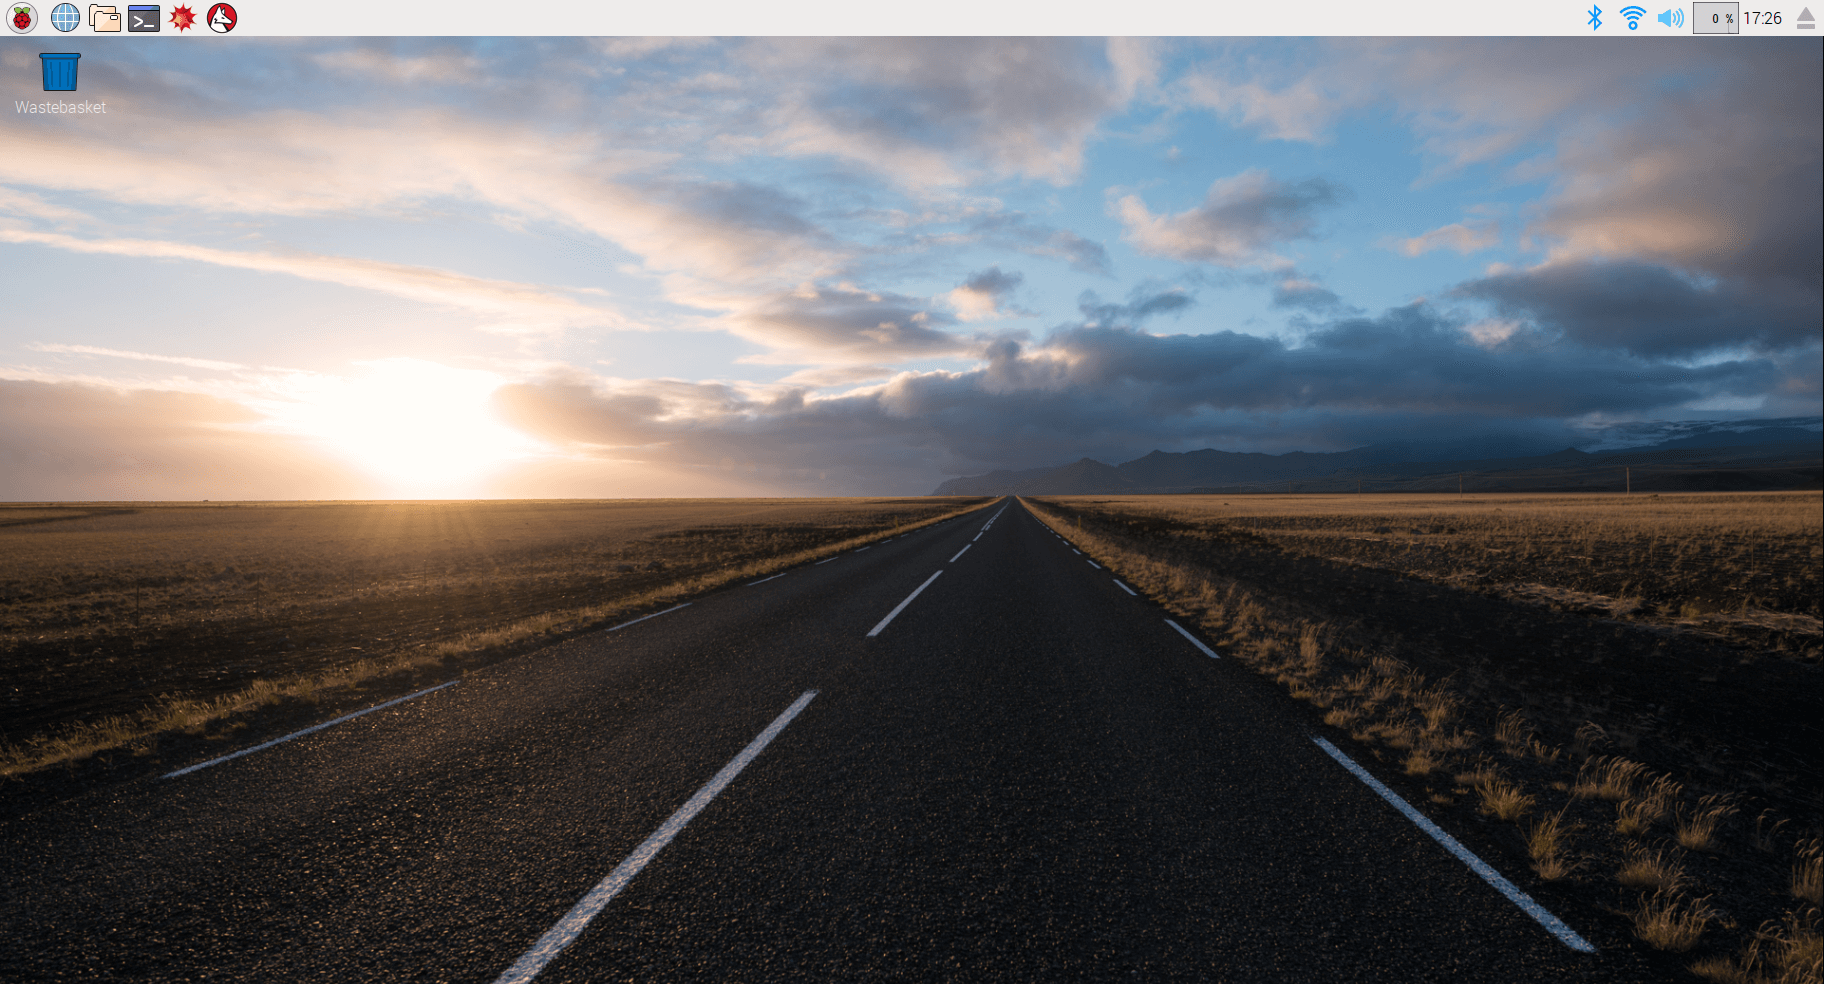
Once the boot is complete, you will see a desktop screen similar to what shown below.
Congratulations! RaspberryPI is up. Let’s configure some settings in next section.
Configuring Raspbian OS
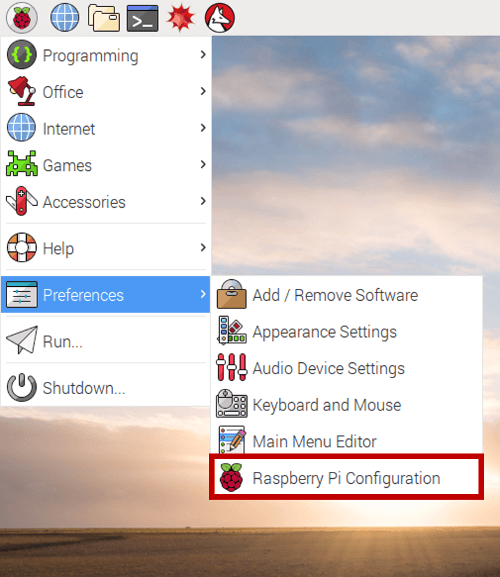
By default, RaspberryPI uses the UK based keyboard setting and language is the UK English too. In order to change it according to your locality, open the RaspberryPI configuration.
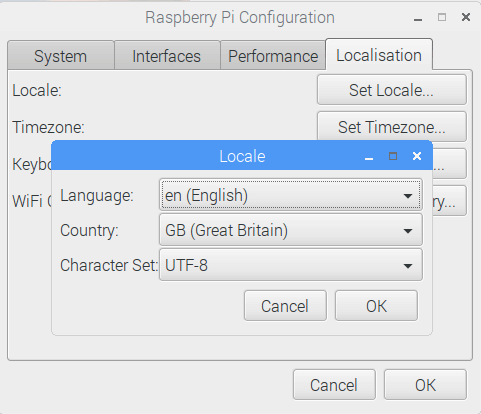
Click on Set Locale button and select the preffered language.
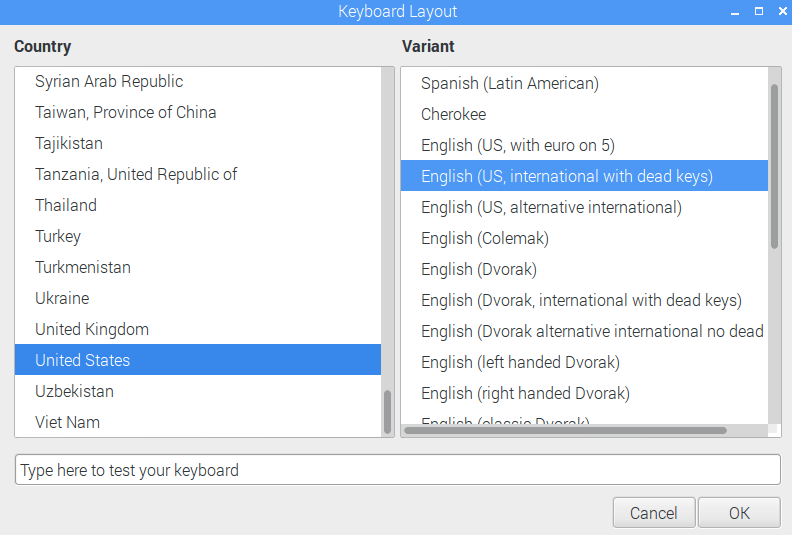
Change the keyboard setting according to your locality.
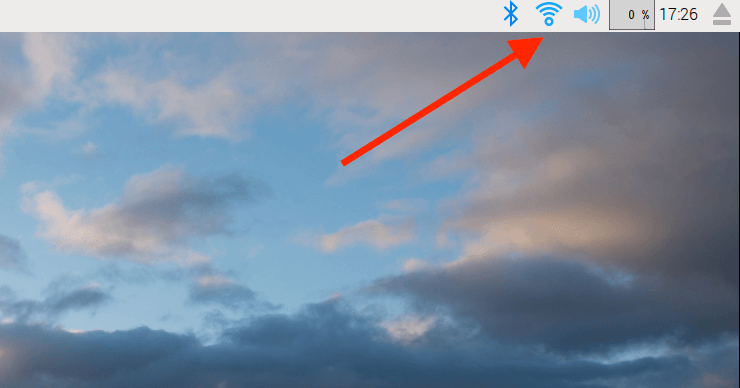
Now click on the Wifi icon at the right corner and connect to the Wifi. Alternatively, you can also plug the ethernet cable in the RaspberryPI.
Now let’s install the Raspbian system update before installing Node.js.
Open up terminal (Icon at the main bar) and run the following command.
sudo apt-get update
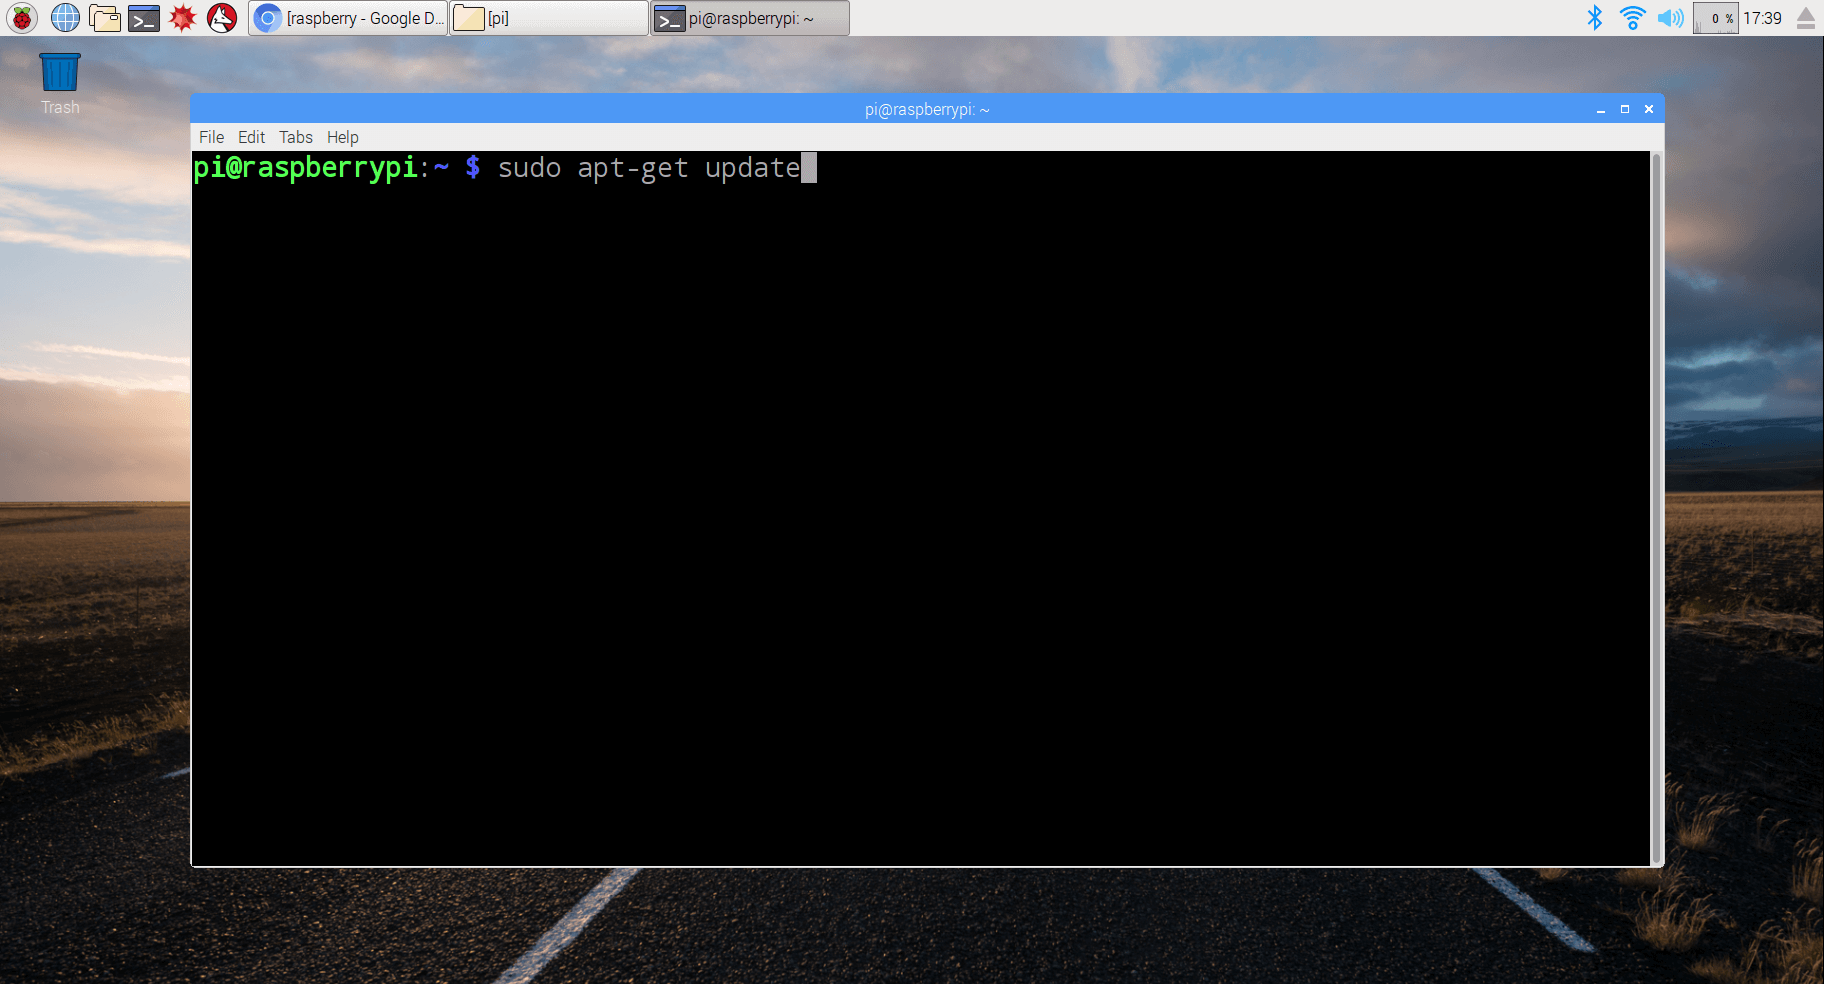
Once the update is done, we are good to install Node.js in our RaspberryPI.
Installing Node.js in RaspberryPI
Open the terminal and run the following command.
curl -sL https://deb.nodesource.com/setup_7.x | sudo -E bash -
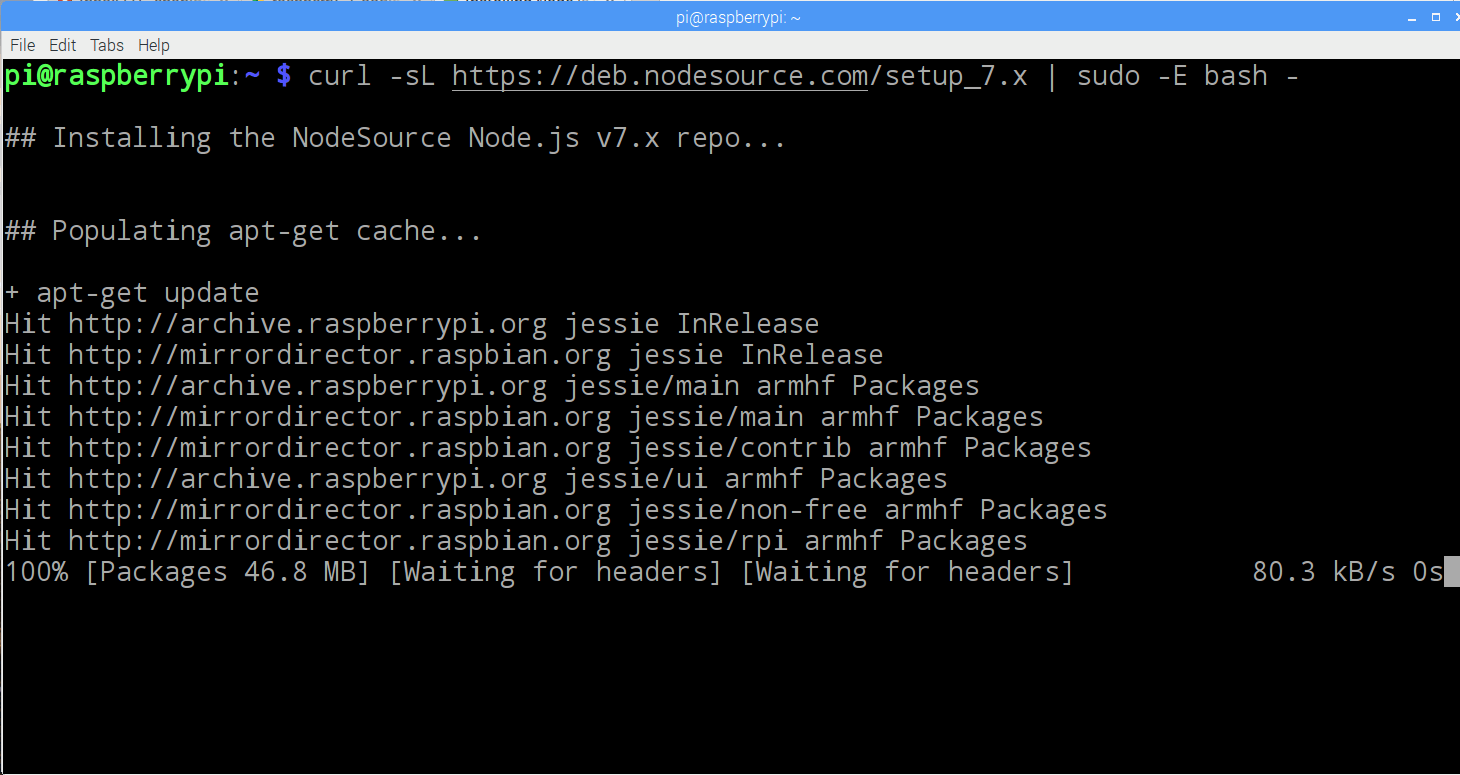
Now run the following command to install Node.js.
sudo apt-get install -y nodejs
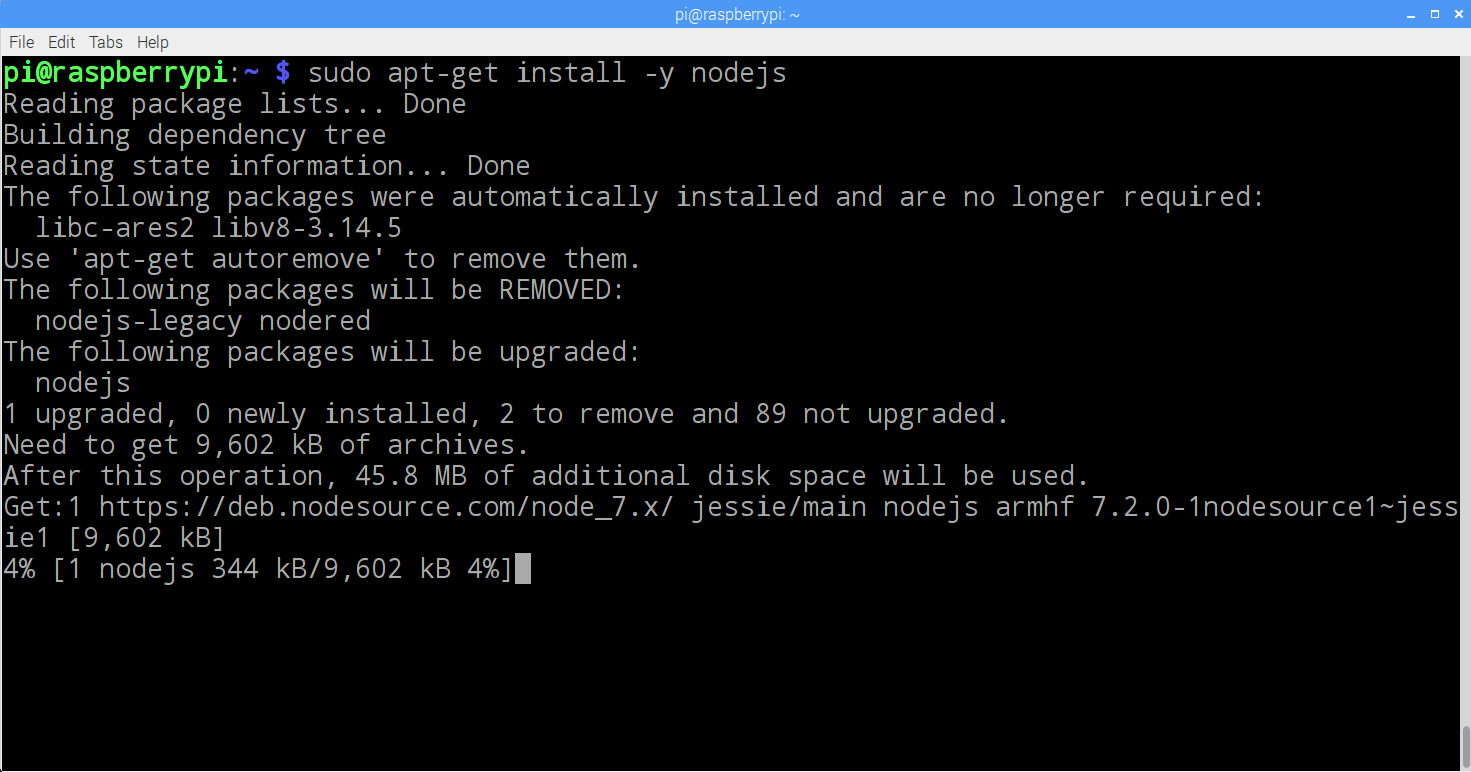
Let’s check if Node is installed.
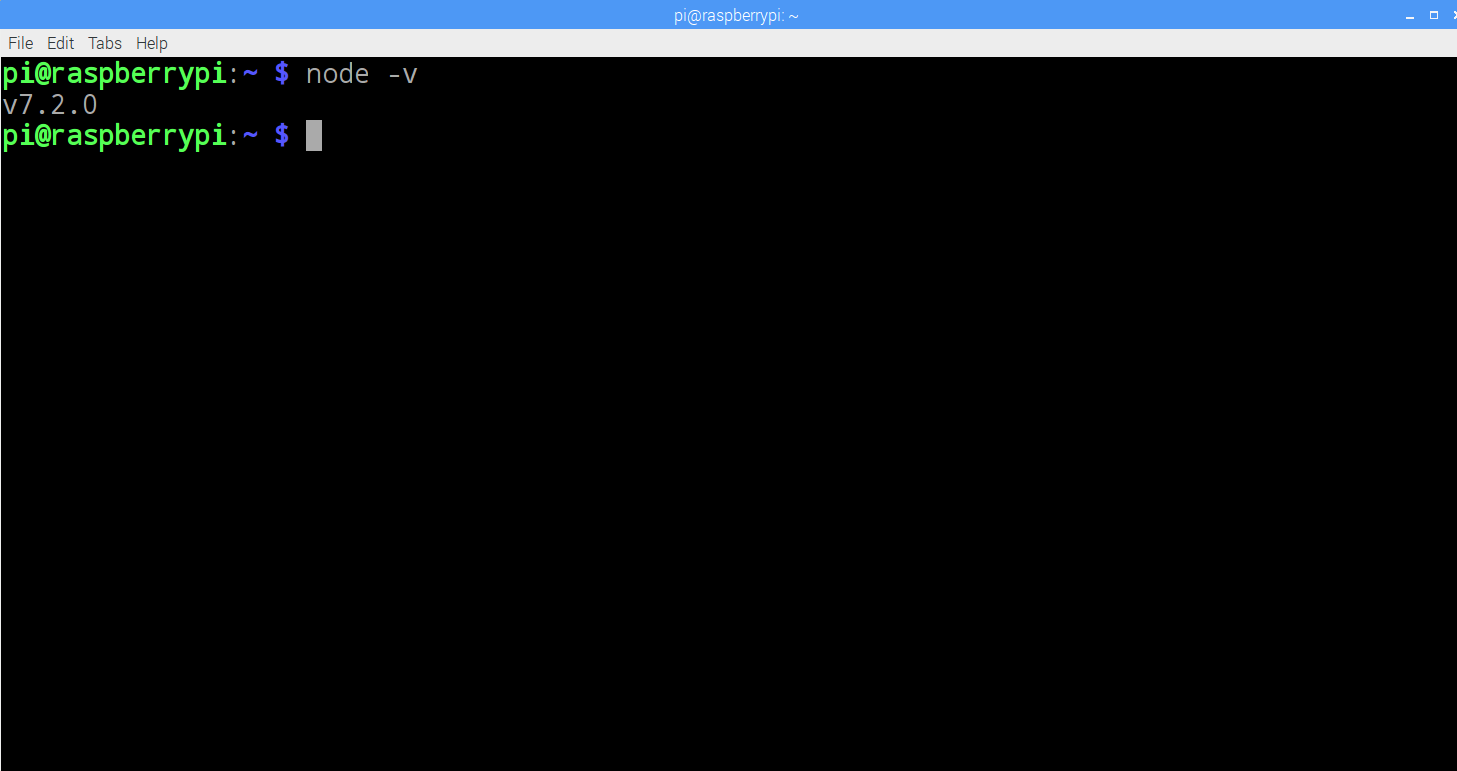
Awesome! We have Node.js installed and ready to use.
Next tutorial
In next tutorial, we are going to learn how to configure RaspberryPI with external camera. Stay tuned.
Conclusion
We learned how to configure, boot and setup RaspberryPI step by step with each detail. We also learned about changing the RaspberryPI setting and updating it with latest updates. We also installed Node.js in our RaspberryPI which we are going to use in coming tutorials in “RaspberryPI and Node.js” series.

