New to Rust? Grab our free Rust for Beginners eBook Get it free →
Nodejs Authentication Using JWT and Refresh Token

Nodejs authentication using JWT a.k.a JSON web token is very useful when you are developing a cross-device authentication mechanism.
Here is how token-based authentication works:
- User logins to the system and upon successful authentication, the user are assigned a token which is unique and bounded by time limit say 15 minutes
- On every subsequent API call, the user provides the access token in order to consume the system resources.
- When time is expired, the user has to login again to get a new token
The last step is frustrating, we can’t ask users to log in each and every single time once the token is expired.
There are two ways to solve this:
- Increase the time of the token
- Use refresh token to extend the token
I have covered token-based authentication in this article in detail.
In this Nodejs authentication tutorial, I am going to build a simple/boilerplate solution to handle the refresh token mechanism in Nodejs authentication.
Full disclosure: Code is not production grade, it is meant for the explanation purpose only.
So let’s begin.
Creating the Project
Let’s get straight to the code.
You need to create a new folder and run the following command to initialize the new Nodejs project.
npm init --y
This will create a new package.json file.
Installing dependencis
You need few dependencies to run the project. Install them using the following command.
npm i --S express body-parser jsonwebtoken
Once they are installed, you are good to go.
Adding Gitignore
You need to add this file to avoid certain folders being added to the Git repository.
To do this, you need to create a new file and name it .gitignore and add the following line.
node_modules/
This means, avoid adding node modules folder in the git repository.
Ok, let’s write some code.
Creating Server and adding routes
I am going to use express to create a Nodejs server. Here is the code.
app.js
const express = require('express')

const bodyParser = require('body-parser')

const jwt = require('jsonwebtoken')

const router = express.Router()

const config = require('./config')

const tokenList = {}

const app = express()
router.get('/', (req,res) => {
res.send('Ok');
})
router.post('/login', (req,res) => {
const postData = req.body;
const user = {
"email": postData.email,
"name": postData.name
}
// do the database authentication here, with user name and password combination.
const token = jwt.sign(user, config.secret, { expiresIn: config.tokenLife})
const refreshToken = jwt.sign(user, config.refreshTokenSecret, { expiresIn: config.refreshTokenLife})
const response = {
"status": "Logged in",
"token": token,
"refreshToken": refreshToken,
}
tokenList[refreshToken] = response
res.status(200).json(response);
})
router.post('/token', (req,res) => {
// refresh the damn token
const postData = req.body
// if refresh token exists
if((postData.refreshToken) && (postData.refreshToken in tokenList)) {
const user = {
"email": postData.email,
"name": postData.name
}
const token = jwt.sign(user, config.secret, { expiresIn: config.tokenLife})
const response = {
"token": token,
}
// update the token in the list
tokenList[postData.refreshToken].token = token
res.status(200).json(response);
} else {
res.status(404).send('Invalid request')
}
})
router.use(require('./tokenChecker'))
router.get('/secure', (req,res) => {
// all secured routes goes here
res.send('I am secured...')
})
app.use(bodyParser.json())
app.use('/api', router)
app.listen(config.port || process.env.port || 3000);
Here is the config file.
config.json
{

    "secret": "some-secret-shit-goes-here",

    "refreshTokenSecret": "some-secret-refresh-token-shit",

    "port": 3000,

    "tokenLife": 900,

    "refreshTokenLife": 86400

}
In the login route, we are doing the token generation.
Notice these two lines:
    const token = jwt.sign(user, config.secret, { expiresIn: config.tokenLife})

    const refreshToken = jwt.sign(user, config.refreshTokenSecret, { expiresIn: config.refreshTokenLife})
I am using different secrets and times to expire for both of the keys and storing the keys in an array using the following code.
tokenList[refreshToken] = response
Tip: You must use the store instead of an array in production, such as Redis.
In the token route, I am expecting the refresh token in the payload, if the payload exists, I am checking if it is a valid token.
If it is a valid token, I am creating a new token and sending it back to the user. This way user doesn’t need to log in again.
Creating middleware to authenticate the API calls
You need to have a piece of code that always executes and check if the token coming in the API calls is valid or not.
If you have noticed, I have added this middleware code in the Server code.
router.use(require('./tokenChecker'))
Here is the code for this middleware.
tokenChecker.js
const jwt = require('jsonwebtoken')

const config = require('./config')
module.exports = (req,res,next) => {
const token = req.body.token || req.query.token || req.headers['x-access-token']
// decode token
if (token) {
// verifies secret and checks exp
jwt.verify(token, config.secret, function(err, decoded) {
if (err) {
return res.status(401).json({"error": true, "message": 'Unauthorized access.' });
}
req.decoded = decoded;
next();
});
} else {
// if there is no token
// return an error
return res.status(403).send({
"error": true,
"message": 'No token provided.'
});
}
}
It’s simple token validation. This way all the API calls which are below this middleware have to provide a valid token to consume the system’s resources.
Testing the code
Let’s do some testing.
Run the code using the following command.
node app.js
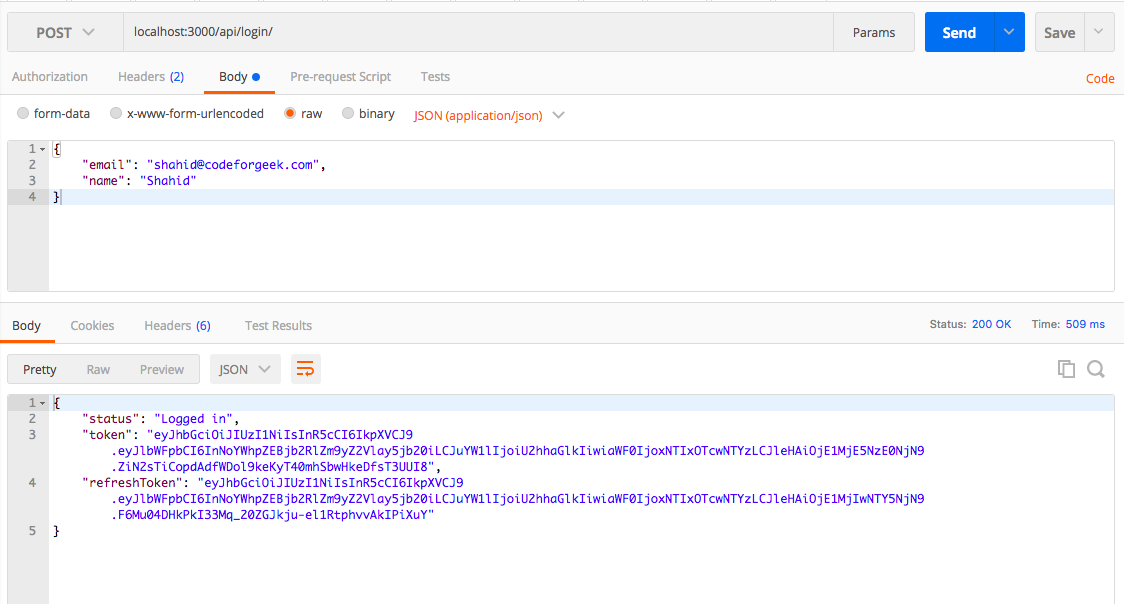
Open your favorite API testing tool, mine is Postman, and hit the /login API route.
URL: http://localhost:3000/api/login

body: {

	"email": "[email protected]",

	"name": "Shahid"

 }
Here is the sample screenshot to refer to.
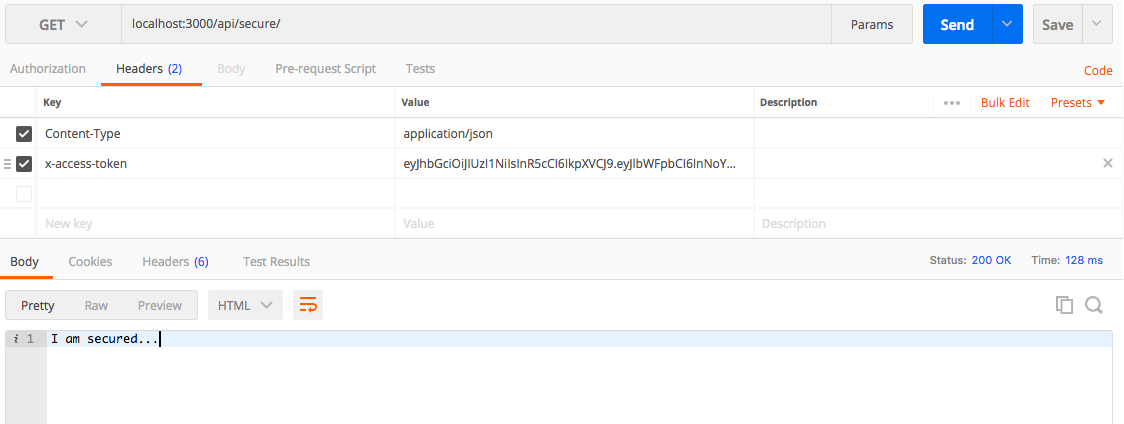
Now copy the token and use it to access the /secure API route.
Refer to this screenshot for help.
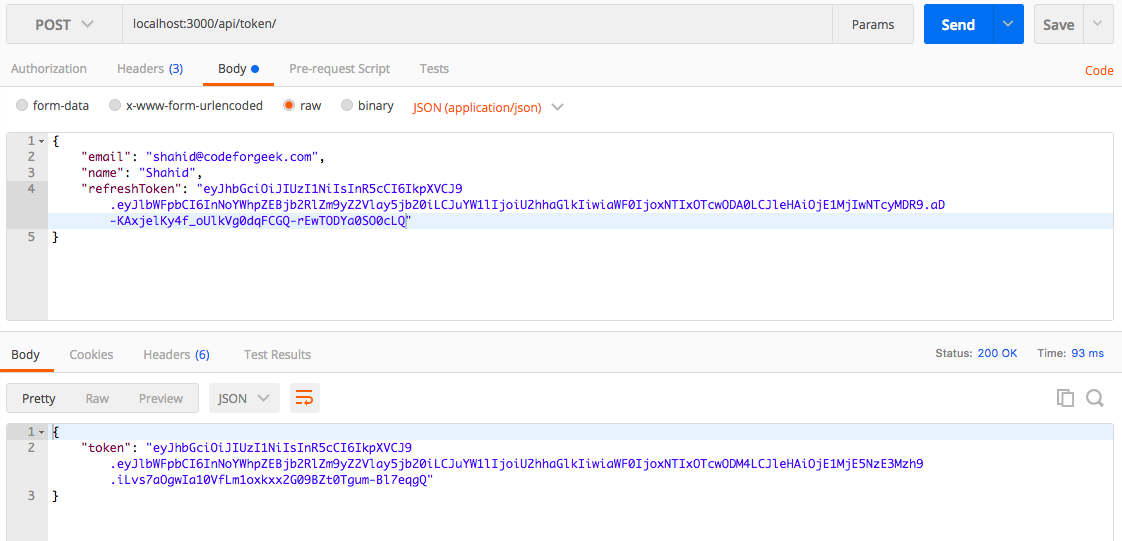
Now, let’s do a token exchange, shall we?
You need to call /token route and provide the refresh token to obtain a new token. Refer to the screenshot below for the payload example.
Download the code
The source code is open source and you can clone, distribute and download it from the Github. Click here to view the repository.
Conclusion
Nodejs authentication using tokens is an integral part of web development. You need to use the refresh token mechanism for the seamless flow of the application. We covered the basics of it and I am sure you can take it from there.