New to Rust? Grab our free Rust for Beginners eBook Get it free →
Pre-rendering and Data Fetching in Next.js

In React, if we want to fetch data then it is not straightforward. First, the component is rendered without any data then useEffect is triggered to fetch data and then fetched data gets stored in the component’s state using useState and finally the component is re-rendered with the fetched data.
This creates a little delay in displaying the data after the page is rendered. Next.js handle this fetching very well using the pre-rendering and extended web fetch API. Let’s understand this in detail.
Check Out the Previous Tutorial: Middleware in Next.js
How Does Data Fetching Work in Next.js?
Look at the below code to observe how exactly we fetch and render data in Next.js:
const getJoke = async () => {
    const res = await fetch("https://v2.jokeapi.dev/joke/Any");
    return res.json();
};

export default async function Home() {
    const joke = await getJoke();

    return <div>
        <h1>Joke</h1>
        <p>{joke.setup ? `${joke.setup} - ${joke.delivery}` : joke.joke}</p>
    </div>;
}
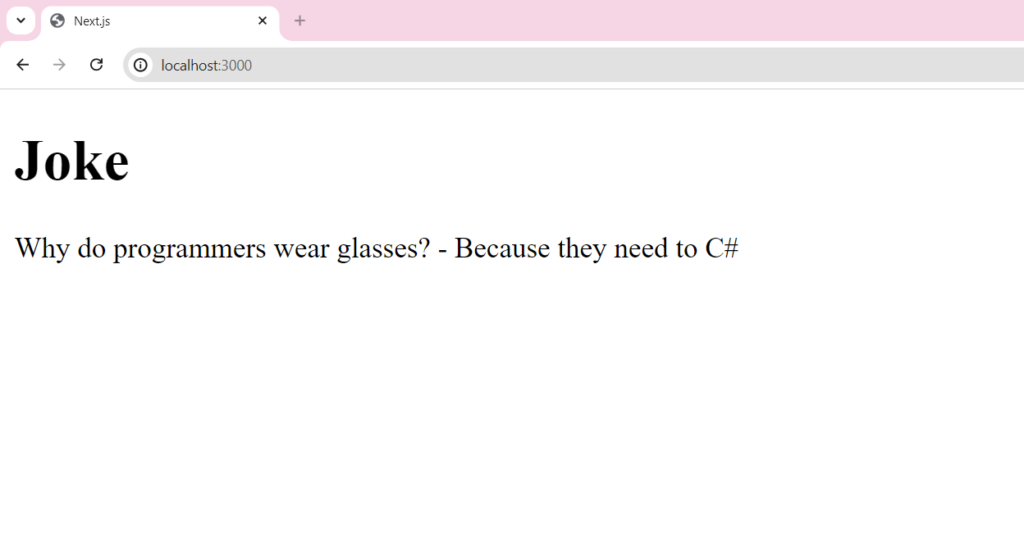
This is the code for the home page i.e. the “/” route and it is asynchronous as you can see async in the export statement. So if someone makes a request to “/”, Next.js does not render the HTML directly. Instead, it makes the request to the API directly, which in the case of React is done by the browser after rendering. Next.js does not render the page until it fetches the data. When the data is received, only then it renders the page.
This will ensure that the client receives pre-rendered HTML instead of blank HTML waiting for data to be populated.
Output:
*If you are struggling to understand the routing system in Next.js, we have an easy guide for you: File-Based Routing in Next.js
Advantages of Pre-rendering
- This ensures that the client gets pre-rendered HTML and does not see a blank page waiting for data to be fetched.
- Pre-rendering means better SEO as the search engine can easily crawl and index the content which helps in better search engine rankings.
- It helps to increase the initial page loading time making the rendering much faster and smoother.
- This is faster than the browser executes JavaScript code on the client side for API calls after the HTML renders.
- Providing content instantly in less time increases overall user experience leading to higher satisfaction and engagement.
Caching Data
Usually, when a page is refreshed or requested again, data is fetched again, this will lead to unnecessary wait times as the data may be the same one that is fetched again and again. Next.js solves this problem by caching the fetched data in a data cache on the server so that it does not need to be fetched again on every request.
fetch(URL, { cache: 'force-cache' })
force-cache means use the cached content.
Other Cache-Control Directives:
- default: default and force-cache are the same.
- no-cache: cache the response but check for new content.
- reload: fetch the latest content every time and update the cache.
- no-store: never cache anything and fetch data on every request.
- only-if-cached: use the cached version if available otherwise return an error i.e., no fetching.
Example:
In the code above, we haven’t defined any directive, so by default, it’s { cache: ‘default’ } which results in the same joke in every request. Let’s update the code and use { cache: ‘no-cache’ } to get a new joke in every request.
const getJoke = async () => {
    const res = await fetch("https://v2.jokeapi.dev/joke/Any", {cache: 'no-cache'});
    return res.json();
};

export default async function Home() {
    const joke = await getJoke();

    return <div>
        <h1>Joke</h1>
        <p>{joke.setup ? `${joke.setup} - ${joke.delivery}` : joke.joke}</p>
    </div>;
}
Outputs:
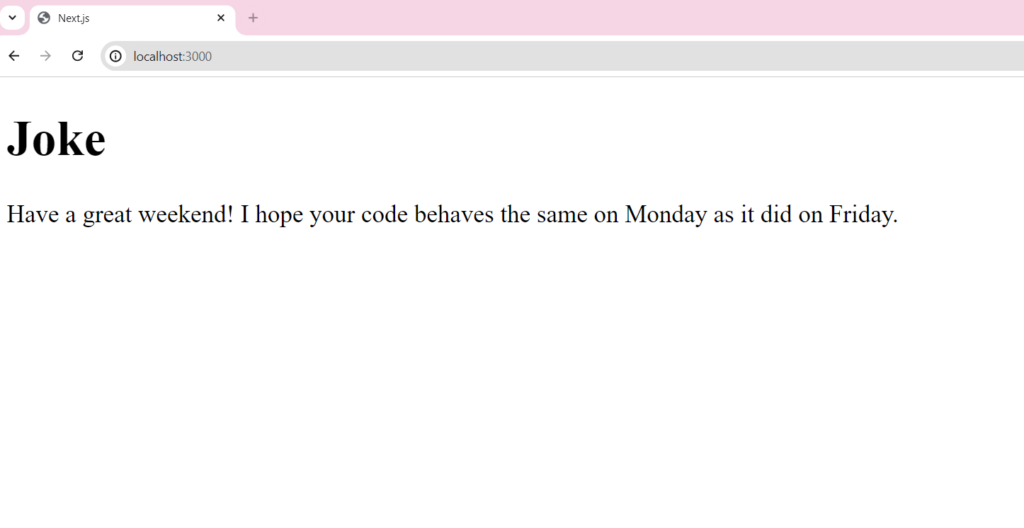
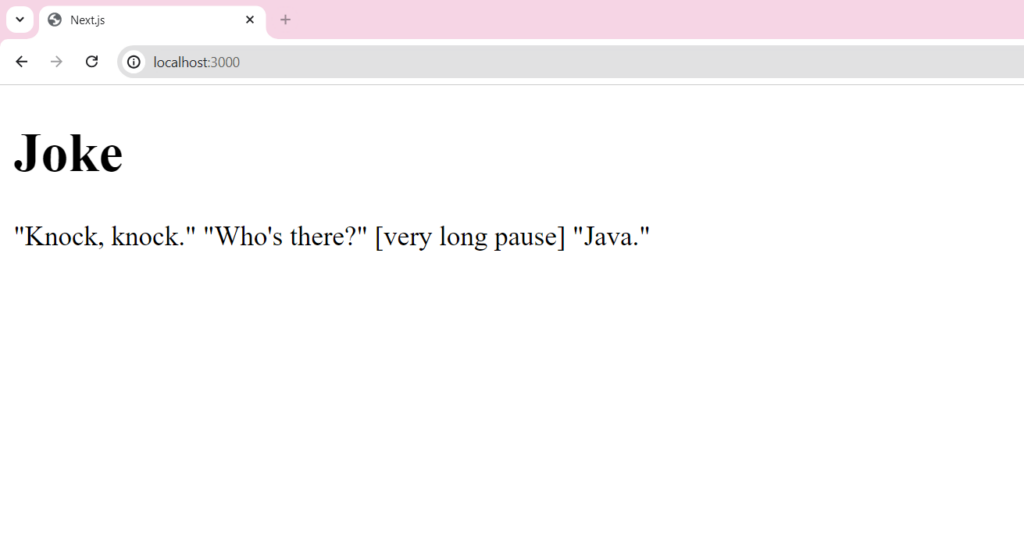
And so on.
Revalidating Data
Revalidation means clearing the data cache and fetching the latest data again. We can revalidate by defining time-based intervals or using cache tags for on-demand triggering.
Time-based Revalidation:
When fetching data in Next.js we can set timed intervals in seconds using the next option for revalidation after the specified seconds.
fetch(URL, { next: { revalidate: 3600 } })
On-demand Revalidation:
While fetching data in Next.js we can also give it different tags using the next option to refresh cached data selectively based on cache tags:
fetch(URL, { next: { tags: [name] } });
We can then use the revalidateTag function from next/cache to trigger revalidate (refresh) for all cache entries passing tag names as arguments in a Server Action or Route Handler:
import { revalidateTag } from 'next/cache';

export default async function action() {
  await revalidateTag('collection');
}
Handling Loading States and Errors in Next.js
We can create a file loading.tsx inside the folder where our page.tsx file is present to create a loading UI for that route, which only shows when data is being fetched and the HTML is waiting to be rendered:


Same, we can also create an error.tsx file in the same folder to handle any errors in fetching data:
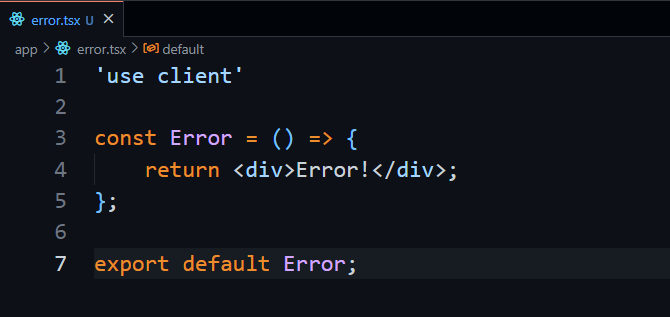

We don’t need to do any additional setup, Next.js will automatically show the relevant page accordingly.
Summary
In short, Next.js first fetches the data and then renders it to the client, which is called pre-rendering. It helps to increase the loading speed and present a smoother UI. Next also extends the fetch API to cache and revalidate the data for each fetch request and lets us create files like loading.tsx and error.tsx to handle the loading state and error automatically.
Reference