
New to Rust? Grab our free Rust for Beginners eBook Get it free →
Next.js Link Component: Navigating Between Pages


The Next.js Link component is used to navigate between different pages in a Next.js application. This is given by the next/link module and can switch between pages without triggering a full page reload. This makes the overall user experience better by providing seamless and fast page navigation. To link to a page all we have to do is import the <Link> component and define href.
Link Component in Next.js
In our previous tutorial, we learned how to create different pages in Next.js using file-based routing but to switch between pages we changed the URL manually. Like for the Home page we entered http://localhost:3000/, for the About Us page we entered http://localhost:3000/about but how to navigate between pages directly? Well here comes the Next.js Link component to link one page to another.
Syntax:
import Link from 'next/link';

<Link href="/path">Page Name</Link>
Props:
- href: In the href, we pass the URL of a page to link it to.
- replace: If we set it to true, then if a user clicks on the back button after navigating, the browser will not take us back to the previous page.
- scroll: By default, Next.js will scroll to the top of the page when navigating to a new route and if false it will not scroll to the top.
- prefetch: By default, Next.js prefetches linked pages to increase navigation speed. If we set it to false, this will not happen.
What changed in Next.js 13 and later
Before Next.js 13, you had to wrap the text or element inside <Link> with a child <a> tag. That looked like this:
// Old syntax — Next.js 12 and earlier
import Link from 'next/link';

<Link href="/about">
  <a>About Us</a>
</Link>
Starting from Next.js 13, the <a> tag is no longer required. The <Link> component renders the anchor tag automatically. If you include a child <a> tag now, Next.js will log a warning in development asking you to remove it.
// New syntax — Next.js 13+
import Link from 'next/link';

<Link href="/about">About Us</Link>
This is a breaking change for anyone upgrading from older versions. The Next.js team published a codemod to handle this automatically:
npx @next/codemod@latest new-link .
Run that from the project root and it will remove all the redundant <a> tags across your codebase. If you work on a shared codebase and find <Link><a>...</a></Link> patterns still present, they’re likely from older articles or tutorials that haven’t been updated. The old syntax still works but generates a warning, the codemod is the clean fix.
App Router vs Pages Router: what is different
Both routers use import Link from 'next/link' and the same <Link href="..."> syntax on the surface, but the import path for programmatic navigation differs.
In the Pages Router, you import the router hook from next/router:
// Pages Router
import { useRouter } from 'next/router';
In the App Router (Next.js 13+), that module is replaced by next/navigation:
// App Router
import { useRouter } from 'next/navigation';
import { usePathname } from 'next/navigation';
import { useSearchParams } from 'next/navigation';
The <Link> component itself stays the same across both routers. What changes is everything around it, how you read the current route, how you access query params and how you do programmatic redirects. The official docs now recommend using <Link> for all declarative navigation and reaching for useRouter only when you need to navigate programmatically in response to an event (a form submit, a button click, etc.).
Prefetch behavior also changed with the App Router:
- Static routes, the full route is prefetched when the link enters the viewport.
- Dynamic routes: prefetching is skipped by default, or the route is partially prefetched if a
loading.tsxfile is present in that route folder.
This is different from Pages Router behavior, where all linked pages were prefetched in full. If you notice that navigation to dynamic routes feels slow, adding a loading.tsx to the route folder is the right fix, it lets Next.js prefetch the layout and show a loading skeleton immediately while the page data loads.
Linking Between Pages in Next.js
Now we know what <Link> component is, let’s create a new Next.js application and use it to link to different pages.
1. Creating a New Next.js Project
Open a terminal and execute the below command to create a Next.js application:
npx create-next-app@latest
Make sure that Node.js version 18.17 or higher is installed on your system.
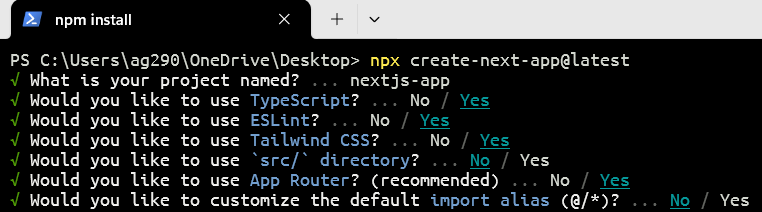
Check Yes for both TypeScript and App Router to follow along with us.
If you want a detailed guide on how to start with Next.js, click here.
2. Creating Different Pages
Once the project is set up, open it inside a code editor and remove all the files inside the app directory and create the following files:
app/page.tsx:
Inside the app directory, create a new page.tsx. This will be used as the home page for our Next.js application.
const HomePage = () => {
    return <h1>Home Page</h1>;
};

export default HomePage;
app/about/page.tsx:
To create a new page for our application, create a folder named about with a page.tsx file inside the app directory.
const AboutPage = () => {
    return <h1>About Us</h1>;
};

export default AboutPage;
app/contact/page.tsx:
Again create a folder named contact inside the app directory with a page.tsx to create a contact page.
const ContactPage = () => {
    return <h1>Contact Us</h1>;
};

export default ContactPage;
This will eventually create three pages: home (“/”), about (“/about”) and contact (“/contact”). This process is called file-based routing which we have covered in our previous tutorial.
3. Linking Between Pages
Now create a file layout.tsx inside the app directory.
app/layout.tsx:
The layout (layout.tsx) is like a wrapper that goes with each page (page.tsx) within their respective folder or subfolder to construct a similar component for all of them.
For example, if we want the same navbar on all of our application pages, we can code it in app/layout.tsx and each page (page.tsx) of that folder or subfolder will have the same navbar. See our layout tutorial for a deeper look at how nested layouts work.
import Link from 'next/link';

export const metadata = {
  title: 'Next.js',
  description: 'Generated by Next.js',
}

export default function RootLayout({
  children,
}: {
  children: React.ReactNode
}) {
  return (
    <html lang="en">
      <body>
        <ul>
        <li><Link href="/">Home</Link></li>
        <li><Link href="/about">About Us</Link></li>
        <li><Link href="/contact">Contact Us</Link></li>
        </ul>
        {children}
      </body>
    </html>
  )
}
The first line is the import statement, which imports the Link component from “next/link”. Then there is a metadata object that defines the meta title and description. After this, the code exports a component called RootLayout as the default export, using children as props of type React.ReactNode. This component returns JSX, which represents the structure of the HTML document. All the code inside this is just basic HTML containing components and children.
Output
Now execute the below command to run our Next.js application:
npm run dev
Here we are running the development server which listens on http://localhost:3000.
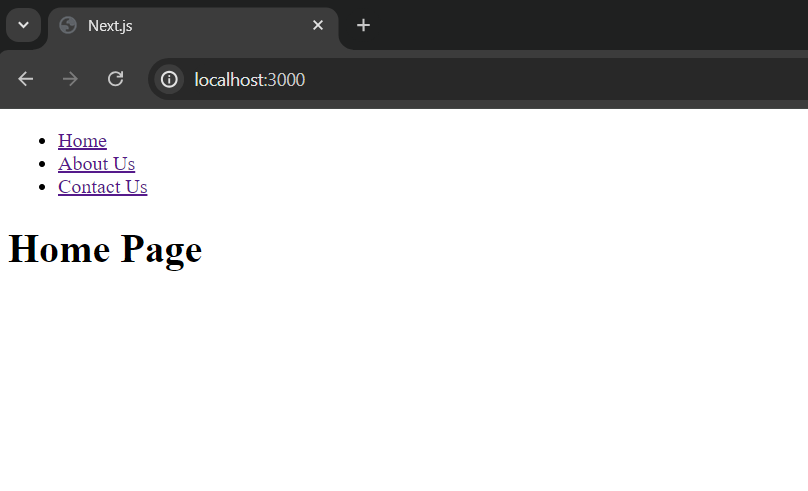
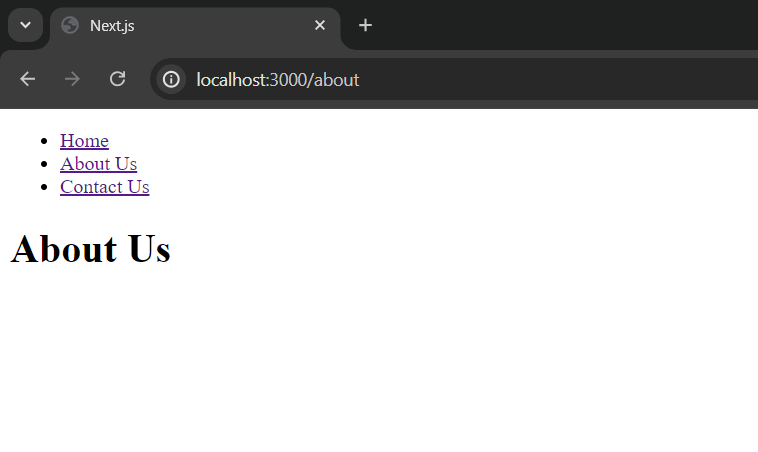
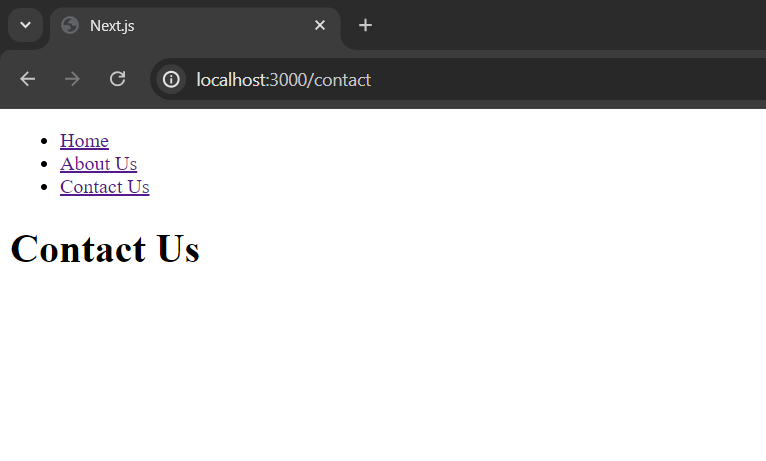
See the links are appear on each page and by clicking on any of them we can go to that page without a full page reload.
How to highlight active links
When you’re building a navbar, it’s helpful to visually mark which page the user is currently on. In the App Router, you do this using the usePathname hook from next/navigation.
Because usePathname is a client hook, the component needs the 'use client' directive at the top:
'use client';

import Link from 'next/link';
import { usePathname } from 'next/navigation';

export default function Navbar() {
  const pathname = usePathname();

  return (
    <nav>
      <ul>
        <li>
          <Link
            href="/"
            className={pathname === '/' ? 'font-bold' : ''}
          >
            Home
          </Link>
        </li>
        <li>
          <Link
            href="/about"
            className={pathname === '/about' ? 'font-bold' : ''}
          >
            About Us
          </Link>
        </li>
        <li>
          <Link
            href="/contact"
            className={pathname === '/contact' ? 'font-bold' : ''}
          >
            Contact Us
          </Link>
        </li>
      </ul>
    </nav>
  );
}
The usePathname hook returns the current URL path as a string. You compare it against each link’s href and apply a CSS class (or inline style) when they match. This is the standard pattern in the App Router, no third-party library needed.
Keep the Navbar component in a separate file (for example app/components/Navbar.tsx) and import it into your app/layout.tsx. Since layout components are Server Components by default, and usePathname is a client hook, the separation is required.
How to link to dynamic routes
Dynamic routes use bracket syntax in the folder name, for example app/blog/[slug]/page.tsx. When you need to link to a dynamic route, use a template literal to build the href:
import Link from 'next/link';

interface Post {
  id: number;
  title: string;
  slug: string;
}

export default function PostList({ posts }: { posts: Post[] }) {
  return (
    <ul>
      {posts.map((post) => (
        <li key={post.id}>
          <Link href={`/blog/${post.slug}`}>{post.title}</Link>
        </li>
      ))}
    </ul>
  );
}
You can also pass an object to href if you need query parameters alongside the path:
<Link
  href={{
    pathname: '/products',
    query: { category: 'shoes', sort: 'price' },
  }}
>
  Shoes — sorted by price
</Link>
This resolves to /products?category=shoes&sort=price. The object form is useful when you’re building filters or search pages where the query string changes based on user input.
Link vs router.push: which to use
The <Link> component and router.push() both do client-side navigation. The difference is when you use each.
Use <Link> for anything the user clicks, navbars, menus, content links, pagination. It renders as an <a> tag in the HTML, which means it’s crawlable by search engines and works without JavaScript enabled (since browsers follow anchor tags natively). It also automatically prefetches the linked route when the link enters the viewport.
Use router.push() when navigation needs to happen in response to non-click events, for example, redirecting a user after a form submission or moving to the next step in a checkout flow:
'use client';

import { useRouter } from 'next/navigation';

export default function LoginForm() {
  const router = useRouter();

  async function handleSubmit(e: React.FormEvent) {
    e.preventDefault();
    // ... validate and submit
    router.push('/dashboard');
  }

  return (
    <form onSubmit={handleSubmit}>
      <button type="submit">Log in</button>
    </form>
  );
}
One thing to be careful about: in the App Router, import useRouter from next/navigation, not next/router. The next/router module belongs to the Pages Router and does not work in the app directory.
Link component props reference
The <Link> component accepts a few props worth knowing:
href (required): The destination path or URL. Can be a string ("/about") or an object with pathname and query fields.
replace: When set to true, clicking the link replaces the current entry in the browser’s history stack instead of adding a new one. So the back button will not take the user to the previous page. Useful after form submissions when you don’t want the user going back and resubmitting.
<Link href="/success" replace>
  Go to success page
</Link>
scroll: Defaults to true, which scrolls to the top of the page on navigation. Set to false to preserve the current scroll position.
<Link href="/terms" scroll={false}>
  Terms of Service
</Link>
prefetch: Controls whether the linked route is prefetched. Accepts true, false or null (default). Setting it to false is useful when you have a large list of links and you don’t want Next.js prefetching all of them upfront.
<Link href="/rarely-visited-page" prefetch={false}>
  Archive
</Link>
onNavigate: Added in Next.js 15.3. A callback that fires during client-side navigation, before the new page renders. You can call e.preventDefault() inside it to cancel the navigation. Useful for blocking navigation when a form has unsaved changes.
<Link
  href="/dashboard"
  onNavigate={(e) => {
    if (hasUnsavedChanges) {
      e.preventDefault();
      alert('Save your changes before leaving.');
    }
  }}
>
  Dashboard
</Link>
Note that onNavigate only fires for client-side SPA navigation. It does not fire when the user opens the link in a new tab or clicks with modifier keys held down.
Link vs anchor tag
The <Link> component from next/link replaces the plain <a> tag for internal navigation. For external links, URLs pointing to a different domain, you use a regular <a> tag:
// Internal — use Link
<Link href="/blog">Blog</Link>

// External — use <a>
<a href="https://github.com" target="_blank" rel="noopener noreferrer">
  GitHub
</a>
The <Link> component does not add rel="noopener noreferrer" automatically, so when you use <a> for external links and set target="_blank", add those rel values yourself. They prevent the opened tab from accessing the original page via window.opener.
You can also add standard HTML attributes to <Link> such as className, aria-label, target and rel and Next.js passes them through to the underlying <a> tag:
<Link
  href="/about"
  className="nav-link"
  aria-label="About our company"
>
  About
</Link>
Key takeaways
- The Next.js
nextjs linkcomponent fromnext/linkhandles client-side navigation without a full page reload. - Since Next.js 13, the child
<a>tag is no longer needed inside<Link>. - Use
usePathname()fromnext/navigationto detect the active route and style active nav links. - Use a template literal (
href={\/blog/${slug}`}`) to link to dynamic routes. replace={true}prevents the user from going back after navigation, useful after form submissions.prefetch={false}reduces bandwidth for links that are rarely clicked.onNavigate(added in Next.js 15.3) lets you intercept and cancel navigation before it happens.- For programmatic navigation, use
useRouterfromnext/navigationin the App Router, notnext/router. - External links should use a plain
<a>tag withrel="noopener noreferrer".
Frequently asked questions
What is the Next.js Link component used for?
It handles client-side navigation between pages in a Next.js app without triggering a full page reload, and automatically prefetches linked routes.
Do I need a child anchor tag inside the Next.js Link component?
No. Since Next.js 13, the <Link> component renders an <a> tag automatically. Adding a child <a> generates a warning in development.
How do I check which link is active in Next.js?
Use the usePathname() hook from next/navigation. Compare its return value to each link’s href and apply a CSS class when they match.
What is the difference between Link and router.push in Next.js?
<Link> is for declarative navigation via clicks and renders as an <a> tag. router.push() is for programmatic navigation triggered by events like form submissions.
How do I disable prefetching for a link in Next.js?
Pass prefetch={false} to the <Link> component. This is useful for long lists of links where prefetching all routes would waste bandwidth.
Can I pass custom attributes like className to the Next.js Link component?
Yes. Standard HTML attributes such as className, aria-label, target and rel are passed through to the underlying <a> tag.
What is the onNavigate prop in Next.js Link?
Added in Next.js 15.3, onNavigate is a callback that fires before client-side navigation completes. Calling e.preventDefault() inside it cancels the navigation, useful for unsaved-form guards.
In our next tutorial, we will look at dynamic routes in Next.js and how to access URL segments to render dynamic content.