
New to Rust? Grab our free Rust for Beginners eBook Get it free →
Managing and Creating Configuration Files in Node.js

Node.js is widely used for building web applications and when it comes to creating easy-to-manage apps, it becomes essential to establish an efficient approach for handling configuration files. Managing these files is an important aspect of the development process as developers need to customize them according to their needs. This customization directly impacts how the application functions and adapts to situations.
Introduction to the Configuration Files
Configuration files store data for applications that regulate the behaviour of your applications. Effectively handling them simplifies collaboration across development teams, maintenance, and troubleshooting. This is particularly useful in large, complex systems where changing the source code can be risky and time-consuming.
Configuration files are both functional and adaptable. Whether you want to edit, modify, or even start fresh with a new configuration file, there are several tools available to handle them.
Before you begin working with configuration files, select the file format that you will be working with (YAML, INI, JSON, XML, etc.). JSON is the preferred format for the majority of Node.js applications due to its adaptability and ease of usage.
In this article, we’ll explore the basics of Node.js configuration files with two modules:
- Config
- Dotenv
Installing and Configuring Config in Node.js
The “config” package is a popular npm package that is commonly used to handle configuration settings in Node.js applications. It provides a convenient way to create configuration files and access configuration data throughout the application.
In this, we’ll walk through the process of installing node-config to streamline your configuration setup in Node.js projects.
Step 1: Open your terminal and run the following command to install the config package using npm:
npm install config
The above command will add the config package as one of our dependencies in the package.json file.
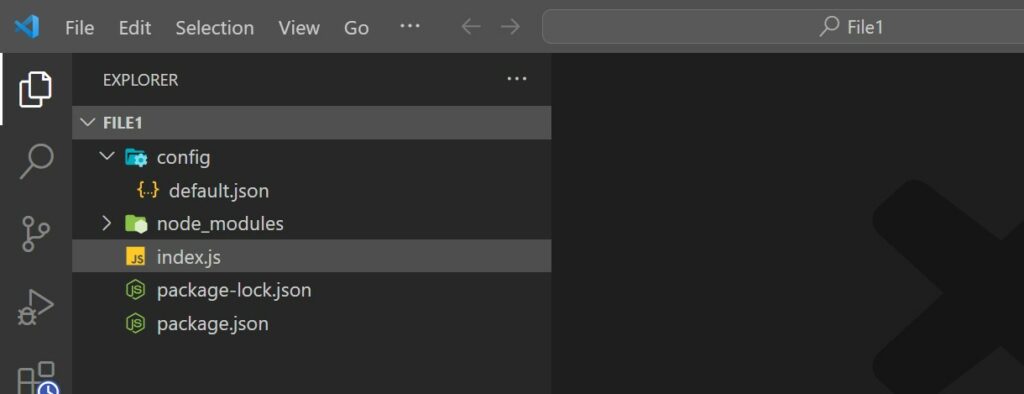
Step 2: Now create a dedicated folder named “config” inside the root directory and then initialise a file by the name of “default.json”.
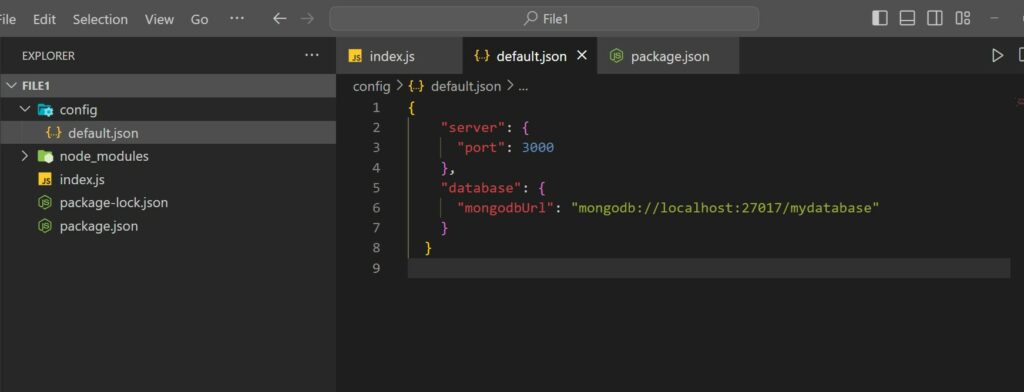
Step 3: Now inside the file “default.json”, add parameters that are required for various scenarios, such as defining the server port and MongoDB connection URL.
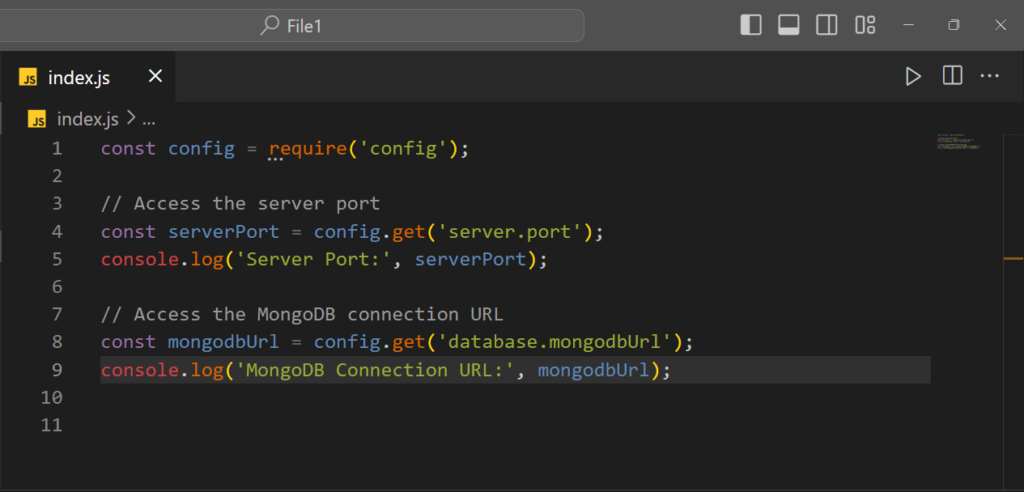
Step 4: You can then use the “config.get()” function to retrieve the parameters defined in the “default.json” file. The server port and MongoDB connection URL may be accessed as follows:
Step 5: Run the Node.js script by running the below command:
node index.js
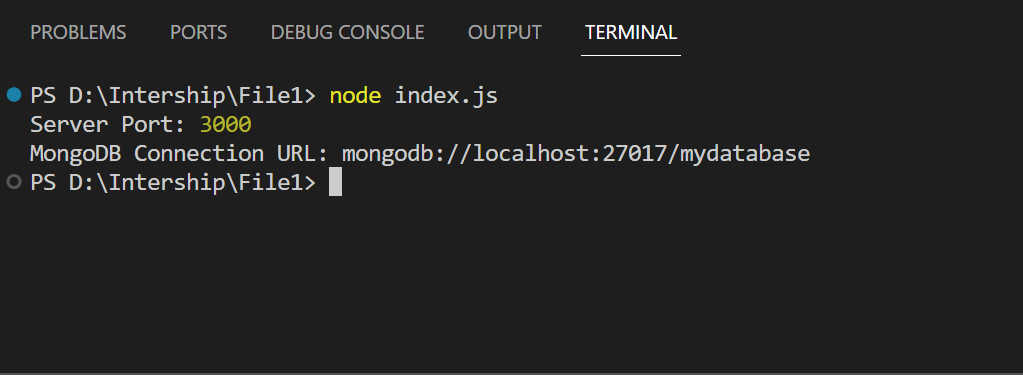
The code in the above script uses the config.get(‘server.port’) and config.get(‘database.mongodbUrl’) functions to retrieve the server port and mongodbUrl information. This retrieves the value of the ‘port’ and ‘mongodbUrl’ are then logged in the console
Installing and Configuring Dotenv in Node.js
The dotenv package is a simple approach to store your configuration data in a separate file named .env. To utilize the dotenv package in your Node.js application, follow these steps:
Step 1: Install the “dotenv“ package by using the following command in your terminal:
npm install dotenv
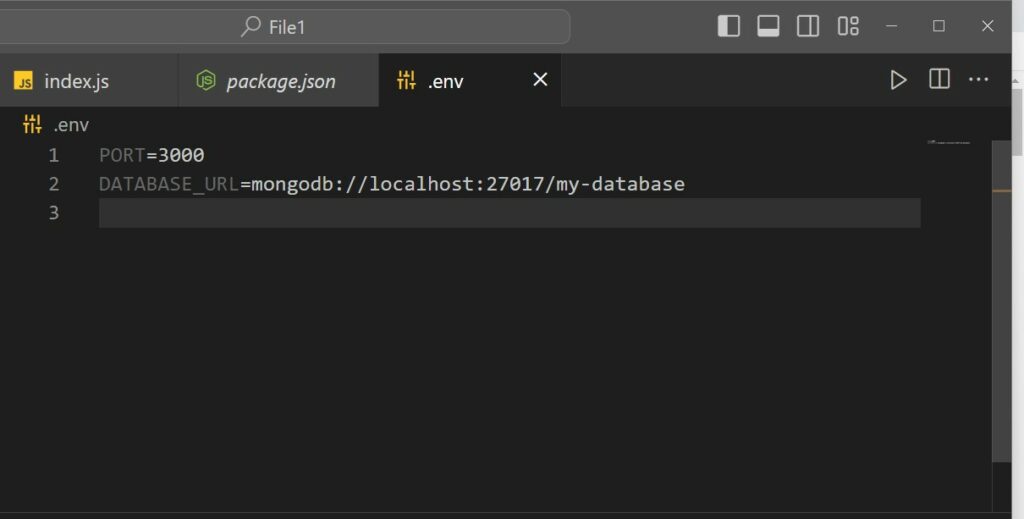
Step 2: Create a config file named .env in your root directory of the project and define your config parameters such as PORT and DATBASE_URL.
Step 3: Create a file index.js and to access the environment variables, we must utilize a process object with an env that includes all of the environment variables.
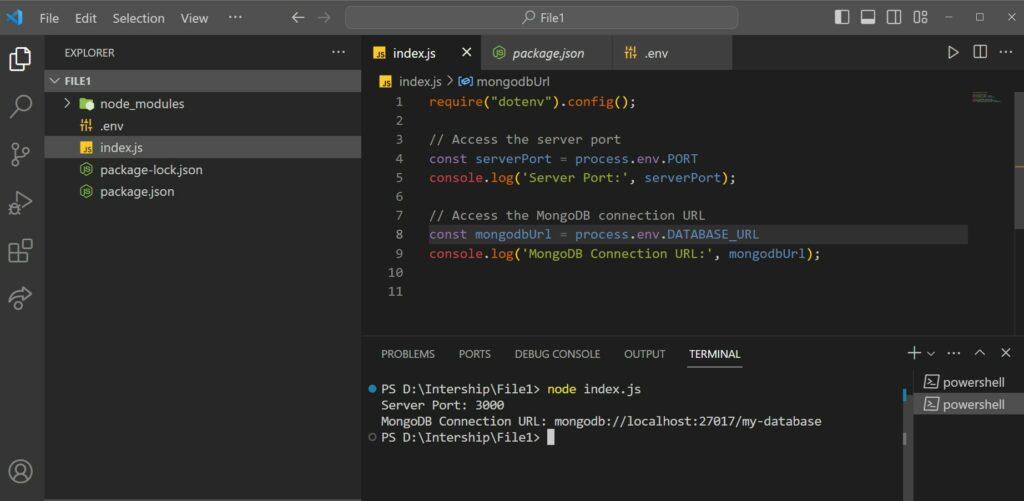
The code in this example calls config() method using the line “require(‘dotenv’).config();” which loads the data inside the .env file and assigns the variable and their values to the process.env object.
Then we follow by calling the process.env object to retrieve these environment variables. In this specific example, two variables— PORT, and DATABASE_URL are retrieved. and then finally we logged these variables inside the console
Important Note: To protect confidential sensitive data, never include your .env file under version control. Rather, provide people access to a template (such as.env.example) that has placeholder values.
Configuration File Best Practices in Node.js
- Centralized Configuration File: Creating a centralized configuration file by storing all the parameters in a single location makes it easier to update without affecting the codebase.
- Environment Specific Configurations: We should maintain different configurations for different environments (e.g., development, production). This guarantees that every environment has unique configurations, for ex – suppose we are working with a database during the development phase, in this scenario, we specify a local MongoDB instance as the database URL but in the production stage, we might use a cloud database.
- Don’t Include Sensitive Data in Version Control: To reduce the risk of exposing sensitive information from unauthorized users, we should not commit configuration files to the version control and to do so we can add them to the .gitIgnore file.
- Sensitive Data Encryption: Whenever possible, encrypt configuration files containing sensitive data. Implement secure key management practices to safeguard encryption keys.
Conclusion
This article provided a thorough guide to storing Node.js configurations. We discussed two useful tools in the Node.js ecosystem for effectively managing configurations: the “config” and “dotenv“. We explored how these packages can be used in the actual project by providing examples.
Finally, we have also learned the best practices for a more efficient and secure deployment process. We also looked at the need to encrypt sensitive data to provide an additional degree of security against unwanted access and keep sensitive configuration files out of version control.
Reference
https://www.npmjs.com/package/dotenv


