New to Rust? Grab our free Rust for Beginners eBook Get it free →
Java and MySQL Connectivity Using JDBC

This tutorial is about Connecting Java to MySQL database using JDBC driver. You may find many tutorials on this topic but most of them show you the code and links to download a driver and install it which is what I am also gonna do but in an easy, straightforward way.
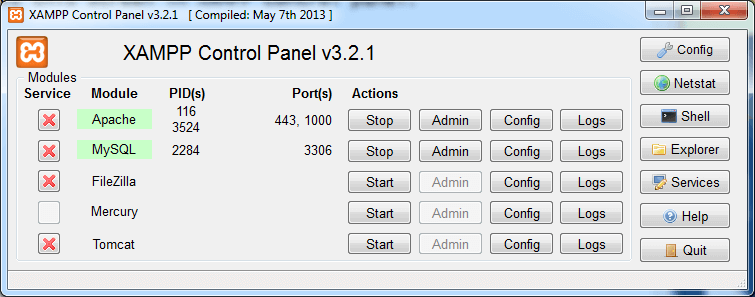
You need a MySQL database before proceeding. Installing XAMPP in your system helps a lot because apart from MySQL you will get many other handy tools coupled as the PHPMyAdmin package. So if you do not have it, please install it and run it. You should have this screen in the XAMPP control panel.

Since this tutorial is about connecting to a MySQL database, I am not going to create a new database or that stuff, instead, I am going to use databases that come as an example in the MySQL database. To know it go to http://localhost:1000/phpmyadmin/. I am going to use “cdcol” database (it is example database comes with installation) to demonstrate my code.
NOTE: For this tutorial and running code successfully I am going to ask you to download the latest Java from here and the Eclipse editor. If you running Windows 64 bit like me then choose 64 bit Java and 64-bit Eclipse else you may face any issue (issue is debugged already. See here).
Open Eclipse, Create new Java project from File Menu. Inside “src” folder in Project on “Package Explorer” create new Java file and name it properly.

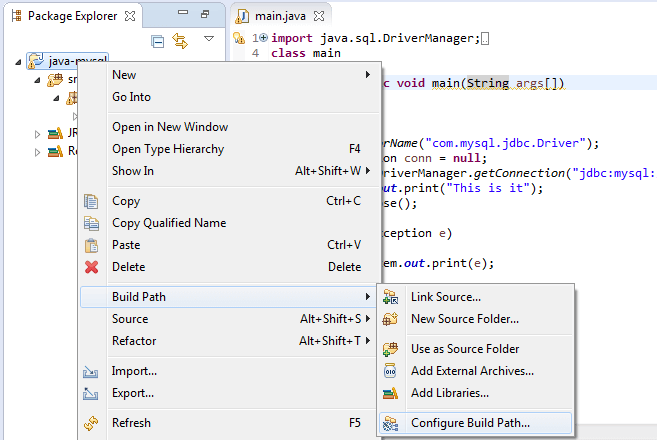
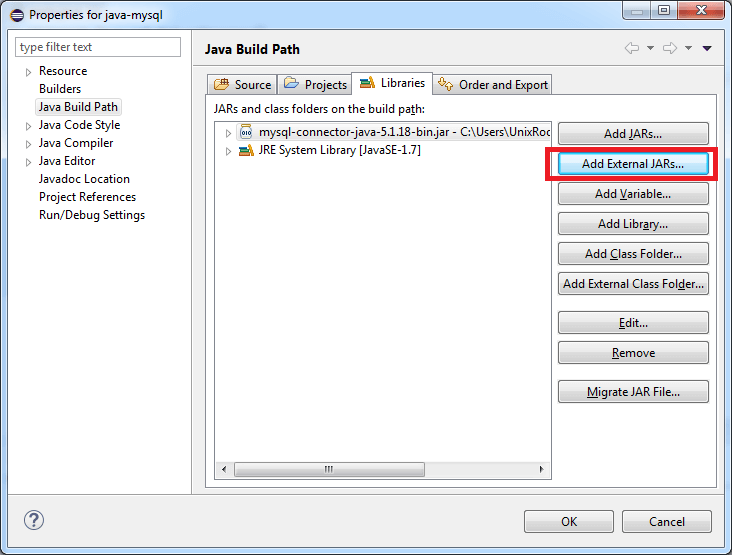
Now it’s time to add JDBC library in our project. Right click on Project in “Package Explorer” and Build path -> Configure Build Path. Window Pops up. Click on “Add External Jar” and choose the Jar file from Computer.
Link: Download JDBC Jar file.

Ok, now you have done with the configuration of the JDBC driver. It’s time to code our project and check whether it’s working or not.
import java.sql.DriverManager;

import java.sql.Connection;

import java.sql.SQLException;
Import these classes which are Java built-in classes for SQL operation. To load the JDBC driver we are going to use “Class.forName“. This line will load it.
Class.forName(“com.mysql.jdbc.Driver”);
This line will load the JDBC. Now its time to create Connection variable in order to connect to our database. So let’s do it. We are going to use “getConnection()” method. Syntax for it as shown below.
DriverManager.getConnection(“jdbc:mysql://<Host>/Database”,”<MySQL user name>”, “MySQL password”);
In my case it is.
DriverManager.getConnection(“jdbc:mysql://localhost/cdcol”,”root”, “”);
Where “cdcol” is database name, “root” is default MySQL username and MySQL password is blank. Here is complete code.
import java.sql.DriverManager;

import java.sql.Connection;

import java.sql.SQLException;

class main {

    public static void main(String args[]) {

        try {

            Class.forName("com.mysql.jdbc.Driver");

            Connection conn = null;

            conn = DriverManager.getConnection("jdbc:mysql://localhost/test","root", "");

            System.out.print("Database is connected !");

            conn.close();

        }

        catch(Exception e) {

            System.out.print("Do not connect to DB - Error:"+e);

        }

    }

}
Copy the code and paste it into your file. Let’s run it. In eclipse just hit the play button and it will compile and run it. Here is the output of this code.

Well, it runs, let’s see what happens when we stop our MySQL server and run the code. Stop MySQL database from XAMPP control panel and then run the code. I got this.

I hope you find this tutorial useful and in the next upcoming tutorial, we will deal with Java Servlet and much other cool stuff and again in an easy way.


