New to Rust? Grab our free Rust for Beginners eBook Get it free →
How to Deploy a Django Web Application
Once the website is created on the python Django framework, you have to deploy it on the server. The developed website is only available on your local computer. Now you will learn how to deploy it! Deploying is the process of publishing your application on the Internet so people can see your app live. There are various options available to deploy a web app to the server. So, let’s discuss the pros and cons of different options:
1. Installing Directly on Server:
you can install all your web app files directly on the server. You have to create a virtual Linux server and install dependencies required for your web app. Python virtual environment should be created where you can install and run your app. NGINX, Apache webserver are examples. But, this is an old method which is not so useful nowadays. You have to replicate things. I(f Server fails it is tedious to deploy the same thing on a new server. It has a lot of complex configuration.
2. Docker Compose:
First set up the Linux server and create an app set to have all dependencies installed in Docker. Then you have to simply run Docker compose file on the server. This approach is better than the previous approach as only a single docker file needs to be installed instead of individual files. The drawback is that it runs on a single server. If the user base grows over some time, it is difficult to create more servers.
3. A Managed Docker Orchestration Service:
This is a good option for long term solutions. A developer has to deploy containers to different servers and set up multiple servers. So this approach spins up more tasks and spread these tasks across servers. There is also one serverless option (Fargate) available which removes the need to manage underlying servers. Examples are AWS ECS, Kubernetes, Google clouds, AWS, Azure.
The drawback of this approach is that it is expensive in the case of single task deployment as there are multiple servers involved. It is complex to set up. The extra management service cost also is an overburden.
4. Use a Serverless Technology:
Google App Engine is an example of it. The benefit of it is that no infrastructure management. It is cheaper for smaller apps and audience. The drawback is that it is tied with the vendor. It is challenging to move away to a different vendor.
One has to choose which option is better for a specific application. Once you have developed your first web app in the Django framework, you want to host it to make it live over the internet. There are several providers as we have discussed. But, the best-suited way is to use python anywhere to host or deploy your website for beginners. It also has a free account with limited access. The paid option is also very reasonable at $5 per month only. This is specific to python Django focused web services as well which makes it a good choice.
So let’s start the deployment steps on python anywhere:
- Once code is ready on the local machine, push it to GitHub. Github has an advantage that code remains safe in the GitHub repository in case your local machine got corrupted and transferring code from local to python anywhere is easy. Version management is also a benefit of using GitHub. Signup for free on pythonanywhere.com and generate a login Id and password. You will be able to see the dashboard.
This article assumes that you have already uploaded your code to the GitHub repository. I have created a pythondjango repository on GitHub and pushed my local project “myproject” to this GitHub repository. You can download GitHub on your machine by signing up on www.github.com. You will be able to see Git CMD, Git GUI on your machine. Using Git CMD you can push your local machine project to the git repository.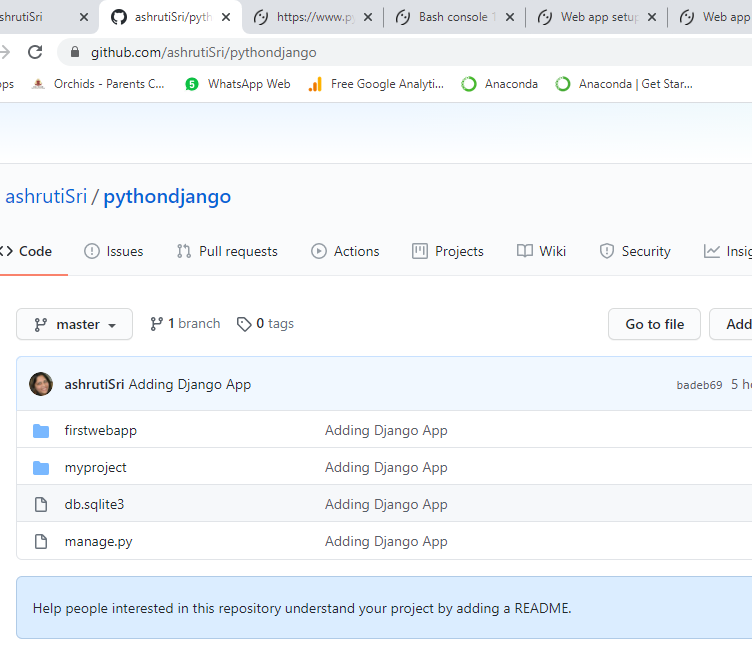
If you want to have a look at how to create a simple Django project on a local machine, refer to the below article:
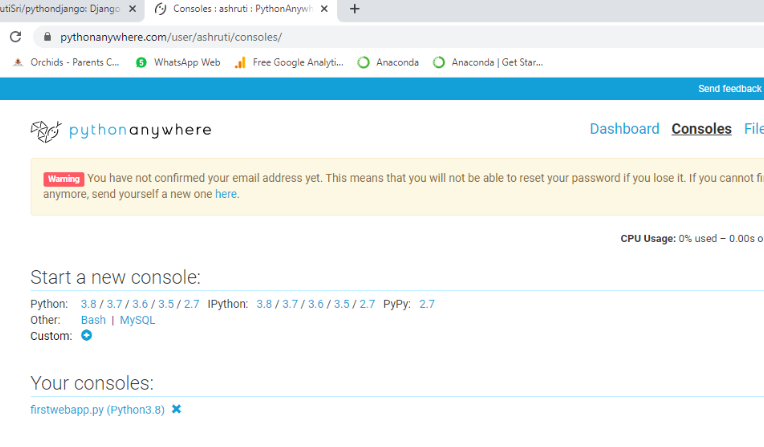
Python Django Framework Tutorial for Beginners – A Beginner’s Guide to start with Django - Now you have to choose “consoles” on your pythonanywhere dashboard. Then click on “bash” to open your bash console.
You have to first setup virtualenvironment on your bash using the below command :
mkvirtualenv - –python=/usr/bin/python3.4 djangvenv
Then you can see files by using the command:
ls –lrth
- Then you have to clone your GitHub project repository here. Right? So, this can be done by using the below command :
git clone https://github.com/ashrutiSri/pythondjango.git
Now you will be able to see your project files on pythonanywhere dashboard under the Files section. Now run the below command on bash console:
mv pythondjango myproject
- Go to dashboard under the “web “section and click on “add a new web app” then click next then it will ask for a select python web framework.
- Select manual configuration if you have already developed a web app otherwise choose the Django option. I am using manual configuration as I already have a project.
- Select python version 3.5 and continue.
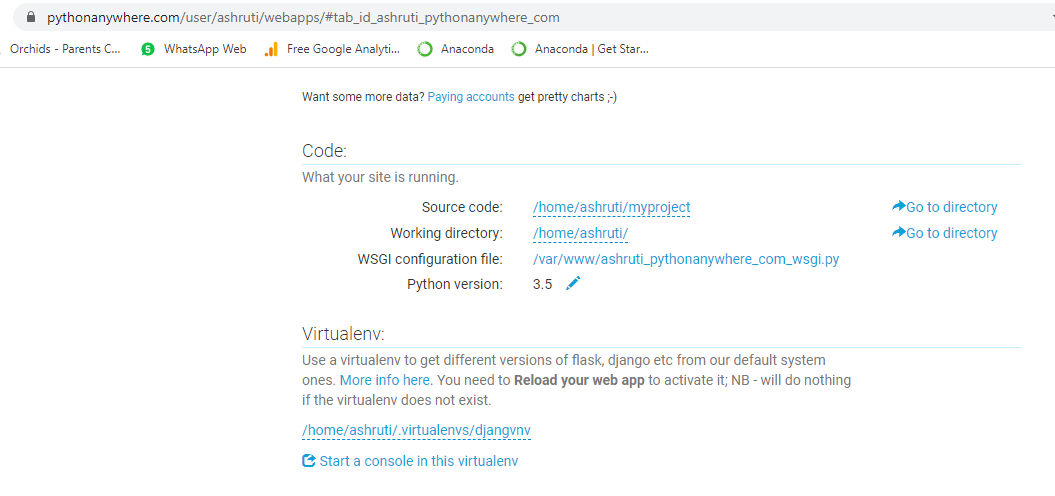
- Then web app is created and you can view it on the dashboard page so choose the virtual environment section type “djanvenv” which we have just set up in the previous step as /home/ashruti/.virtualenvs/djangvenv
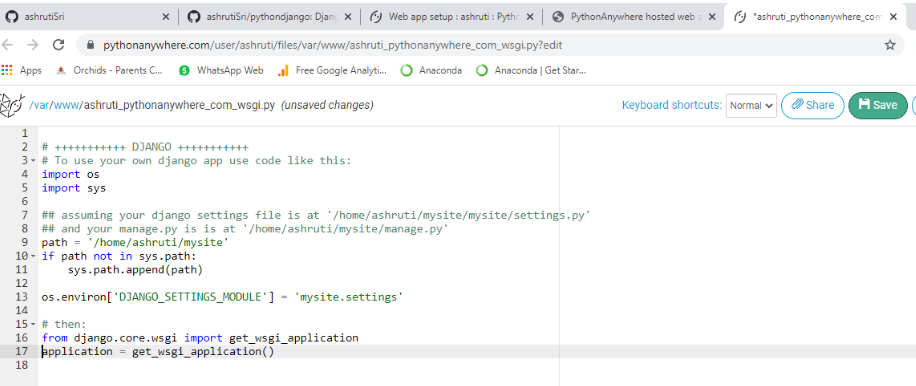
- Click on the WGSI configuration file to open it in a new window. A code editor is there you can add text there. Remove everything except the Django section and uncomment everything under the Django section. You have to now provide the path of your project here.Change the path as: ‘/home/ashruti/myproject’ and os.environ as ‘myproject.settings’ instead of ‘mysite.settings’.
- Now Install Django framework in virtual environment djanvenv on bash using below command :
pip install django
Now go to the files tab on pythonanywhere dashboard and edit the settings.py file. Set debug to False and Allowed host to = [ashruti.pythonanywhere.com]. “ashruti.pythonanywhere.com” is my user details on pythonanywhere. You can put your user name.pythonanywhere.com. Or you can choose[“*”] for now but it is not safe. - Now go to the web tab on the dashboard and Fill source code directory and Save the settings.
- You can define static (using STATIC_ROOT under settings file) and media directory and URLs but they are not required in this project. We are leaving this part as our project is a simple print message web app.
- Now reload the web app on the web tab on the dashboard. You will be able to see your web app running. Since the myproject project which was uploaded already has the firstwebapp web app which displays ‘Hello, My First App !’ message. So it can be accessed using URL: ashruti.pythonanywhere.com/firstwebapp/
You can put your site address here or any other web app name which you have created under the Django project respectively.
That is how hosting is done on pythonanywhere server. For paid accounts process will be a bit different. In a paid account, you can choose a custom domain, and you are given CNAME which you need to update with your domain name service provider.