New to Rust? Grab our free Rust for Beginners eBook Get it free →
Building real time polling app using RethinkDB and Nodejs

RethinkDB and Nodejs are the perfect combination to build your next real-time web application. RethinkDB provides the combination of SQL and NoSQL data model and live feed which is perfect for building real-time web application.
What we’ll be building
In this guide, we will develop basic polling app using Node and RethinkDB. It requires almost no prior knowledge of NodeJS but having basic information is plus point.
We’ll be creating a simple polling application which will let user to
- Create new poll with 3 choices.
- Allow user to vote.
- Show the vote count updates live.
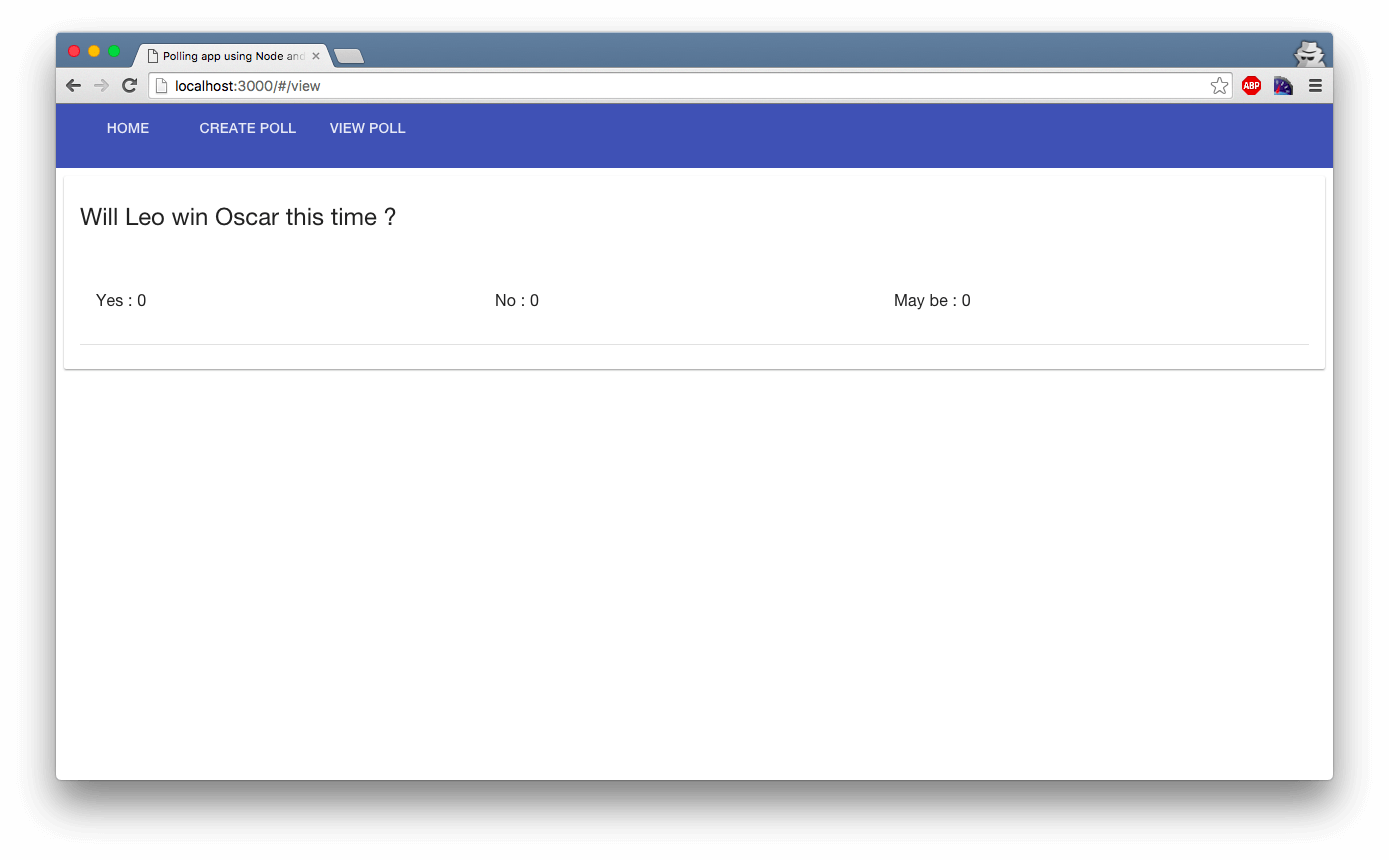
At the end of this tutorial, we’ll have something like this.
We’ll be using RethinkDB as our database engine and Nodejs as an application server. We’ll be using Angular and Angular-material library for front-end design.
Introduction
RethinkDB and Nodejs together are best pair to develop a real time web application. In this tutorial, we will develop polling application where the user can create polls, vote them and see the result of voting live. We can do this using Socket.io and any database such as MySQL or MongoDB but the difference with them and RethinkDB is “Pull” and “Push” of changes.
In the case of MySQL or MongoDB, we need to perform polling in order to find out the changes in our database. In the case of RethinKDB, it will push the changes to middle tier and all you need to do from there is broadcast it to the client.
Let’s begin with developing our polling app using RethinkDB and Nodejs.
Installation
I am sure you have Node.js installed in your computer. If not please visit node.js official website and download the installer suitable to your operating system.
Note : Make sure you have latest Nodejs installed in your system because we are going to use ES6 features to code this app.
I have covered installation of RethinKDB Server in this tutorial in detail. Click on the link and install the RethinkDB in your computer.
Project Setup
The first goal is to develop our Nodejs Server and interface RethinkDB with it.To maintain the code structure as neat as possible we will follow this folder structure.
| - config [ Contains project wide configuration files ]

| - controller [ Contains the routes of the express ]

| - models [ Contains the database interaction code ]

| - test [ contains test files]

| - view [ Contains front end files ]

- app.js - Main server file.

- package.json
Create a folder and generate a package.json in it. Package.json is a project manifest file that describes our project.
Tip : Best practice is to use npm init command to generate package.json for fresh new project.
Here is sample package.json file.
{

  "name": "polling-app-node-rethinkdb",

  "version": "1.0.0",

  "description": "Building real time polling application using RethinkDB and Node.js.",

  "main": "app.js"

}
Let’s install require modules for our project. We will use Express as web framework, rethinkdb official client driver and socket.io to handle the real time communication with front end. Run following command to install them and it will write package entries in package.json file.
Related learning :
npm install --save express rethinkdb socket.io async body-parser
You may need to provide sudo access depending upon the location and access rights to the folder.
The Nodejs Server
We need a web server to deliver the static files and to handle the RethinkDB operation. Here is sample Nodejs Server written using Express.
var express = require('express');

var bodyParser = require('body-parser');

var app = express();

var http = require('http').Server(app);

var router = express.Router();
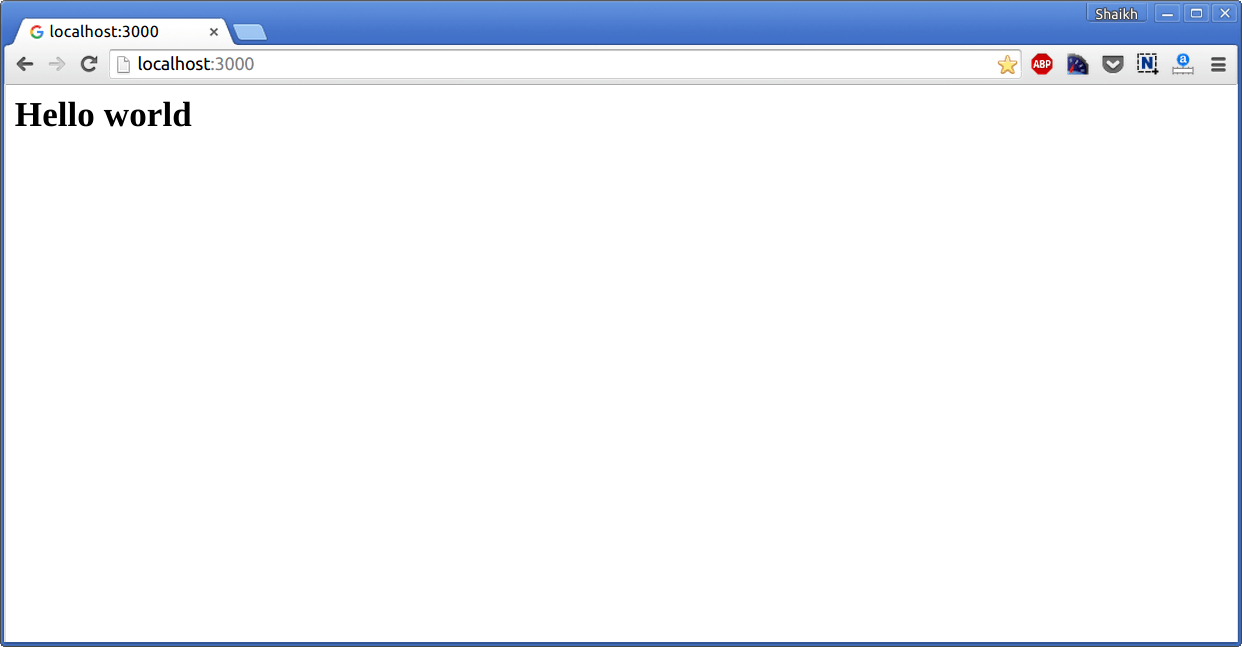
router.get('/', function(req, res){
res.send('
Hello world
');
});
app.use(bodyParser.json());
app.use('/',router);
http.listen(3000, function(){
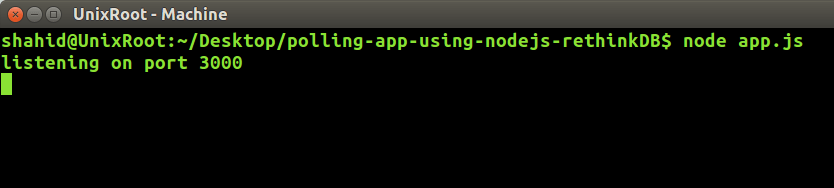
console.log('listening on port 3000');
});
If you run node app.js, you should see following.
And if you point your browser to http://localhost:3000
Configuring routes
Let’s define various HTTP routes for our application. We need following HTTP routes to handle the working of the application.
- GET /polls – Should return all polls from RethinkDB.
- POST /polls – Should create new poll.
We need to define this in our controllers folder. Create index.js in controllers folder and add following code.
/controllers/index.js
var express = require('express');

var router = express.Router();
/**
* @description
* First route will handle the static html file delievery.
* Second route will handle the API calls.
*/
router.use('/',require('./home'));
router.use('/polls',require('./polls'));
module.exports = router;
In this file, we have defined two routes. First is ‘/’ where we will place the code to deliver the static files. All those code will be placed in home.js file. In second route we will define the API calls for the polls operation.
Here is home.js placed inside the controllers folder.
/controllers/home.js
var express = require('express');

var router = express.Router();
router.get('/',function(req,res) {
res.send('
Hello World
');
});
module.exports = router;
Here is skeleton code of polls.js.
/controllers/polls.js
var express = require('express');

var router = express.Router();
router.route('/')
.get(function(req,res) {
// Code to fetch the polls.
})
.post(function(req,res) {
// Code to add new polls.
})
.put(function(req,res) {
// Code to update votes of poll.
});
module.exports = router;
We need to modify our app.js to use this file as the route. Here is modified app.js.
app.js
var express = require('express');

var bodyParser = require('body-parser');

var app = express();

var http = require('http').Server(app);
/**
Adding the controllers.
*/
app.use(bodyParser.json());
app.use(require('./controllers'));
http.listen(3000, function(){
console.log('listening on port 3000');
});
Run the code using node app.js and view the app in browser.
Integrating RethinkDB
Let’s integrate RethinkDB in our application. We have already installed the required module (rethinkdb) and we’ll write some functions in order to do the CRUD operation. Create new file in models folder named db.js which will contain code to connect to RethinkDB and connect to RethinkDB database.
/models/db.js
"use strict";

var rethinkdb = require('rethinkdb');

var async = require('async');
class db {
setupDb() {
var self = this;
async.waterfall([
function(callback) {
self.connectToRethinkDbServer(function(err,connection) {
if(err) {
return callback(true,"Error in connecting RethinkDB");
}
callback(null,connection);
});
},
function(connection,callback) {
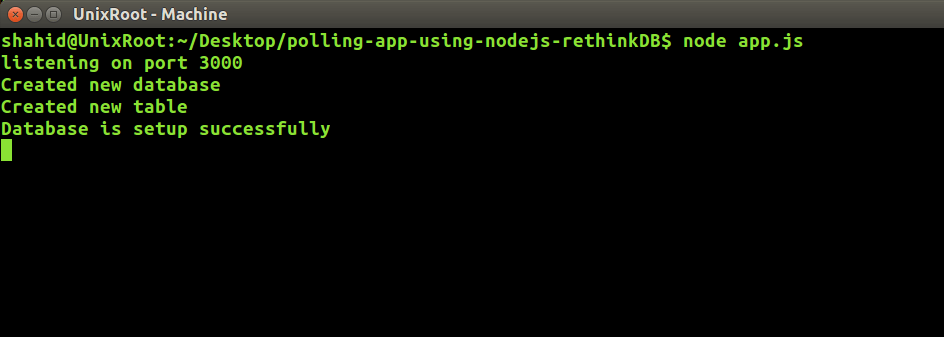
rethinkdb.dbCreate('polls').run(connection,function(err, result) {
if(err) {
console.log("Database already created");
} else {
console.log("Created new database");
}
callback(null,connection);
});
},
function(connection,callback) {
rethinkdb.db('polls').tableCreate('poll').run(connection,function(err,result) {
connection.close();
if(err) {
console.log("table already created");
} else {
console.log("Created new table");
}
callback(null,"Database is setup successfully");
});
}
],function(err,data) {
console.log(data);
});
}
connectToRethinkDbServer(callback) {
rethinkdb.connect({
host : 'localhost',
port : 28015
}, function(err,connection) {
callback(err,connection);
});
}
connectToDb(callback) {
rethinkdb.connect({
host : 'localhost',
port : 28015,
db : 'polls'
}, function(err,connection) {
callback(err,connection);
});
}
}
module.exports = db;
We have defined three functions :
- setupDb()
- connectToRethinkDb()
- connectToDb()
setupDb() contains three inner function which executes one after another by using Async module. This is good way to avoid callback hell. In first function we are connecting to RethinkDB Server, in the second function we are creating a database and it will return an error if it is already created, in the third function we are creating table if not already created.
We will call this function just once during the initializing of the main application.
Then we have defined connectToRethinkDbServer() and connectToDb() function which performs connection to RethinkDB Server and RethinkDB database respectively.
We need to modify our app.js file again to incorporate the database setup code.
app.js
var express = require('express');

var bodyParser = require('body-parser');

var app = express();

var http = require('http').Server(app);

var db = require('./models/db');
/**
Adding the controllers.
*/
var dbModel = new db();
/**
Setting up the database and creating table.
*/
dbModel.setupDb();
app.use(bodyParser.json());
app.use(require('./controllers'));
http.listen(3000, function(){
console.log('listening on port 3000');
});
If you now reload the Server, you should see following in the console.
Writing RethinkDB functions
We have to perform following operation in RethinkDB database.
- Creating new poll.
- Updating votes.
- Getting all polls.
We’ll insert the data in our RethinkDB schema in the following manner.
{

  "Question" : "Which is best phone?",

  "polls" : [

    {

      "option" : "iPhone", vote : 0

    },

    {

      "option" : "Android", vote : 0

    }

   ]

}
Let’s write our code to do this operation. Let’s create another file in our models folder named polls.js and add code to do task listed above.
Here is skeleton of the polls.js
/models/polls.js
"use strict";

var rethinkdb = require('rethinkdb');

var db = require('./db');

var async = require('async');
class polls {
}
module.exports = polls;
First we a function to add a new poll. Here it is.
/models/polls.js
"use strict";

var rethinkdb = require('rethinkdb');

var db = require('./db');

var async = require('async');
class polls {
addNewPolls(pollData,callback) {
async.waterfall([
function(callback) {
db.connectToDb(function(err,connection) {
if(err) {
return callback(true,"Error connecting to database");
}
callback(null,connection);
});
},
function(connection,callback) {
rethinkdb.table('poll').insert({
"question" : pollData.question,
"polls" : pollData.polls
}).run(connection,function(err,result) {
connection.close();
if(err) {
return callback(true,"Error happens while adding new polls");
}
callback(null,result);
});
}
],function(err,data) {
callback(err === null ? false : true,data);
});
}
}
module.exports = polls;
Again we are using Async to avoid callback nesting as much as possible. Here we are first connecting to our database by using the function written in db.js and then adding the poll data in our table using insert command of RethinkDB. We will pass values in pollData variable in same format we mentioned earlier.
Next, we need a function to update the vote. In order to perform this operation, we require the system generated id of the object and the option of which vote we need to update.
/models/polls.js
"use strict";

var rethinkdb = require('rethinkdb');

var db = require('./db');

var async = require('async');
class polls {
addNewPolls(pollData,callback) {
......................................
}
votePollOption(pollData,callback) {
async.waterfall([
function(callback) {
db.connectToDb(function(err,connection) {
if(err) {
return callback(true,"Error connecting to database");
}
callback(null,connection);
});
},
function(connection,callback) {
rethinkdb.table('poll').get(pollData.id).run(connection,function(err,result) {
if(err) {
return callback(true,"Error fetching polls to database");
}
for(var pollCounter = 0; pollCounter < result.polls.length; pollCounter++) {
if(result.polls[pollCounter].option === pollData.option) {
result.polls[pollCounter].vote += 1;
break;
}
}
rethinkdb.table('polls').get(pollData.id).update(result).run(connection,function(err,result) {
connection.close();
if(err) {
return callback(true,"Error updating the vote");
}
callback(null,result);
});
});
}
],function(err,data) {
callback(err === null ? false : true,data);
});
}
}
module.exports = polls;
We have created a function where we are first connecting to our database, then we are verifying the poll data by using get method and in that we are passing the system generated id. If we found a result, we are looping over the polls keys which will be an array of object and contains the options and vote. And if the requested option and option in object matches, we increment the vote by 1.
And once the increment is performed we are simply updating the object by using get and update method.
Next, we need a function to return all of the polls in our table. Here is a code for it.
/models/polls.js
"use strict";

var rethinkdb = require('rethinkdb');

var db = require('./db');

var async = require('async');
class polls {
addNewPolls(pollData,callback) {
.............................
}
votePollOption(pollData,callback) {
.............................
}
getAllPolls(callback) {
async.waterfall([
function(callback) {
db.connectToDb(function(err,connection) {
if(err) {
return callback(true,"Error connecting to database");
}
callback(null,connection);
});
},
function(connection,callback) {
rethinkdb.table('poll').run(connection,function(err,cursor) {
connection.close();
if(err) {
return callback(true,"Error fetching polls to database");
}
cursor.toArray(function(err, result) {
if(err) {
return callback(true,"Error reading cursor");
}
callback(null,result);
});
});
}
],function(err,data) {
callback(err === null ? false : true,data);
});
}
}
module.exports = polls;
We are again connecting our database first, then selecting all of the data from the table. Once we get the data, we are converting the cursor to an Array and sending it back to the caller function.
Now we need to integrate our controller with model. All we need is to modify our polls.js and call respective model functions from the routes. Here is our polls.js after modification.
/controllers/polls.js
var express = require('express');

var router = express.Router();

// require model file.

var pollModel = require('../models/polls');
router.route('/')
.get(function(req,res) {
// Code to fetch the polls.
var pollObject = new pollModel();
// Calling our model function.
pollObject.getAllPolls(function(err,pollResponse) {
if(err) {
return res.json({"responseCode" : 1, "responseDesc" : pollResponse});
}
res.json({"responseCode" : 0, "responseDesc" : "Success", "data" : pollResponse});
});
})
.post(function(req,res) {
// Code to add new polls.
var pollObject = new pollModel();
// Calling our model function.
// We nee to validate our payload here.
pollObject.addNewPolls(req.body,function(err,pollResponse) {
if(err) {
return res.json({"responseCode" : 1, "responseDesc" : pollResponse});
}
res.json({"responseCode" : 0, "responseDesc" : "Success","data" : pollResponse});
});
})
.put(function(req,res) {
// Code to update votes of poll.
var pollObject = new pollModel();
// Calling our model function.
// We need to validate our payload here.
pollObject.votePollOption(req.body,function(err,pollResponse) {
if(err) {
return res.json({"responseCode" : 1, "responseDesc" : pollResponse});
}
res.json({"responseCode" : 0, "responseDesc" : "Success", "data" : pollResponse});
});
});
module.exports = router;
Before moving ahead let's test our code and see are we able to create/vote/get polls or not? Before starting Node Server make sure RethinkDB Server is up and running. Run RethinkDB Server from terminal using the following command.
rethinkdb
Run Node Server using the following command.
node app.js
Open any API simulator application, we recommend POSTMAN chrome extension. We need to validate following three cases.
- Create new poll - POST /polls
- Update vote - PUT /polls
- Get all votes - GET /polls
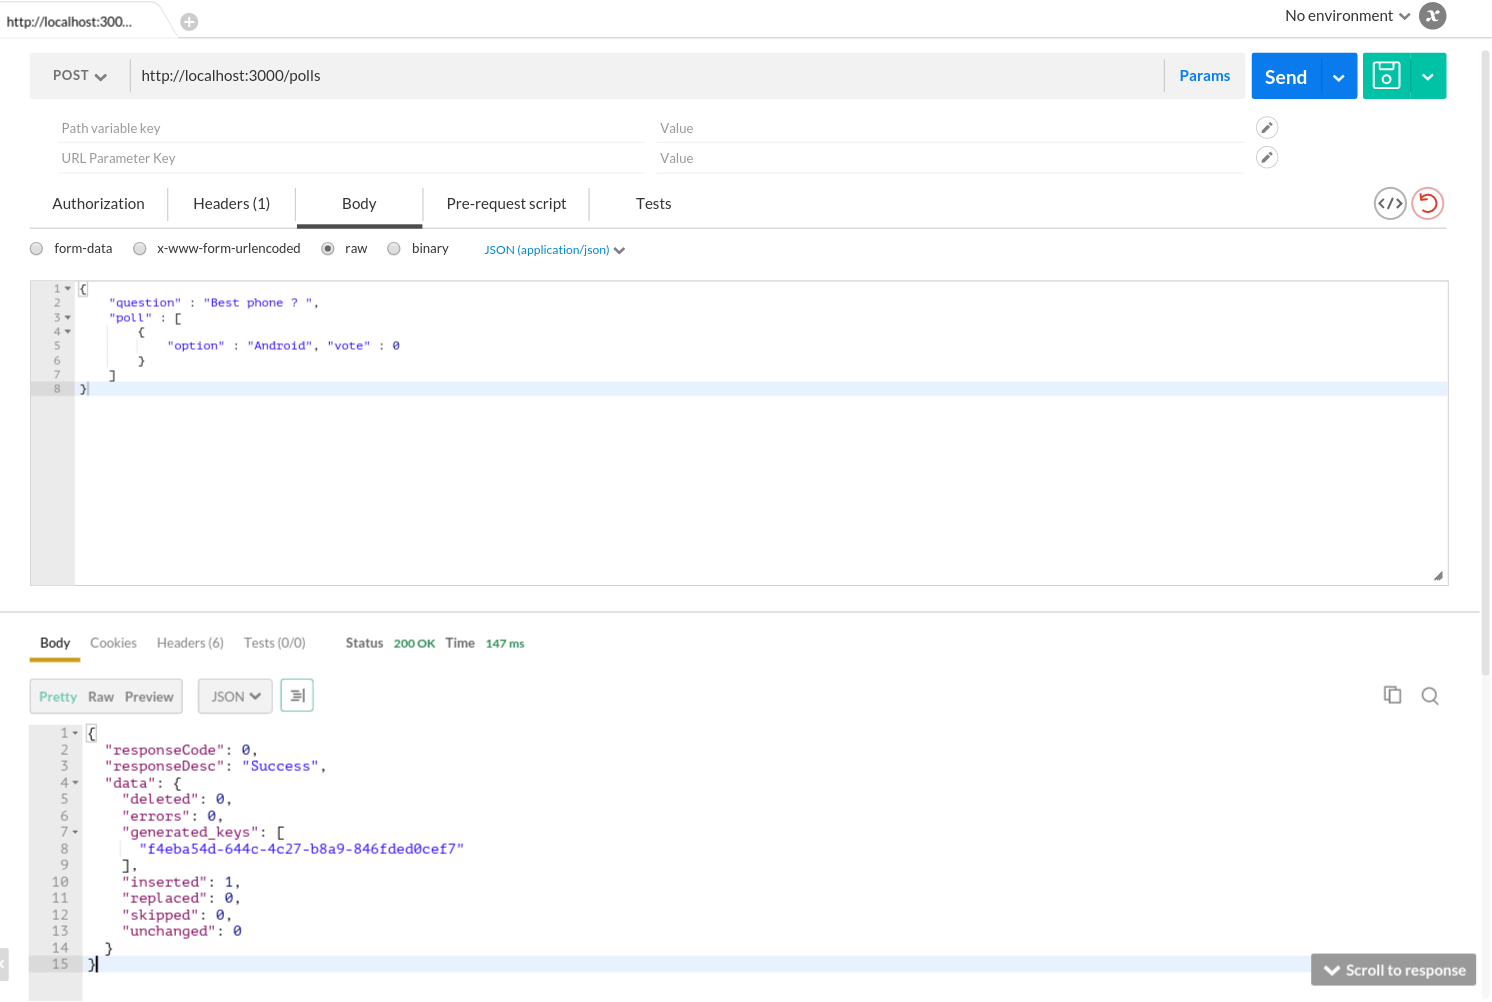
Create new poll - POST /polls
Hit POST request to http://localhost:3000/polls with following data.
{

    "question" : "Best phone ? ",

    "polls" : [

        {

            "option" : "Android", "vote" : 0

        }

    ]

}
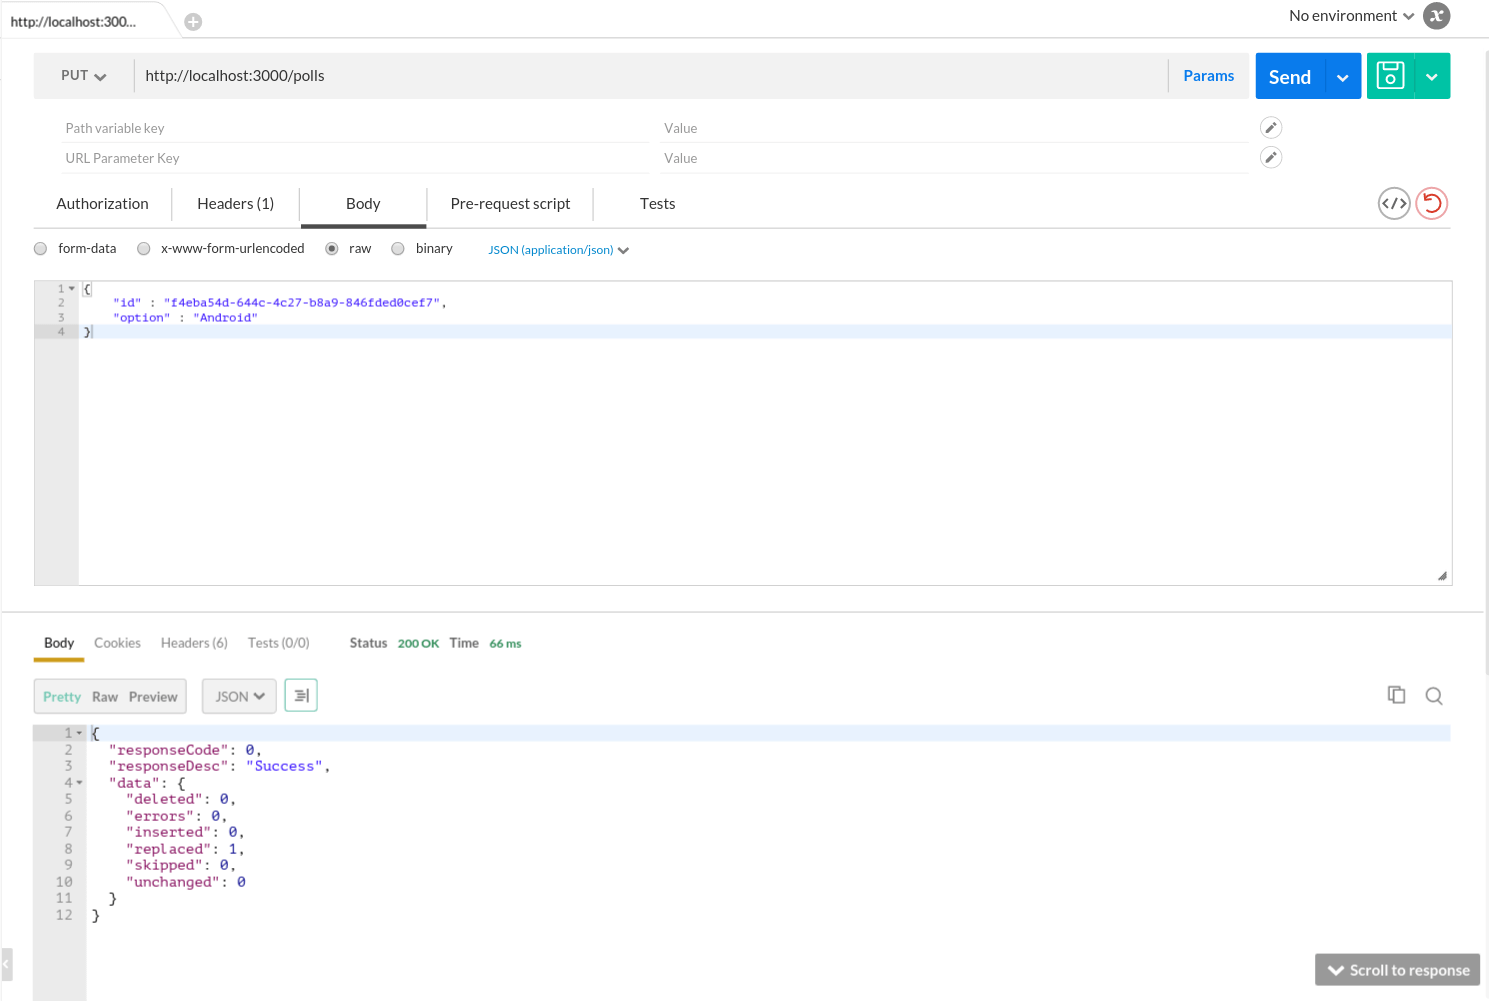
Update vote - PUT /polls
To perform this we need to have id of the poll. Copy the one from response. Hit PUT request to http://localhost:3000/polls with following data.
{

    "id" : "f4eba54d-644c-4c27-b8a9-846fded0cef7",

    "option" : "Android"

}
Get all votes - GET /polls
Just hit the GET request to http://localhost:3000/polls
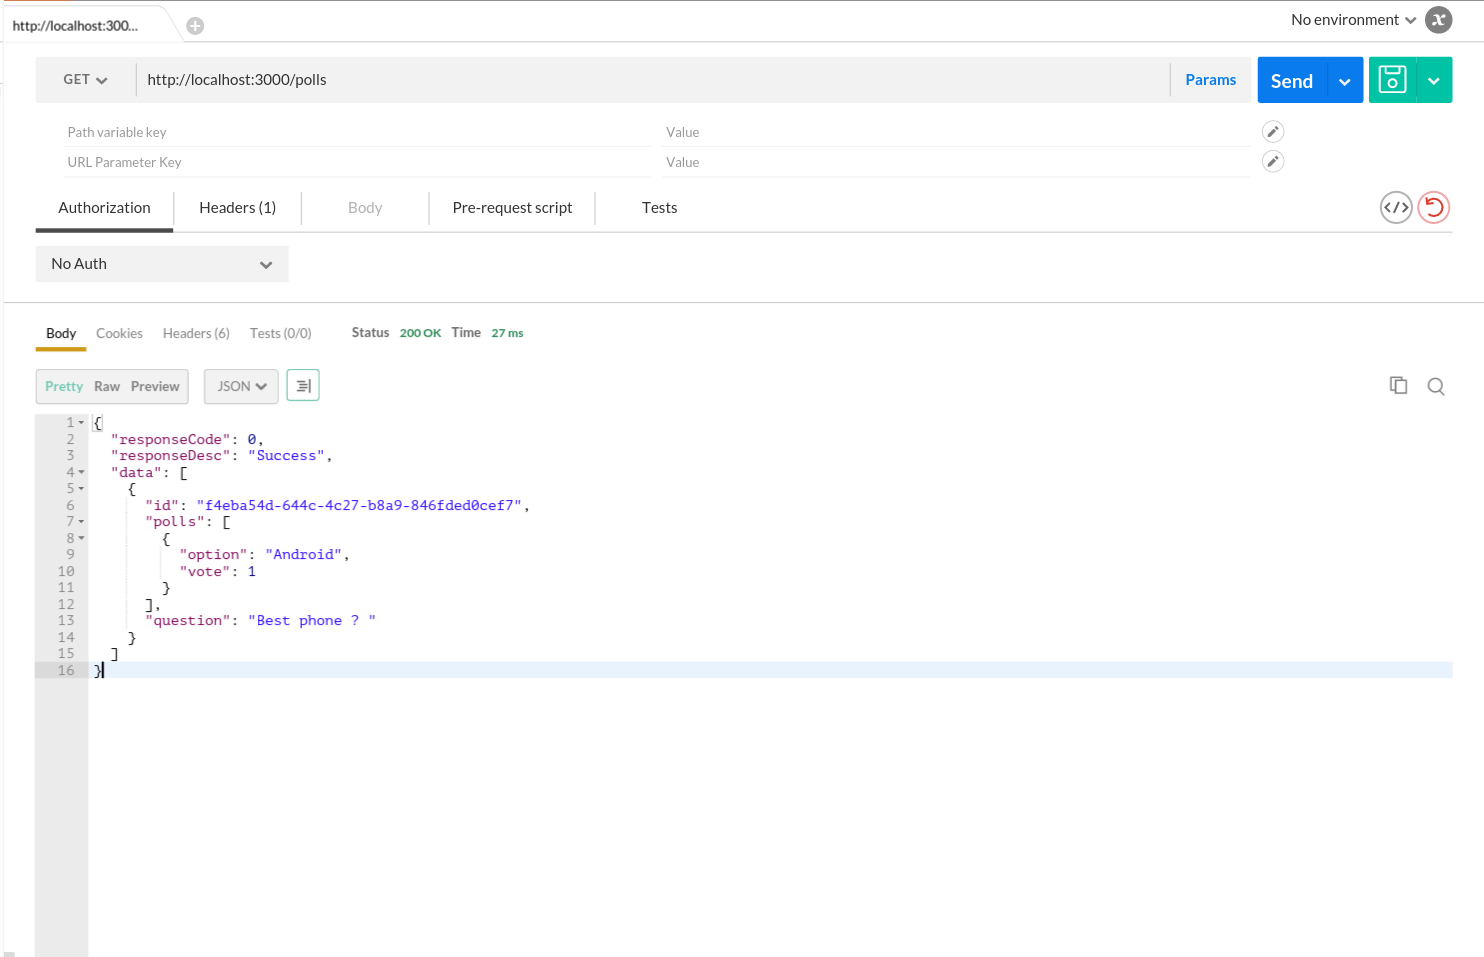
It seems we have our API's ready and working. It's time to design and code User Interface and bind these API to have a fully fledged application.
Developing front-end
In front-end, we will use following libraries.
- Angular
- Angular material
The material user interface is Google's innovation in user interface technology. The angular material is very rich library for Angular to develop an application which gives look and feel of the material design.
To know more about Material design, visit here.
Let's begin with the installation of tools. I prefer Bower as a front-end package manager to install libraries on go. However it's not mandatory, you can always install it manually.
We need Bower installed globally and project wise as well. To install it globally to use it as command line tool;run the following command.
npm install bower -g
You may need sudo access for this.
Once the installation is complete, switch to the project directory and install bower as developer dependency.
npm install bower --save-dev
After installation, switch to view folder and install libraries required.
bower install angular-material -D && bower install angular-route && bower install angular-messages
This will install libraries we need to develop front-end of the application. You may be able to bower_components folder in view directory. We are good to go.
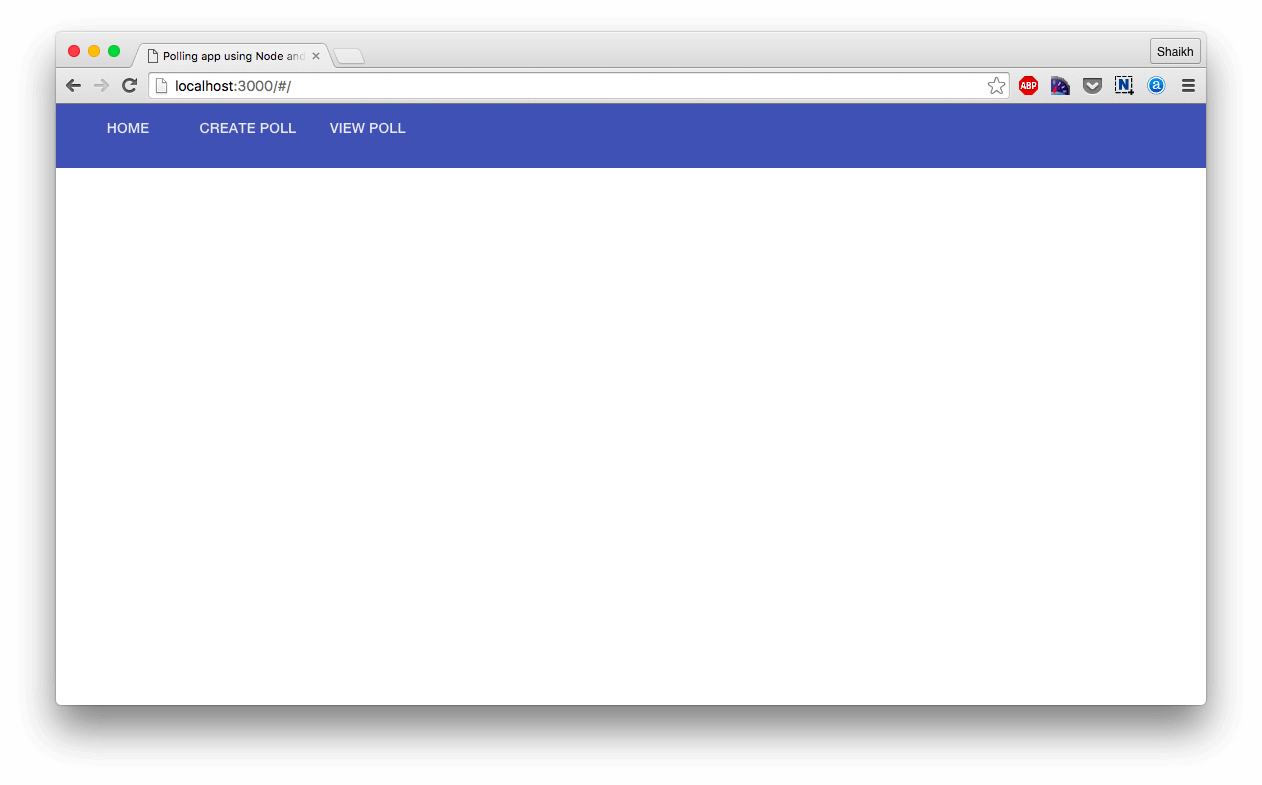
Designing home page
The home page will contain menu bar with three options and down below the menu we will have listed polls. Here is code for same.
/view/index.html
We will get following output out of this code.
Here is the Angular code.
/view/js/app.js
var app = angular.module('starterApp', ['ngMaterial','ngRoute','ngMessages']);
app.config(function($routeProvider){
$routeProvider
.when('/',{
templateUrl: 'home.html'
})
.when('/create',{
templateUrl: 'create.html'
})
.when('/view',{
templateUrl: 'view.html'
});
});
app.controller('pollingController',function($scope,$http,socket) {
$scope.pollData = [];
// Load polls when app initialise.
getPollData();
/**
* @function
* @description fetch the polls from RethinkDB and render it in UI.
*/
function getPollData() {
$http.get("/polls").success(function(response){
$scope.pollData = response.data;
});
}
});
As you may have noticed we are using ng-Route to perform the routing at front-end. We need to creating respective files routes to load it in the view respectively.
Related article : Single page routing in AngularJS.
/view/home.html
        {{pollInfo.question}}


       {{ polls.option }}
md-card is a Angular material element and we are using ng-repeat to create those cards equivalent to polls.
hiddenrows array and updateVote function we will define in next section.
/view/js/app.js
var app = angular.module('starterApp', ['ngMaterial','ngRoute','ngMessages']);
app.config(function($routeProvider){
$routeProvider
.when('/',{
templateUrl: 'home.html'
})
.when('/create',{
templateUrl: 'create.html'
})
.when('/view',{
templateUrl: 'view.html'
});
});
app.controller('pollingController',function($scope,$http,socket) {
$scope.pollData = [];
$scope.hiddenrows = [];
getPollData();
function getPollData() {
........................
}
$scope.updateVote = function(index) {
var data = {
"id" : $scope.pollData[index].id,
"option" : $scope.pollData[index].selected
};
$http.put("/polls",data).success(function(response) {
if(response.responseCode === 0) {
$scope.hiddenrows.push(index);
} else {
console.log("error");
}
});
}
});
updateVote() function will take the vote and hit the API to update it in our RethinkDB. hiddenrows array will contain the index of all those polls which have been voted by the user.
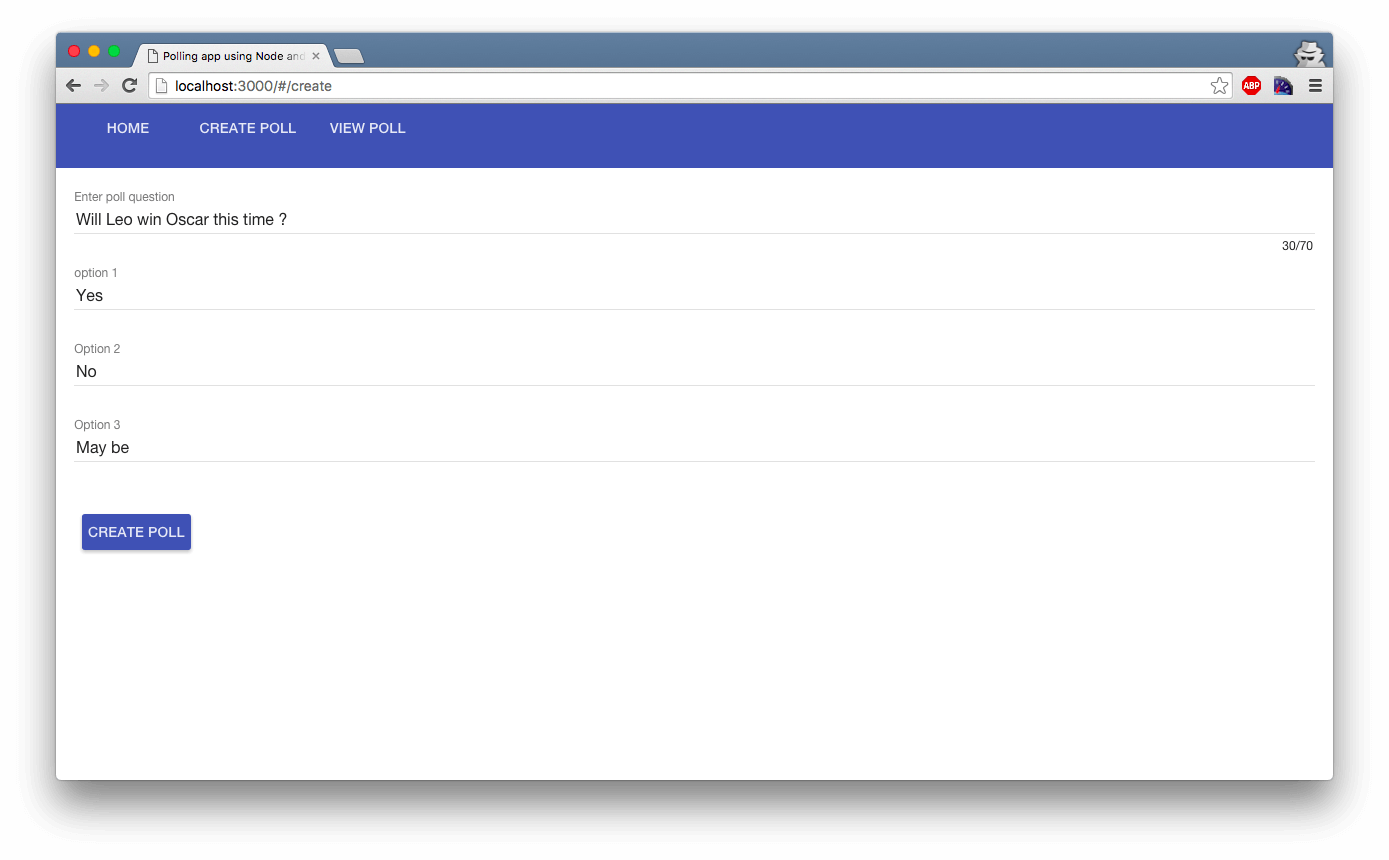
Create new poll screen
In this screen, we will have form consist of 4 input box to allow the user to create a new poll using 3 options. Here is the code for same.
/view/create.html
This code will generate following output.
On the click event of the button we will call submitPoll() function by passing event as parameter. We will use event parameter to show material dialogue box.
Here is the submitPoll() function.
/view/js/app.js
var app = angular.module('starterApp', ['ngMaterial','ngRoute','ngMessages']);
app.config(function($routeProvider){
$routeProvider
.when('/',{
templateUrl: 'home.html'
})
.when('/create',{
templateUrl: 'create.html'
})
.when('/view',{
templateUrl: 'view.html'
});
});
app.controller('pollingController',function($scope,$mdDialog,$http,socket) {
$scope.pollData = [];
$scope.formData = {};
$scope.voteData = {};
$scope.hiddenrows = [];
getPollData();
function getPollData() {
........................
}
$scope.submitPoll = function(ev) {
var data = {
"question" : $scope.formData.pollQuestion,
"polls" : [{
"option" : $scope.formData.pollOption1, "vote" : 0
},{
"option" : $scope.formData.pollOption2, "vote" : 0
},{
"option" : $scope.formData.pollOption3, "vote" : 0
}]
};
var message = {"title" : "", "message" : ""};
// Calling the API to add new poll.
$http.post('/polls',data).success(function(response) {
if(response.responseCode === 0) {
message.title = "Success !";
message.message = "Poll is successfully created";
data["id"] = response.data.generated_keys[0];
// Updating pollData to update the view, this will automatically update and render the new vote at home page.
$scope.pollData.push(data);
} else {
message.title = "Error !";
message.message = "There is some error happened creating poll";
}
// Upon Error or success, dialogue box will appear with message.
$mdDialog.show(
$mdDialog.alert()
.parent(angular.element(document.querySelector('#popupContainer')))
.clickOutsideToClose(true)
.title(message.title)
.textContent(message.message)
.ok('Got it!')
.targetEvent(ev)
);
});
}
$scope.updateVote = function(index) {
.............................
}
});
View all poll screen
In this screen, we will show every poll which has been created by pulling all of them from RethinkDB. We already have a $scope.pollData array with everything we need, all we need to do is to render it in material elements.
Here is the code for same.
/view/view.html
{{pollInfo.question}}
{{polls.option}} : {{polls.vote}}
This code will generate following output.
Real time updates push notification using RethinkDB
This is the coolest and my favorite feature of RethinkDB. RethinkDB is capable of finding out changes in the table automatically and this can be best used in real time application.
Consider the scenario in our application, after creating the poll user can do the voting. As soon as new vote is added we have to update the "view poll" screen. We will subscribe rethinkDB to our polls table and rethinkDB will keep pushing the changes to us. All we need then to broadcast the changes using Socket.io across connected clients.
Create new file models folder and name it feeds.js and add the following code in it.
/models/feeds.js
var rethinkdb = require('rethinkdb');

var db = require('./db');

var pollObject = new db();

module.exports = function(socket) {

  pollObject.connectToDb(function(err,connection) {

  if(err) {

    return callback(true,"Error connecting to database");

  }

  // Look over this line carefully.

  // we are invoking changes() function on poll table.

  // On every change it will give us data.

  rethinkdb.table('poll').changes().run(connection,function(err,cursor) {

    if(err) {

      console.log(err);

    }

    // We are scrolling over the cursor data and broadcasting the changes using socket.

    cursor.each(function(err,row) {

      console.log(JSON.stringify(row));

      if(Object.keys(row).length > 0) {

        socket.broadcast.emit("changeFeed",{"id" : row.new_val.id,"polls" : row.new_val.polls});

      }

    });

  });

  });

};
This is a very important piece of code across all the application. This code will keep us updated and notified about any changes in the poll table. All we need to do now is to invoke this function from Express and we are good to go in the backend.
app.js
var express = require('express');

var bodyParser = require('body-parser');

var app = express();

var http = require('http').Server(app);

// Adding socket.io

var io = require('socket.io')(http);

var db = require('./models/db');

var feed;

// On connection to the socket, just invoking the function.

io.on('connection',function(socket) {

  feed = require('./models/feeds')(socket);

});
/**
Adding the controllers.
*/
var dbModel = new db();
dbModel.setupDb();
app.use(bodyParser.json());
app.use(express.static(__dirname + '/view'));
app.use(require('./controllers'));
http.listen(3000, function(){
console.log('listening on port 3000');
});
And back-end is done, let's integrate the socket.io in AngularJs and test the complete application.
Integrating socket.io in AngularJS
To integrate Socket.io in AngularJS we will add socket as a factory and listen to the event we are emitting from the back-end. Here is the code for same.
/view/js/app.js
var app = angular.module('starterApp', ['ngMaterial','ngRoute','ngMessages']);
app.factory('socket',function(){
// This is where our app running.
var socket = io.connect('http://localhost:3000');
return socket;
});
app.config(function($routeProvider){
$routeProvider
.when('/',{
templateUrl: 'home.html'
})
.when('/create',{
templateUrl: 'create.html'
})
.when('/view',{
templateUrl: 'view.html'
});
});
app.controller('pollingController',function($scope,$mdDialog,$http,socket) {
$scope.pollData = [];
$scope.formData = {};
$scope.voteData = {};
$scope.hiddenrows = [];
getPollData();
function getPollData() {
...............................
}
$scope.submitPoll = function(ev) {
...............................
}
$scope.updateVote = function(index) {
...............................
}
// This is the event we are emitting from Server.
socket.on('changeFeed',function(data) {
// on any change, we will first iterate through our pollData array.
// If any id matches, we will then update the vote count.
// $scope.apply will make the change in HTML screen.
for(var pollCounter = 0 ;pollCounter < $scope.pollData.length; pollCounter++) {
if($scope.pollData[pollCounter].id === data.id) {
$scope.pollData[pollCounter].polls = data.polls;
$scope.$apply();
}
}
});
});
And we have completed the implementation of the app. Let's test it out.
Testing the app
Run the app by using
node app.js
and visit localhost:3000 from your browser. First create any poll.
Open another browser window and visit the view poll screen. Simultaneously from another window, perform the vote. You should be able to see a live update in the count of the vote.
Checkout the console screen too, you can see the live changes in polls table.

Create more polls and have fun.
Further improvement
To improve the app quality further, we can use payload validation in back-end and work on the layout of the application in front-end.
Related reading : Payload validation in Node.js
Further reading
We have found these two related books which may help you to gain more knowledge in the subject.
Conclusion
This tutorial is little lengthy than usual tutorials we have in here but I am sure its worth of your time. We tried to take you through every single step of development that we usually go through to develop application before writing tutorials to make you understand the flow better.
RethinkDB is no doubt "next big thing" and with the features such ReQL query language and live feed changes there is the big scope of innovation in application development.