New to Rust? Grab our free Rust for Beginners eBook Get it free →
Ajax Live Search Using Angular and Node
Live search is one of the most interactive and mandatory part of any web applications. It allows user to see how their search keyword is returning the result and by that result they can improve the keyword. Ajax search such as one Google uses fires up the uses of Search Engine. Facebook Graph search is one of the great example of manipulating search using keywords. These are examples of live search and if you are one looking for it, then you are right place.
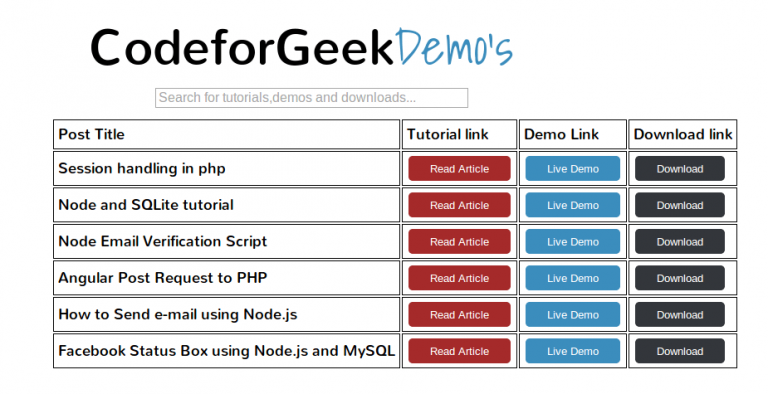
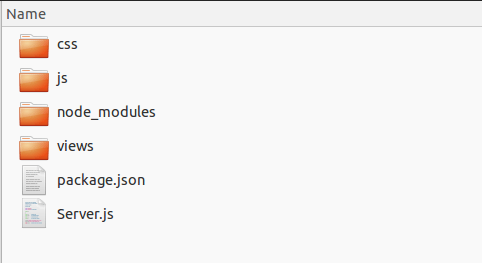
If you visit demos page of Codeforgeek , try putting keywords in the text box and you will see the result filtered live. This is happening using Angular.js keyword. So let’s dive into code, first i will explain you directory structure of our project.
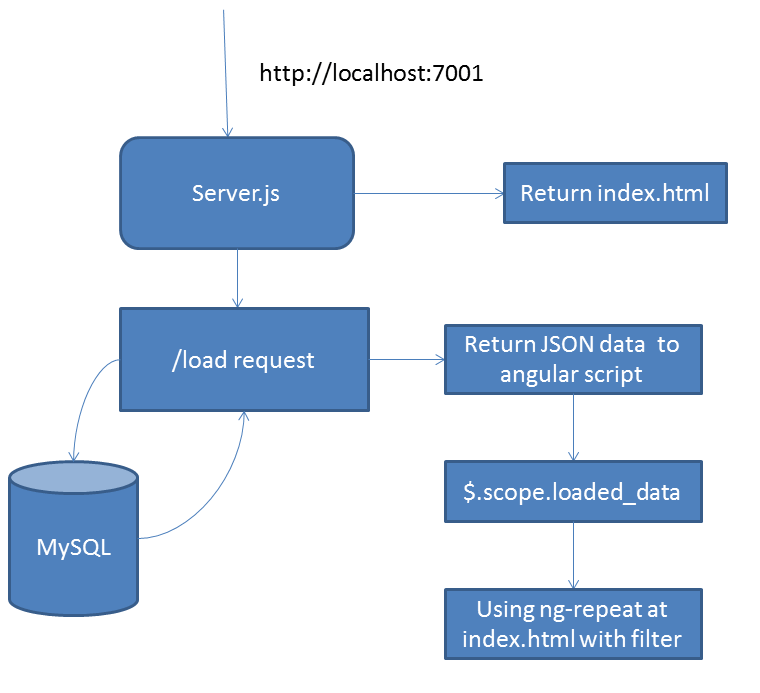
Before implementation, i want to explain the working of whole system. We are using “ng-repeat” keyword for live search. It allows us to put those data which we need for search on client end, so for every key input there is no database call which in turn improves the system performance. Here is graphic dealing with the working of system.
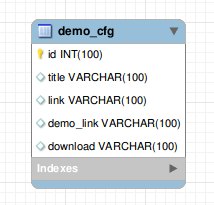
Let’s create one simple database and add some sample data in it. I have MySQL database called “demos” and inside a table called “demo_cfg“. Create any database of your own choice using phpmyadmin and create table using following Query OR you can import SQL file i have provided in downloads. Here is a table structure.
package.json
{

"name": "demos-cfg",

"version": "0.0.1",

"description": "Live search using Angular and Node",

"main": "Server.js",

"dependencies": {

"ejs": "^1.0.0",

"express": "^4.8.6",

"mysql": "^2.4.3"

}

}
Let me explain you back-end logic first, we are going to create one Express Server which listen on Port 7001. It have two router (‘/’,’/load’). On first request it will render the home page of application and on second router request it will load the values from database. We have placed all JavaScript file, CSS files and front end files (HTML) on separate folder to avoid confusion. Here is our Server.js Skeleton code.
Server.js
var express = require('express');

var app = express();

var mysql = require('mysql');

var connection = mysql.createConnection({

host : 'localhost',

user : 'mysql user (generally root)',

password : 'Mysql password (generally blank)',

database : 'Your database, in my case it is demos'

});
connection.connect(function(){
console.log("MySQL Database is Connected");
});
app.use(express.static(__dirname + '/css'));
app.use(express.static(__dirname + '/js'));
app.set('views', __dirname + '/views');
app.engine('html', require('ejs').renderFile);
app.get('/',function(req,res){
res.render('index.html');
});
app.get('/load',function(req,res){
connection.query("select * from cfg_demos",
function(err,rows,fields){
if(err) throw err;
res.end(JSON.stringify(rows));
});
});
app.listen(7001,function(){
console.log("App is started at PORT 7001");
});
As you can see in code, we are doing our code step by step. First we have defined the dependencies, then we connected to Database, then we have defined front-end files location and finally defining router and running the app. In this way you can easily determine the errors if occurred and also code looks beautiful.
We have two JavaScript files. app.js and core.js . In first file i have defined the angular app and in second file i have put the angular controller code. Let me show you both of them.
js/app.js
var app = angular.module('demos_cfg', []);
js/core.js
app.controller('main_control',function($scope,$http){

load_demos();

function load_demos(){

$http.get("http://localhost:7001/load").success(function(data){

$scope.loaded_demos=data;

})

}

});
Yes that’s it. We are simply calling the GET request and getting the data stored in $scope.loaded_demos variable. What all we have to do now is add little bit of code in HTML file. Here you go, index.html file.
views/index.html
CodeforGeekDemo's
| Post Title | Tutorial link | Demo Link | Download link |
| {{data.title}} |
Please note this line ng-repeat=”data in loaded_demos | filter:search. This line basically performing search in loaded_demos which is nothing but data from database. This search is live and Angular does this internally. You don’t have to worry about anything to do it. Pretty interesting. Yes it is.
You can look over to Demos page of codeforgeek for live demo of this code.
How to run the code
Make sure you have created the database with tables as shown above. Download the code and switch to the directory using command prompt and type npm install and once it is done you can run the project using node Server.js. You can view the output at localhost:7001.