
Introduction
In this tutorial, we will learn how to implement token based authentication in Node.js using JWT. Token-based authentication is a very popular approach in Authentication part of the application. It’s been implemented and used by the variety of popular web services.
What is token based authentication
Generally, we do authentication of a web application by maintaining the Session on the Server and we use cookies at the client end to perform the session tracking.
This limits the scalability of the system to the web as Mobile apps generally do not support or work on cookies.
Plus, cookies are not secure and can be used to perform cross-site forgery attacks. I want to keep the theory short, you can learn more about in this w3.org doc.
Our project
We’ll be building the simple authentication system using Node.js and RethinkDB with of course token based authentication. Here is what we gonna do:
- Setting up the project.
- Creating RethinkDB database and table.
- Developing token based authentication in Node.js using JWT.
So let’s dive in.
Setting up the project
Start the new project using npm init command.
Here is my initial package.JSON file.
"name": "token-based-authentication",
"version": "1.0.0",
"description": "",
"main": "index.js",
"scripts": {
"test": "echo "Error: no test specified" && exit 1"
},
"keywords": [],
"author": "",
"license": "ISC"
}
Let’s install dependency we require to implement our system.
Once dependencies are installed, we can move ahead to code our project. Here is the project directory structure.
Folder structure
+ middlewares
+ models
+ node_modules
- config.json
- package.json
- app.js
Let’s create database in RethinkDB.
Creating RethinkDB database and table
I am assuming you have installed RethinkDB in your system. If not, it’s no big deal to do it. Follow our introduction to RethinkDB tutorial to understand the concept of this awesome database technology.
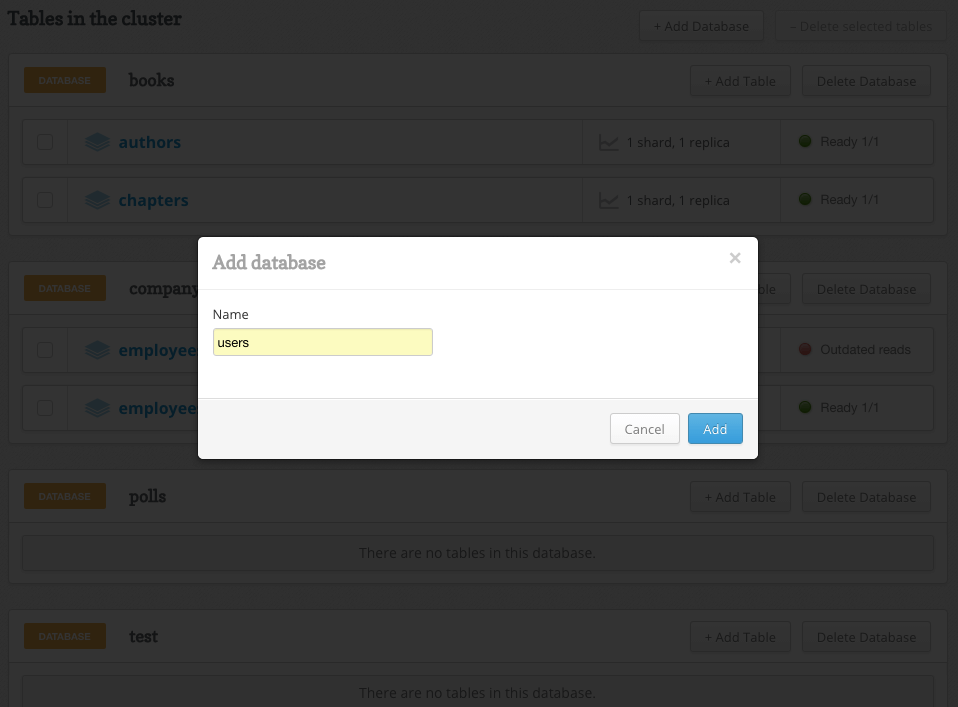
If you already have it, start your RethinkDB Server and open up web admin console by pointing to http://localhost:8080.
First, create a new database.
Then create a table in it.
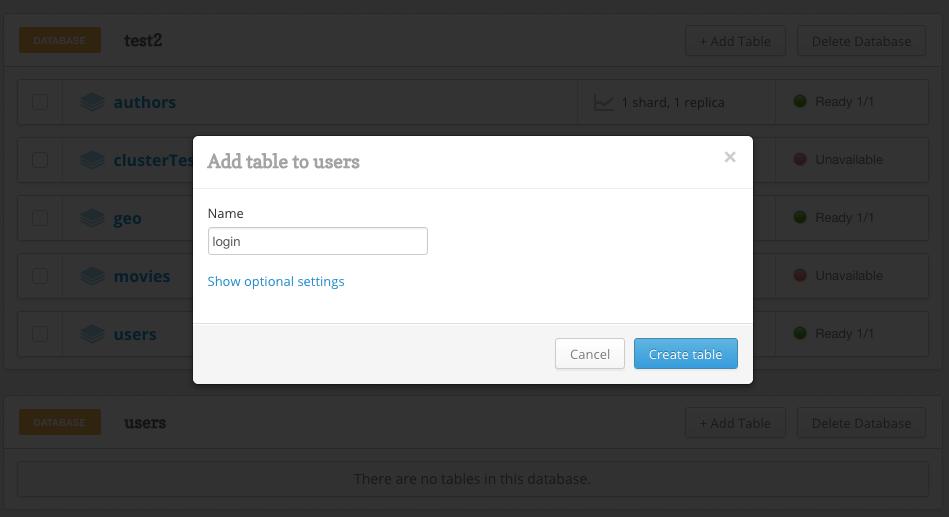
Okay, RethinkDB database is setup and we can now do real stuff and code our project.
Developing token based authentication in Node.js using JWT
We are going to use JSON web token node module to avail the token based authentication. It’s really easy and very handy module. Before I jump into coding, let me show you how the system going to work.
Step 1: Client performs login and upon success, new token is generated. This API should not perform token validation, instead, it needs to generate token.
Step 2: Client perform a request to other API’s and provides the token either in the query string, request body or HTTP header.
Step 3: Server perform token validations if the token is valid then the request is processed and the response is sent back to the client.
This seems very easy in Express.js. What all we need to do is to have one middleware which performs the token validation. We will place all those API’s which doesn’t require token validation (such as login) above to this middleware and all of them which does require token validation, we will place them after the middleware.
Enough talking. Let’s code. Here is our Node Server code.
var bodyParser = require('body-parser');
var app = express();
global.config = require('./config');
app.use(bodyParser.json());
app.use(bodyParser.urlencoded({ extended: false }));
app.use(require('./controllers')); //routes which does't require token authentication should be placed here
app.use(require('./middlewares/TokenValidator')); //middleware to authenticate token
app.use(require('./controllers/account')); //Apis to protect and use token should be placed here
app.listen(config.port,function() {
console.log("Listening at Port "+config.port);
});
Notice in our code, we have middleware which performs token validation and we have two API’s, one to perform login one to show account details. Of course account details should be shown if the user is valid i.e have valid token so we put this API below the middleware and login which in turns generate the token placed before the middleware.
Here is our config file.
"port" : 3000,
"secret" : "ssssshhhhh"
}
Now let’s look at controllers. We have controller folder that takes care of token generation. Here is the code for same.
var router = express.Router();
/**
* @description
* First route will handle the static html file delievery.
* Second route will handle the API calls.
*/
router.get('/',function(req,res) {
res.json({message : "Hello World"});
});
router.use('/user',require('./user'));
module.exports = router;
This file acts as an entry point to manage other routes. I have found this cleanest way to manage express routes. Let me know if you have a better way in comments.
Here is the user router.
var router = express.Router();
var db = require('../models/db');
var jwt = require('jsonwebtoken');
router.post('/',function(req,res) {
//Create new User.
var data = {
email : req.body.emailAddress,
password : req.body.password
};
var model = new db();
model.addNewUser(data,function(error,response) {
if(error) {
return res.json({"error" : true,"message" : error})
}
res.json({"error" : false,"message" : "Added new user"});
});
});
router.post('/login',function(req,res) {
var model = new db();
//perform user login
model.findUser(req.body.emailAddress,function(error,response) {
if(error) {
return res.json({"error" : true,"message" : error});
}
if(!response) {
return res.json({"error" : true,"message" : "User not found"});
}
if(response.password !== req.body.password) {
return res.json({"error" : true,"message" : "Password mismatch"});
}
var token = jwt.sign(response, global.config.secret, {
expiresIn: 1440 // expires in 1 hours
});
res.json({
error: false,
message: 'Validation successful!',
token: token
});
});
});
module.exports = router;
In first route, we are creating new user using our model function addNewUser() which we will see in moment. Upon successful creation of user, we are returning the response.
In the second route, we are validating the user against the database and if found, we are generating new web token using JWT function, here we are passing our secret which should be strong in production. You can, in fact, use TLS keys to perform the encryption of the token.
For the sake of simplicity and demonstration, I am using simple key but it is not recommended for production.
So let’s look at models now. First our function is addNewUser(). Here it is.
var rethinkdb = require('rethinkdb');
var async = require('async');
class db {
connectToDb(callback) {
rethinkdb.connect({
host : 'localhost',
port : 28015,
db : 'users'
}, function(err,connection) {
callback(err,connection);
});
}
addNewUser(userData,callback) {
var self = this;
async.waterfall([
function(callback) {
self.connectToDb((err,connection) => {
if(err) {
return callback(true,"Error connecting to database");
}
callback(null,connection);
});
},
function(connection,callback) {
rethinkdb.table('login').insert(userData).run(connection,function(err,result) {
connection.close();
if(err) {
return callback(true,"Error happens while adding new user");
}
callback(null,result);
});
}
],function(err,data) {
callback(err === null ? false : true,data);
});
}
findUser(emailAddress,callback) {
-------------------------------
}
}
module.exports = db;
Here we are first connecting to RethinkDB database and then inserting a new document in it. Make sure you always release the connection after the query execution.
Here is findUser() function.
var rethinkdb = require('rethinkdb');
var async = require('async');
class db {
connectToDb(callback) {
rethinkdb.connect({
host : 'localhost',
port : 28015,
db : 'users'
}, function(err,connection) {
callback(err,connection);
});
}
findUser(emailAddress,callback) {
var self = this;
async.waterfall([
function(callback) {
self.connectToDb((err,connection) => {
if(err) {
return callback(true,"Error connecting to database");
}
callback(null,connection);
});
},
function(connection,callback) {
rethinkdb.table('login').filter({"email" : emailAddress}).run(connection,function(err,cursor) {
connection.close();
if(err) {
return callback(true,"Error fetching user from database");
}
cursor.toArray(function(err, result) {
if(err) {
return callback(true,"Error reading cursor");
}
//Assuming email will be primary key and unique
callback(null,result[0]);
});
});
}
],function(err,data) {
callback(err === null ? false : true,data);
});
}
addNewUser(userData,callback) {
-----------------------------------
}
}
module.exports = db;
Here we are using filter() ReQL command to find out email address and returning back the result. No big deal here.
Let’s look over the middleware to validate token on each request.
Middleware to validate token
Here is our middleware code.
module.exports = function(req,res,next) {
var token = req.body.token || req.query.token || req.headers['x-access-token'];
// decode token
if (token) {
// verifies secret and checks exp
jwt.verify(token, global.config.secret, function(err, decoded) {
if (err) {
return res.json({"error": true, "message": 'Failed to authenticate token.' });
}
req.decoded = decoded;
next();
});
} else {
// if there is no token
// return an error
return res.status(403).send({
"error": true,
"message": 'No token provided.'
});
}
}
This is the main part of the code. Here we are checking all of the sources from where token could possibly arrive such as query string, request body, and header.
Upon receiving, we are verifying it using our secret and incoming token. The boom that’s it 🙂 If it’s successful, we are moving to next route else returning back the error response.
Running the code
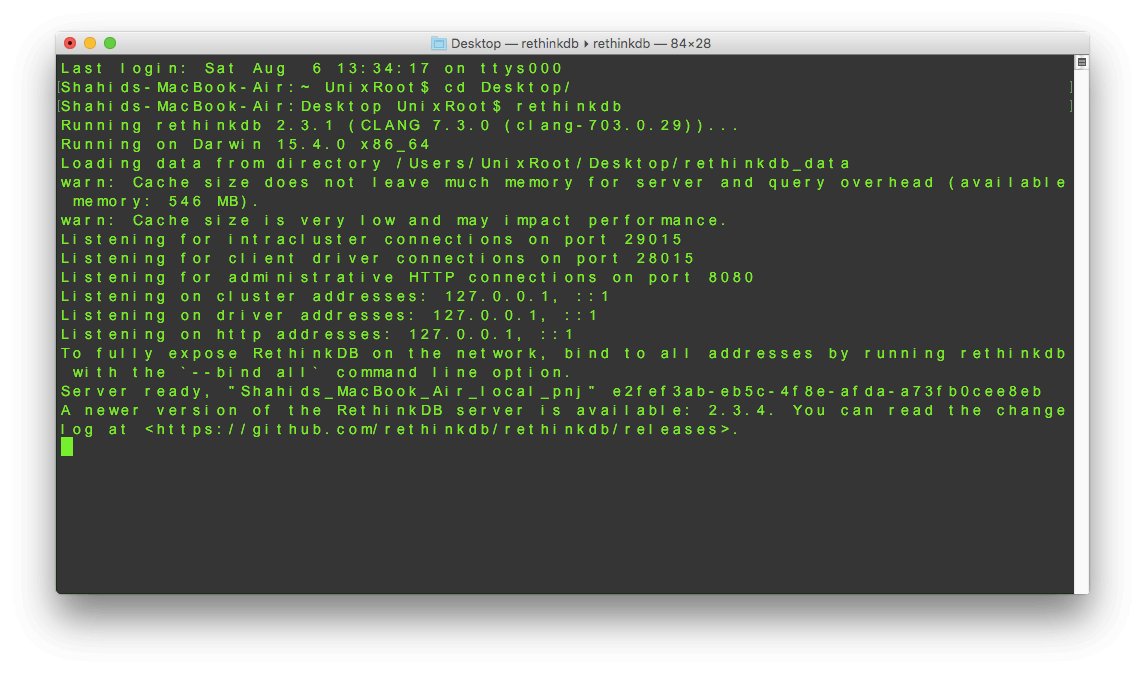
To run the code make sure RethinkDB is up and running. All you need to do is run the following command in terminal.
You should be seeing the similar screen as shown below.
Now switch to the project folder and run the Server using then the following command.
The server is listening on the specified port.

To hit the API, open up your API simulator. We recommend Postman.
Creating new user
Hit POST request to localhost:3000/users with request data shown below.

Generating access token OR performing log in
Once the user is created, hit POST request to localhost:3000/user/login with request data shown below.

As you can see, we now have the token with us.
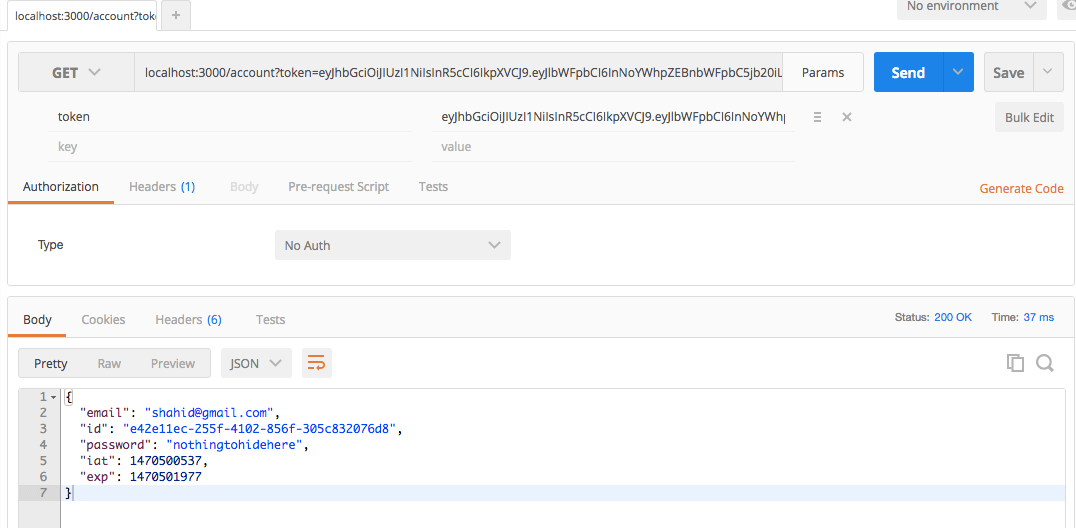
Accessing API’s using token
As we have discussed in the earlier section, we can pass the token in the query string, request body, and in header depending upon the HTTP request type.
Here I am showing the query string format, you can check it with header too.
Note: header name is x-access-token and value is a token string.
Try putting bad token or no token and you should be receiving an error.
That’s it, we just built our basic token based authentication system.
Conclusion
We have built our basic token based authentication which is scalable across mobile and web devices. You can grab this code from Github and alter it according to your need.