
In this tutorial, you will learn how to create, test, and update a Lambda function. You will also learn how to publish a new version and create an alias for a Lambda function. You can learn basics about Serverless here.
Creating a function
Here’s how you can create an AWS Lambda function through the AWS Lambda Console:
- Once you have created an AWS Free Tier account, log in to your AWS account through the AWS Management Console at https://aws.amazon.com/console/.
- Once you have logged in to the AWS Console, navigate to the AWS Lambda Console.
-
From the AWS Lambda Console, click the Create a function button:
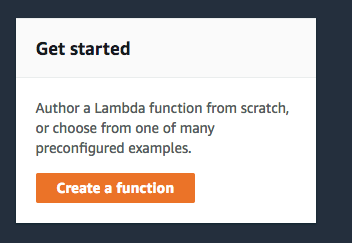
-
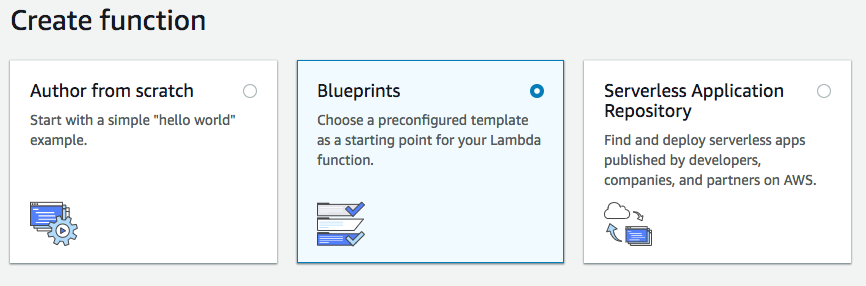
Once you have clicked the button, you will be presented with three different options to create an AWS Lambda function:
- Authoring an AWS Lambda function from scratch.
- Creating an AWS Lambda function from a list of preconfigured blueprints to kickstart your AWS Lambda functions.
- Pick an already published serverless app from the Serverless Application Repository, which consists of apps published by developers and companies on AWS
-
Select the Blueprints option:
- In the Blueprints filter box, add a filter called hello-world and select the blueprint called hello-world.
-
You should see A starter AWS Lambda function in Node.js. Click on the Configure button at the bottom:
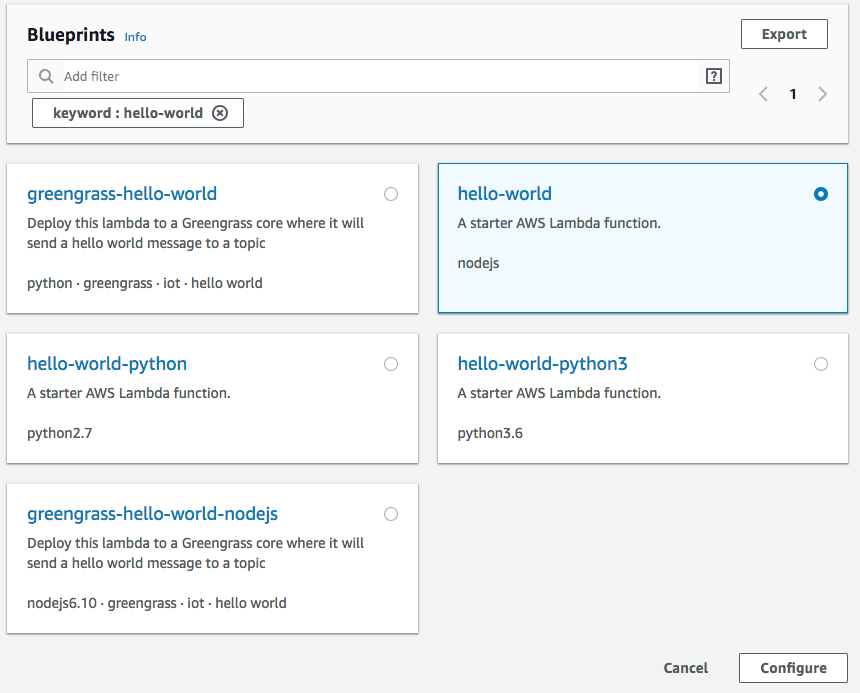
-
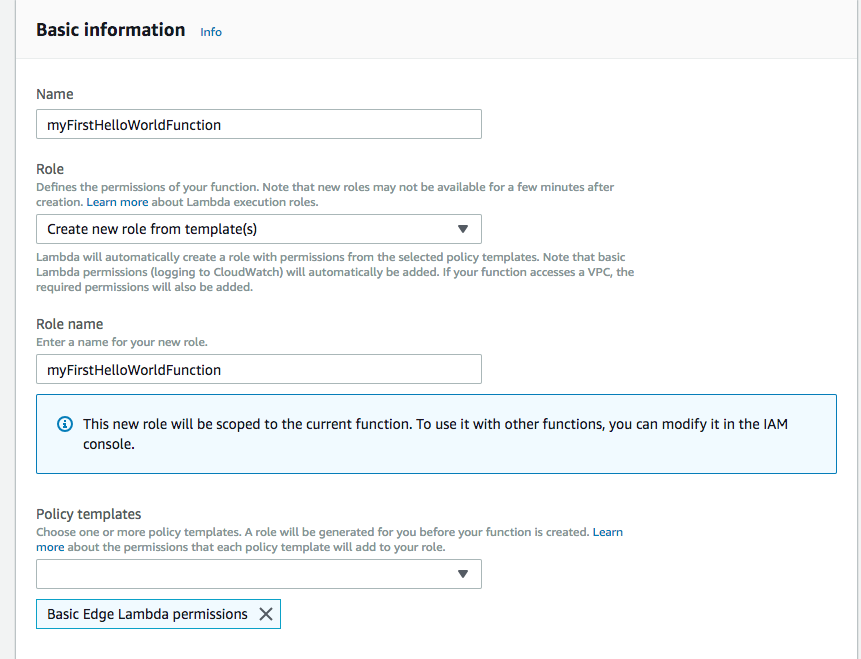
Now, you will be presented with options to configure the AWS Lambda function that you are creating:
- Name your Lambda function, myFirstHelloWorldFunction.
- Select Create new roles from template(s) from the dropdown for the Role
- Give your role the same name as the Lambda function to easily identify the IAM role.
- From the list of Policy templates, select Basic Edge Lambda permissions.
- Click on the Create function button at the bottom:
- The other configuration setting that is very important is the name of the handler for your AWS Lambda function.
- For the one that you created, set it as index.handler, which is the module-name.export value of your AWS Lambda function.
- In this case, the AWS Lambda function will call exports.handler in the index.js file that was created as part of the blueprint:
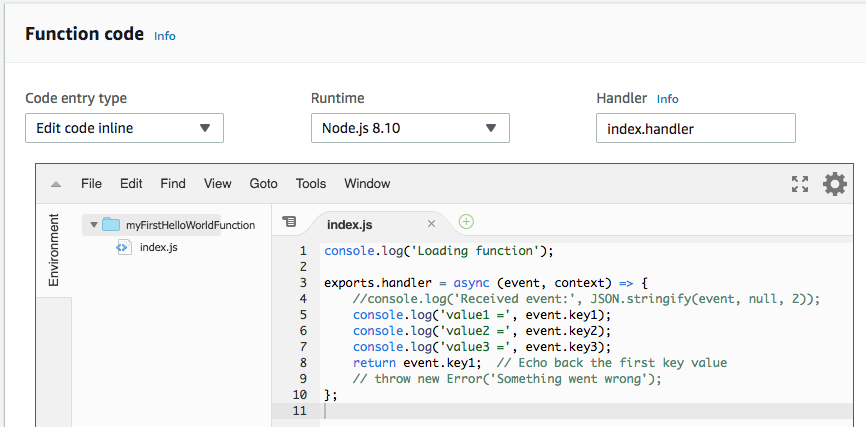
If you examine the code that the blueprint created, it will look like the following:
exports.handler = async (event, context) => {
// console.log('Received event:', JSON.stringify(event, null, 2));
console.log('value1 =', event.key1);
console.log('value2 =', event.key2);
console.log('value3 =', event.key3);
return event.key1; // Echo back the first key value
// throw new Error('Something went wrong');
};
You can find this AWS Lambda function code here.
The preceding code prints the whole event that triggered the AWS Lambda function (which is commented out). Then it prints three different keys from the event, named key1, key2, and key3 and finally returns key1. When you test this AWS Lambda function through the console, you need to make sure that the test event has these three keys defined.
Testing the function
It’s time to take a look at how you can test the newly created AWS Lambda function using the AWS Lambda Console. At this point, as you don’t have any triggers defined for your AWS Lambda function, you will just have to use the AWS Lambda console to configure a test event and invoke your AWS Lambda function.
To test the newly created AWS Lambda function:
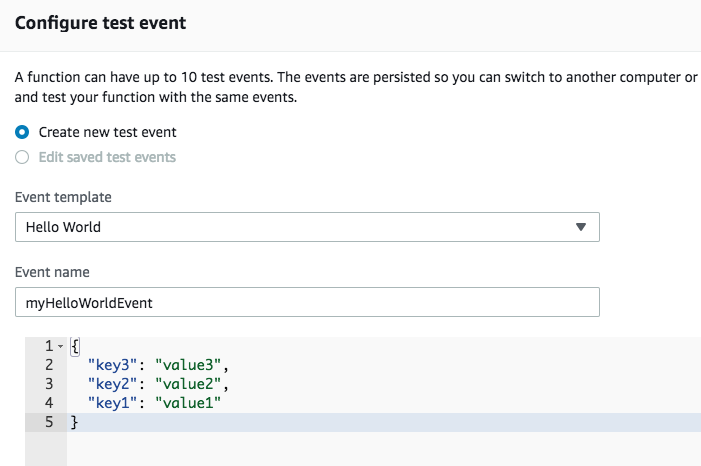
- Click on the Test button, which opens up the Configure test event dialog box.
- In Configure test event, select the Hello World event template.
- Set a name for the event, for example, myHelloWorldEvent, and click on the Create button.
-
The Hello World event template should look like this JSON snippet:
{
"key3": "value3",
"key2": "value2",
"key1": "value1"
}Here is a screenshot of Configure test event:
-
Now, ensure that the myHelloWorldEvent event is selected in the events list to test your AWS Lambda function in the Console, next to the Test button:

- Now, when you click the Test button, you will see an execution result saying that it succeeded, providing a link to CloudWatch Logs, so you can view the log of your AWS Lambda function execution.
-
In the console, you will also see the value of key1 logged, which in this case is value1, since that is what was configured in the test event:

-
The console output also logs the Summary of this AWS Lambda function execution, including the following:
- The time it took to execute
- The memory that was configured for the AWS Lambda function
- The maximum memory that was consumed by the AWS Lambda function execution
- The duration for which you are billed for the AWS Lambda execution.
The summary section also includes a link to the CloudWatch log group:

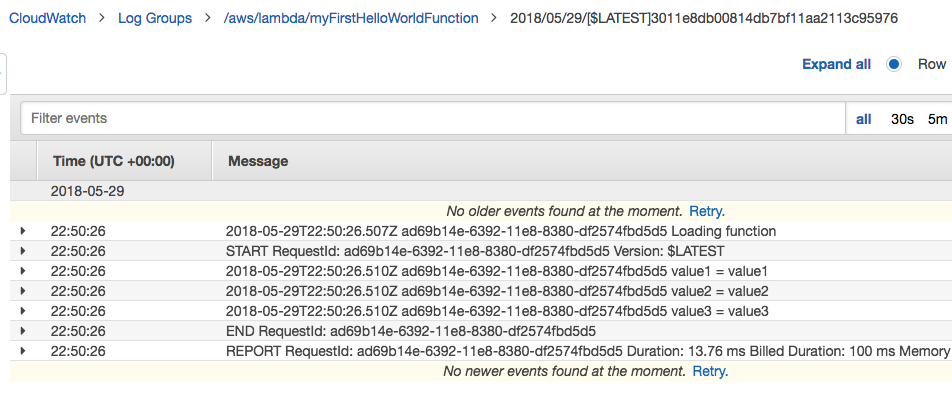
- If you navigate to the CloudWatch Log Group link that is available in the Summary, you can view the logs that are generated by your AWS Lambda function. In this case, the function outputs the three different values of the keys that are configured in the test event used to test the Lambda function:
Updating the function
Now that you are able to successfully test your AWS Lambda function through the console, it’s time to look at how you can make changes to the Lambda function through the console, deploy those changes through the console, and see if your changes are reflected by testing the AWS Lambda function as in the following steps:
- In the AWS Lambda console, select the AWS Lambda function, myFirstHelloWorldFunction, which you created previously, and navigate to the Function code section to modify the code.
-
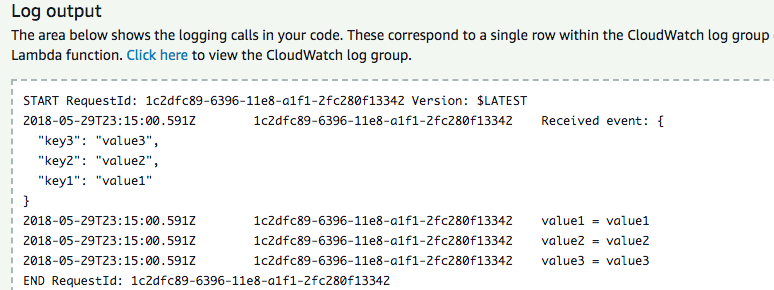
The only change that you will be making is to uncomment the line that prints the entire event sent to the AWS Lambda function. Once you make the change, the code will look like this:
console.log('Loading function');
exports.handler = async (event, context) => {
console.log('Received event:', JSON.stringify(event, null, 2));
console.log('value1 =', event.key1);
console.log('value2 =', event.key2);
console.log('value3 =', event.key3);
return event.key1; // Echo back the first key value
// throw new Error('Something went wrong');
}; - You can find the preceding AWS Lambda function code here.
- Once the changes have been made, click on the Save button in the top right-hand corner, which deploys the changes to the $LATEST version of your AWS Lambda function.
- With the changes in place, click on the Test button with myHelloWorldEvent selected.
- In the output of your AWS Lambda function execution, you should now see the whole event printed, along with the values of each key:
Publishing a new version
By default, when you update and save the AWS Lambda function, it gets saved to $LATEST version. However, if you want to create a snapshot of the AWS Lambda function’s $LATEST version for future reference, AWS provides a mechanism to do so by publishing the function to a named version. You can do this through the AWS console by performing the following steps:
-
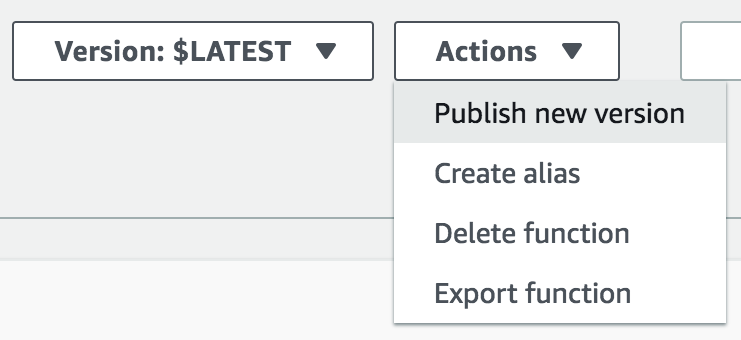
In the AWS Lambda Console, click on the Actions dropdown and select Publish new version:
-
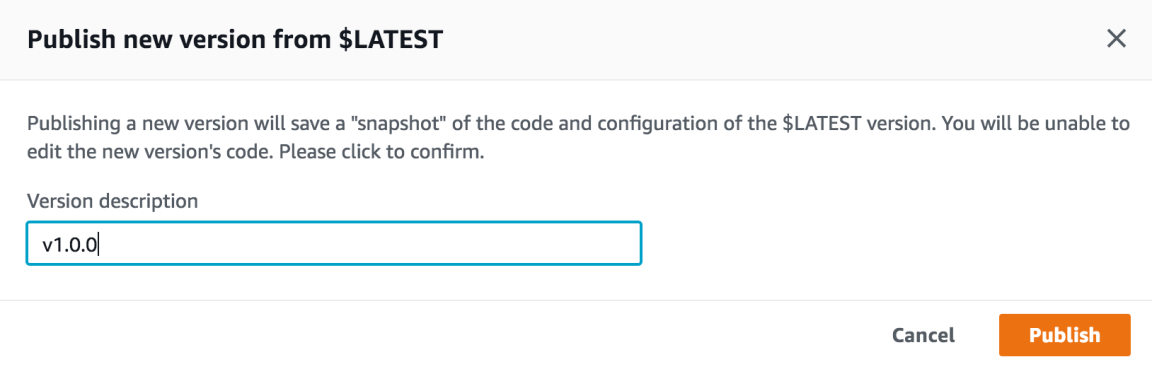
In the dialog window, enter a value for the description of the version (for example, Snapshot created on June 1st 2018) and click on the Publish button:
- Once the Publish button is pressed, a new version will be published for your AWS Lambda function, and the version number will be automatically set to 1 by the AWS Lambda platform (assuming this is the first time you are creating a version for your AWS Lambda function).
- As you publish new versions, they will be auto-incremented by the AWS Lambda platform.
-
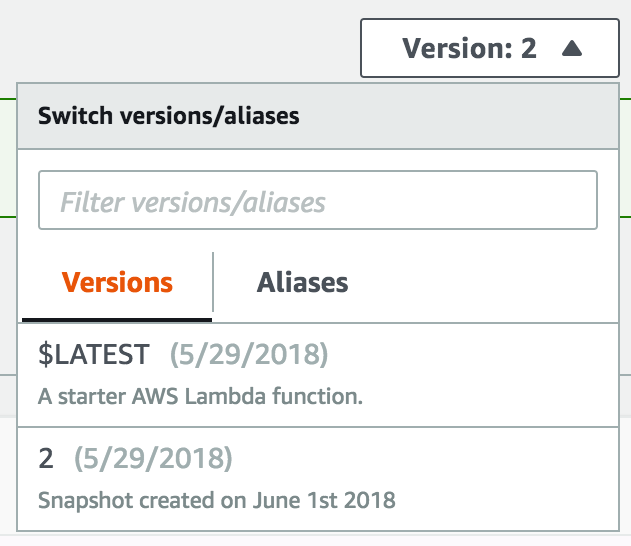
You can see the available versions for your AWS Lambda function by selecting the Version dropdown:
Creating an alias for a Lambda function
There will be cases where you will need to create slightly different versions of your AWS Lambda function for different environments (test and production), for different environment-specific settings. To handle this use case, the AWS Lambda platform provides you with the capability to create an alias, which points to one or more versions of your AWS Lambda function. Here’s how you can create an alias for your AWS Lambda function:
-
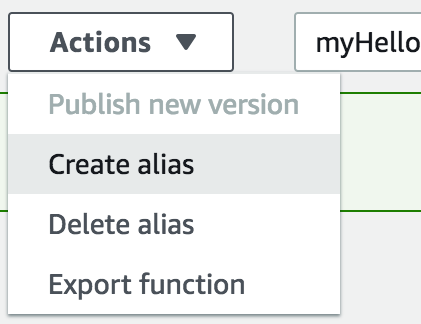
In the AWS console, from the Actions dropdown, select Create alias:
-
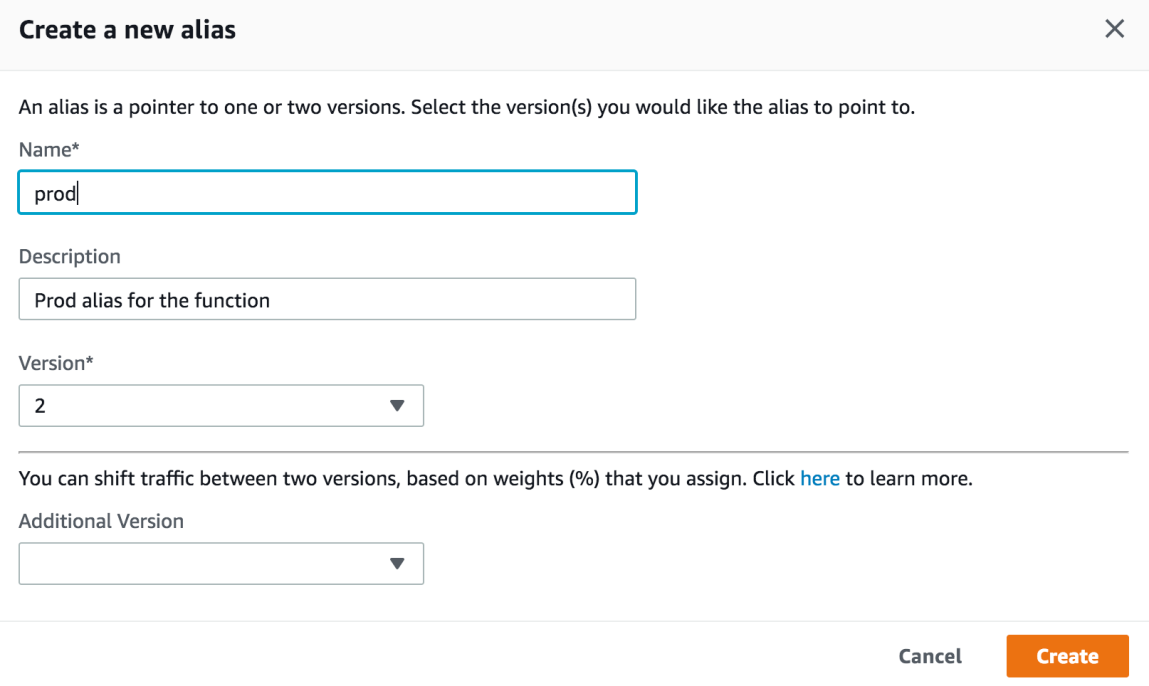
In the dialog window that opens up:
- Enter the name as prod
- Enter the description as Prod alias for the function
- Select the version that you want to create the alias for and press the Create button:
With the alias created, when you invoke your AWS Lambda function from an HTTP event trigger such as the Amazon API Gateway or an S3 event trigger, you can specify the alias of your AWS Lambda function that needs to be invoked.
Conclusion:
We have covered step by step instructions to create, update the AWS lambda function and create their alias. You can checkout this book for more information on the same.