Angular2 CLI by default comes up with deployment to Github pages. Though Github pages are the great source for open source project hosting, we may need to deploy our app on different Servers. In this article, we will learn about how to deploy an Angular app on Heroku Server.
In this tutorial, Angular version 2 is used.
You can replicate the same steps to deploy on other cloud providers as well.
Getting Started
You need a Heroku account to create your Server. Click here to visit their official site and create the account.
You obviously need an Angular project. I am referring the codebase of this tutorial.
You can also use your own codebase. All you need to do is push it in Github repository. In case, if you are not familiar with Github then learn it within 2 minutes by referring this tutorial.
Building the App
Angular CLI provides ng build command to compile the application into the output directory. This generated output is static HTML and JS files and can be served via any web server such as Nginx, Apache or custom servers.
To build the Angular 2 project, run the following command.
–aot is an option for ahead of time compilation, learn more about it here.
When we push the code to Heroku, we want Heroku to automatically run this command. This can be achieved by changing the package.json, add the following in the scripts section of package.json.
"scripts": {
....
"postinstall": "ng build --aot -prod"
}
}
This will make sure that every time we push new code to Heroku, Angular automatically build the code and push it into /dist directory.
Next, we need to move angular-cli dependency from dev dependencies section to dependencies section.
This is to make sure Heroku install this as the dependency module in the Server.
"dependencies": {
....
"angular-cli": "1.0.0-beta.28.3",
....
}
}
Creating the Server
This step is optional if you are going to Serve the static files using Nginx or Apache server.
In order to demonstrate the working, we will just create the simple Express server and run it once the code is deployed in Heroku instance.
Install the Express dependency.
Create new file called Server.js and place the following code in it.
const app = express();
// Run the app by serving the static files
// in the dist directory
app.use(express.static(__dirname + '/dist'));
// Start the app by listening on the default
// Heroku port
app.listen(process.env.PORT || 8080);
Now add this command in package.json file to run the Server automatically when we deploy the code.
"scripts": {
....
"start": "node Server.js",
....
}
}
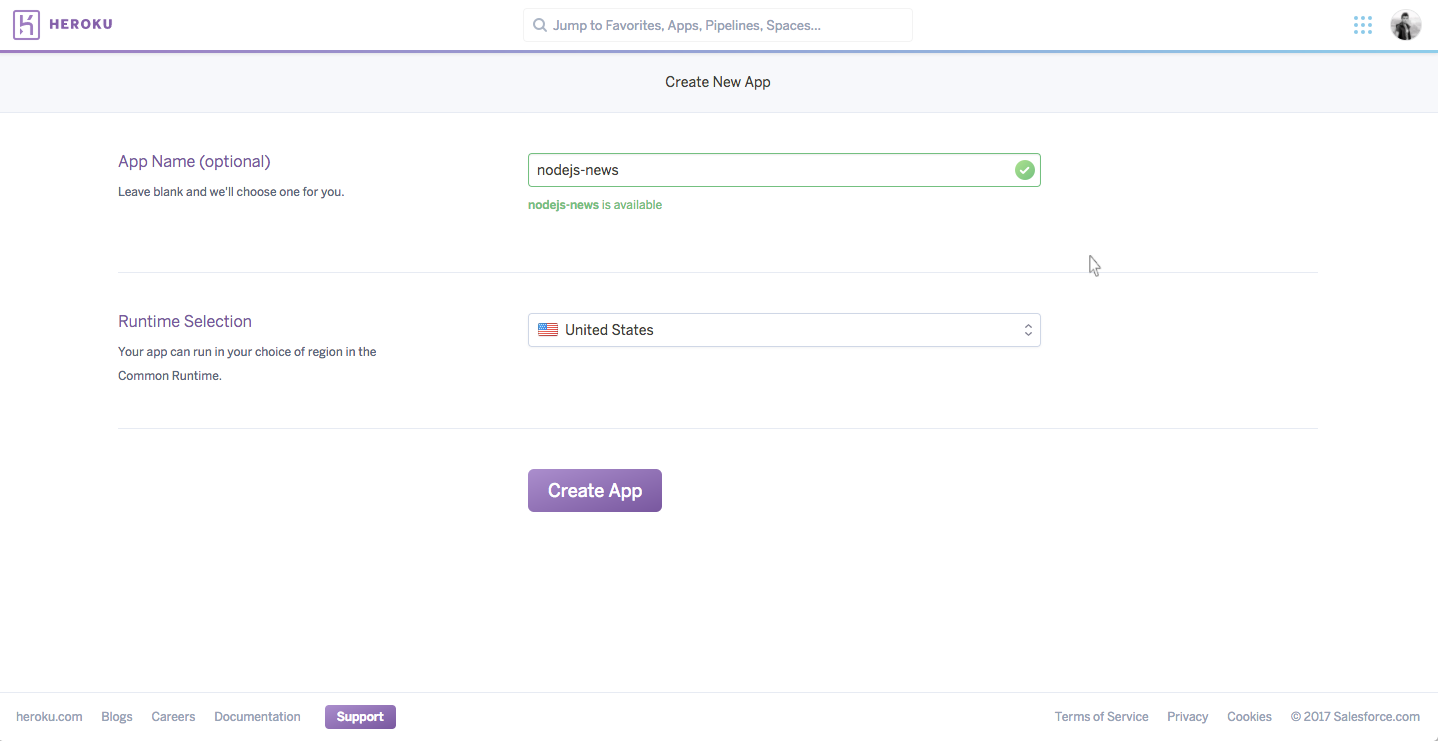
Create New Heroku App
Login to your Heroku account and click on the ‘New’ button located at top right corner and then click on ‘Create New App’.
Provide your application name and run time selection i.e Server location.
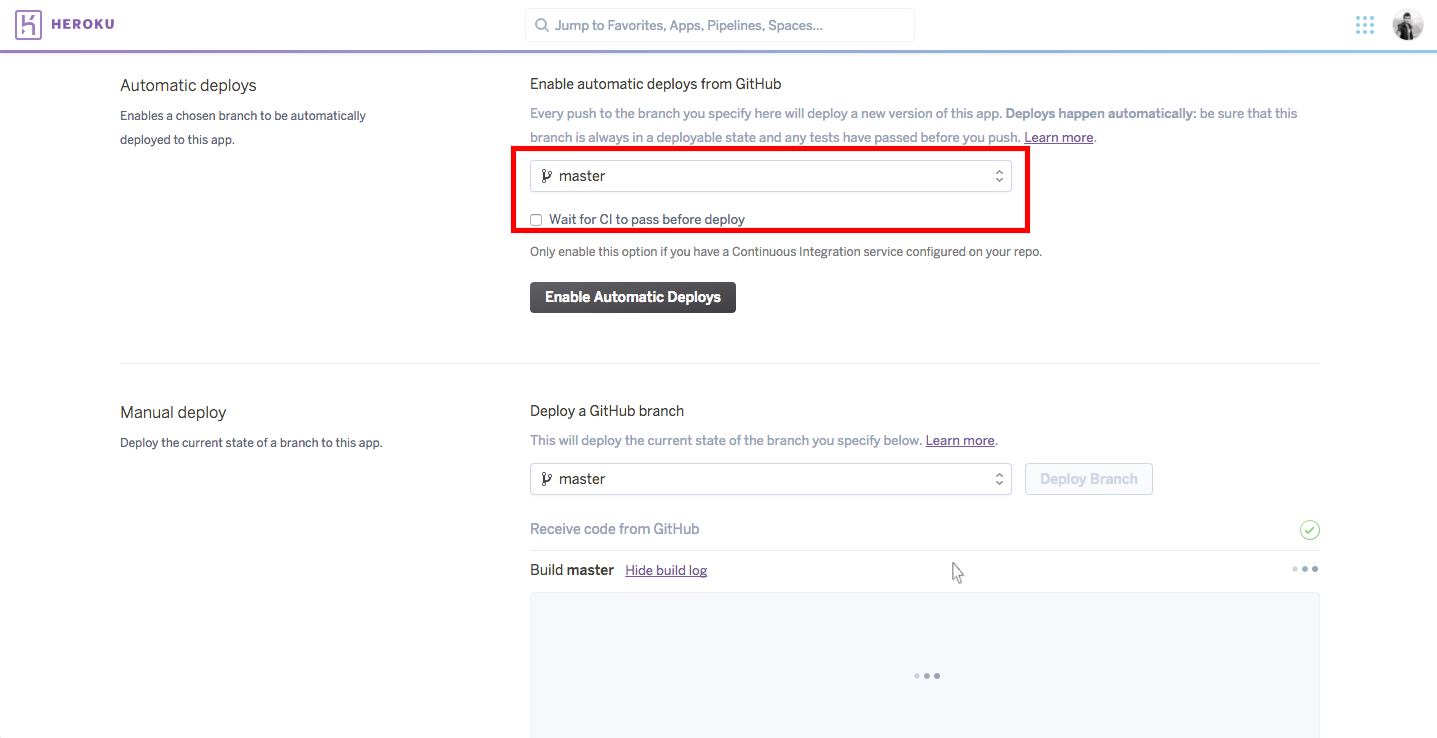
Now, in next screen, Heroku will ask you the deployment method. Here, select the Github button and authenticate your GitHub account.
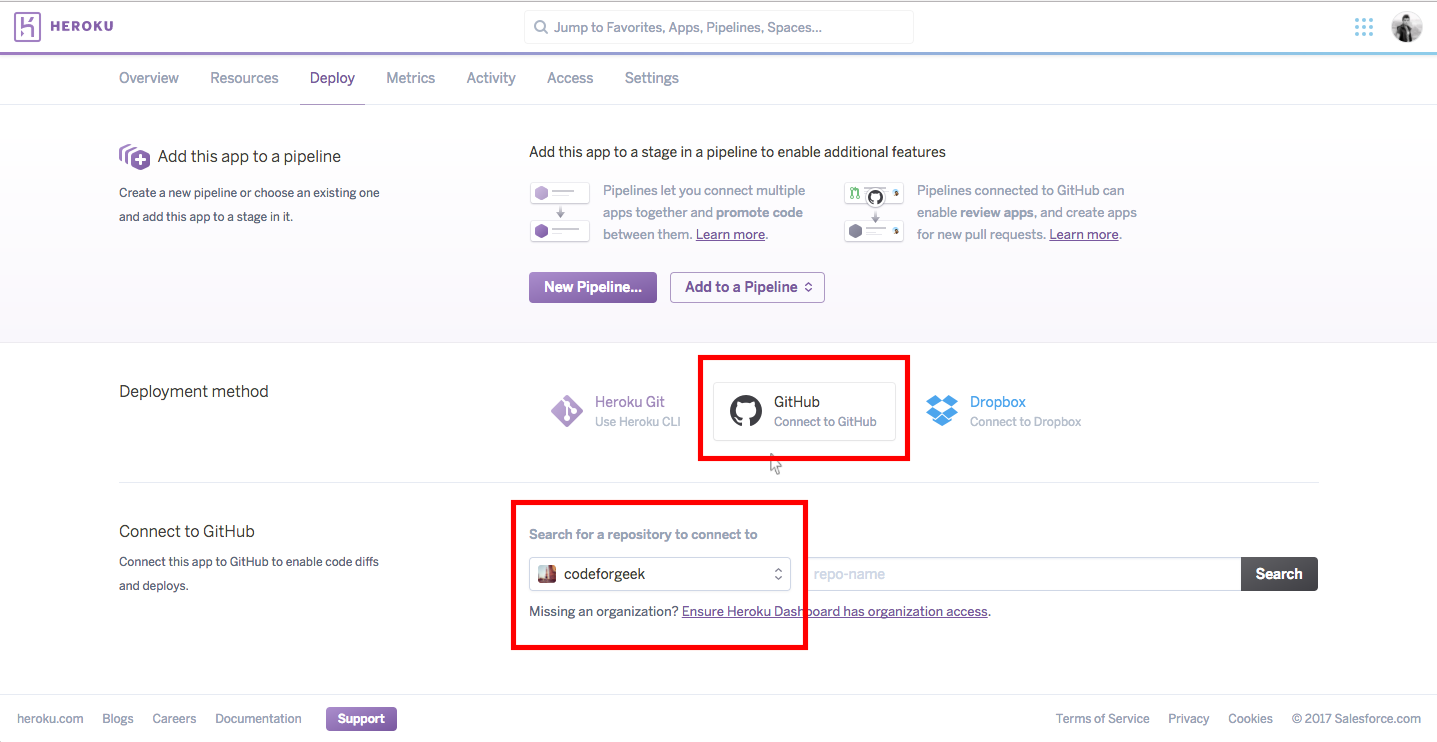
Type in your repository name where the Angular code is placed.
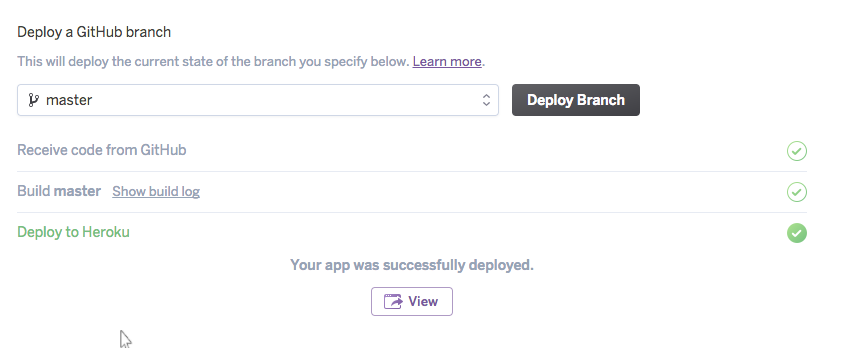
Select the Github branch (by default master) and click on Deploy Branch button.
Wait few seconds and you will see the success screen once the code is deployed in Heroku instance.
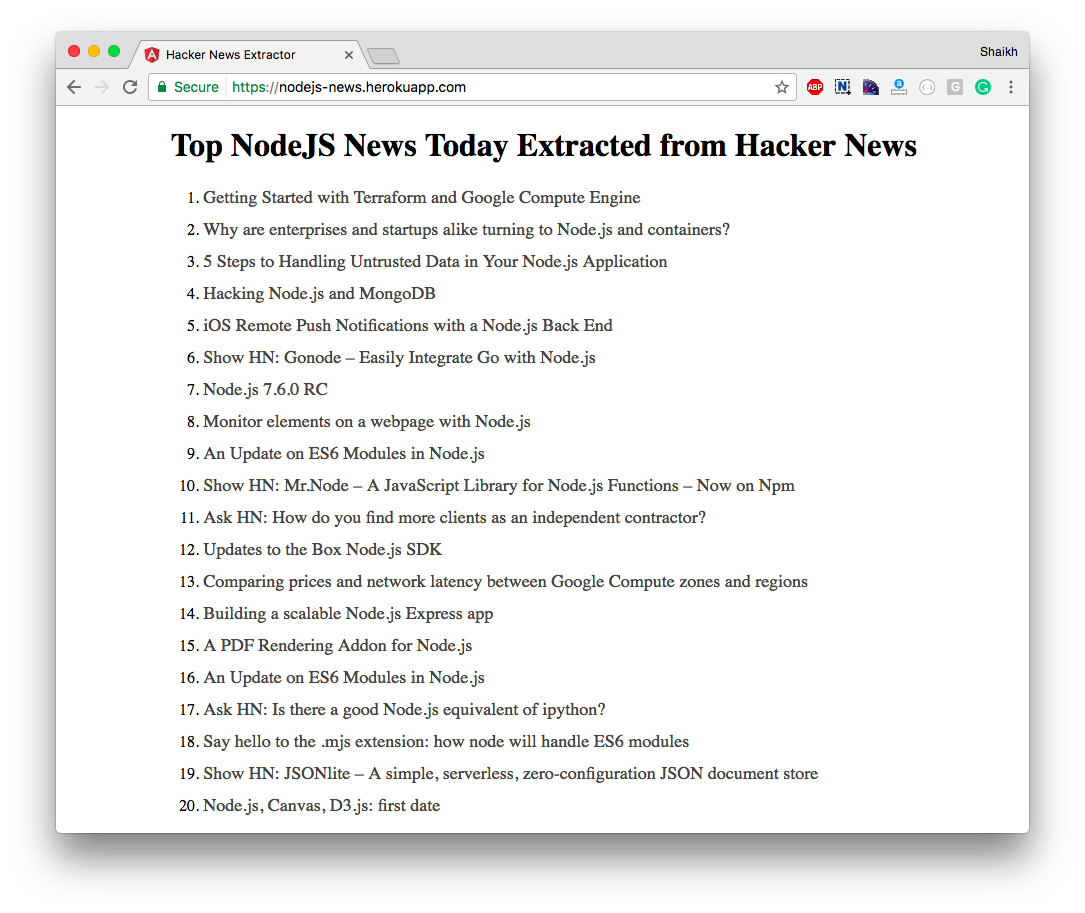
Once it is deployed, visit the application URL.
You can see our application running on Heroku here.
Conclusion
Angular2 CLI is a great tool to manage your project. With the help of Node.js rich package manager and flexibility, we can build and deploy Angular application very easily.